Love this? Save it for later!
Share the inspiration with your friends
The summer I moved into my first apartment, I wasn’t exactly dreaming about baking a red velvet flag cake. I was mostly trying to figure out how to balance a checkbook and keep a houseplant alive. But there I was, on a slow Sunday afternoon, helping my elderly neighbor, Mr. Jenkins, carry in groceries. Between bags, he casually started talking about a cake he once saw at a Fourth of July picnic that “looked like a flag but tasted like heaven.” Honestly, I wasn’t expecting a man who wore suspenders every day to have much to say about desserts, but I listened as he described the layers, the colors, and that creamy frosting that stole the show.
He handed me a faded, stained recipe card scribbled in his wife’s handwriting, insisting I try making it sometime. The recipe was for a red velvet flag cake with cream cheese frosting — the perfect combination of classic flavors arranged to look like a flag, which seemed quirky enough to catch my attention. I made a mess of the kitchen the first time (forgot to preheat the oven, naturally), but once I tasted that rich, moist cake with its tangy, smooth frosting, I was hooked.
Maybe you’ve been there — chasing a recipe because it’s not just about food but about stories and moments. This cake stuck with me because it’s not just festive or pretty, it’s the kind of recipe that makes you smile while you bake and feel a little proud when you slice into it. Believe me, once you try this Perfect Red Velvet Flag Cake with Cream Cheese Frosting, you’ll understand why I keep coming back to it for celebrations or just to brighten an ordinary day.
Why You’ll Love This Recipe
After testing and tweaking this recipe over several holidays and neighborhood potlucks, I can say with confidence that this red velvet flag cake stands out for many reasons. Here’s why it’s become a personal favorite and a crowd-pleaser:
- Quick & Easy: The entire cake comes together in under 90 minutes, making it perfect for last-minute celebrations or when you just want something special without fuss.
- Simple Ingredients: No need for fancy or obscure items — most are pantry staples like cocoa powder and vinegar, so you can whip it up anytime.
- Perfect for Patriotic Occasions: The flag design makes it ideal for Fourth of July, Memorial Day, or any summer BBQ where you want to impress without stress.
- Crowd-Pleaser: Kids love the fun colors; adults appreciate the classic cream cheese frosting that’s just the right balance of sweet and tangy.
- Unbelievably Delicious: The texture is moist and tender, with a subtle cocoa flavor that pairs beautifully with the creamy frosting — honestly, it’s comfort food with a festive twist.
- This isn’t just another red velvet cake. The layering technique to create the flag effect is straightforward but makes a big visual impact. Plus, the frosting recipe is easy to follow and yields a silky, spreadable finish without being too sweet or heavy.
- On a personal note, this cake always brings a bit of nostalgia and fun to my kitchen — it’s a recipe that turns baking into a mini celebration, even on ordinary days.
What Ingredients You Will Need
This recipe uses simple, wholesome ingredients to deliver bold flavor and that signature red velvet texture without any fuss. Most are pantry staples, and they work together for a moist, tender crumb and luscious frosting. Here’s what you’ll gather:
- For the Cake:
- All-purpose flour – 2 ½ cups (315g), sifted for lightness
- Cocoa powder – 2 tablespoons (unsweetened, preferably Hershey’s for consistent flavor)
- Baking soda – 1 teaspoon
- Salt – ½ teaspoon
- Granulated sugar – 1 ¾ cups (350g)
- Vegetable oil – 1 cup (240ml), for moistness (can substitute with melted coconut oil)
- Large eggs – 2, at room temperature (helps the cake rise evenly)
- Buttermilk – 1 cup (240ml), room temperature (adds tang and tenderness; or use 1 cup milk + 1 tbsp lemon juice as a substitute)
- White vinegar – 1 tablespoon (enhances the red color and reacts with baking soda)
- Vanilla extract – 2 teaspoons (pure vanilla for best aroma)
- Red food coloring – 2 tablespoons (use gel for vibrant color without extra liquid)
- For the Cream Cheese Frosting:
- Cream cheese – 8 ounces (225g), softened (I recommend Philadelphia brand for smooth texture)
- Unsalted butter – ½ cup (115g), softened (adds richness)
- Powdered sugar – 4 cups (480g), sifted to avoid lumps
- Vanilla extract – 1 teaspoon
- Pinch of salt (balances sweetness)
If you want to make this gluten-free, swapping the flour for a blend like Bob’s Red Mill 1-to-1 gluten-free flour works well. For a dairy-free cream cheese frosting, try using vegan cream cheese and a dairy-free butter alternative (look for brands like Miyoko’s or Earth Balance).
Equipment Needed
To make the Perfect Red Velvet Flag Cake, you’ll need some basic kitchen equipment that most home cooks have, plus a few items that make the layering and decorating easier:
- Two 9-inch (23 cm) round cake pans – metal pans work best for even heat distribution; if you only have one, you can bake in batches but it takes longer.
- Mixing bowls – one large for dry ingredients, one medium for wet ingredients.
- Electric mixer or stand mixer – makes beating the frosting much easier and smoother; a hand whisk can work but expect a workout.
- Rubber spatula – for folding and scraping the batter cleanly.
- Cooling racks – essential so the cakes cool evenly and don’t get soggy on the bottom.
- Offset spatula or butter knife – perfect for spreading the cream cheese frosting evenly.
- Measuring cups and spoons – accuracy is key for baking success.
- Toothpicks or cake tester – to check doneness.
Personally, I’ve found that silicone spatulas are a lifesaver for scraping every last bit of batter out of the bowl. If you’re on a budget, metal cake pans from your local store or online work just fine and last for years with proper care. Just remember to grease the pans well or use parchment paper rounds to prevent sticking.
Preparation Method
- Preheat and Prepare Pans: Preheat your oven to 350°F (175°C). Grease and flour two 9-inch round cake pans or line them with parchment paper. This step prevents the cake from sticking and ensures clean edges.
- Mix Dry Ingredients: In a large bowl, sift together 2 ½ cups all-purpose flour, 2 tablespoons cocoa powder, 1 teaspoon baking soda, and ½ teaspoon salt. Sifting helps avoid lumps and aerates the mix for a lighter cake. Set aside.
- Combine Wet Ingredients: In a separate bowl, whisk 1 ¾ cups sugar and 1 cup vegetable oil until combined. Add 2 large eggs one at a time, mixing well after each. Stir in 1 cup buttermilk, 1 tablespoon white vinegar, 2 teaspoons vanilla extract, and 2 tablespoons red food coloring. The batter will be bright red and smooth — if it looks dull, you can add a little more color for that signature hue.
- Combine Wet and Dry: Slowly add the dry ingredients to the wet mixture, folding gently with a rubber spatula until just combined. Overmixing can make the cake tough, so stop when no flour streaks remain. The batter should be smooth and pourable.
- Divide and Bake: Pour the batter evenly between the two prepared pans. Tap the pans gently on the counter to release any air bubbles. Bake for 25-30 minutes, or until a toothpick inserted in the center comes out clean. The cake should spring back lightly when touched.
- Cool Completely: Let the cakes cool in their pans for 10 minutes, then invert onto cooling racks. Cooling completely before frosting is crucial to avoid melting the cream cheese frosting.
- Prepare the Cream Cheese Frosting: Using an electric mixer, beat 8 ounces softened cream cheese and ½ cup softened unsalted butter together until smooth and creamy. Gradually add 4 cups powdered sugar, 1 cup at a time, mixing well after each addition. Stir in 1 teaspoon vanilla extract and a pinch of salt. The frosting should be spreadable but thick enough to hold shape.
- Assemble the Flag Layers: Once the cakes are cool, slice each cake horizontally into two layers (you’ll have four layers total). Arrange three layers side by side on your serving platter to create the stripes, leaving space for the “star” section. Crumble a small portion of cake for the star area or use blueberries if you want a fresh touch. Spread frosting between each layer and over the top and sides, smoothing with an offset spatula. Add blueberries or white chocolate chips on the blue section to mimic stars.
- Chill and Serve: Chill the cake in the refrigerator for at least 30 minutes to set the frosting before slicing. This helps the layers stay intact and makes cutting cleaner.
Pro tip: If your kitchen is warm, frosting can get tricky. Try chilling the frosting for 10 minutes before spreading, or keep the cake refrigerated until just before serving to keep everything fresh and neat.
Cooking Tips & Techniques
Making a red velvet flag cake with cream cheese frosting might seem intimidating, but a few insider tips help keep things smooth and stress-free:
- Use room temperature ingredients: Eggs, buttermilk, cream cheese, and butter all mix better when they’re not cold. This helps you avoid lumps and get a smooth batter and frosting.
- Don’t overmix the batter: Folding the flour in gently keeps the cake tender. Overworking develops the gluten and makes the texture dense.
- Check your oven temperature: Oven temps can vary, so an oven thermometer can be a lifesaver. A too-hot oven can dry out the cake, while too cool means underbaking.
- Level your cake layers: If your cake domes on top, use a serrated knife to trim it flat. This helps the flag layers stack neatly without wobbling.
- Freeze cake layers before decorating: I’ve learned this the hard way — frozen layers are easier to frost because they crumble less and hold their shape.
- Don’t skip chilling the frosting: If your frosting feels too soft, a quick chill firms it up so it spreads well without sliding off.
- Work quickly when assembling: Cream cheese frosting softens fast at room temperature, so have your assembly area ready to minimize delays.
At one point, I tried making this cake on a hot summer day without air conditioning — let’s just say the frosting turned into a little runny mess. Lesson learned: keep it cool, or chill in batches!
Variations & Adaptations
This Perfect Red Velvet Flag Cake is great as is, but you can tweak it to fit different tastes or dietary needs. Here are some ideas I’ve tried and loved:
- Vegan version: Replace eggs with flax eggs (1 tablespoon ground flaxseed + 3 tablespoons water per egg), use plant-based milk with vinegar for buttermilk, and swap cream cheese and butter for vegan alternatives. The texture is slightly different but still delicious.
- Berry flag twist: Instead of blueberries for the star section, try fresh raspberries or blackberries for a seasonal flair and natural sweetness.
- Chocolate cream cheese frosting: Add ¼ cup (25g) unsweetened cocoa powder to the frosting for a mocha twist that pairs beautifully with the red velvet layers.
- Gluten-free adaptation: Use a certified gluten-free flour blend and add ½ teaspoon xanthan gum if your blend doesn’t include it. The cake stays moist and tender.
- Mini flag cupcakes: Bake the batter in cupcake tins and decorate each with a mini flag pattern using frosting and berries—fun for kids’ parties.
One time, I swapped the traditional cream cheese frosting for a mascarpone-based one for a slightly richer, less sweet finish. It was a hit at a friend’s brunch, even with folks who usually don’t like red velvet!
Serving & Storage Suggestions
This red velvet flag cake is best served chilled or at room temperature. The cream cheese frosting tastes so smooth and creamy when not too cold but still firm enough to hold the flag design.
For a festive presentation, slice the cake into generous wedges and serve with fresh berries or a dollop of whipped cream on the side. It pairs wonderfully with classic beverages like iced tea, coffee, or a sparkling lemonade.
To store, cover the cake tightly with plastic wrap or keep in an airtight container in the refrigerator. It stays fresh for up to 4 days. You can also freeze individual slices wrapped in foil and placed in a freezer bag for up to 2 months.
When reheating, let frozen slices thaw in the fridge overnight, then bring to room temperature before serving to enjoy the best texture and flavor. Over time, the flavors meld beautifully, making leftovers even tastier the next day.
Nutritional Information & Benefits
This cake might feel indulgent, but it has some redeeming qualities too. Here’s a rough estimate per serving (based on 12 slices):
| Calories | 350 |
|---|---|
| Fat | 18g |
| Saturated Fat | 9g |
| Carbohydrates | 45g |
| Sugar | 32g |
| Protein | 4g |
Key ingredients like cream cheese and buttermilk provide calcium and protein, while the cocoa powder adds antioxidants. Using vegetable oil instead of butter in the batter keeps it moist but slightly lighter. For those watching gluten, the recipe adapts well to gluten-free flours.
From a wellness perspective, I appreciate that this cake can be enjoyed as a treat without sacrificing texture or flavor. It’s all about balance and savoring the moment, which is just as important as the ingredients.
Conclusion
So, why give this Perfect Red Velvet Flag Cake with Cream Cheese Frosting a try? Because it’s more than just a pretty dessert — it’s a recipe that brings smiles, sparks conversations, and tastes like a celebration in every bite. You can easily customize it to suit your tastes or dietary needs, and the result is always rewarding.
I love this cake because it reminds me of unexpected kindness and stories shared over groceries, and because it makes any occasion feel special without complicated steps. I hope you’ll find it just as fun and satisfying to bake and share.
Don’t forget to leave a comment below if you make the cake, share your variations, or have any questions. I’d love to hear your experiences with this recipe — after all, food tastes best when it brings people together.
Happy baking and enjoy every slice!
Frequently Asked Questions
Can I make this cake ahead of time?
Absolutely! You can bake the layers a day ahead and keep them wrapped tightly in the fridge. Assemble and frost the cake the next day for the freshest results.
What if I don’t have buttermilk?
No worries — mix 1 cup of milk with 1 tablespoon of lemon juice or white vinegar, let it sit for 5 minutes, and use that as a buttermilk substitute.
How do I get the red color without artificial dye?
Natural alternatives like beet juice or powder can add color, but they may affect the flavor slightly. Using gel food coloring gives the best vibrant red without changing taste.
Can I freeze the assembled cake?
It’s better to freeze the cake layers separately and frost fresh after thawing. Freezing a frosted cake can change the texture of the frosting.
What’s the best way to cut this cake for neat slices?
Use a sharp serrated knife and wipe it clean between cuts. Chilling the cake first helps the frosting firm up, making slicing easier and cleaner.
Pin This Recipe!
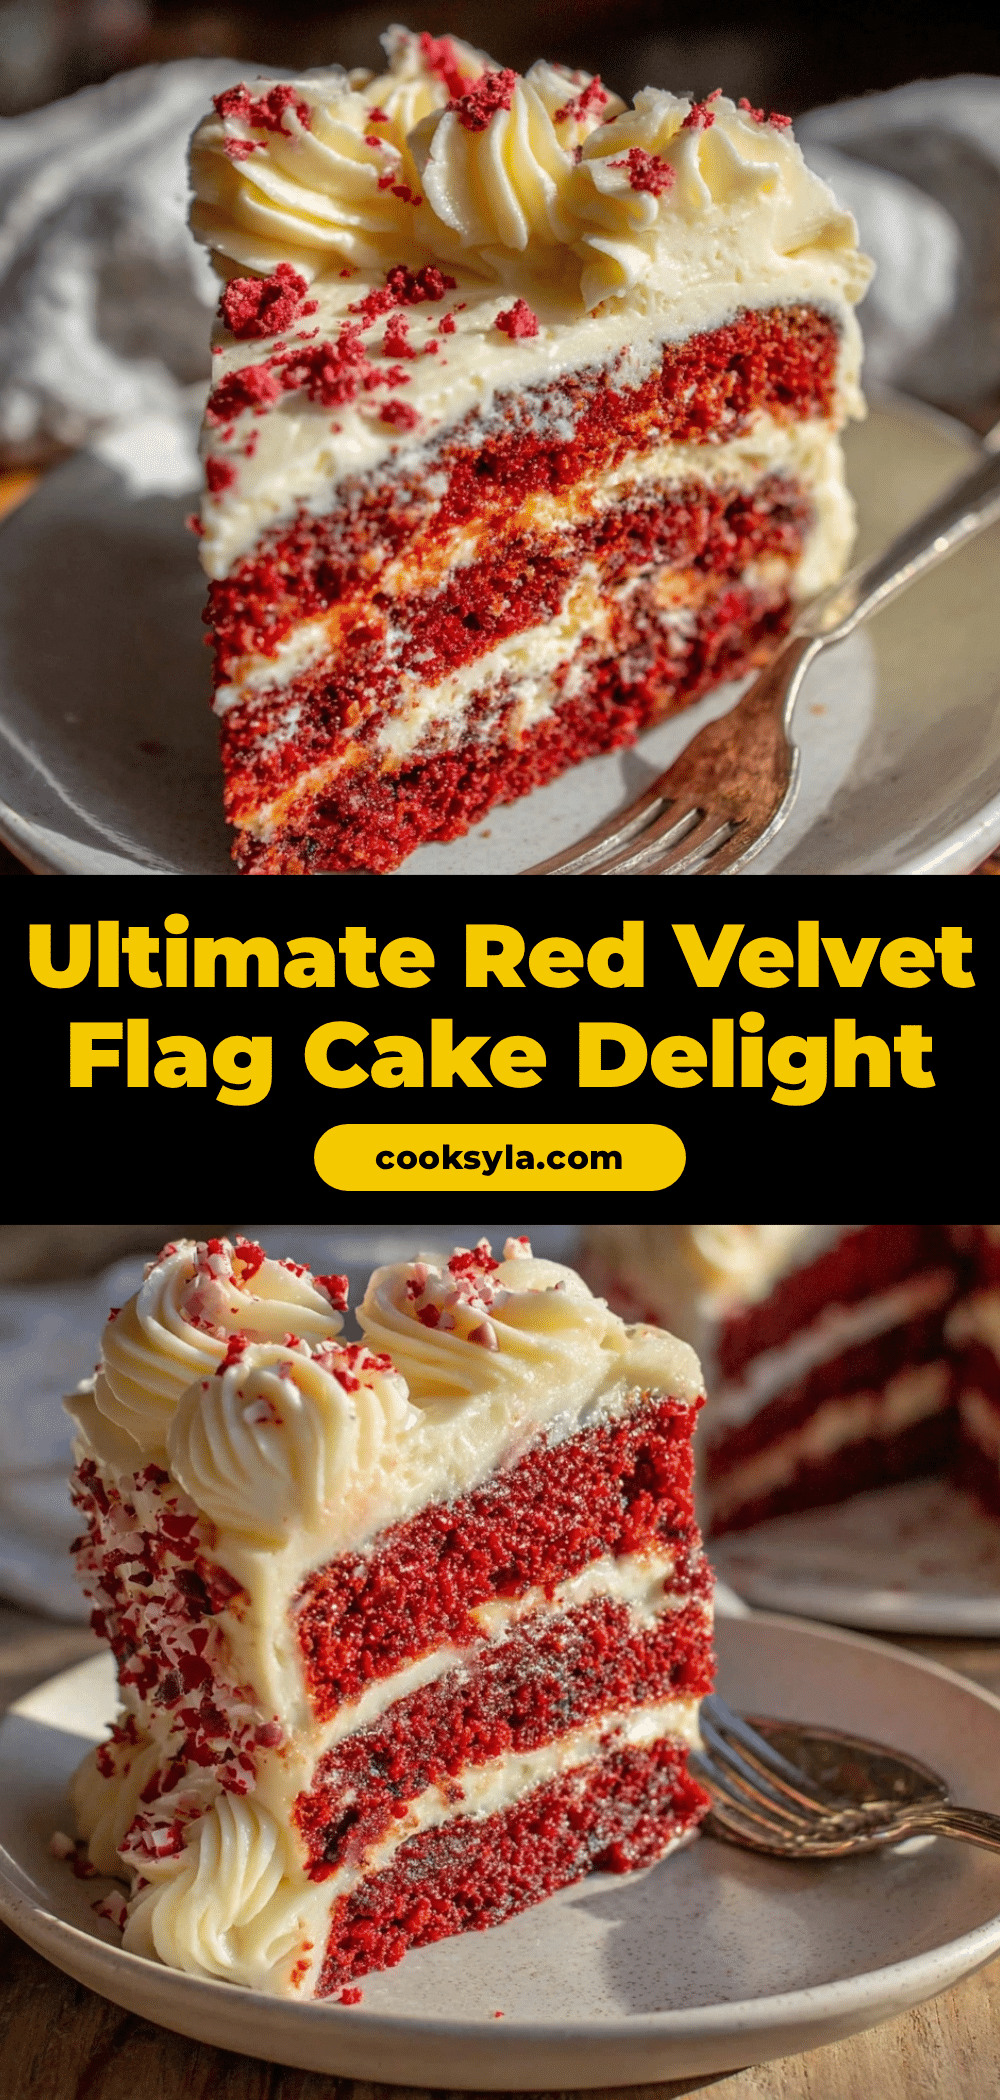
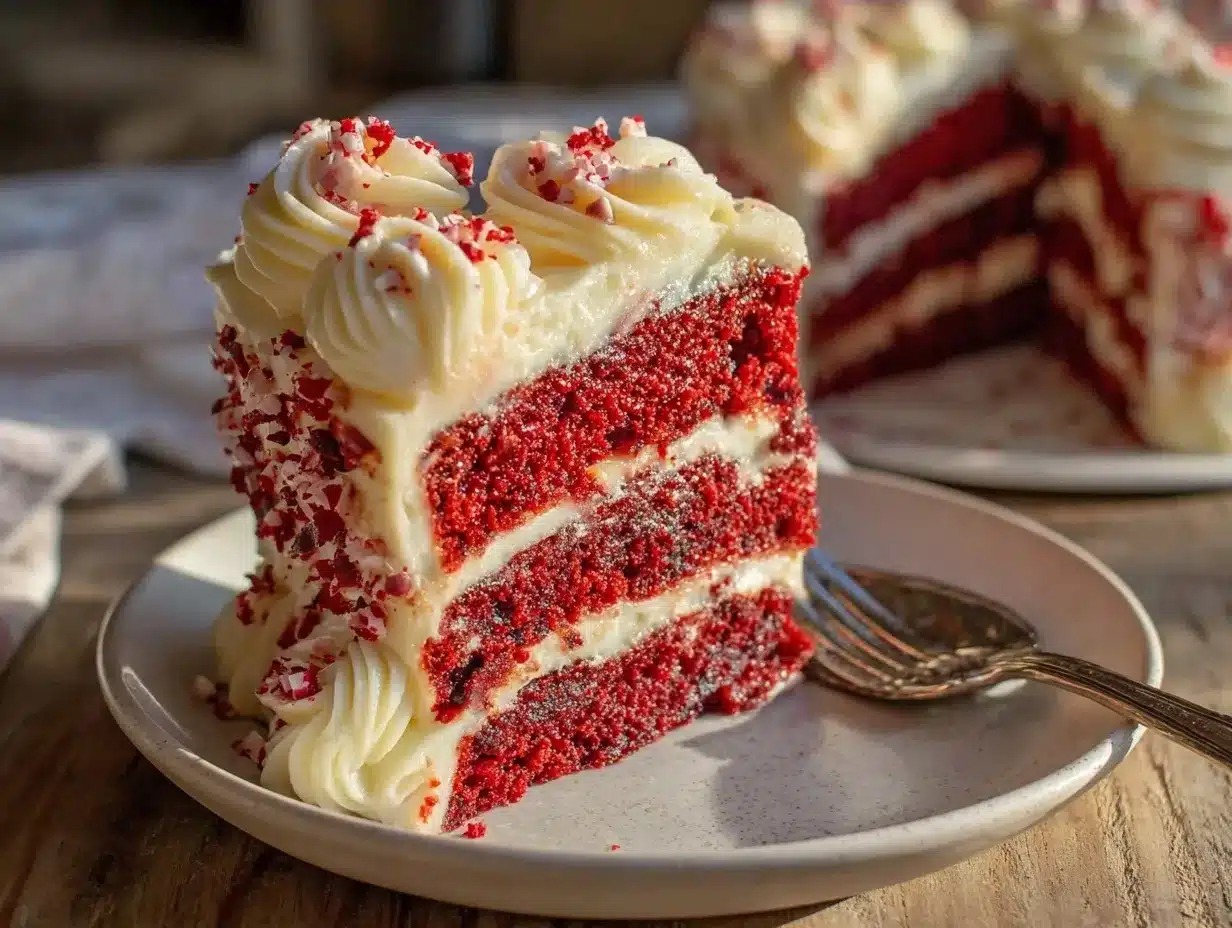
Perfect Red Velvet Flag Cake Recipe with Easy Cream Cheese Frosting
A moist and tender red velvet cake with a tangy cream cheese frosting, designed to look like a patriotic flag. Perfect for celebrations and easy to make with simple pantry ingredients.
- Prep Time: 20 minutes
- Cook Time: 30 minutes
- Total Time: 50 minutes
- Yield: 12 servings 1x
- Category: Dessert
- Cuisine: American
Ingredients
- 2 ½ cups (315g) all-purpose flour, sifted
- 2 tablespoons unsweetened cocoa powder
- 1 teaspoon baking soda
- ½ teaspoon salt
- 1 ¾ cups (350g) granulated sugar
- 1 cup (240ml) vegetable oil (can substitute with melted coconut oil)
- 2 large eggs, room temperature
- 1 cup (240ml) buttermilk, room temperature (or 1 cup milk + 1 tbsp lemon juice as substitute)
- 1 tablespoon white vinegar
- 2 teaspoons vanilla extract
- 2 tablespoons red food coloring (gel preferred)
- 8 ounces (225g) cream cheese, softened
- ½ cup (115g) unsalted butter, softened
- 4 cups (480g) powdered sugar, sifted
- 1 teaspoon vanilla extract
- Pinch of salt
Instructions
- Preheat oven to 350°F (175°C). Grease and flour two 9-inch round cake pans or line with parchment paper.
- In a large bowl, sift together flour, cocoa powder, baking soda, and salt. Set aside.
- In a separate bowl, whisk sugar and vegetable oil until combined. Add eggs one at a time, mixing well after each.
- Stir in buttermilk, white vinegar, vanilla extract, and red food coloring until batter is bright red and smooth.
- Slowly fold dry ingredients into wet mixture with a rubber spatula until just combined. Do not overmix.
- Divide batter evenly between prepared pans. Tap pans gently to release air bubbles.
- Bake for 25-30 minutes or until a toothpick inserted in the center comes out clean.
- Cool cakes in pans for 10 minutes, then invert onto cooling racks to cool completely.
- Beat cream cheese and butter with an electric mixer until smooth. Gradually add powdered sugar, mixing well after each addition.
- Stir in vanilla extract and salt until frosting is spreadable but thick.
- Slice each cake horizontally into two layers, creating four layers total.
- Arrange three layers side by side on a serving platter to form stripes, leaving space for the star section.
- Crumble a small portion of cake or use blueberries for the star area.
- Spread frosting between each layer and over the top and sides, smoothing with an offset spatula.
- Decorate the blue section with blueberries or white chocolate chips to mimic stars.
- Chill the cake in the refrigerator for at least 30 minutes before slicing and serving.
Notes
Use room temperature ingredients for best results. Do not overmix the batter to keep the cake tender. Chill frosting if too soft before spreading. Freeze cake layers before decorating to reduce crumbling. Use a serrated knife to level cake layers and for clean slicing. Keep cake refrigerated until serving to maintain frosting firmness.
Nutrition
- Serving Size: 1 slice (1/12 of cak
- Calories: 350
- Sugar: 32
- Fat: 18
- Saturated Fat: 9
- Carbohydrates: 45
- Protein: 4
Keywords: red velvet cake, cream cheese frosting, flag cake, patriotic dessert, Fourth of July cake, easy red velvet, layered cake