Love this? Save it for later!
Share the inspiration with your friends
It was 10:47 PM on a rainy Thursday, and I was staring into the fridge with the kind of desperation that only comes after a long week. The Tupperware graveyard stared back—half a bag of pepperoni from a pizza night, some heavy cream threatening to expire, and a box of pasta that had seen better days. I didn’t have the energy for anything complicated, but I needed something for the next three days of work lunches. Honestly, I was this close to ordering takeout again.
Then it hit me—why not make a creamy pasta that actually tastes better after sitting in the fridge? I mean, we’ve all had those sad, dry reheated lunches that make you question your life choices. But what if I could create something that gets creamier, more flavorful, and honestly more satisfying the next day? That night, standing in my socks on the cold kitchen floor, the Easy Make-Ahead Creamy Pepperoni Pasta Lunch was born.
The pepperoni crisped up in the pan, releasing all that spicy, smoky oil into the cream sauce. The pasta soaked up every bit of flavor while it cooled. And when I reheated it the next day at work? Let me tell you, my coworkers were hovering around my desk like seagulls. This recipe stayed with me because it solved the eternal lunch problem—something quick, satisfying, and actually better made ahead. Maybe you’ve been there too, stuck in that midday meal rut where everything feels boring. This one changes the game.
Why You’ll Love This Recipe
After testing this recipe about seven times (my family was thrilled, my waistline less so), I can confidently say this is the make-ahead lunch you’ve been waiting for. Here’s why this one stands out from every other pasta recipe you’ve tried:
- Quick & Easy: Comes together in under 25 minutes, perfect for Sunday meal prep or a busy weeknight. The actual hands-on time is maybe 15 minutes—the rest is just letting the pasta do its thing.
- Simple Ingredients: No fancy grocery trips needed. You likely already have pasta, cream, cheese, and pepperoni in your kitchen. I’ve made this with whatever pasta shape was lurking in my pantry, and it works every time.
- Perfect for Lunch Meal Prep: This isn’t just good for make-ahead—it’s designed for it. The flavors meld together overnight, creating a creamier, more cohesive dish than when it’s freshly made. Great for work lunches, school lunches, or those days when you need to grab and go.
- Crowd-Pleaser: Kids love the pepperoni (it’s basically pizza in pasta form), and adults appreciate the rich, savory flavor. I’ve brought this to potlucks and watched it disappear before the salad.
- Unbelievably Delicious: The texture is what gets me every time. The pepperoni crisps up and infuses the cream sauce with smoky, spicy goodness, while the pasta stays perfectly al dente even after reheating. It’s comfort food that doesn’t get soggy or sad the next day.
What makes this recipe different from the rest? It’s the technique of crisping the pepperoni first and letting the pasta cool slowly in the sauce. Most make-ahead pasta recipes end up dry because the sauce separates or gets absorbed. But this method creates a sauce that clings to every piece of pasta, getting better as it sits. I tested this with regular pasta salads, cream-based sauces, and even oil-based dressings—nothing worked as well as this specific approach.
This recipe isn’t just good—it’s the kind that makes you close your eyes after the first bite. It’s comfort food reimagined: faster, more convenient, but with the same soul-soothing satisfaction of a warm, cheesy pasta dish. Perfect for impressing your coworkers without stress, or turning a simple lunch into something you actually look forward to.
What Ingredients You Will Need
This recipe uses simple, mostly pantry-staple ingredients to deliver bold flavor without the fuss. Most of these items you probably already have, which is exactly what I love about it.
- Pasta (1 pound / 450g): I recommend short pasta shapes like penne, rotini, or fusilli. They hold the sauce better than long pasta and reheat more evenly. Personally, I love using rotini because those little spirals catch all the creamy goodness. Any shape works, though—just adjust cooking time based on the package.
- Pepperoni (6 ounces / 170g), sliced: Use good-quality pepperoni for the best flavor. I prefer stick pepperoni that I slice myself—it’s thicker and crisps up better than pre-sliced. Turkey pepperoni works too if you want a lighter option, but you’ll lose some of that rich, smoky flavor.
- Heavy Cream (1 cup / 240ml): This is the backbone of the creamy sauce. Full-fat cream gives the best texture and doesn’t separate when reheated. If you need a lighter option, half-and-half works but won’t be as thick. I’ve tried this with coconut cream for a dairy-free version, and it’s surprisingly good—just add a pinch of garlic powder to balance the sweetness.
- Parmesan Cheese (1 cup / 100g), freshly grated: Please, please skip the pre-shredded stuff. Freshly grated Parmesan melts smoothly and adds that nutty, salty depth that makes this sauce irresistible. Pecorino Romano works beautifully too if you want a sharper flavor.
- Garlic (4 cloves), minced: Fresh garlic is non-negotiable here. It adds that aromatic punch that makes the sauce feel rich and complex. I’ve used garlic powder in a pinch (about 1 teaspoon), but fresh is noticeably better.
- Butter (2 tablespoons / 28g): Unsalted butter lets you control the salt level. It adds richness and helps the sauce cling to the pasta.
- Chicken or Vegetable Broth (1/2 cup / 120ml): This thins the sauce just enough to coat the pasta perfectly without making it watery. I prefer low-sodium broth to control the saltiness. In a pinch, pasta water works great too—just reserve a cup before draining.
- Red Pepper Flakes (1/2 teaspoon, optional): Adds a gentle heat that complements the pepperoni. Skip it if you’re sensitive to spice, but I love the little kick it brings.
- Salt and Black Pepper: To taste. Go easy on the salt since pepperoni and Parmesan are already salty. Freshly cracked black pepper makes a difference here.
- Fresh Parsley (2 tablespoons), chopped: For garnish and a pop of freshness. It cuts through the richness and makes the dish look beautiful.
Equipment Needed
Nothing fancy here—this recipe is designed for real kitchens with real tools. Here’s what you’ll need:
- Large Pot (6-8 quart / 6-8 liter): For cooking the pasta. Make sure it’s big enough for the pasta to move freely.
- Large Skillet or Dutch Oven: A 12-inch skillet with high sides works perfectly. I use my trusty cast iron skillet—it holds heat beautifully and gives the pepperoni a perfect crisp. A non-stick pan works too, just be gentle with the pepperoni.
- Colander: For draining pasta. Nothing special, just make sure it’s clean.
- Wooden Spoon or Silicone Spatula: For stirring the sauce. Wooden spoons are my favorite—they don’t scratch pans and feel right in the hand.
- Cheese Grater: For fresh Parmesan. A microplane gives the finest texture, but a box grater works great too.
- Measuring Cups and Spoons: Standard set for accurate measurements.
- Sharp Knife and Cutting Board: For mincing garlic and chopping parsley.
- Meal Prep Containers (4-5): Airtight containers for storing individual portions. Glass containers are best for reheating—they distribute heat evenly and don’t stain.
If you don’t have a large skillet, use a saucepan and work in batches. I’ve definitely made this in a small pot before, and while it’s a bit more work, it still turns out great. Budget-friendly tip: check thrift stores for cast iron skillets—they’re often under $10 and last forever.
Preparation Method
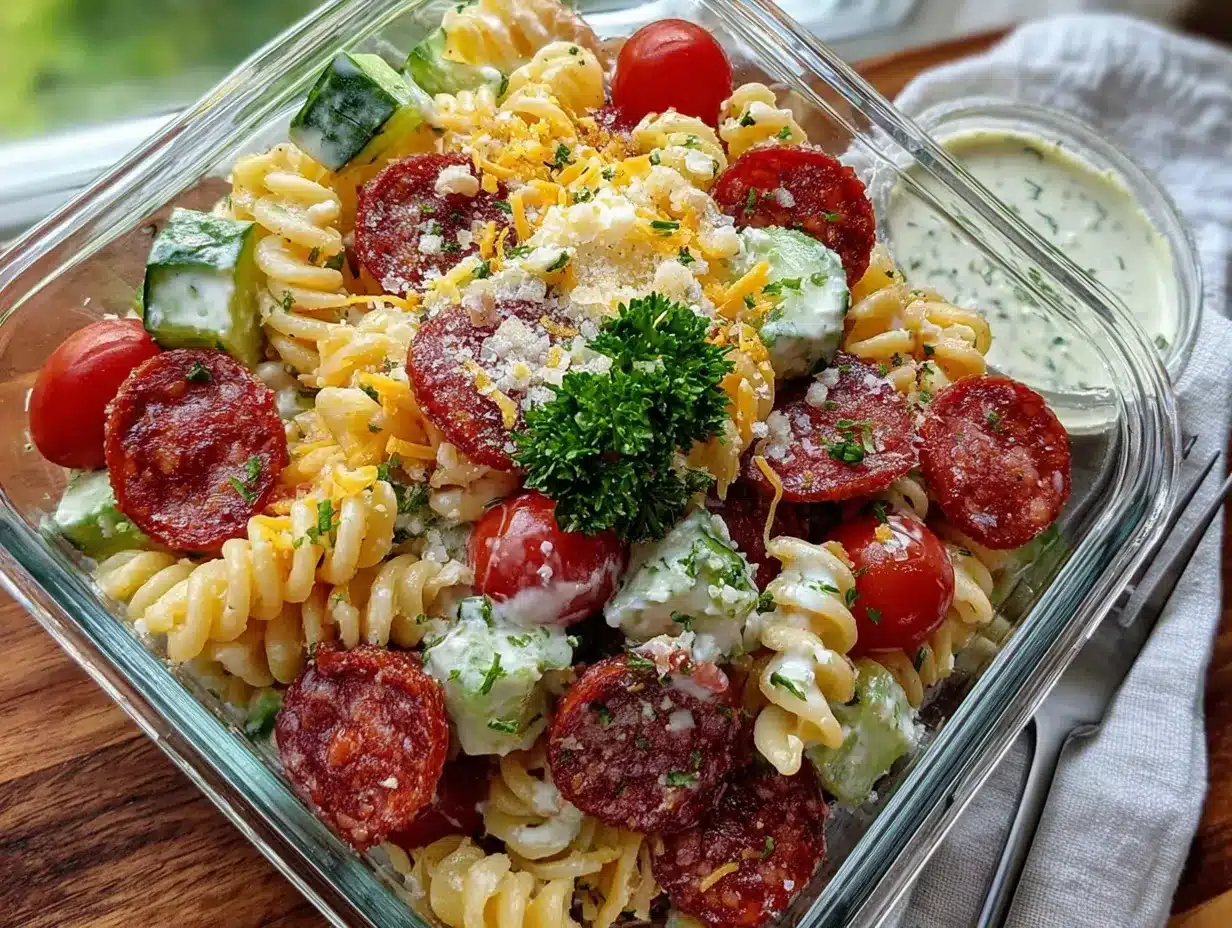
Let’s get cooking! This comes together faster than you’d think, so have everything prepped and ready to go.
- Cook the pasta: Bring a large pot of generously salted water to a rolling boil. Add your pasta and cook according to package directions until al dente—usually 8-10 minutes. Here’s the trick: cook it 1 minute less than the package says. The pasta will continue cooking in the hot sauce later, and you don’t want mushy reheated pasta. Reserve 1 cup of pasta water before draining, then drain the pasta in a colander. Don’t rinse it—you want that starch to help the sauce stick.
- Crisp the pepperoni: While the pasta cooks, heat your large skillet over medium heat. Add the pepperoni slices in a single layer—you might need to do this in batches. Cook for 2-3 minutes per side until they’re crispy and the edges are curling. The pepperoni will release a lot of oil, which is exactly what we want. Transfer the crispy pepperoni to a paper towel-lined plate, but leave that beautiful, flavorful oil in the pan. This is where all the magic starts.
- Sauté the garlic: Reduce the heat to medium-low. Add the butter to the same pan with the pepperoni oil. Once it melts, add the minced garlic and red pepper flakes (if using). Cook for about 30-45 seconds, stirring constantly. You want the garlic fragrant but not brown—burnt garlic will ruin the whole sauce. I learned this the hard way, trust me.
- Build the cream sauce: Pour in the heavy cream and chicken broth, stirring to combine. Bring this to a gentle simmer—not a boil, just a soft bubble around the edges. Let it cook for 2-3 minutes, stirring occasionally, until it thickens slightly. You’ll notice it coating the back of a spoon. This is when I always take a deep breath—it smells incredible.
- Add the Parmesan: Remove the pan from heat. Gradually add the grated Parmesan cheese, stirring constantly. The residual heat will melt it into a smooth, velvety sauce. If it seems too thick, add a splash of the reserved pasta water. If it’s too thin, let it sit for another minute. The sauce should be glossy and coat the back of a spoon.
- Combine everything: Add the drained pasta to the sauce. Toss well to coat every piece. Add the crispy pepperoni back in, reserving a handful for topping. Toss again. Season with salt and black pepper to taste—remember, the pepperoni and Parmesan are already salty, so go easy. I usually start with 1/4 teaspoon of salt and adjust from there.
- Cool and portion: Let the pasta cool in the skillet for about 10-15 minutes, stirring occasionally. This allows the sauce to absorb into the pasta slightly. Then divide into your meal prep containers. Top each portion with the reserved crispy pepperoni and a sprinkle of fresh parsley. Let them cool completely to room temperature before sealing the lids—about 30 minutes. This prevents condensation and soggy pasta.
Pro tip: If you’re making this for the whole week, I recommend leaving the fresh parsley off until you’re ready to eat. It stays brighter and fresher that way. The pasta will keep beautifully for up to 4 days in the refrigerator.
Cooking Tips & Techniques
After making this recipe more times than I care to admit, I’ve picked up a few tricks that make a real difference. Here’s what I’ve learned:
Don’t skip crisping the pepperoni. This isn’t just about texture—it’s about flavor. When pepperoni crisps, it releases all that smoky, spicy oil into the pan, which becomes the foundation of your sauce. If you skip this step, you’re missing half the flavor. I once tried just tossing raw pepperoni into the sauce, and it was bland and greasy. Never again.
The pasta water trick is real. That reserved cup of starchy pasta water is liquid gold. If your sauce seems too thick after adding the cheese, a splash of pasta water loosens it perfectly without making it watery. The starch helps the sauce cling to the pasta. I’ve saved many a sauce with this trick.
Under-cook your pasta. I can’t stress this enough. Cook it 1-2 minutes less than the package directions. The pasta will absorb some of the sauce as it cools and reheats, so starting with al dente pasta ensures it won’t turn into mush by day three. My first batch was over-cooked, and by Wednesday, I was eating what can only be described as pasta porridge. Not my finest moment.
Let it cool before refrigerating. This is crucial for food safety and texture. Hot pasta in a sealed container creates condensation, which makes the sauce watery and the pasta soggy. Let it cool on the counter for 30 minutes, stirring occasionally, then seal and refrigerate. Your future self will thank you.
Reheat with a splash of milk. When you’re ready to eat, add a tablespoon of milk or cream before reheating. The pasta absorbs liquid as it sits, so a little extra moisture brings it back to that creamy, saucy perfection. Microwave for 1-2 minutes, stirring halfway through, and you’re golden.
Variations & Adaptations
This recipe is incredibly versatile—I’ve tried several variations, and they’ve all been winners. Here are some of my favorites:
Spicy Sausage Version: Swap the pepperoni for spicy Italian sausage (about 6 ounces). Remove the casings and crumble the sausage into the pan, cooking until browned. The fennel and red pepper flakes in the sausage add a whole new dimension. This version is a hit with my spice-loving friends.
Vegetarian Option: Skip the pepperoni and add 1 cup of roasted red peppers (chopped) and 1 cup of sautéed mushrooms. The roasted peppers add that same smoky sweetness, while mushrooms bring the umami. For extra protein, toss in some cannellini beans or chickpeas. My vegetarian sister-in-law requests this version constantly.
Gluten-Free Adaptation: Use your favorite gluten-free pasta—I’ve had great success with brown rice pasta and chickpea pasta. Just be careful not to overcook it; gluten-free pasta can turn mushy quickly. The sauce is naturally gluten-free, so this is an easy swap.
Lighter Cream Sauce: Replace half the heavy cream with whole milk or half-and-half. Add an extra tablespoon of butter for richness. The sauce won’t be as thick, but it’s still creamy and satisfying. I’ve made this version when I wanted something a little less indulgent, and it works beautifully.
Add Vegetables: Toss in a cup of frozen peas or spinach at the end. The residual heat will warm them through without overcooking. Broccoli florets (blanched) or sun-dried tomatoes are also excellent additions. I love adding peas—they add a pop of sweetness and color that makes the dish feel complete.
Serving & Storage Suggestions
This recipe is designed for make-ahead lunches, but it’s also wonderful fresh. Here’s how to serve and store it:
Serving Temperature: This pasta is delicious warm, at room temperature, or even cold straight from the fridge (don’t judge me). For warm servings, reheat individual portions in the microwave for 1-2 minutes, or in a skillet over medium heat with a splash of milk. I prefer the skillet method—it heats more evenly and the edges get slightly crispy.
Presentation: If you’re serving this for guests, top each portion with extra crispy pepperoni, a sprinkle of fresh parsley, and a generous grating of Parmesan. A side of crusty garlic bread and a simple green salad with lemon vinaigrette makes this a complete meal. For a casual lunch, just grab a container and go.
Storage: Store in airtight containers in the refrigerator for up to 4 days. I like to portion them out individually so I can grab one and go. The flavors actually improve after a day—the pepperoni infuses the sauce more, and the pasta absorbs all that creamy goodness. Do not freeze this dish; the cream sauce will separate and become grainy when thawed.
Reheating Tips: Add 1-2 tablespoons of milk or cream before reheating to restore the sauce’s creamy texture. Microwave on high for 1 minute, stir, then microwave for another 30-60 seconds. If using a skillet, add a splash of milk and heat over medium-low, stirring occasionally, for about 3-4 minutes. The pasta will be perfectly creamy and satisfying.
Flavor Development: Here’s something I love—this pasta tastes even better on day two or three. The pepperoni flavor deepens, the sauce gets more cohesive, and every bite is perfectly seasoned. I’ve had coworkers ask if I made a different recipe on day three because it tasted so good. Nope, same recipe—just better with time.
Nutritional Information & Benefits
While this is definitely an indulgent lunch option, it does have some redeeming qualities. Here’s a rough breakdown per serving (based on 5 servings):
- Calories: Approximately 520-580 per serving
- Protein: 18-22g (thanks to the cheese and pepperoni)
- Carbohydrates: 45-50g (mostly from pasta)
- Fat: 28-32g (from cream, cheese, and pepperoni)
- Calcium: Good source from the Parmesan and cream
- Iron: Moderate amount from the pasta
Health Benefits: The pepperoni provides protein and B vitamins, while the Parmesan offers calcium and protein. If you add vegetables like peas or spinach, you’ll boost the fiber and vitamin content. For a lighter version, use half-and-half and turkey pepperoni to reduce calories and fat by about 30%.
Dietary Considerations: This recipe contains dairy and gluten. For a dairy-free version, use coconut cream and dairy-free Parmesan-style cheese. For gluten-free, use your favorite gluten-free pasta. It’s not suitable for vegan diets unless you use plant-based alternatives for all dairy and skip the pepperoni.
My Take: I believe in balance. This isn’t a health food—it’s comfort food that makes busy days better. Pair it with a big salad or some roasted vegetables, and you’ve got a satisfying, balanced lunch that keeps you full and happy. Sometimes that’s exactly what we need.
Conclusion
This Easy Make-Ahead Creamy Pepperoni Pasta Lunch has honestly changed my meal prep game. It’s the kind of recipe that makes you look forward to lunch—even on a Monday. The crispy pepperoni, the velvety cream sauce, the perfectly coated pasta—it all comes together in under 25 minutes and gets better with each passing day.
I love this recipe because it proves that make-ahead meals don’t have to be boring or dry. You can have something indulgent, satisfying, and delicious waiting for you in the fridge, ready to grab and go. Whether you’re feeding a family, meal-prepping for a busy week, or just tired of sad desk lunches, this one’s for you.
I’d love to hear how this turns out for you! Did you add any vegetables? Try a different protein? Leave a comment below and let me know your favorite variation. And if you loved this recipe, share it with a friend who needs better lunch options. Happy cooking, and here’s to never having a boring lunch again!
Frequently Asked Questions
Can I use pre-shredded Parmesan cheese?
You can, but I really recommend grating it fresh. Pre-shredded cheese contains anti-caking agents that prevent it from melting smoothly, which can make your sauce grainy. Freshly grated Parmesan melts into a silky, cohesive sauce every time.
How long does this pasta last in the fridge?
It stays fresh for up to 4 days in an airtight container. The flavors actually improve after the first day, so don’t be afraid to make it ahead. Just remember to let it cool completely before sealing the container.
Can I freeze this creamy pasta?
I don’t recommend freezing this dish. The cream sauce will separate when thawed, leaving you with a watery, grainy texture. This recipe is designed for refrigerator storage only. If you need a freezer-friendly meal, try a tomato-based pasta instead.
What’s the best pasta shape for this recipe?
Short pasta shapes with ridges or curves work best—rotini, fusilli, penne, or farfalle are my top choices. They catch the sauce in all those nooks and crannies, and they reheat evenly. Long pasta like spaghetti works in a pinch, but it doesn’t hold the sauce as well and can clump together when reheated.
Can I make this recipe dairy-free?
Absolutely! Use full-fat coconut cream instead of heavy cream, and a dairy-free Parmesan-style cheese. The coconut cream adds a slight sweetness, so add a pinch of garlic powder and an extra pinch of salt to balance it. I’ve tested this version, and it’s surprisingly delicious—just different from the original.
Pin This Recipe!
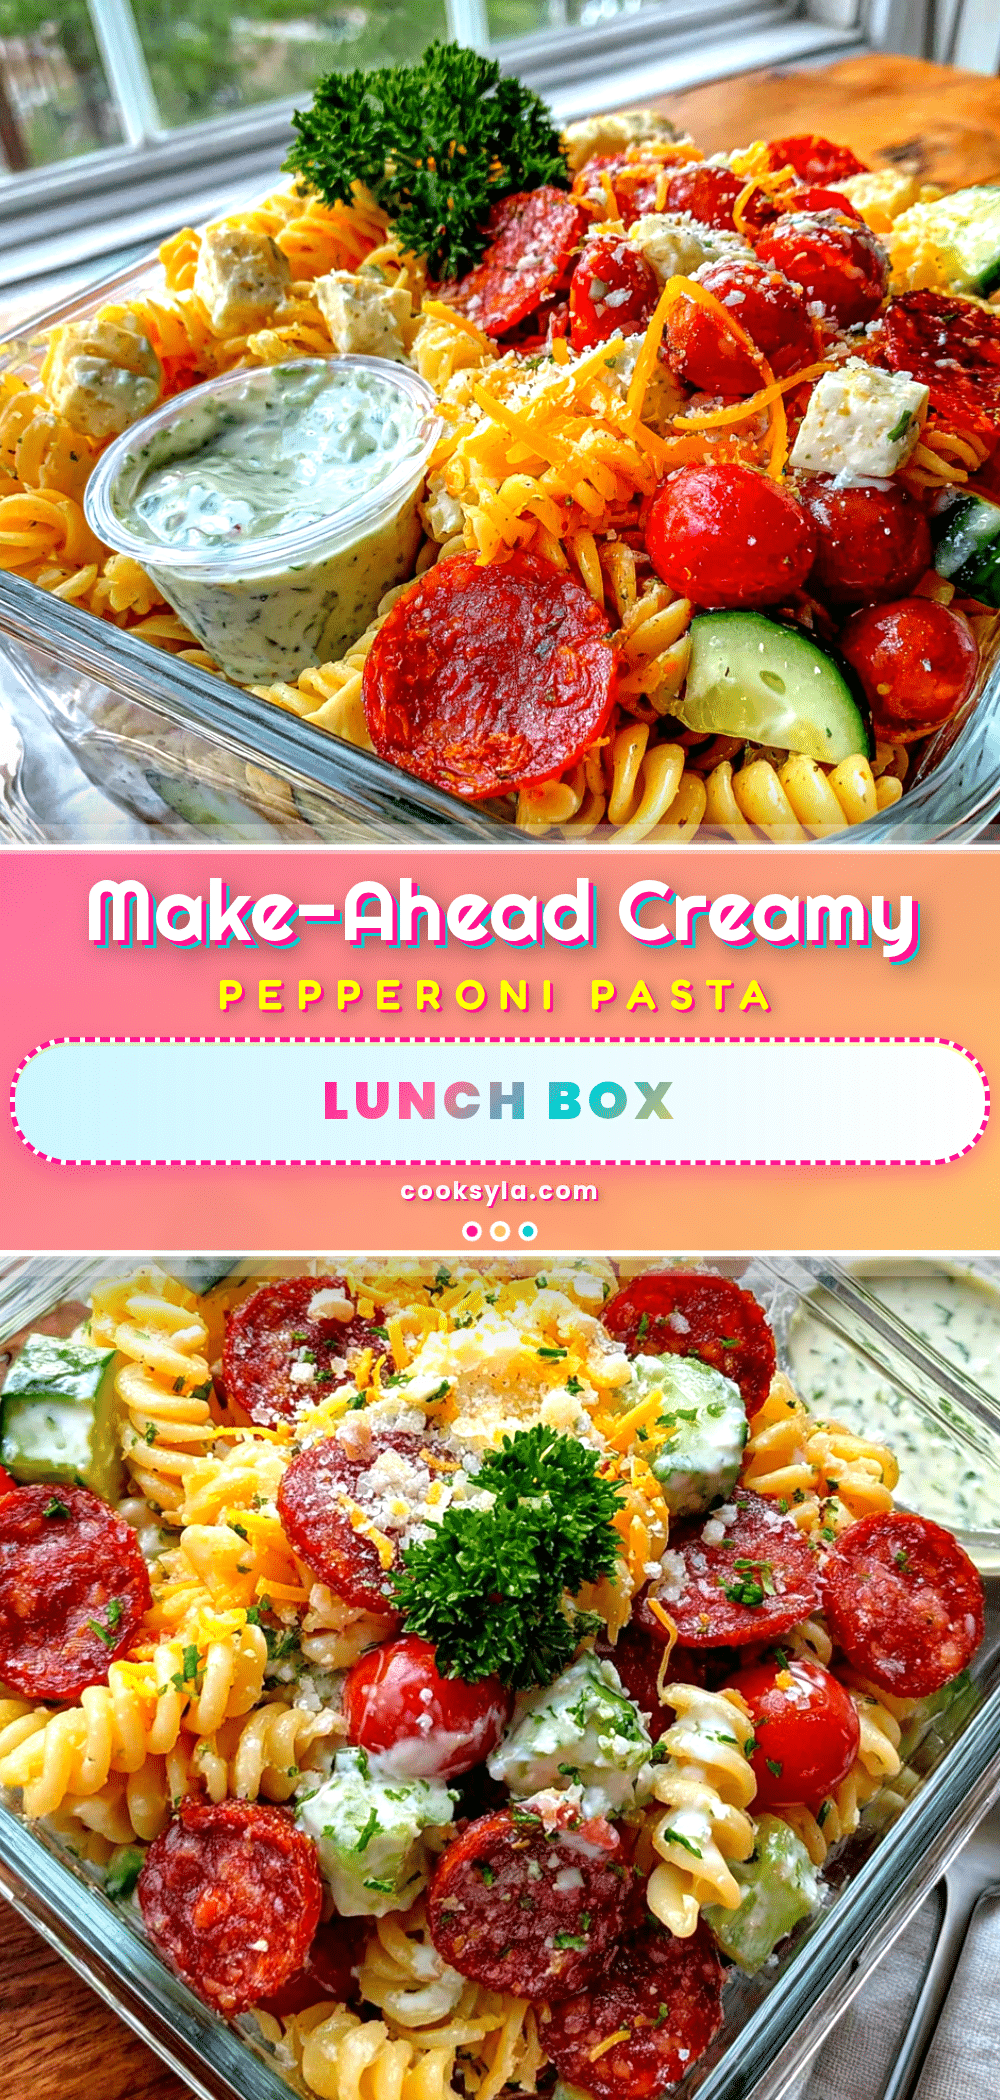
Easy Make-Ahead Creamy Pepperoni Pasta Lunch

A quick and easy creamy pepperoni pasta that tastes even better after sitting in the fridge, perfect for make-ahead lunches. The pepperoni crisps up and infuses the cream sauce with smoky, spicy goodness, while the pasta stays perfectly al dente even after reheating.
- Prep Time: 15 minutes
- Cook Time: 10 minutes
- Total Time: 25 minutes
- Yield: 5 servings 1x
- Category: Main Course
- Cuisine: Italian-American
Ingredients
- 1 pound (450g) short pasta (penne, rotini, or fusilli)
- 6 ounces (170g) sliced pepperoni
- 1 cup (240ml) heavy cream
- 1 cup (100g) freshly grated Parmesan cheese
- 4 cloves garlic, minced
- 2 tablespoons (28g) unsalted butter
- 1/2 cup (120ml) low-sodium chicken or vegetable broth
- 1/2 teaspoon red pepper flakes (optional)
- Salt and black pepper to taste
- 2 tablespoons fresh parsley, chopped
Instructions
- Cook the pasta: Bring a large pot of generously salted water to a rolling boil. Add pasta and cook according to package directions until al dente, cooking 1 minute less than package says. Reserve 1 cup of pasta water before draining. Drain pasta in a colander; do not rinse.
- Crisp the pepperoni: While pasta cooks, heat a large skillet over medium heat. Add pepperoni slices in a single layer (work in batches if needed). Cook 2-3 minutes per side until crispy and edges curl. Transfer to a paper towel-lined plate, leaving the oil in the pan.
- Sauté the garlic: Reduce heat to medium-low. Add butter to the same pan with the pepperoni oil. Once melted, add minced garlic and red pepper flakes (if using). Cook 30-45 seconds, stirring constantly, until fragrant but not browned.
- Build the cream sauce: Pour in heavy cream and chicken broth, stirring to combine. Bring to a gentle simmer (not a boil) and cook 2-3 minutes, stirring occasionally, until slightly thickened.
- Add the Parmesan: Remove pan from heat. Gradually add grated Parmesan cheese, stirring constantly until melted and smooth. If too thick, add a splash of reserved pasta water. If too thin, let sit another minute.
- Combine everything: Add drained pasta to the sauce and toss well to coat. Add crispy pepperoni back in, reserving a handful for topping. Toss again. Season with salt and black pepper to taste (go easy on salt as pepperoni and Parmesan are salty).
- Cool and portion: Let pasta cool in the skillet for 10-15 minutes, stirring occasionally. Divide into meal prep containers. Top each portion with reserved crispy pepperoni and fresh parsley. Let cool completely to room temperature (about 30 minutes) before sealing lids.
Notes
Don’t skip crisping the pepperoni—it releases smoky, spicy oil that flavors the sauce. Under-cook pasta by 1-2 minutes to prevent mushiness upon reheating. Let pasta cool completely before refrigerating to avoid condensation. When reheating, add 1-2 tablespoons of milk or cream to restore creaminess. The flavors improve after a day in the fridge. Do not freeze this dish as the cream sauce will separate.
Nutrition
- Serving Size: 1 serving (about 1/5
- Calories: 550
- Sugar: 3
- Sodium: 800
- Fat: 30
- Saturated Fat: 15
- Carbohydrates: 48
- Fiber: 2
- Protein: 20
Keywords: make-ahead pasta, creamy pepperoni pasta, lunch meal prep, easy pasta recipe, pepperoni pasta, creamy pasta, meal prep lunch


