Love this? Save it for later!
Share the inspiration with your friends
My niece asked why I couldn’t just brown the butter first before creaming it with the sugar. I started to explain why that wouldn’t work — then stopped. Honestly, I had no good reason. I’d been making chocolate chip cookies the same way for years, following the classic method like it was carved in stone. But she had a point. Why not?
That conversation happened on a rainy Tuesday afternoon. I remember because I was supposed to be testing a recipe for a client, and instead I found myself standing over a saucepan, watching butter foam and turn golden while my niece sat on the counter, swinging her legs. “See?” she said. “It smells like cookies already.” She was right about that too.
The first batch came out of the oven, and I’ll be honest — I was nervous. I took a bite, and something clicked. The nutty, toasty flavor from the brown butter had transformed everything. The edges were crisp, the centers were soft, and the taste was deeper, almost caramel-like. I mean, I’ve made a lot of cookies in my life, but these were different.
What really got me, though, was what happened five days later. I’d stashed a few in a container on the counter, fully expecting them to turn into sad, crumbly disks. You know that feeling when you reach for a cookie you’ve been ignoring, and you just know it’s going to disappoint? I took a bite, and it was still soft. Not just edible — genuinely soft and chewy. My niece looked at me like, “Told you so.”
So here we are. These brown butter chocolate chip cookies stay soft 5 days — maybe longer if you don’t eat them all first. I’ve tested this recipe a dozen times since that Tuesday, tweaking ratios and chilling times, and it never fails. Let me show you how to make them.
Why You’ll Love This Recipe
Let’s be real for a second — there are about a million chocolate chip cookie recipes out there. But this one is different. I’ve tested it, my niece has tested it, and honestly, my entire neighborhood has tested it. Here’s why it stands out:
- Stays Soft for Days: The combination of brown butter and a specific ratio of brown to white sugar creates a cookie that stays tender and chewy for up to five days. No more rock-hard cookies by Wednesday.
- Deep, Nutty Flavor: Browning the butter adds a toasty, caramelized depth that regular butter just can’t match. It’s like your cookies went to flavor finishing school.
- Simple Ingredients: You probably have everything in your kitchen right now. No weird extracts or hard-to-find flours.
- Perfect for Any Occasion: These work for bake sales, after-school snacks, late-night cravings, or pretending you’re a contestant on a baking show.
- Crowd-Pleaser: I brought these to a potluck and three people asked for the recipe before the plates were cleared. Kids love them. Adults love them. Your coworker who claims they don’t eat sweets loves them.
- Forgiving Recipe: Mess up the chill time? No problem. Use a different brand of chocolate? Still works. This recipe is built to handle real-life kitchen chaos.
What makes this recipe different from the rest is the technique. Most recipes either use melted butter or room-temperature butter. This one uses brown butter that’s been cooled just enough to work with, plus a resting period that lets the flavors meld. It’s not just another version — it’s my best version. And honestly, it’s the kind of cookie that makes you close your eyes after the first bite.
What Ingredients You Will Need
This recipe uses simple, wholesome ingredients to deliver big flavor and that perfect soft texture. Most of these are pantry staples, which is part of the beauty. Here’s what you’ll need and why each one matters.
- Unsalted butter, 1 cup (2 sticks, 226g): You’ll brown this, so unsalted is important — it lets you control the salt level later. I prefer Kerrygold or Plugrà for their higher fat content, which browns beautifully.
- Brown sugar, 1 cup packed (200g): This is the secret to softness. Brown sugar has molasses, which attracts moisture and keeps cookies tender. Dark brown sugar gives a deeper flavor, but light works fine too.
- Granulated sugar, 1/2 cup (100g): Adds structure and helps with those slightly crispy edges. The balance between brown and white sugar is crucial here.
- All-purpose flour, 2 1/4 cups (280g): Spoon and level this — don’t scoop directly from the bag. Too much flour makes dry cookies. I use King Arthur Flour for consistent results.
- Baking soda, 1 teaspoon: Helps cookies spread and brown. Make sure it’s fresh — test it by dropping a pinch in vinegar; it should fizz.
- Salt, 1 teaspoon: I use fine sea salt. It balances the sweetness and enhances the brown butter flavor. If using table salt, reduce to 3/4 teaspoon.
- Large eggs, 2 (room temperature): Room-temperature eggs incorporate better into the brown butter mixture. If you forgot to take them out, place them in warm water for 5 minutes.
- Vanilla extract, 2 teaspoons: Pure vanilla extract makes a difference. Imitation works in a pinch, but the real stuff adds floral notes that complement the brown butter.
- Semi-sweet chocolate chips, 2 cups (340g): I use Ghirardelli 60% cacao chips. You can also chop a good chocolate bar for those melty puddles. Milk chocolate makes it sweeter; dark chocolate adds intensity.
- Flaky sea salt (optional, for finishing): A sprinkle right out of the oven transforms these cookies. Maldon is my go-to.
Substitution guidance: For a dairy-free version, use vegan butter (I recommend Miyoko’s) — just note that browning may take longer. For gluten-free, swap in a 1:1 gluten-free flour blend with xanthan gum. If you only have salted butter, reduce the added salt to 1/4 teaspoon and watch the browning process carefully (salted butter can foam differently).
Equipment Needed
You don’t need a fancy kitchen for these brown butter chocolate chip cookies stay soft 5 days. Here’s what you’ll actually use:
- Light-colored saucepan: A light interior helps you see the butter change color. Dark pans make it hard to judge doneness. I use a stainless steel 2-quart saucepan.
- Large mixing bowl: Go for glass or ceramic — they don’t react with ingredients. Stainless steel works too, but avoid plastic if you’re using hot brown butter.
- Whisk and wooden spoon: Whisk for the butter and sugar, wooden spoon for folding in chips. A rubber spatula also helps scrape every bit of that brown butter.
- Baking sheets (2): Light-colored, rimmed baking sheets are best. Dark sheets can cause over-browning on the bottoms. I use Nordic Ware naturals.
- Parchment paper or silicone baking mats: Parchment is cheaper and disposable; silicone mats are reusable and non-stick. Both work great.
- Cookie scoop (1.5 tablespoon size): This ensures uniform cookies that bake evenly. A 1.5-tablespoon scoop gives you the classic bakery-style size. If you don’t have one, use two spoons.
- Cooling rack: Lets air circulate under cookies so they don’t steam and get soggy bottoms.
- Plastic wrap or reusable bowl cover: For chilling the dough. A bowl cover works, but plastic wrap directly on the surface prevents a skin from forming.
Budget-friendly tip: No cookie scoop? Use a measuring tablespoon or just eyeball it — cookies don’t have to be identical. No stand mixer? A bowl and a wooden spoon work perfectly. I actually prefer mixing by hand for this recipe because it’s harder to overmix.
Preparation Method
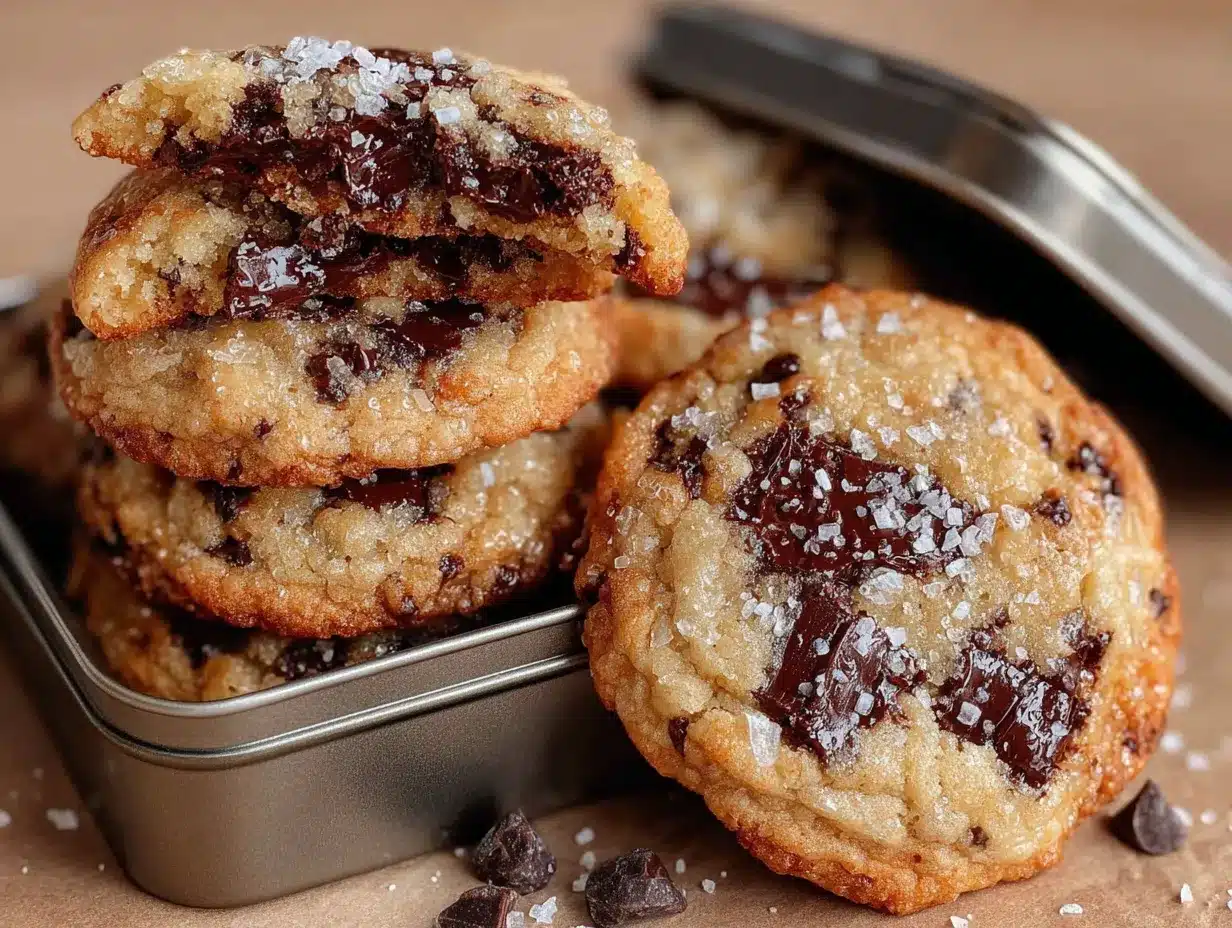
Alright, let’s make these cookies. I’ve broken this down so you can follow along without stress. Take your time — the results are worth it.
- Brown the butter: Cut the butter into tablespoon-sized pieces and place them in your light-colored saucepan over medium heat. Stir constantly with a rubber spatula or wooden spoon. The butter will melt, foam, and then start to crackle. After about 5-7 minutes, you’ll see golden brown specks forming at the bottom. The butter will smell nutty and amazing. As soon as it turns amber and smells like toasted hazelnuts, remove it from the heat immediately. Pour it into a heatproof bowl (including all those brown bits — that’s flavor). Let it cool for 15-20 minutes until it’s warm but not hot. You should be able to touch the bowl comfortably.
- Mix sugars and butter: Add the brown sugar and granulated sugar to the warm brown butter. Whisk vigorously for about 2 minutes until the mixture looks like wet sand and has slightly thickened. The sugar will help cool the butter further. This step is important — don’t rush it.
- Add eggs and vanilla: Crack both eggs into the butter-sugar mixture. Add the vanilla. Whisk until everything is fully combined and the mixture looks smooth and glossy, about 1 minute. It should fall off the whisk in ribbons. If it looks separated, keep whisking — it will come together.
- Combine dry ingredients: In a separate bowl, whisk together the flour, baking soda, and salt. This evenly distributes the leavening and salt so you don’t get a pocket of baking soda in one cookie. Yes, I’ve done that. It’s not pleasant.
- Add dry to wet: Pour the flour mixture into the wet ingredients. Use a wooden spoon or rubber spatula to fold gently. Stop mixing as soon as you no longer see streaks of flour. A few streaks are okay — they’ll disappear when you add the chips. Overmixing develops gluten and makes tough cookies.
- Fold in chocolate chips: Add the chocolate chips and fold until just distributed. The dough will be soft and slightly sticky. That’s perfect. If it’s too sticky to handle, refrigerate for 15 minutes before scooping.
- Chill the dough: Cover the bowl with plastic wrap pressed directly onto the surface of the dough. Refrigerate for at least 30 minutes, but 2 hours is better. This step is non-negotiable for soft cookies — chilling solidifies the butter, which means cookies spread less and stay thicker and softer.
- Preheat oven: About 15 minutes before you’re ready to bake, preheat your oven to 350°F (175°C). Line two baking sheets with parchment paper.
- Scoop the dough: Use your cookie scoop to portion dough into 1.5-tablespoon balls. Place them 2 inches apart on the prepared sheets. If you want bakery-style cookies, roll each ball between your palms to make them perfectly round — this gives a more uniform shape.
- Bake: Bake one sheet at a time in the center of the oven for 10-12 minutes. At 10 minutes, the edges should be golden brown and the centers should look slightly underdone and puffy. They will continue to bake on the hot sheet after you pull them out. For softer cookies, pull them at 10 minutes. For slightly crispier edges, go to 12.
- Cool: Let cookies rest on the baking sheet for 5 minutes. This allows them to set without breaking. Then transfer to a cooling rack. If using flaky sea salt, sprinkle it on right after you pull them from the oven.
Sensory cue check: When you pull the cookies from the oven, the edges should be set and golden, the centers should look puffy and slightly pale, and your kitchen should smell like a bakery. The cookies will look underdone in the middle — trust the process.
Cooking Tips & Techniques
I’ve made this recipe more times than I can count, and I’ve learned a few things the hard way. Here’s what I wish someone had told me:
Don’t walk away from browning butter. I did once — got distracted by a phone call — and ended up with burnt butter that smelled like sadness. The transition from perfect to burnt happens in about 30 seconds. Stay at the stove. Swirl the pan. Watch for those brown specks.
Temperature matters more than you think. If the brown butter is too hot when you add the eggs, you’ll end up with scrambled egg bits in your cookies. Let it cool to warm — think bathwater temperature, not hot tub. If you’re unsure, touch the bowl: it should feel warm but not uncomfortable.
Chill time is not optional. I know, I know — you want cookies now. But chilling the dough for at least 30 minutes (2 hours is ideal) does three things: it solidifies the butter so cookies don’t spread into pancakes, it allows the flour to fully hydrate for a better texture, and it deepens the flavor as the brown butter’s nutty notes meld with the sugars. Yes, I’ve baked unchilled dough before. The cookies were flat and greasy. Don’t be like past me.
Use a cookie scoop for consistent size. Uneven cookies mean some burn while others are underdone. A 1.5-tablespoon scoop gives you 24-26 cookies that all bake in the same time. If you don’t have one, use a measuring spoon and roll the dough into balls with your hands.
Bake one sheet at a time. I know it’s tempting to cram two sheets in the oven, but the heat circulates unevenly and you’ll end up with cookies that are done on one side and raw on the other. Bake in batches. Your patience will be rewarded.
Let them rest on the sheet. Those 5 minutes after baking are crucial. The cookies are still cooking from residual heat, and moving them too early causes them to fall apart. I learned this when I tried to transfer a cookie immediately and it basically disintegrated in my hands. Sad, but educational.
Variations & Adaptations
One of the best things about this recipe is how flexible it is. Here are some ways to make it your own:
- Chocolate variation: Swap semi-sweet chips for dark chocolate chunks (60-70% cacao) for a more intense flavor, or use milk chocolate if you prefer sweeter cookies. I once used a mix of white chocolate and macadamia nuts — it was a different cookie entirely, but still soft and delicious.
- Nutty addition: Fold in 1/2 cup of toasted pecans or walnuts along with the chocolate chips. Toast them first in a dry pan for 3-4 minutes until fragrant — it brings out their oils and makes them crunchier.
- Gluten-free option: Substitute the all-purpose flour with a 1:1 gluten-free baking flour that contains xanthan gum. I’ve tried this with King Arthur Measure for Measure, and the texture was surprisingly close to the original. Chill the dough for at least 1 hour to help the gluten-free flour absorb moisture.
- Vegan version: Use vegan butter (like Miyoko’s) and a flax egg (1 tablespoon ground flaxseed mixed with 3 tablespoons water, let sit for 5 minutes). The brown butter flavor is slightly less pronounced, but the cookies still stay soft for days.
- Flavor twist: Add 1/2 teaspoon of cinnamon or cardamom to the dry ingredients for a warm, spiced note. Or stir in 1 tablespoon of instant espresso powder with the dry ingredients — it doesn’t make the cookies taste like coffee, but it deepens the chocolate flavor.
- Sea salt finish: This isn’t really a variation — it’s a requirement. A light sprinkle of flaky sea salt on top right after baking creates a sweet-salty contrast that makes these cookies unforgettable. Try it once and you’ll never go back.
Personal favorite: I once added 1/4 cup of cocoa powder to the dry ingredients and used white chocolate chips instead of semi-sweet. The brown butter and cocoa created a fudgy, rich cookie that disappeared at a party in 20 minutes. Just saying — experiment.
Serving & Storage Suggestions
These cookies are best served slightly warm, when the chocolate is still a little melty and the edges have that perfect crisp-to-soft contrast. If you’re reheating, pop one in the microwave for 10-15 seconds — it brings back that fresh-from-the-oven texture.
Storage: Place cooled cookies in an airtight container at room temperature. Layer them with parchment paper between stacks to prevent sticking. They’ll stay soft for up to 5 days — I’ve tested this repeatedly. The key is the brown butter and brown sugar combination, which retains moisture better than regular butter cookies.
Freezer instructions: You can freeze the baked cookies for up to 3 months. Place them in a single layer on a baking sheet, freeze for 1 hour, then transfer to a freezer-safe bag. Thaw at room temperature for 30 minutes, then warm in the oven at 300°F for 5 minutes.
Freezing dough: This is my favorite trick. Scoop the dough into balls, place them on a parchment-lined baking sheet, and freeze until solid. Transfer to a freezer bag. When you want cookies, bake directly from frozen — just add 2-3 minutes to the baking time. Fresh cookies in 15 minutes, anytime.
Serving suggestions: These cookies are perfect with a glass of cold milk, a cup of coffee, or a scoop of vanilla ice cream sandwiched between two of them (yes, I’ve done this). They also make fantastic ice cream toppings — crumble them over vanilla bean ice cream with a drizzle of caramel.
Flavor development note: These cookies actually taste better on day two. The brown butter flavor deepens as it sits, and the texture becomes even more tender. So if you can resist eating them all on day one, you’re in for a treat.
Nutritional Information & Benefits
Let’s be honest — these are cookies, not health food. But here’s the approximate nutritional breakdown per cookie (based on 24 cookies):
- Calories: 220-250
- Fat: 12-14g
- Carbohydrates: 28-32g
- Protein: 3-4g
- Sugar: 18-22g
Health highlights: Brown butter contains conjugated linoleic acid (CLA), which has been linked to some health benefits in moderate amounts. The dark chocolate chips provide antioxidants called flavonoids, which support heart health. And hey — a cookie made with real ingredients is always better than something from a package with ingredients you can’t pronounce.
Dietary considerations: This recipe contains gluten, dairy, and eggs. For gluten-free, dairy-free, or vegan adaptations, see the variations section above. These cookies are not low-carb or keto-friendly due to the sugar content, but they are made with simple, recognizable ingredients.
My personal take: I believe in balance. These cookies are a treat, and they’re meant to be enjoyed without guilt. One cookie with a glass of milk is a beautiful thing. A whole batch in one sitting? Maybe save that for a special occasion. Or don’t — I’m not judging.
Conclusion
These brown butter chocolate chip cookies stay soft 5 days because of the technique, not luck. The brown butter adds depth, the brown sugar keeps them tender, and the chilling step ensures they hold their shape. It’s a recipe born from a question from a curious kid and a willingness to try something new — and honestly, that’s how the best recipes happen.
I hope you make these and love them as much as I do. Feel free to customize them — swap the chocolate, add nuts, sprinkle sea salt, or experiment with spices. That’s the beauty of a good base recipe: it’s a starting point for your own creativity.
If you try this recipe, I’d love to hear about it. Drop a comment below, share a photo, or tell me about your own kitchen experiments. And if you have a question about the process, just ask — I’ve probably made the mistake already and learned from it. Happy baking!
Frequently Asked Questions
Can I use salted butter instead of unsalted?
Yes, but reduce the added salt in the recipe to 1/4 teaspoon. Also, salted butter can foam differently when browning, so keep a close eye on it to prevent burning.
Why did my cookies turn out flat?
Flat cookies usually mean the butter was too warm or the dough wasn’t chilled long enough. Make sure your brown butter is cooled to room temperature, and chill the dough for at least 30 minutes — 2 hours is better.
Can I skip the chilling step?
You can, but the cookies will spread more and won’t be as thick or soft. Chilling solidifies the butter and allows the flavors to develop. If you’re in a rush, 30 minutes is the minimum.
How do I know when the butter is properly browned?
Look for golden brown specks at the bottom of the pan and a nutty, toasty aroma. The butter will go from melted and foamy to amber colored in about 5-7 minutes. Remove it from heat immediately when you see the specks.
Can I freeze the cookie dough?
Absolutely! Scoop the dough into balls, freeze on a baking sheet, then transfer to a freezer bag. Bake directly from frozen, adding 2-3 minutes to the baking time. Fresh cookies whenever you want them.
Pin This Recipe!
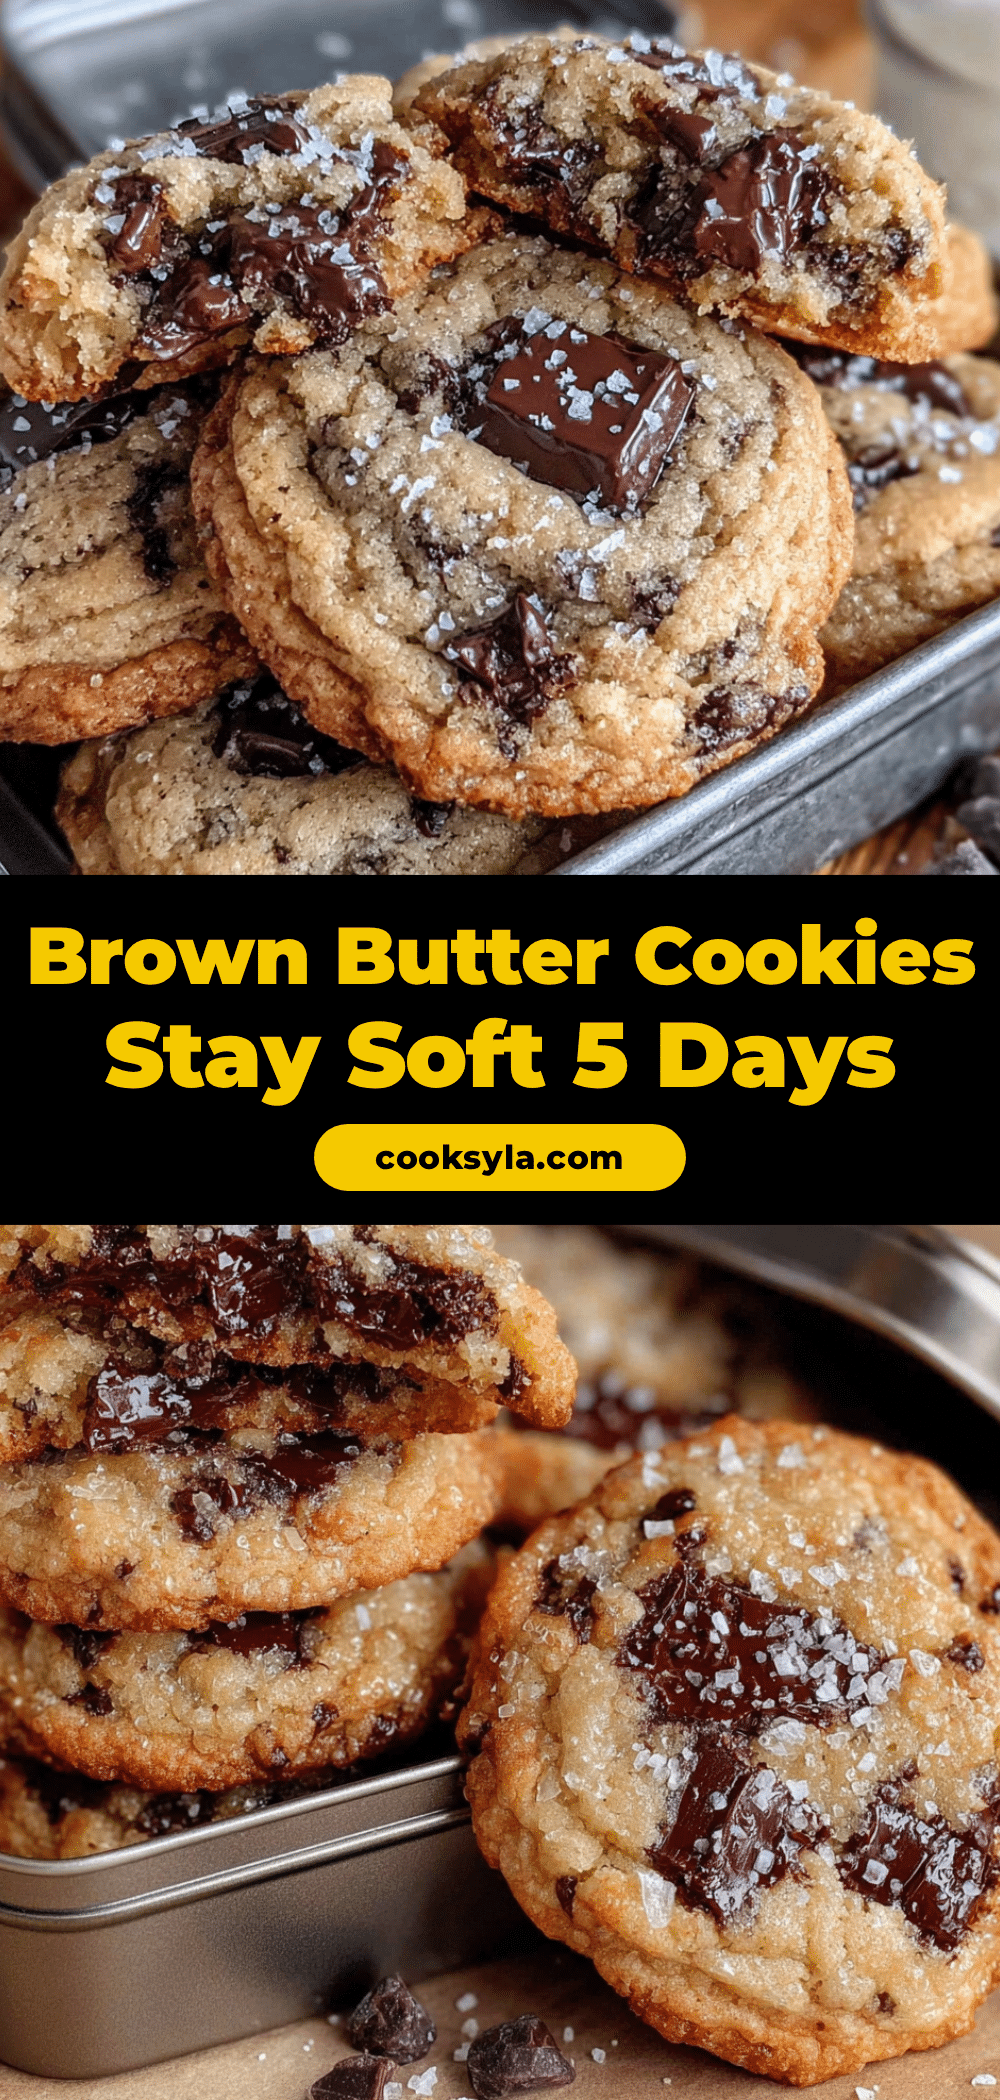
Brown Butter Chocolate Chip Cookies: Best Recipe for Soft 5 Days

These brown butter chocolate chip cookies stay soft for up to 5 days thanks to a unique technique that combines nutty browned butter with the perfect ratio of sugars. A simple, forgiving recipe that delivers deep, caramel-like flavor and a tender, chewy texture every time.
- Prep Time: 20 minutes
- Cook Time: 12 minutes
- Total Time: 2 hours 32 minutes (includes chilling)
- Yield: 24-26 cookies 1x
- Category: Dessert
- Cuisine: American
Ingredients
- 1 cup (2 sticks, 226g) unsalted butter
- 1 cup packed (200g) brown sugar
- 1/2 cup (100g) granulated sugar
- 2 1/4 cups (280g) all-purpose flour
- 1 teaspoon baking soda
- 1 teaspoon fine sea salt
- 2 large eggs, room temperature
- 2 teaspoons pure vanilla extract
- 2 cups (340g) semi-sweet chocolate chips
- Flaky sea salt (optional, for finishing)
Instructions
- Brown the butter: Cut the butter into tablespoon-sized pieces and place in a light-colored saucepan over medium heat. Stir constantly. After 5-7 minutes, when the butter turns amber and smells nutty with golden brown specks at the bottom, remove from heat immediately. Pour into a heatproof bowl and let cool for 15-20 minutes until warm but not hot.
- Mix sugars and butter: Add brown sugar and granulated sugar to the warm brown butter. Whisk vigorously for about 2 minutes until the mixture looks like wet sand and has slightly thickened.
- Add eggs and vanilla: Crack both eggs into the butter-sugar mixture. Add vanilla. Whisk until fully combined, smooth, and glossy, about 1 minute. It should fall off the whisk in ribbons.
- Combine dry ingredients: In a separate bowl, whisk together flour, baking soda, and salt.
- Add dry to wet: Pour the flour mixture into the wet ingredients. Fold gently with a wooden spoon or rubber spatula until just combined. Stop when no streaks of flour remain (a few streaks are okay).
- Fold in chocolate chips: Add chocolate chips and fold until just distributed. The dough will be soft and slightly sticky.
- Chill the dough: Cover the bowl with plastic wrap pressed directly onto the surface. Refrigerate for at least 30 minutes, but 2 hours is better.
- Preheat oven: About 15 minutes before baking, preheat oven to 350°F (175°C). Line two baking sheets with parchment paper.
- Scoop the dough: Use a 1.5-tablespoon cookie scoop to portion dough into balls. Place 2 inches apart on prepared sheets. For bakery-style cookies, roll each ball between palms to make perfectly round.
- Bake: Bake one sheet at a time in the center of the oven for 10-12 minutes. At 10 minutes, edges should be golden brown and centers slightly underdone and puffy. For softer cookies, pull at 10 minutes; for crispier edges, go to 12.
- Cool: Let cookies rest on the baking sheet for 5 minutes, then transfer to a cooling rack. If using flaky sea salt, sprinkle on right after pulling from the oven.
Notes
Don’t walk away from browning butter—it can burn in 30 seconds. Let brown butter cool to bathwater temperature before adding eggs to avoid scrambling. Chilling dough is non-negotiable for soft, thick cookies. Bake one sheet at a time for even results. Cookies taste even better on day two as flavors deepen.
Nutrition
- Serving Size: 1 cookie
- Calories: 235
- Sugar: 20
- Sodium: 180
- Fat: 13
- Saturated Fat: 8
- Carbohydrates: 30
- Fiber: 1
- Protein: 3.5
Keywords: brown butter chocolate chip cookies, soft cookies, chewy cookies, chocolate chip cookies, easy cookie recipe, homemade cookies


