Love this? Save it for later!
Share the inspiration with your friends
I was standing in the middle of the baking aisle at Target—a place I swore I’d only be in for five minutes—when a woman I’d never met before grabbed my cart and said, “You need this recipe.” She was holding a package of rainbow sprinkles in one hand and a box of yellow cake mix in the other. I blinked at her, honestly a little startled, because I was just trying to find parchment paper and maybe a new spatula. But she had this look in her eye, the kind you see in someone who has just discovered something life-changing. “My kid’s teacher gave it to me last year,” she said, “and now I make them for every single school event.” She scribbled something on a napkin from her purse—a crumpled napkin, which I thought was hilarious—and handed it to me. That napkin became the foundation for the Best Back-to-School Funfetti Cookie Bars you’ll ever make.
I didn’t even catch her name. She just smiled, waved, and disappeared toward the checkout. And there I was, holding a napkin with a recipe that would completely change how I approached back-to-school baking. I mean, let me tell you, I’ve made a lot of cookie bars in my day. Some were too dry. Some fell apart when you looked at them wrong. But these? These were perfect from the very first batch. The funny thing is, I almost didn’t try them. I had this moment of doubt—like, can a stranger’s napkin recipe really be that good? But I’m so glad I did. The bars come together in under 30 minutes, they’re packed with those happy rainbow sprinkles, and they have this soft, chewy texture that just hits different. Maybe you’ve been there too—looking for something quick, something fun, something that makes the kids smile without you spending all afternoon in the kitchen.
That napkin is still tucked into my recipe box, slightly stained and faded. I keep it as a reminder that the best recipes often come from the most unexpected places. These Funfetti Cookie Bars have become my go-to for the first day of school, for bake sales, and honestly, for any Tuesday that needs a little extra color. They’re the kind of treat that makes you close your eyes after the first bite—and that’s exactly why I keep making them.
Why You’ll Love This Recipe
I’ve tested these Funfetti Cookie Bars more times than I care to admit—and trust me, each batch taught me something new. They’re not just another cookie bar recipe. They’re the result of careful tweaking, a few happy accidents, and that one time I accidentally used salted butter instead of unsalted (honestly, it worked out fine). Here’s why I think you’ll fall for them too:
- Quick & Easy: From mixing bowl to cooling rack in under 30 minutes. That’s faster than a school drop-off line, I swear.
- Simple Ingredients: You probably already have everything in your pantry except maybe the sprinkles. No fancy extracts, no specialty flours—just real, everyday stuff.
- Perfect for Back-to-School: Whether it’s a first-day surprise, a classroom treat, or an after-school snack, these bars fit right in. They travel well and don’t crumble like regular cookies.
- Crowd-Pleaser: I’ve brought these to potlucks, birthday parties, and even a neighborhood watch meeting. Kids and adults alike go back for seconds—sometimes thirds.
- Unbelievably Delicious: The texture is what gets me every time. Soft in the middle, slightly golden on the edges, and packed with that nostalgic funfetti flavor that reminds you of childhood birthday parties.
What makes this recipe different? It’s the technique—blending the butter and sugars until they’re light and fluffy, then letting the dough rest for just five minutes before baking. That little pause makes the bars extra tender. Plus, I use a mix of granulated and brown sugar for that perfect balance of sweetness and chew. This isn’t just another version of a cookie bar. It’s the version I’d serve to my own family on the first day of school, the one that makes my kids say, “Mom, can you make these again tomorrow?”
Honestly, this recipe is comfort food reimagined—faster, easier, but with the same soul-soothing satisfaction. It’s perfect for impressing your kids’ teachers without breaking a sweat, or turning a regular afternoon into something a little more special.
What Ingredients You Will Need
This recipe relies on simple, pantry-friendly ingredients to create those soft, chewy, sprinkle-packed cookie bars. No complicated shopping list here—just the basics, plus a generous handful of rainbow sprinkles. Let’s break it down.
For the Cookie Bars
- Unsalted butter, melted: ½ cup (1 stick or 113g). Melting the butter gives the bars a denser, fudgier texture. If you only have salted butter, just skip the added salt later.
- Granulated sugar: ½ cup (100g). Adds sweetness and helps create those slightly crispy edges.
- Light brown sugar, packed: ½ cup (100g). This is the secret to chewiness. The molasses in brown sugar keeps the bars soft for days.
- Large egg: 1, at room temperature. A room-temperature egg mixes more evenly into the batter, giving you a smoother texture.
- Vanilla extract: 1 teaspoon. I prefer pure vanilla extract for that rich, warm flavor. Imitation works in a pinch, but pure is worth the splurge.
- All-purpose flour: 1¾ cups (220g). Spoon and level it—don’t scoop directly from the bag, or you’ll end up with dry bars.
- Baking powder: ½ teaspoon. Helps the bars rise just a bit without making them cakey.
- Salt: ¼ teaspoon. Balances the sweetness and brings out the vanilla flavor.
- Rainbow sprinkles (jimmies): ½ cup (80g). I recommend jimmies (the long, skinny ones) over nonpareils (the tiny round ones). Jimmies hold their color better and don’t bleed into the batter. My favorite brand is Wilton—they’re vibrant and stay bright after baking.
Ingredient Tips & Substitutions
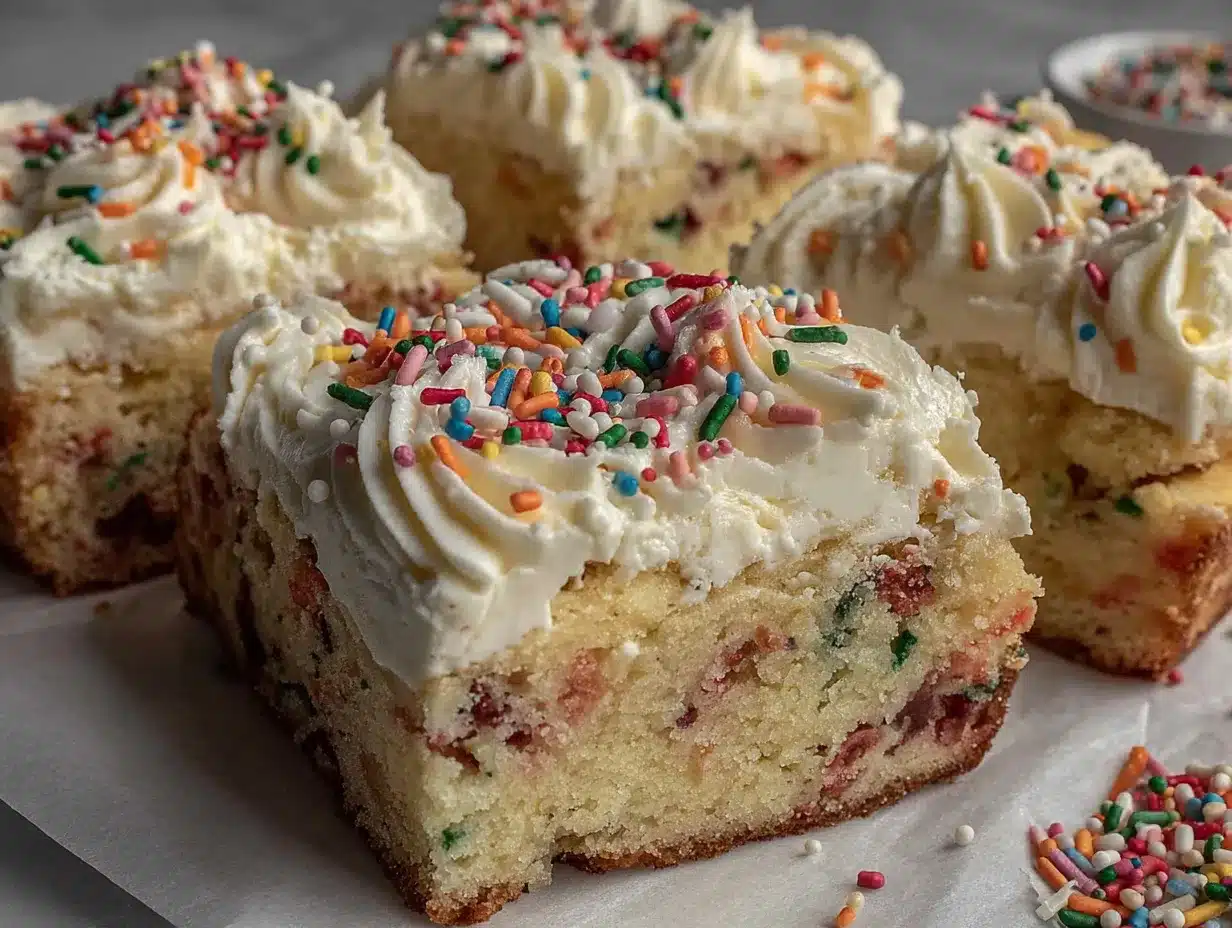
- Butter: You can use coconut oil (melted) for a dairy-free version, but the bars will be slightly less tender. I’ve tried it—still good, just different.
- Sugar: If you’re out of brown sugar, use all granulated. The bars will be a bit crisper, but they’ll still taste great.
- Egg: For an egg-free version, use a flax egg (1 tablespoon ground flaxseed mixed with 3 tablespoons water, let sit for 5 minutes). The texture will be slightly denser.
- Flour: A 1:1 gluten-free baking flour blend works well here. I’ve tested it with Bob’s Red Mill, and the results were surprisingly good.
- Sprinkles: Use holiday-themed sprinkles for Christmas, Valentine’s Day, or Halloween. Just stick to jimmies—trust me on this one.
Equipment Needed
You don’t need a professional bakery setup to make these bars. Here’s what I use every time:
- 9×9-inch baking pan: This is the perfect size for thick, soft cookie bars. If you only have an 8×8, the bars will be slightly thicker—just add 2-3 minutes to the baking time.
- Parchment paper: Line the pan with parchment, leaving some overhang on two sides. This creates “handles” that let you lift the whole slab out after baking. It’s a game-changer.
- Mixing bowls: One medium bowl for the wet ingredients, one large bowl for the dry. I use glass bowls because they’re easy to clean, but any bowl works.
- Whisk: For mixing the wet ingredients. A fork works too, but a whisk gives you a smoother blend.
- Spatula: A silicone spatula is best for folding in the sprinkles without crushing them.
- Measuring cups and spoons: Accurate measurements matter here. I prefer metal measuring cups for dry ingredients and a glass liquid measuring cup for the melted butter.
- Cooling rack: Lets air circulate under the pan so the bars cool evenly. If you don’t have one, just set the pan on a trivet.
Honestly, I’ve made these bars with a wooden spoon and a Pyrex dish when I was visiting my sister’s house. They turned out fine. Don’t stress if you’re missing something—improvisation is part of the fun.
Preparation Method
Let’s get baking! I’ve broken this down into clear steps, with all the little details I’ve learned from making these bars probably twenty times now.
- Preheat your oven to 350°F (175°C). Line a 9×9-inch baking pan with parchment paper, leaving a 2-inch overhang on two opposite sides. This makes lifting the bars out so much easier. I learned this the hard way after a batch that refused to come out of the pan.
- Melt the butter. In a microwave-safe bowl, melt ½ cup (1 stick) of unsalted butter in 20-second intervals, stirring between each, until fully melted. Let it cool for about 2 minutes—you don’t want it hot enough to cook the egg later.
- Mix the wet ingredients. In a medium bowl, whisk together the melted butter, ½ cup granulated sugar, and ½ cup packed light brown sugar until smooth. The mixture should look glossy. Add 1 large egg and 1 teaspoon vanilla extract, then whisk until fully combined. It might look a little separated at first—that’s normal. Keep whisking until it comes together.
- Combine the dry ingredients. In a large bowl, whisk together 1¾ cups all-purpose flour, ½ teaspoon baking powder, and ¼ teaspoon salt. Make sure the baking powder is evenly distributed—I’ve had clumps before, and they create little pockets of bitterness.
- Combine wet and dry. Pour the wet mixture into the dry mixture. Use a spatula to fold everything together until just combined. A few streaks of flour are okay—overmixing will make the bars tough. This is the moment I always remind myself to be gentle.
- Fold in the sprinkles. Gently fold in ½ cup of rainbow jimmies. Don’t overmix here—just a few folds until the sprinkles are evenly distributed. If you stir too much, the colors might bleed, and you’ll end up with grayish bars. Trust me, I’ve done it.
- Press into the pan. Transfer the dough to your prepared pan. It will be thick and slightly sticky. Use your spatula (or lightly greased hands) to press it evenly into the corners. Make sure the surface is level—this helps the bars bake evenly.
- Bake. Bake for 18-22 minutes, or until the edges are golden brown and the center looks set but still soft. A toothpick inserted into the center should come out with a few moist crumbs—not wet batter. I start checking at 18 minutes because every oven runs differently.
- Cool completely. Place the pan on a cooling rack and let the bars cool for at least 30 minutes. This step is crucial—if you cut them too soon, they’ll crumble. I know it’s hard to wait, but it’s worth it.
- Slice and serve. Use the parchment overhang to lift the entire slab out of the pan. Place it on a cutting board and slice into 16 squares (4 rows by 4 rows). For cleaner cuts, wipe your knife between slices.
Cooking Tips & Techniques
Over the years, I’ve made every mistake you can imagine with cookie bars. Here’s what I’ve learned so you don’t have to repeat my failures.
- Don’t overbake. The number one mistake is leaving them in the oven too long. Cookie bars continue to cook from residual heat after you pull them out. Take them out when the center still looks slightly underdone—it will set as they cool. I once baked a batch for 25 minutes thinking “a little longer won’t hurt,” and they came out dry. Learn from me.
- Use room-temperature egg. A cold egg can seize the melted butter, creating a lumpy batter. Just let your egg sit on the counter for 15 minutes before starting, or place it in a bowl of warm water for 5 minutes.
- Measure flour correctly. Scooping directly from the bag packs the flour, giving you too much. Instead, spoon flour into your measuring cup and level it off with a knife. This small step makes a huge difference in texture.
- Let the dough rest. After mixing, let the dough rest for 5 minutes before pressing it into the pan. This allows the flour to fully hydrate, resulting in softer, more tender bars. I stumbled on this trick when I got distracted by a phone call—best accident ever.
- Use parchment paper. I cannot stress this enough. Parchment paper prevents sticking and makes cleanup a breeze. Plus, you can lift the entire slab out for perfect slicing. Greasing the pan works, but it’s not as reliable.
- Timing is everything. While the bars bake, clean up your workspace. By the time they’re done, you’ll have almost no dishes left. Multitasking like this makes the whole process feel effortless.
Variations & Adaptations
One of the best things about this recipe is how flexible it is. I’ve tried several variations over the years, and each one brought something new to the table.
- Chocolate Chip Funfetti Bars: Reduce the sprinkles to ¼ cup and add ½ cup of mini chocolate chips. The combination of chocolate and rainbow sprinkles is absolutely irresistible. My kids voted this their favorite version.
- Gluten-Free Version: Substitute the all-purpose flour with a 1:1 gluten-free baking blend. I’ve used Bob’s Red Mill and King Arthur, and both worked beautifully. Add 1 teaspoon of xanthan gum if your blend doesn’t include it.
- Vegan Funfetti Bars: Use melted coconut oil instead of butter, a flax egg (1 tablespoon ground flaxseed + 3 tablespoons water), and dairy-free sprinkles. The texture is slightly denser, but the flavor is still spot-on.
- Citrus Twist: Add 1 teaspoon of lemon or orange zest to the wet ingredients. The bright citrus flavor pairs surprisingly well with the vanilla and sprinkles. I made this for a spring brunch, and it was a hit.
- Holiday Themes: Swap the rainbow sprinkles for red and green at Christmas, pastels for Easter, or orange and black for Halloween. The base recipe stays the same—just change the sprinkle colors to match the occasion.
- Brown Butter Version: For a nuttier, more complex flavor, brown the butter before using it. Melt the butter in a saucepan over medium heat, swirling occasionally, until it turns golden brown and smells toasty. Let it cool before using. This adds about 5 minutes to the prep but takes the bars to a whole new level.
Serving & Storage Suggestions
These Funfetti Cookie Bars are best served at room temperature, but they’re also delicious slightly warm with a glass of cold milk. I like to arrange them on a colorful platter for back-to-school parties—the rainbow sprinkles really pop against a white plate.
For storage, place the bars in an airtight container at room temperature. They’ll stay soft and chewy for up to 4 days. If you stack them, place a sheet of parchment paper between layers to prevent sticking. I’ve also stored them in the fridge for up to a week, but they tend to dry out a bit—so room temperature is really the way to go.
These bars freeze beautifully. Wrap individual bars in plastic wrap, then place them in a freezer-safe bag or container. They’ll keep for up to 3 months. When you’re ready to enjoy one, just let it thaw at room temperature for about 30 minutes, or pop it in the microwave for 10-15 seconds. I always keep a stash in the freezer for unexpected school events or last-minute cravings.
For reheating, the microwave is your friend. A quick 10-second zap brings back that fresh-from-the-oven softness. If you’re reheating a whole pan, cover it with foil and warm it in a 300°F oven for 5-7 minutes.
One thing I’ve noticed: the flavors actually get better after a day. The vanilla and brown sugar meld together, and the texture becomes even more tender. So don’t be afraid to make these a day ahead—they’ll taste even better.
Nutritional Information & Benefits
I’m not a nutritionist, but I’ve done my homework on these bars. Here’s a rough estimate per bar (based on 16 servings):
- Calories: ~210
- Total Fat: 9g
- Saturated Fat: 5g
- Carbohydrates: 31g
- Sugar: 18g
- Protein: 2g
- Fiber: 0.5g
While these are definitely a treat, there are a few bright spots. The butter provides a small amount of vitamin A, and the egg adds a bit of protein. Plus, let’s be honest—sometimes you just need a little joy in your day, and these bars deliver.
For dietary considerations: This recipe contains gluten, dairy, and eggs. For a gluten-free version, use a 1:1 gluten-free flour blend. For a dairy-free version, substitute the butter with melted coconut oil or a plant-based butter. For an egg-free version, use a flax egg as mentioned earlier.
I personally believe that balance is key. These bars are meant to be enjoyed—not as an everyday snack, but as a celebration of something special, like the first day of school or a Tuesday that needed a little sparkle.
Conclusion
These Best Back-to-School Funfetti Cookie Bars are more than just a recipe—they’re a little moment of happiness you can bake in under 30 minutes. They’re soft, chewy, packed with rainbow sprinkles, and absolutely perfect for celebrating the start of a new school year or any day that needs a pop of color.
I hope you’ll make them your own. Add chocolate chips, switch up the sprinkle colors, or try the brown butter version—whatever feels right to you. That’s the beauty of a simple recipe like this: it’s a canvas for your creativity.
Personally, I love these bars because they remind me of that stranger in the baking aisle who took a moment to share something wonderful. Every time I make them, I think of her, and I smile. I hope they bring a little of that same joy to your kitchen.
If you try these Funfetti Cookie Bars, I’d love to hear about it! Leave a comment below, share a photo, or tag me on social media. And if you have a fun variation of your own, please share it—I’m always looking for new ideas. Happy baking, friends!
Frequently Asked Questions
Can I use a different size pan?
Yes, but the baking time will change. For an 8×8-inch pan, add 2-3 minutes. For a 9×13-inch pan, the bars will be thinner—bake for 15-18 minutes and check early.
Why did my bars turn out dry?
Most likely, they were overbaked or the flour was measured incorrectly. Remember to spoon and level your flour, and pull the bars out when the center still looks slightly underdone.
Can I use natural sprinkles?
Absolutely! Natural sprinkles work fine, though the colors may be less vibrant. Just make sure they’re jimmies-style, not nonpareils, to avoid color bleeding.
Can I make these ahead of time?
Yes! They actually taste better the next day. Store them in an airtight container at room temperature for up to 4 days, or freeze them for up to 3 months.
Can I double the recipe?
Definitely. Double all ingredients and bake in a 9×13-inch pan. Increase the baking time to 25-30 minutes, checking for doneness at the 25-minute mark.
Pin This Recipe!
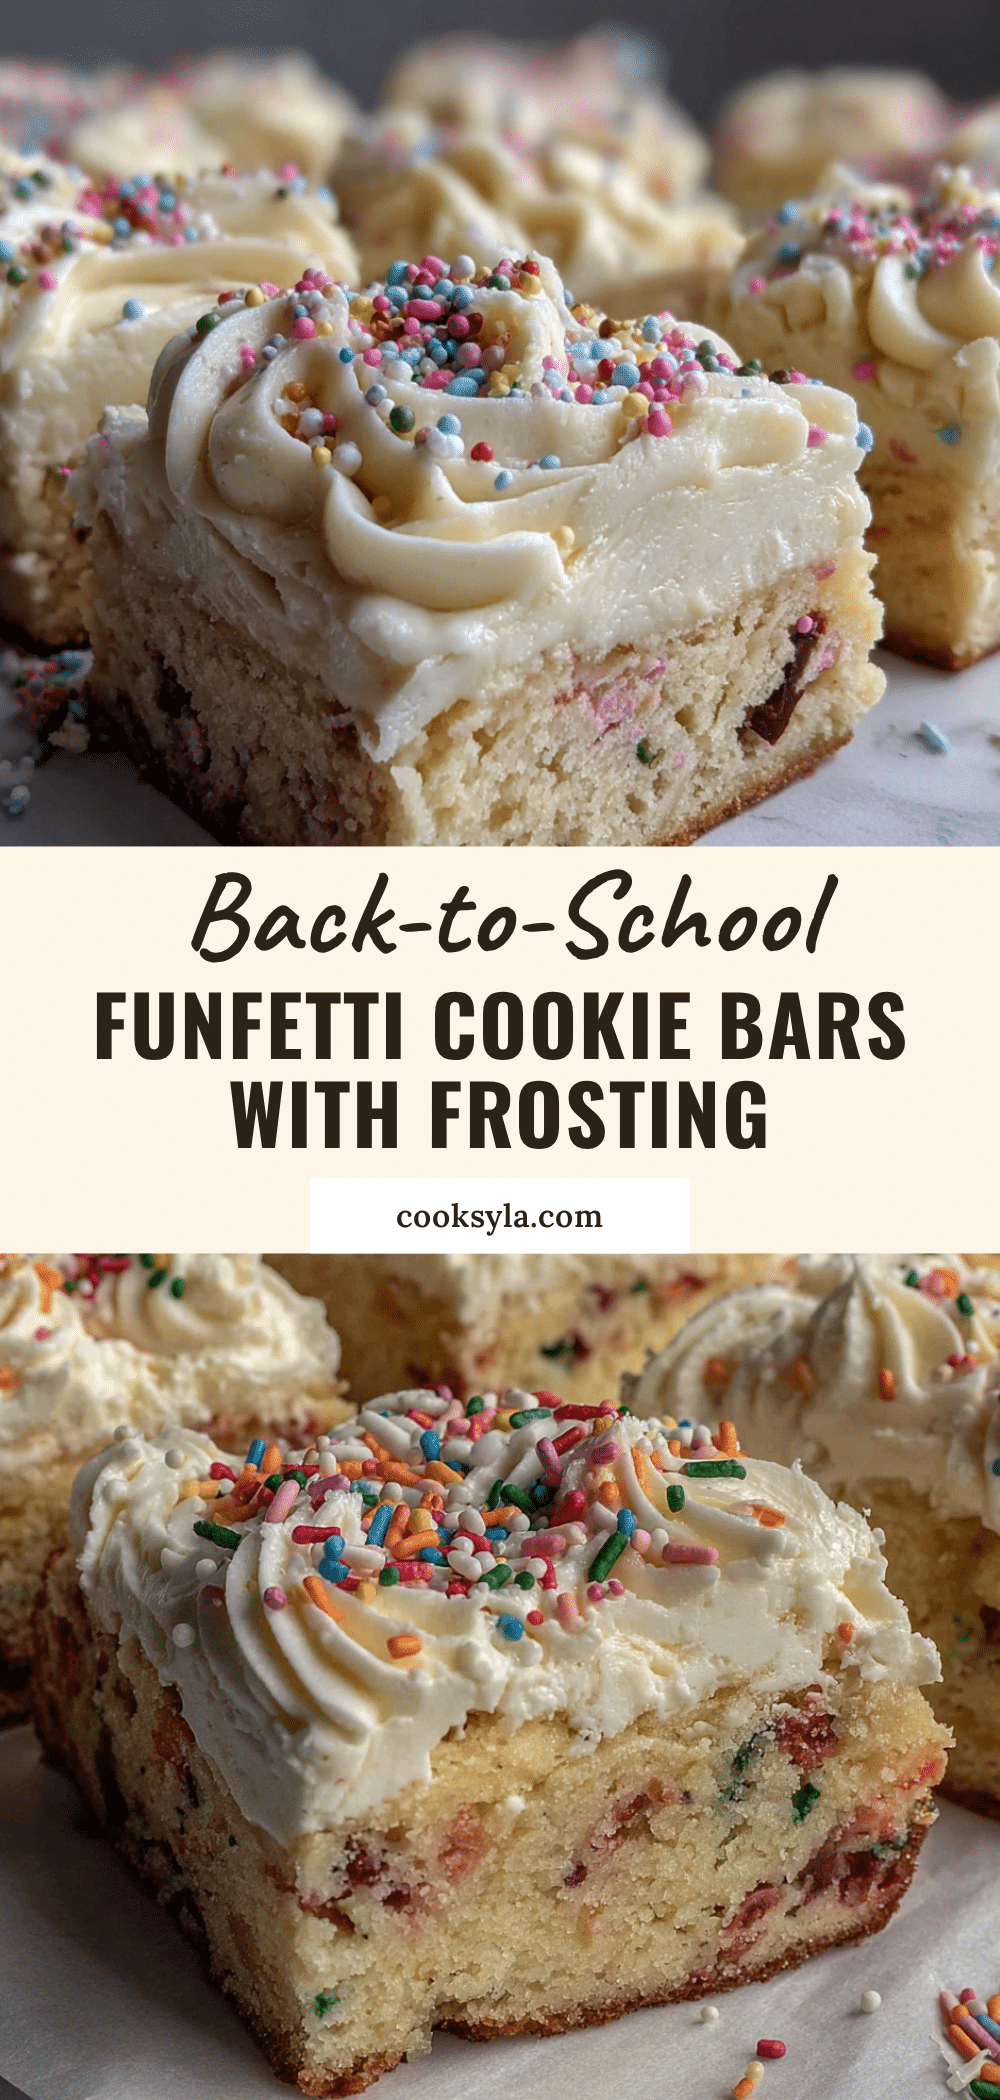
Best Back-to-School Funfetti Cookie Bars: Easy 30-Minute Recipe

Soft, chewy, and packed with rainbow sprinkles, these Funfetti Cookie Bars come together in under 30 minutes. Perfect for back-to-school treats, bake sales, or any day that needs a little extra color.
- Prep Time: 10 minutes
- Cook Time: 20 minutes
- Total Time: 30 minutes
- Yield: 16 servings 1x
- Category: Dessert
- Cuisine: American
Ingredients
- ½ cup (1 stick or 113g) unsalted butter, melted
- ½ cup (100g) granulated sugar
- ½ cup (100g) light brown sugar, packed
- 1 large egg, at room temperature
- 1 teaspoon vanilla extract
- 1¾ cups (220g) all-purpose flour
- ½ teaspoon baking powder
- ¼ teaspoon salt
- ½ cup (80g) rainbow sprinkles (jimmies)
Instructions
- Preheat your oven to 350°F (175°C). Line a 9×9-inch baking pan with parchment paper, leaving a 2-inch overhang on two opposite sides.
- Melt the butter in a microwave-safe bowl in 20-second intervals, stirring between each, until fully melted. Let it cool for about 2 minutes.
- In a medium bowl, whisk together the melted butter, granulated sugar, and brown sugar until smooth. Add the egg and vanilla extract, then whisk until fully combined.
- In a large bowl, whisk together the flour, baking powder, and salt.
- Pour the wet mixture into the dry mixture. Use a spatula to fold everything together until just combined. A few streaks of flour are okay.
- Gently fold in the rainbow sprinkles until evenly distributed. Do not overmix.
- Transfer the dough to the prepared pan. Use a spatula or lightly greased hands to press it evenly into the corners and level the surface.
- Bake for 18-22 minutes, or until the edges are golden brown and the center looks set but still soft. A toothpick inserted into the center should come out with a few moist crumbs.
- Place the pan on a cooling rack and let the bars cool completely for at least 30 minutes.
- Use the parchment overhang to lift the entire slab out of the pan. Place on a cutting board and slice into 16 squares (4 rows by 4 rows). For cleaner cuts, wipe your knife between slices.
Notes
For best results, use room-temperature egg and let the dough rest for 5 minutes before pressing into the pan. Do not overbake; the center should look slightly underdone when you pull them out. Store in an airtight container at room temperature for up to 4 days, or freeze for up to 3 months.
Nutrition
- Serving Size: 1 bar
- Calories: 210
- Sugar: 18
- Sodium: 95
- Fat: 9
- Saturated Fat: 5
- Carbohydrates: 31
- Fiber: 0.5
- Protein: 2
Keywords: funfetti cookie bars, back-to-school treats, easy cookie bars, rainbow sprinkle bars, 30-minute recipe


