Love this? Save it for later!
Share the inspiration with your friends
The first day of school was in three days, and I’d completely forgotten about the lunch situation. My son, Leo, had been dropping hints all week about the “cool lunches” his friends brought—bento boxes, thermoses shaped like dinosaurs, things I’d never even seen in a store. I, on the other hand, was staring at a pantry full of boxed pasta and a block of cheddar. Everyone else’s Pinterest boards were probably filled with adorable, bento-box creations. I had a half-used bag of elbow macaroni and a vague memory of my own thermos lunches from the 90s. The panic was real, let me tell you.
Honestly, I’d never successfully packed a hot lunch in my life. My attempts usually resulted in a lukewarm, soggy mess that my kid would trade for a bag of chips. But Leo had specifically requested mac and cheese—his absolute favorite—and I was determined to figure it out. I mean, how hard could it be? Famous last words, right? I spent that Tuesday evening testing methods, making a huge mess of my kitchen, and learning that not all thermoses are created equal. The first batch? A gluey, cold disaster. The second? Slightly better, but still sad.
But the third attempt—that was the winner. It was creamy, cheesy, and stayed perfectly warm until lunchtime. Leo came home that day and announced, “Mom, this is the best thermos mac and cheese ever. Jake tried to trade me his pudding cup for it.” I knew I had cracked the code. This recipe isn’t just about the cheese sauce; it’s about the technique. It’s about preheating the thermos, undercooking the pasta just a touch, and using a secret ingredient that keeps the sauce from separating. Maybe you’ve been there—staring at a lunchbox, wondering how to send real, comforting food with your kid. This is the solution. This is the recipe that turned me from a lunch-packaging failure into a thermos-wielding hero.
Why You’ll Love This Recipe
Let’s be honest—packing school lunches is a daily grind. You want something quick, but you also want it to be good. This easy thermos mac and cheese ticks every box. It’s the kind of recipe that makes you feel like a kitchen pro, even on a Tuesday morning when you’re half asleep.
- Quick & Easy: This comes together in under 20 minutes. Seriously. You can make the cheese sauce while the pasta boils. It’s faster than driving to the drive-thru.
- Simple Ingredients: No fancy cheese blocks or obscure spices. You likely already have butter, milk, flour, and shredded cheddar in your kitchen. I use a standard sharp cheddar for the best flavor.
- Perfect for School Lunches: This recipe is specifically engineered for the thermos. It stays creamy and hot for hours, so your kid gets a warm, comforting lunch even in the middle of winter.
- Crowd-Pleaser: It’s not just for kids. My husband has stolen leftovers for his own lunch more than once. It’s that good.
- Unbelievably Delicious: The texture is the real star. It’s not gloopy or dry. It’s a silky, rich cheese sauce that clings to every piece of pasta. It’s next-level comfort food, I promise.
What makes this different from every other mac and cheese recipe? It’s the method. I use a classic roux-based sauce, but I add a secret ingredient—a tiny pinch of mustard powder and a splash of hot sauce. You don’t taste them, I swear. But they cut through the richness of the cheese and keep the sauce from breaking when it sits in the thermos. It’s a little trick I learned from a chef friend, and it makes all the difference. This isn’t just another version of mac and cheese; it’s the best version for a thermos. It’s the one that gets you a “best lunch ever” note in the lunchbox.
What Ingredients You Will Need
This recipe uses simple, wholesome ingredients to deliver a creamy, flavorful mac and cheese that holds up perfectly in a thermos. The magic is in the balance of the cheese sauce and the pasta.
- For the Pasta:
- 8 ounces (about 2 cups) elbow macaroni (or any small pasta shape like shells or ditalini)
- Water, for boiling
- 1 teaspoon salt (for the pasta water)
- For the Cheese Sauce:
- 2 tablespoons unsalted butter
- 2 tablespoons all-purpose flour
- 1 ½ cups whole milk (2% works too, but whole milk makes it creamier)
- ½ cup heavy cream (adds richness—don’t skip it!)
- 2 cups (8 ounces) sharp cheddar cheese, shredded (I prefer Kraft or Sargento for consistent melting, but any good block of cheddar works)
- ½ cup (2 ounces) Monterey Jack cheese, shredded (adds extra creaminess and meltability)
- ½ teaspoon salt
- ¼ teaspoon black pepper
- ¼ teaspoon mustard powder (this is the secret ingredient—it prevents the cheese sauce from breaking)
- ⅛ teaspoon garlic powder
- 1-2 dashes of hot sauce (like Tabasco or Cholula—you won’t taste it, I promise)
Ingredient Selection Tips: For the best texture, use a block of cheese and shred it yourself. Pre-shredded cheese has anti-caking agents that can make the sauce grainy. I know, it’s a pain, but it’s worth it. For a gluten-free option, use a gluten-free all-purpose flour blend and gluten-free pasta. The sauce will be slightly thinner, but it still works beautifully. For a dairy-free version, substitute the butter with vegan butter, the milk with unsweetened oat milk, and use a high-quality vegan cheddar shred. The texture will be different, but still delicious.
Equipment Needed
You don’t need fancy equipment for this recipe. A few basic kitchen tools will do the trick. Here’s what you’ll need:
- Large Pot: For boiling the pasta. A 4-5 quart pot is perfect.
- Medium Saucepan: For making the cheese sauce. A heavy-bottomed saucepan prevents scorching.
- Whisk: Essential for a smooth, lump-free roux and cheese sauce.
- Wooden Spoon or Silicone Spatula: For stirring the pasta and cheese sauce together.
- Measuring Cups and Spoons: For accurate ingredient measurements.
- Colander: For draining the pasta.
- Thermos: A good-quality, insulated thermos is crucial. I use a Stanley or Thermos brand—they hold heat the best. A 10-ounce thermos is perfect for a kid’s lunch.
- Box Grater or Food Processor: For shredding the cheese. A box grater is classic, but a food processor with a shredding disc makes it super fast.
If you don’t have a heavy-bottomed saucepan, don’t worry. Just keep the heat on medium-low and stir constantly. I’ve used a cheap non-stick pan before, and it worked fine—I just had to be more careful. For the thermos, any insulated bottle will work, but the ones with a wide mouth are easier to fill and clean. I once tried using a cheap travel mug, and it didn’t hold the heat at all. Lesson learned.
Preparation Method
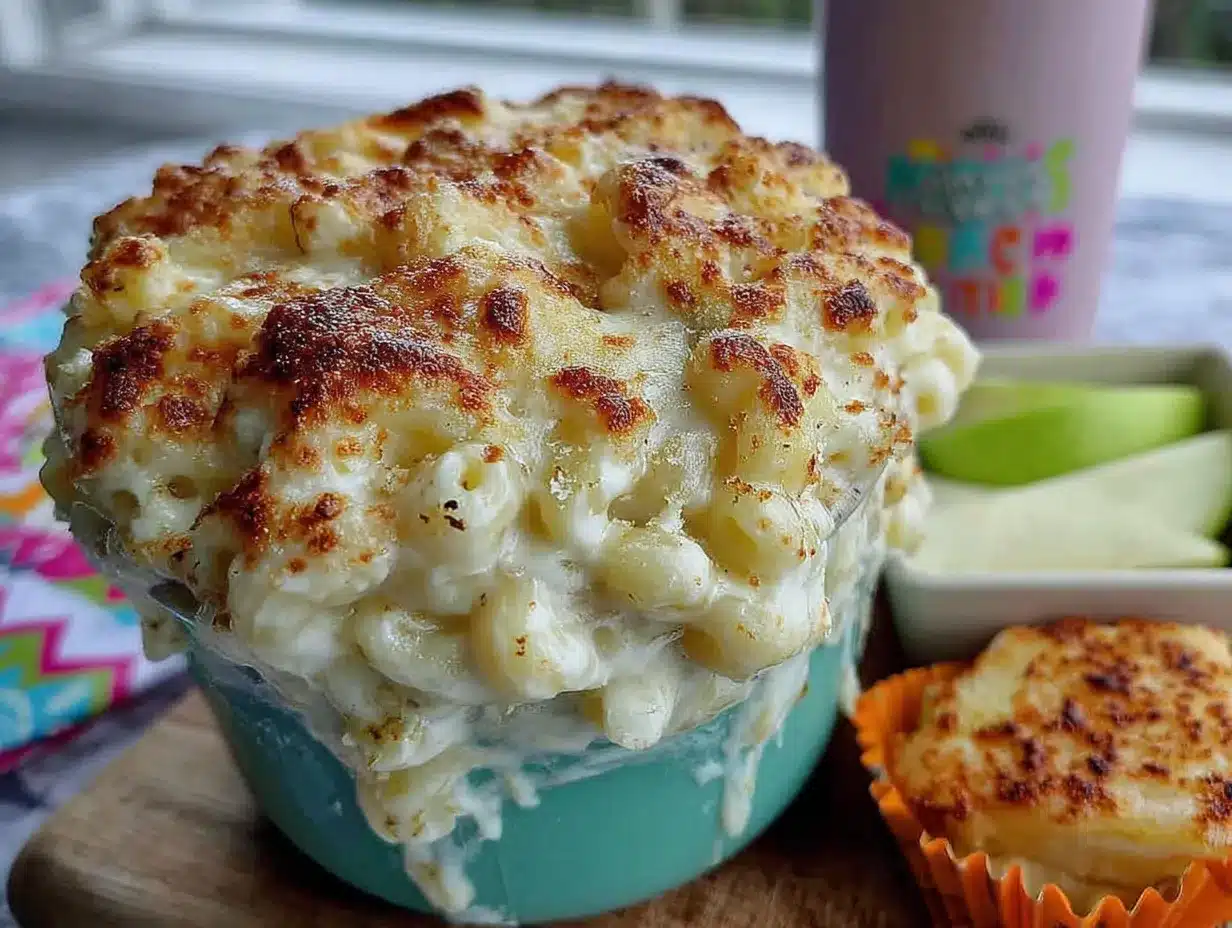
This is where the magic happens. Follow these steps carefully, and you’ll have a thermos-ready mac and cheese that stays creamy and delicious for hours.
- Preheat Your Thermos (This is the most important step!): Fill your thermos with boiling water. Close the lid and let it sit while you prepare the mac and cheese. This step ensures the thermos is hot, so the mac and cheese stays hot. Don’t skip this—I did it once, and the lunch was lukewarm by noon. Set a timer for 5 minutes.
- Cook the Pasta: Bring a large pot of salted water to a rolling boil. Add the elbow macaroni and cook for 1-2 minutes less than the package directions. For example, if the box says 8 minutes, cook it for 6-7 minutes. You want the pasta to be al dente—firm to the bite. It will continue to cook slightly in the hot cheese sauce and in the thermos. Overcooked pasta turns to mush. Drain the pasta in a colander. Do not rinse it! The starch on the pasta helps the sauce stick.
- Make the Roux: While the pasta is cooking, melt the butter in a medium saucepan over medium heat. Once it’s melted and bubbling, add the flour. Whisk constantly for about 1 minute. The mixture will be thick and smell a bit nutty. This is your roux, and it’s the foundation of a smooth, creamy sauce. If it starts to brown, you’ve cooked it too long—reduce the heat.
- Add the Milk and Cream: Slowly pour in the milk and heavy cream while whisking constantly. Keep whisking until the mixture is smooth and starts to thicken, about 3-4 minutes. It should be thick enough to coat the back of a spoon. If you see lumps, don’t panic—just whisk harder. A few small lumps will disappear as you add the cheese.
- Add the Cheese and Seasonings: Reduce the heat to low. Add the shredded cheddar and Monterey Jack cheese, one handful at a time, stirring until each handful is fully melted before adding the next. This prevents the sauce from becoming grainy. Once all the cheese is melted, add the salt, black pepper, mustard powder, garlic powder, and hot sauce. Stir until everything is combined. Taste the sauce—it should be rich, cheesy, and slightly tangy from the mustard powder. Adjust the salt if needed.
- Combine Pasta and Sauce: Add the drained pasta to the saucepan with the cheese sauce. Stir gently with a wooden spoon or spatula until every piece of pasta is coated in that glorious, creamy sauce. The pasta will look a little wet, but that’s perfect—the pasta will absorb some of the sauce as it sits.
- Fill the Thermos: Dump the hot water out of your preheated thermos. Use a spoon or a small spatula to carefully fill the thermos with the mac and cheese. Pack it in there—you want it as full as possible to retain heat. Close the lid tightly immediately.
Pro-Tip: If you’re making this the night before, let the mac and cheese cool completely before refrigerating it. In the morning, reheat it in the microwave for about 1 minute, then transfer it to the preheated thermos. The texture will be almost as good as fresh.
Cooking Tips & Techniques
I’ve made this recipe at least twenty times, and I’ve learned a few things the hard way. Here are my best tips for thermos mac and cheese success.
- Don’t Overcook the Pasta: This is the number one mistake. Overcooked pasta turns into a mushy, unappetizing mess in the thermos. Cook it al dente—firm to the bite. It will soften slightly from the hot sauce and the time in the thermos.
- Use a Good Thermometer: If you’re serious about hot lunches, invest in a kitchen thermometer. Before you fill the thermos, check the temperature of the mac and cheese. It should be at least 165°F (74°C). This ensures it stays in the safe zone for hours.
- Preheat the Thermos Thoroughly: I can’t stress this enough. A cold thermos will suck the heat right out of your food. Fill it with boiling water and let it sit for at least 5 minutes. For extra insurance, I sometimes fill it twice—once for 5 minutes, then again for another 2 minutes.
- Don’t Skimp on the Fat: The whole milk and heavy cream are not just for richness. They help stabilize the cheese sauce and prevent it from separating. I tried making this with skim milk once, and it was a watery disaster. Use the full-fat stuff.
- Grate Your Own Cheese: Pre-shredded cheese is coated in cellulose, an anti-caking agent that prevents it from melting smoothly. Your sauce will be grainy and clumpy. Trust me, the extra 2 minutes it takes to grate a block of cheese is worth it.
- Make Extra Sauce: The pasta will absorb some of the sauce as it sits. I always make a little more sauce than I think I need. The leftover sauce is great on broccoli or as a dip for soft pretzels.
Variations & Adaptations
This recipe is a great base, but it’s also super versatile. Here are a few ways to switch it up based on what you have in your pantry or what your kid is craving.
- Add Protein: Stir in some cooked, diced chicken, crumbled bacon, or even some leftover taco meat. It makes the lunch more filling and adds a new flavor dimension. My son loves it with little pieces of ham.
- Make it Veggie-Packed: Steam some broccoli florets or peas and stir them into the mac and cheese before filling the thermos. The heat from the sauce will warm them through. It’s a sneaky way to get some greens in.
- Go Tex-Mex: Swap the cheddar and Monterey Jack for a Mexican blend cheese. Add a can of drained, diced green chiles and a pinch of cumin. It’s a fun twist that my kids call “fiesta mac.”
- Gluten-Free Version: Use gluten-free pasta (I like the Barilla or Jovial brands) and a gluten-free all-purpose flour blend. The sauce will be slightly thinner, but it still works. Cook the gluten-free pasta according to package directions, but still undercook it by 1 minute.
- Dairy-Free Version: Use vegan butter, unsweetened oat milk (it’s the creamiest), and a high-quality vegan cheddar shred. I’ve had good luck with the Daiya or Violife brands. The sauce won’t be as rich, but it’s still a solid comfort food option.
Serving & Storage Suggestions
This mac and cheese is designed to be eaten straight from the thermos at lunchtime, but here are a few tips for the best experience.
- Serving Temperature: The mac and cheese should be piping hot when it goes into the thermos. It will stay warm for 4-5 hours in a good thermos. When your kid opens it at lunch, it should still be warm and creamy.
- Presentation: For a fun lunch, pack the thermos alongside some apple slices, baby carrots, and a small treat. The contrast of hot, cheesy pasta with cold, crisp veggies is perfect.
- Storage: If you have leftovers, let the mac and cheese cool completely before transferring it to an airtight container. It will keep in the refrigerator for up to 3 days. The sauce will thicken as it cools, but that’s normal.
- Reheating: To reheat, add a splash of milk or water to the mac and cheese and microwave it in 30-second intervals, stirring between each, until it’s hot and creamy again. You can also reheat it in a saucepan over medium-low heat with a splash of milk.
- How Flavors Develop: Honestly, this mac and cheese is even better the next day. The flavors meld together overnight, and the pasta absorbs even more of that cheesy goodness. It’s a great make-ahead option for busy mornings.
Nutritional Information & Benefits
This recipe is comfort food at its finest, but it also has some surprising nutritional benefits. Here’s a quick breakdown.
- Estimated Nutritional Values (per serving, about 1 cup):
- Calories: 450-500
- Fat: 28g
- Carbohydrates: 35g
- Protein: 20g
- Calcium: 350mg (35% of daily value)
- Health Benefits: The cheese provides a good source of calcium and protein, which are essential for growing kids. The pasta provides complex carbohydrates for sustained energy throughout the school day.
- Dietary Considerations: This recipe can be easily adapted for gluten-free or dairy-free diets (see variations above). It’s not suitable for vegans in its original form, but the dairy-free version is a good option.
- Potential Allergens: This recipe contains dairy (milk, cheese, butter) and gluten (pasta, flour). Be sure to check labels if you’re using alternative ingredients.
- My Wellness Perspective: I’m a firm believer in balance. This mac and cheese is a treat, not an everyday thing. But when you pair it with a side of fruit or veggies, it’s a perfectly satisfying and nourishing lunch that your kid will actually eat.
FAQs
- Can I use a different type of pasta? Absolutely! Small pasta shapes like shells, ditalini, or even rotini work great. Just make sure to undercook it by 1-2 minutes to prevent mushiness.
- How long will the mac and cheese stay hot in the thermos? In a good-quality, preheated thermos, it will stay warm for 4-5 hours. I’ve tested it with a Stanley thermos, and it was still warm at 4 hours.
- Can I make this recipe in advance? Yes! You can make the mac and cheese the night before, let it cool completely, and refrigerate it. In the morning, reheat it in the microwave for about 1 minute before transferring it to a preheated thermos.
- My cheese sauce turned out grainy. What went wrong? This usually happens when the heat is too high or when you use pre-shredded cheese. Always use a block of cheese and shred it yourself. Cook the sauce over medium-low heat and stir constantly.
- Can I freeze this mac and cheese? I don’t recommend it for thermos use. The texture of the cheese sauce changes after freezing and thawing—it can become watery and grainy. It’s best to make it fresh or just a day ahead.
Conclusion
This easy thermos mac and cheese is more than just a recipe—it’s a game-changer for school lunch routines. It’s the solution to the cold, sad lunch problem that so many parents face. I’ve seen the joy on my son’s face when he opens his thermos at lunch and finds a warm, creamy meal waiting for him. It’s a small victory, but it feels huge.
I encourage you to make this recipe your own. Add your kid’s favorite mix-ins, experiment with different cheeses, or double the batch for the whole family. The beauty of this recipe is its flexibility. It’s forgiving, it’s delicious, and it’s designed to make your life a little easier.
I’d love to hear how it goes! Did your kid love it? Did you add a secret ingredient? Drop a comment below and share your thermos mac and cheese success story. And if you’re looking for more easy lunch ideas, check out my recipe for healthy lunchbox wraps—they’re another lifesaver on busy mornings. Happy cooking, and here’s to warm lunches and happy kids!
Pin This Recipe!

Easy Thermos Mac and Cheese: The Best School Lunch Idea

This creamy, cheesy mac and cheese is specially engineered to stay warm and delicious in a thermos for hours. With a secret ingredient to prevent the sauce from breaking, it’s the perfect hot lunch solution for school or work.
- Prep Time: 10 minutes
- Cook Time: 10 minutes
- Total Time: 20 minutes
- Yield: 4 servings 1x
- Category: Main Course
- Cuisine: American
Ingredients
- 8 ounces (about 2 cups) elbow macaroni (or any small pasta shape like shells or ditalini)
- Water, for boiling
- 1 teaspoon salt (for the pasta water)
- 2 tablespoons unsalted butter
- 2 tablespoons all-purpose flour
- 1 ½ cups whole milk (2% works too, but whole milk makes it creamier)
- ½ cup heavy cream (adds richness—don’t skip it!)
- 2 cups (8 ounces) sharp cheddar cheese, shredded (I prefer Kraft or Sargento for consistent melting, but any good block of cheddar works)
- ½ cup (2 ounces) Monterey Jack cheese, shredded (adds extra creaminess and meltability)
- ½ teaspoon salt
- ¼ teaspoon black pepper
- ¼ teaspoon mustard powder (this is the secret ingredient—it prevents the cheese sauce from breaking)
- ⅛ teaspoon garlic powder
- 1–2 dashes of hot sauce (like Tabasco or Cholula—you won’t taste it, I promise)
Instructions
- Preheat Your Thermos: Fill your thermos with boiling water. Close the lid and let it sit while you prepare the mac and cheese. This step ensures the thermos is hot, so the mac and cheese stays hot. Set a timer for 5 minutes.
- Cook the Pasta: Bring a large pot of salted water to a rolling boil. Add the elbow macaroni and cook for 1-2 minutes less than the package directions. For example, if the box says 8 minutes, cook it for 6-7 minutes. You want the pasta to be al dente—firm to the bite. Drain the pasta in a colander. Do not rinse it!
- Make the Roux: While the pasta is cooking, melt the butter in a medium saucepan over medium heat. Once it’s melted and bubbling, add the flour. Whisk constantly for about 1 minute. The mixture will be thick and smell a bit nutty.
- Add the Milk and Cream: Slowly pour in the milk and heavy cream while whisking constantly. Keep whisking until the mixture is smooth and starts to thicken, about 3-4 minutes. It should be thick enough to coat the back of a spoon.
- Add the Cheese and Seasonings: Reduce the heat to low. Add the shredded cheddar and Monterey Jack cheese, one handful at a time, stirring until each handful is fully melted before adding the next. Once all the cheese is melted, add the salt, black pepper, mustard powder, garlic powder, and hot sauce. Stir until everything is combined.
- Combine Pasta and Sauce: Add the drained pasta to the saucepan with the cheese sauce. Stir gently with a wooden spoon or spatula until every piece of pasta is coated in that glorious, creamy sauce.
- Fill the Thermos: Dump the hot water out of your preheated thermos. Use a spoon or a small spatula to carefully fill the thermos with the mac and cheese. Pack it in there—you want it as full as possible to retain heat. Close the lid tightly immediately.
Notes
For best results, use a block of cheese and shred it yourself to avoid graininess. Preheat the thermos thoroughly with boiling water for at least 5 minutes. Cook pasta al dente (1-2 minutes less than package directions) to prevent mushiness. The secret ingredient (mustard powder and hot sauce) prevents the cheese sauce from breaking. If making ahead, cool completely, refrigerate, and reheat in microwave for about 1 minute before filling the preheated thermos.
Nutrition
- Serving Size: 1 cup
- Calories: 475
- Sugar: 5
- Sodium: 680
- Fat: 28
- Saturated Fat: 17
- Carbohydrates: 35
- Fiber: 1
- Protein: 20
Keywords: thermos mac and cheese, school lunch, easy mac and cheese, hot lunch, kid-friendly, creamy mac and cheese


