Love this? Save it for later!
Share the inspiration with your friends
It was 10:47 PM on a Wednesday that had already lasted about three days, and I was staring into the fridge like it owed me answers. The kids’ lunchboxes for tomorrow were empty, my energy was negative, and the only things looking back at me were a bag of baby carrots, a single bell pepper, some snap peas, and half a cucumber. I didn’t have any deli meat, and the thought of making another plain cheese sandwich made my soul yawn. But I had these colorful vegetables, and then this idea just arrived—almost like a whisper: what if I just… made the lunchbox look like a rainbow?
Honestly, I was too tired to overthink it. I grabbed the cutting board, chopped everything into sticks and cute little shapes, and tossed them into compartments. I added some hummus for dipping, a handful of berries, and a couple of whole-grain crackers. The next day, my kids came home with empty containers and asked for “the rainbow lunch” again. I mean, I almost fell over. Since then, this Easy Rainbow Veggie Bento Box has become our secret weapon against lunchtime boredom. Maybe you’ve been there—staring at a fridge full of vegetables and wondering how to make them actually exciting for little ones. This is that answer.
Why You’ll Love This Recipe
Let me tell you why this bento box has earned a permanent spot in our weekly rotation. It’s not just another lunch idea—it’s a game-changer for busy mornings and picky eaters alike.
- Quick & Easy: This whole thing comes together in under 15 minutes. Seriously. While the toast is toasting or the fruit is washing, you’re already done.
- Simple Ingredients: No fancy grocery trips needed. You likely already have most of these vegetables in your fridge right now.
- Perfect for Busy School Mornings: Great for packing lunches the night before or throwing together in a panic at 7 AM.
- Crowd-Pleaser: Always gets rave reviews from kids and adults alike. My niece, who once declared broccoli “the enemy,” ate an entire container of roasted chickpeas.
- Unbelievably Delicious: The combination of crunchy fresh veggies, creamy dip, and a little something sweet is next-level comfort food.
What makes this recipe different from the rest? It’s the method. Instead of just chopping vegetables and hoping for the best, we’re using color as a hook. Kids eat with their eyes first, and a rainbow layout makes everything feel like a treat. Plus, the dipping sauce is the secret weapon—it turns ordinary carrots into something they actually reach for. This isn’t just another version of a veggie tray; it’s your best version. It’s the kind of lunch that makes you close your eyes after the first bite, knowing your kid is actually eating something good.
What Ingredients You Will Need
This recipe uses simple, wholesome ingredients to deliver bold flavor and satisfying texture without the fuss. Most of these are pantry staples or regular fridge items, making it easy to throw together on a whim.
- For the Rainbow Veggies:
- Red bell pepper, sliced into thin strips (adds sweetness and crunch)
- Orange carrot, cut into sticks or coin shapes (use rainbow carrots for extra fun)
- Yellow bell pepper, sliced into rings or strips (mild and crisp)
- English cucumber, cut into half-moons or sticks (seedless is best)
- Snap peas or snow peas, whole (adds a satisfying snap)
- Purple cabbage, thinly shredded (adds vibrant color and fiber)
- Grape tomatoes, whole or halved (burst of juicy sweetness)
- For the Protein (choose one or mix):
- Hard-boiled eggs, halved (I recommend getting pasture-raised for better flavor)
- Grilled chicken breast, cubed (leftover rotisserie chicken works great)
- Edamame, shelled and lightly salted (a plant-based option kids love)
- Cheddar cheese cubes or cheese sticks, sliced (adds creamy richness)
- For the Dip:
- Hummus (classic or roasted red pepper—store-bought is fine, but I love making my own)
- Greek yogurt ranch dip (mix ½ cup Greek yogurt with 1 tsp ranch seasoning)
- Guacamole (if your kids are avocado fans)
- For the Extras:
- Whole-grain crackers or pita chips (for scooping up dip)
- Fresh berries (strawberries, blueberries, or raspberries for a sweet finish)
- Dried fruit like apricots or mango strips (a chewy treat)
- Optional: a small square of dark chocolate (for a surprise)
Ingredient Selection Tips: Look for firm, brightly colored vegetables without soft spots. For the best texture, avoid pre-cut veggies from the store—they tend to be drier. If you’re using frozen edamame, just thaw it under cold running water before packing.
Equipment Needed
You don’t need a ton of fancy gear to make this bento box, but a few tools make the process smoother.
- A Bento Box or Lunch Container: A divided container with 4-5 compartments works best. I use a stainless steel bento box from PlanetBox—it’s durable and dishwasher safe. If you don’t have one, a regular lunch container with silicone muffin cups works as makeshift dividers.
- A Sharp Knife and Cutting Board: A good chef’s knife makes slicing vegetables quick and safe. I’ve had my Wusthof for years, but any sharp knife will do. Just be careful with little fingers if kids are helping.
- Vegetable Peeler: Handy for carrots and cucumbers, especially if you want to make ribbons for a fancy touch.
- Small Cookie Cutters: Totally optional but fun. Star or flower shapes cut from bell peppers or cucumber slices make the lunchbox extra special. My kids lose their minds over a star-shaped carrot.
- Small Dip Containers: Little silicone cups with lids are perfect for hummus or ranch. I got a set of four on Amazon for under ten bucks.
- Egg Cooker or Small Pot: If you’re including hard-boiled eggs, a dedicated egg cooker is a nice shortcut, but a simple pot of boiling water works perfectly.
Budget-Friendly Tip: You don’t need a fancy bento box. A simple plastic container with compartments from the dollar store works just as well. The key is keeping wet and dry ingredients separate so nothing gets soggy.
Preparation Method
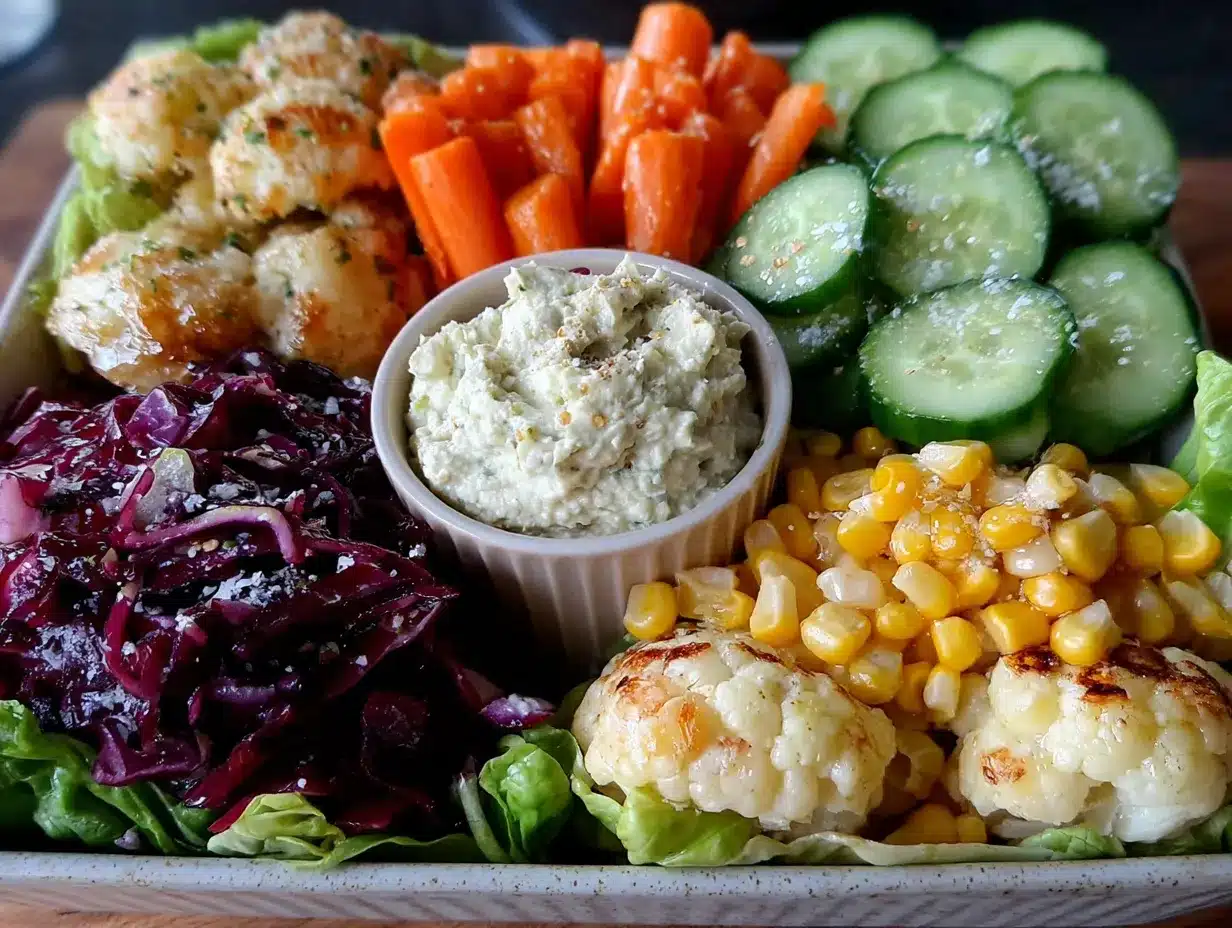
Follow these steps, and you’ll have a beautiful, kid-approved bento box in no time. I’ve included time estimates and sensory cues so you know exactly what to look for.
- Prep the Vegetables (5 minutes): Wash all your vegetables thoroughly under cold water. Pat them dry with a clean kitchen towel—this is important because wet veggies make everything soggy. Slice your red and yellow bell peppers into thin strips, about ¼-inch wide. Cut the cucumber into half-moons by slicing it lengthwise, then cutting each half into thin pieces. Peel the carrots and cut them into sticks about the size of your pinky finger. If using purple cabbage, shred it finely with a knife or a mandoline (watch those fingers!).
- Cook the Protein (10 minutes if needed): If you’re making hard-boiled eggs, place them in a small pot and cover with cold water by an inch. Bring to a boil, then cover the pot and turn off the heat. Let them sit for exactly 10 minutes. While they cook, prepare an ice bath (a bowl of cold water with ice cubes). After 10 minutes, transfer the eggs to the ice bath and let them cool for 5 minutes. Peel under running water—the shells should slide right off. Slice each egg in half lengthwise. Pro tip: If you see a green ring around the yolk, you’ve overcooked them. Aim for a bright yellow center.
- Assemble the Bento Box (5 minutes): Start by placing your dip container in one of the larger compartments. If you’re using hummus, spoon about ¼ cup into a small silicone cup. Arrange your rainbow veggies by color in the remaining compartments. I like to go in order: red bell pepper, orange carrots, yellow bell pepper, cucumber, snap peas, and purple cabbage. Place the protein (egg halves, chicken cubes, or cheese) in a separate compartment. Add your crackers or pita chips next to the dip for easy scooping.
- Add the Sweet Touch (2 minutes): Fill the smallest compartment with fresh berries or dried fruit. If you’re including a small treat like a dark chocolate square, tuck it under a berry so it feels like a surprise. Sensory cue: The berries should look plump and glossy—if they’re mushy, swap them for something else.
- Final Check and Pack (2 minutes): Give the box a gentle shake to make sure nothing is shifting around. Close the lid tightly and refrigerate if you’re packing it the night before. If you’re sending it to school, include an ice pack to keep everything fresh. Personal tip: I always pack the dip separately if I’m making the box the night before, so the crackers don’t get soft. Just add it in the morning.
Cooking Tips & Techniques
Over the years, I’ve learned a few tricks that make this bento box even better. Trust me, I’ve made every mistake in the book so you don’t have to.
- Keep Things Dry: The number one mistake I made early on was not drying the vegetables properly. Wet veggies make the whole box soggy and unappetizing. After washing, spread them on a clean towel and pat them dry. For lettuce or cabbage, use a salad spinner if you have one. It makes a huge difference in texture.
- Cut for Little Hands: When I first started, I cut everything into big chunks because it was faster. My kids took one look and pushed the box away. Now I cut everything into bite-sized pieces—about the size of a thumbnail. It’s easier for them to eat and looks more appealing. Plus, small pieces fit better in the compartments.
- Use the “Dip Hook”: Kids are more likely to eat vegetables if there’s a dip involved. I always include hummus or a yogurt ranch because it adds flavor and makes the veggies feel like a snack. If your kid is hesitant, let them dip the veggies themselves—it gives them a sense of control and makes eating more fun.
- Batch Prep for the Week: Sunday evenings are my prep time. I wash and chop all the vegetables for the week and store them in separate airtight containers with a damp paper towel. In the morning, I just grab and pack. It saves me about 10 minutes each day, which adds up to almost an hour a week.
- Don’t Overpack: I used to cram the box full because I wanted my kids to eat a lot. But an overstuffed box is overwhelming and hard to close. Leave a little breathing room—it looks more inviting and prevents the food from getting squished.
Variations & Adaptations
This bento box is endlessly customizable. Here are some of my favorite ways to switch it up based on what I have in the fridge or what my kids are in the mood for.
- Seasonal Swap: In the summer, I swap the snap peas for fresh green beans or sugar snap peas from the farmer’s market. In the fall, I add roasted sweet potato cubes (just toss them in olive oil and roast at 400°F for 20 minutes). They add a warm, sweet element that kids love.
- Protein Variations: If my kids are tired of eggs, I use leftover grilled chicken or turkey meatballs. For a plant-based option, I add chickpeas tossed in a little olive oil and smoked paprika. My youngest actually prefers edamame over chicken—go figure.
- Dip It Your Way: Hummus is our go-to, but sometimes I switch it up with guacamole, tzatziki, or even a simple peanut butter dip (mix 2 tbsp peanut butter with 1 tbsp yogurt and a drizzle of honey). For a dairy-free option, try cashew cream or a store-bought vegan ranch.
- Allergen-Friendly Adaptations: If you need a nut-free lunch, skip the peanut butter dip and use sunflower seed butter instead. For gluten-free, use rice crackers or veggie sticks instead of wheat-based crackers. Most of the ingredients are naturally gluten-free anyway, which makes this a safe choice for many families.
- Fun Shapes: When I have extra time, I use small cookie cutters to cut bell peppers or cheese into stars, hearts, or dinosaurs. It takes an extra two minutes but makes the lunchbox feel like a special event. My kids call it “fancy lunch day.”
Serving & Storage Suggestions
Here’s how to serve and store this bento box so everything stays fresh and delicious.
- Serving Temperature: Serve cold or at room temperature. If you’re packing it for school, take it straight from the fridge and add an ice pack to keep everything cool. For a picnic, pack it in an insulated bag with a frozen water bottle.
- Presentation Tips: Arrange the vegetables by color in a rainbow pattern—it’s visually striking and makes kids excited to eat. I like to put the dip in the center and arrange the veggies around it like a flower. A sprinkle of sesame seeds or a few fresh herbs on top adds a gourmet touch.
- Storage Instructions: Store assembled bento boxes in the refrigerator for up to 3 days. Keep the dip separate if you’re storing for more than a day to prevent sogginess. If you’re prepping for the week, store the components separately and assemble each morning.
- Freezer Tips: You can freeze some components, but not the whole box. Hard-boiled eggs don’t freeze well (they get rubbery), but you can freeze cooked chicken cubes or edamame. Berries freeze beautifully—just add them straight from the freezer to the box in the morning. They’ll thaw by lunchtime.
- Reheating Methods: Most of this box is meant to be eaten cold, but if you’re including something like roasted sweet potatoes or chicken, you can warm them up in the microwave for 30 seconds before packing. Just let them cool completely before closing the lid to avoid condensation.
Nutritional Information & Benefits
This bento box is packed with nutrients that support growing bodies and busy minds. Here’s a rough estimate per serving (based on one box with hummus, eggs, and berries).
- Calories: Approximately 350-450 calories depending on the protein and dip you choose.
- Protein: 15-20 grams from eggs, chicken, or edamame. Protein keeps kids full and focused through the afternoon.
- Fiber: 8-10 grams from the vegetables and berries. Fiber supports healthy digestion and steady energy levels.
- Vitamins: High in Vitamin A (from carrots and bell peppers), Vitamin C (from bell peppers and berries), and Vitamin K (from cucumber and cabbage).
- Healthy Fats: From hummus (olive oil and tahini) and eggs. Healthy fats support brain development and nutrient absorption.
Dietary Considerations: This recipe is naturally gluten-free if you choose gluten-free crackers. It’s also vegetarian-friendly and can be made vegan by using edamame for protein and a plant-based dip. For nut-free lunches, skip peanut-based dips and use hummus or sunflower seed butter.
Conclusion
This Easy Rainbow Veggie Bento Box has honestly changed our lunch game. It’s quick, it’s colorful, and it actually gets my kids excited about eating vegetables—which, let me tell you, is nothing short of a miracle. Whether you’re packing for school, work, or a picnic, this recipe is worth trying. Customize it based on what your family loves, and don’t be afraid to get creative with the shapes and dips.
I’d love to hear how it goes for you! Drop a comment below and let me know what your favorite veggie combinations are. Did your kids love the rainbow layout? Did you discover a new dip they can’t resist? Share your wins (and your funny stories) in the comments. And if you try this recipe, please share a photo on social media and tag me—I absolutely love seeing your creations. Here’s to less lunch stress and more happy, full bellies!
Frequently Asked Questions
Can I make this bento box the night before?
Absolutely! I recommend packing the vegetables and protein the night before, but keep the dip separate until morning to prevent sogginess. Store the assembled box in the refrigerator with a tight-fitting lid.
What can I use instead of hummus?
You can use Greek yogurt ranch dip, guacamole, tzatziki, peanut butter dip, or even a simple vinaigrette. For a nut-free option, try sunflower seed butter or a dairy-free ranch.
How long will the vegetables stay fresh in the box?
Properly stored in the refrigerator, the vegetables will stay fresh for up to 3 days. Keep the box sealed and add an ice pack if you’re packing it for school. For best texture, eat within 24 hours.
Can I add fruit to this bento box?
Yes! Fresh berries, apple slices, grapes, or melon cubes are all great additions. Just keep them in a separate compartment to prevent the juices from making the veggies soggy. Dried fruit like apricots or mango strips also work well.
What if my kid refuses to eat vegetables?
Start with just one or two veggies they already like, and gradually add new ones. Let them help with the assembly—kids are more likely to eat something they helped prepare. And don’t forget the dip! A tasty dip can make all the difference.
Pin This Recipe!
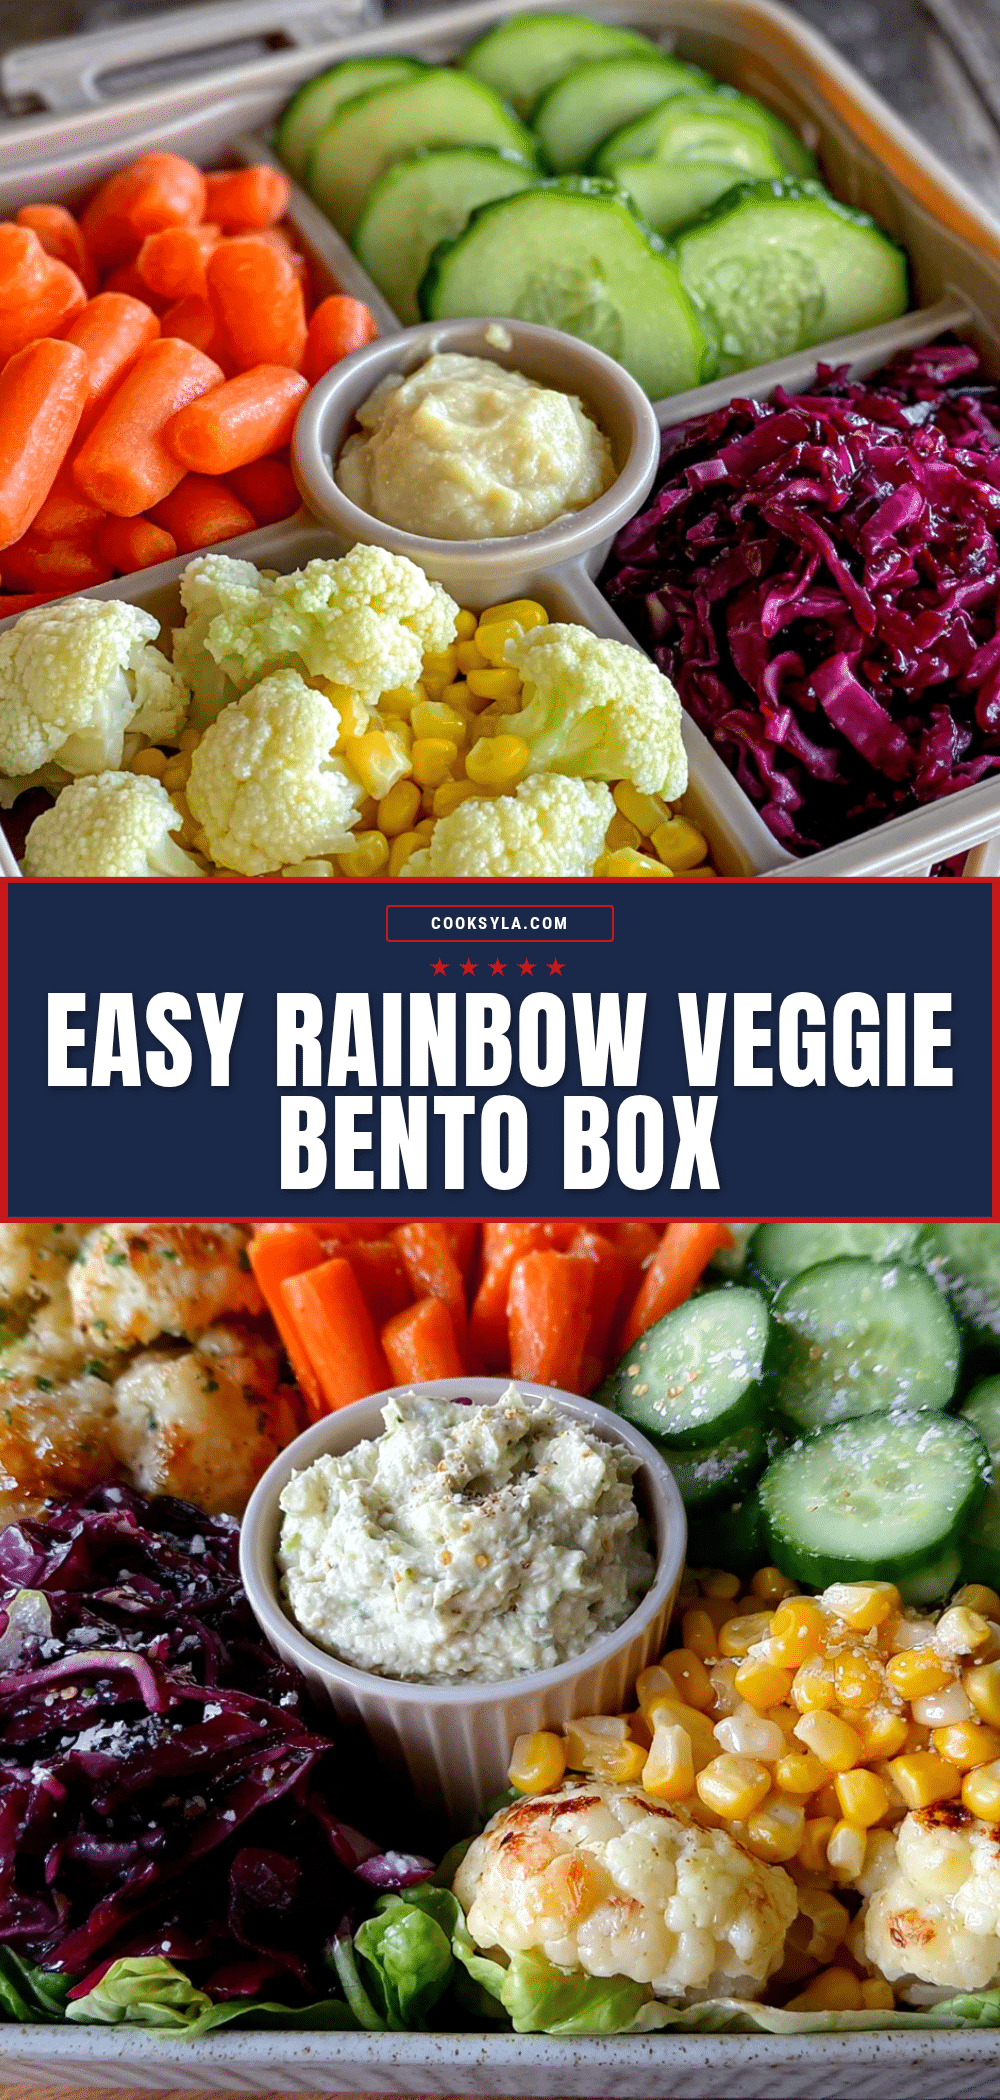
Easy Rainbow Veggie Bento Box: Best Healthy Lunch Idea
A quick and colorful bento box packed with fresh vegetables, protein, and dip, perfect for busy school mornings or a healthy lunch that kids and adults will love.
- Prep Time: 15 minutes
- Cook Time: 10 minutes
- Total Time: 25 minutes
- Yield: 4 servings
- Category: Lunch
- Cuisine: American
Ingredients
- Red bell pepper, sliced into thin strips
- Orange carrot, cut into sticks or coin shapes
- Yellow bell pepper, sliced into rings or strips
- English cucumber, cut into half-moons or sticks
- Snap peas or snow peas, whole
- Purple cabbage, thinly shredded
- Grape tomatoes, whole or halved
- Hard-boiled eggs, halved (or grilled chicken, cubed; or edamame, shelled; or cheddar cheese cubes)
- Hummus (or Greek yogurt ranch dip, or guacamole)
- Whole-grain crackers or pita chips
- Fresh berries (strawberries, blueberries, or raspberries)
- Dried fruit like apricots or mango strips (optional)
- Small square of dark chocolate (optional)
Instructions
- Wash all vegetables thoroughly under cold water and pat dry. Slice red and yellow bell peppers into thin strips (about ¼-inch wide). Cut cucumber into half-moons. Peel carrots and cut into sticks about the size of your pinky finger. Shred purple cabbage finely.
- If using hard-boiled eggs, place eggs in a small pot, cover with cold water by an inch, bring to a boil, cover, and turn off heat. Let sit for 10 minutes. Transfer to an ice bath for 5 minutes, then peel and halve lengthwise.
- Place dip (about ¼ cup hummus) in a small silicone cup in one compartment of the bento box. Arrange rainbow veggies by color in remaining compartments: red bell pepper, orange carrots, yellow bell pepper, cucumber, snap peas, purple cabbage. Add protein (egg halves, chicken, or cheese) in a separate compartment. Add crackers or pita chips next to dip.
- Fill the smallest compartment with fresh berries or dried fruit. Tuck a small dark chocolate square under a berry if desired.
- Close lid tightly and refrigerate if packing the night before. For school, include an ice pack. If packing ahead, keep dip separate and add in the morning to prevent sogginess.
Notes
Keep vegetables dry to prevent sogginess. Cut into bite-sized pieces for kids. Use the ‘dip hook’ to encourage eating. Batch prep veggies on Sunday for the week. Don’t overpack the box. For nut-free, use sunflower seed butter instead of peanut butter dip.
Nutrition
- Serving Size: 1 bento box
- Calories: 400
- Sugar: 12
- Sodium: 350
- Fat: 15
- Saturated Fat: 3
- Carbohydrates: 45
- Fiber: 9
- Protein: 18
Keywords: bento box, rainbow veggies, healthy lunch, kid-friendly, easy lunch, vegetarian, gluten-free option


