Love this? Save it for later!
Share the inspiration with your friends
My daughter asked why I couldn’t just dump everything in one pot and let it simmer while we did homework. I started to explain why that wouldn’t work—something about browning the meat first, layering flavors, the whole spiel. Then I stopped. She was holding a can of diced tomatoes in one hand and a package of ground turkey in the other, looking at me like I was making things harder than they needed to be.
Honestly, she was right. I’d been overcomplicating my chili for years, convinced that each ingredient needed its own dramatic entrance into the pot. That night, I let her take the lead. We threw everything in together—turkey, beans, tomatoes, spices—and let it bubble away while she practiced her multiplication tables. The result? The best turkey chili I’d ever made. It was rich, deeply flavored, and somehow even more comforting than my usual version that required three separate pans and a small mountain of dishes.
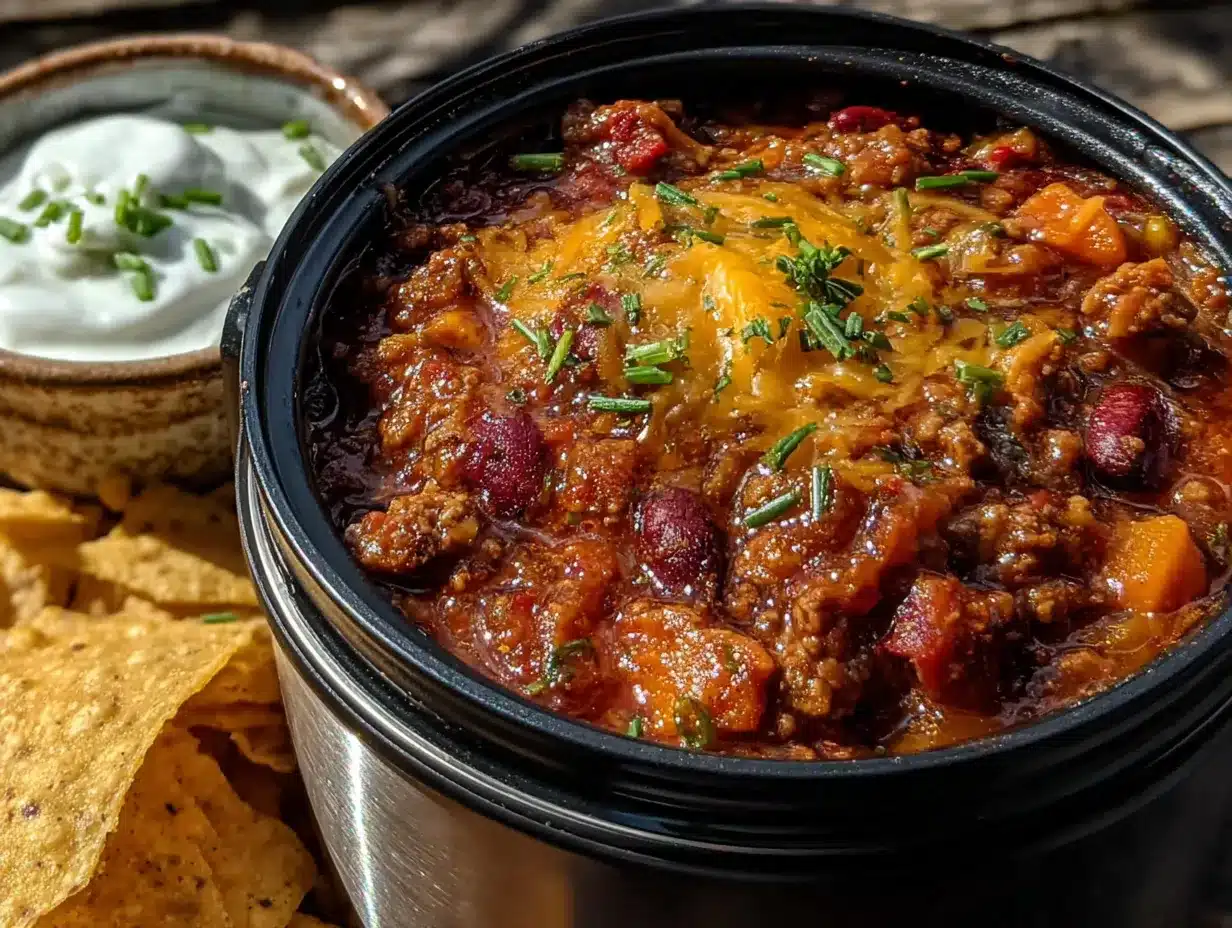
That moment changed how I approach weeknight cooking. This easy make-ahead turkey chili for thermos lunches was born from a ten-year-old’s impatience and my willingness to shut up and listen. It’s become our go-to for busy weeks, cold-weather lunches, and those days when you need something warm and satisfying but don’t have time for a production. I mean, isn’t that the dream? A recipe that practically makes itself and tastes like you spent hours on it?
Why You’ll Love This Recipe
Let me tell you why this chili has earned a permanent spot in our weekly rotation. It’s not just good—it’s the kind of meal that makes you feel like you’ve got your life together, even when you’re scrambling to pack lunches at 6 AM.
- Quick & Easy: From start to finish, this comes together in about 45 minutes. Most of that is hands-off simmering time, so you can fold laundry, help with homework, or just sit down for a minute.
- Simple Ingredients: No fancy grocery trips needed. Ground turkey, canned beans, diced tomatoes, and pantry spices—you probably have most of this stuff already.
- Perfect for Thermos Lunches: This chili holds heat like a champ. It stays piping hot from morning until lunchtime, which is honestly a game-changer for packed lunches.
- Crowd-Pleaser: My kids devour this, my husband requests it weekly, and even my picky mother-in-law asked for the recipe. That’s a win in my book.
- Unbelievably Delicious: The flavor deepens overnight, making this one of those rare dishes that tastes even better the next day. The texture is hearty without being heavy, and the spice level is just right—warming without overwhelming.
What makes this different from other turkey chili recipes is the technique. By letting everything simmer together from the start, the flavors meld in a way that feels slow-cooked and intentional. Plus, it’s designed specifically for thermos use—thicker than regular chili so it doesn’t get watery, and packed with ingredients that hold up well to reheating.
This isn’t just another chili recipe. It’s the one you’ll turn to when you need a reliable, no-stress meal that delivers every single time. It’s comfort food that works with your schedule, not against it.
What Ingredients You Will Need
This recipe uses simple, wholesome ingredients to deliver bold flavor and satisfying texture without the fuss. Most of these are pantry staples, which makes this perfect for those weeks when you haven’t made it to the grocery store.
For the Chili Base
- 1 tablespoon olive oil – I use extra-virgin here, but any neutral oil works fine. (Helps brown the turkey and sauté the aromatics)
- 1 large yellow onion, diced – About 1 ½ cups. Yellow onions give the best savory flavor, but white or sweet onions work too.
- 3 cloves garlic, minced – Fresh is best here. The pre-minced stuff in jars works in a pinch, but fresh garlic adds a punch that makes a difference.
- 1 ½ pounds lean ground turkey – I prefer 93/7 for chili. It’s lean enough to be healthy but has enough fat to stay moist. Ground chicken works great too.
- 2 tablespoons chili powder – I use a standard grocery store blend, but feel free to use your favorite. Just make sure it’s fresh—old chili powder loses its punch.
- 1 teaspoon ground cumin – This adds that warm, earthy note that makes chili taste like chili. Don’t skip it.
- 1 teaspoon smoked paprika – Regular paprika works, but smoked gives a subtle depth that’s incredible.
- ½ teaspoon dried oregano – A little goes a long way. Mexican oregano is ideal if you have it.
- ½ teaspoon salt – Plus more to taste. I start conservative and adjust at the end.
- ¼ teaspoon black pepper – Freshly ground if possible.
- ¼ teaspoon cayenne pepper (optional) – This adds a gentle heat. Leave it out if you’re serving kids or sensitive palates.
For the Liquid and Beans
- 1 can (15 ounces) fire-roasted diced tomatoes, undrained – Fire-roasted adds a subtle smokiness that regular diced tomatoes don’t have. Muir Glen is my go-to brand for these.
- 1 can (15 ounces) tomato sauce – Not marinara, just plain tomato sauce. Hunt’s or Contadina work perfectly.
- 1 can (15 ounces) kidney beans, drained and rinsed – Dark red kidney beans are traditional, but light red work too. Rinsing removes excess sodium and makes them easier to digest.
- 1 can (15 ounces) black beans, drained and rinsed – These add a creamy texture that contrasts nicely with the firmer kidney beans.
- 1 cup low-sodium chicken broth – Vegetable broth works too. Low-sodium is important here because you’re controlling the salt level yourself.
Optional Toppings
- Shredded cheddar cheese – Sharp cheddar is my favorite, but Monterey Jack or a Mexican blend work great.
- Sour cream or Greek yogurt – Greek yogurt adds protein and tang without the extra fat.
- Fresh cilantro, chopped – Adds a fresh pop of color and flavor.
- Diced avocado – Creamy and cooling against the warm spices.
- Crushed tortilla chips – For that satisfying crunch.
Equipment Needed
You don’t need a fancy kitchen to make this chili. Here’s what you’ll need:
- Large Dutch oven or heavy-bottomed pot – A 5-6 quart pot is ideal. I use my trusty Le Creuset, but any heavy pot with a lid works. The heavier the bottom, the less likely your chili will scorch.
- Wooden spoon or silicone spatula – For stirring and breaking up the turkey. Wooden spoons are gentle on your pots and don’t conduct heat.
- Chef’s knife and cutting board – You’ll be dicing an onion and mincing garlic. A sharp knife makes this job infinitely easier.
- Measuring spoons – For the spices. I keep a set dedicated just to spices because they get stained otherwise.
- Can opener – You’ll be opening several cans. A good one saves your hands.
- Colander – For draining and rinsing the beans.
- Thermos for serving – A wide-mouth thermos works best for chili. I’ve had great luck with Stanley and Thermos brands. Pre-heat it with hot water before filling for maximum heat retention.
If you don’t have a Dutch oven, a large soup pot works fine. You might need to stir a bit more frequently to prevent sticking, but the results will be just as delicious.
Preparation Method
Let me walk you through this step by step. I’ve made this chili dozens of times, so I’ve learned a few tricks along the way.
- Heat the oil – Place your Dutch oven over medium heat and add the olive oil. Let it warm for about 30 seconds until it shimmers. You don’t want it smoking—just warm enough to cook the onions.
- Sauté the onion – Add the diced onion and cook for 5-6 minutes, stirring occasionally, until it’s soft and translucent. It should smell sweet and savory, not burnt. If it starts browning too quickly, lower the heat.
- Add the garlic – Stir in the minced garlic and cook for 30 seconds until fragrant. Garlic burns fast, so keep stirring. You’ll know it’s ready when the kitchen smells amazing.
- Cook the turkey – Add the ground turkey to the pot. Break it up with your wooden spoon into small crumbles. Cook for 6-8 minutes until no longer pink. Don’t rush this step—browning adds flavor. If there’s excess liquid, let it cook off rather than draining it. That liquid is flavor.
- Add the spices – Sprinkle the chili powder, cumin, smoked paprika, oregano, salt, pepper, and cayenne (if using) over the turkey. Stir well to coat everything evenly. Cook for 1 minute until the spices are fragrant. This step blooms the spices, making them more flavorful.
- Add the tomatoes and broth – Pour in the fire-roasted diced tomatoes (with their juices), tomato sauce, and chicken broth. Stir everything together, scraping up any browned bits from the bottom of the pot. Those bits are pure flavor gold.
- Add the beans – Stir in the drained and rinsed kidney beans and black beans. Make sure they’re evenly distributed throughout the chili.
- Simmer – Bring the chili to a gentle boil, then reduce the heat to low. Cover and let it simmer for 25-30 minutes, stirring occasionally. The chili should be bubbling gently, not furiously. If it’s too thick, add a splash more broth. If it’s too thin, simmer uncovered for a few extra minutes.
- Adjust seasoning – Taste the chili and adjust salt, pepper, or spices as needed. I usually add another pinch of salt and a dash more cumin at this stage.
- Cool and store – Let the chili cool completely before transferring to containers. For thermos lunches, portion it into individual containers and refrigerate overnight. The flavors meld beautifully as it sits.
Pro tip for thermos packing: In the morning, reheat the chili until it’s piping hot—almost bubbling. While it’s heating, fill your thermos with boiling water and let it sit for 5 minutes. Dump the water, fill with chili, and seal immediately. This pre-heating trick keeps your chili hot for hours.
Cooking Tips & Techniques
After making this chili more times than I can count, I’ve collected a few tips that make a real difference.
Don’t skip the browning step. I know it’s tempting to just dump everything in and walk away, but taking those extra few minutes to brown the turkey adds a depth of flavor you just can’t get any other way. The browned bits on the bottom of the pot—called fond—are where the magic happens.
Season in layers. Add salt at the beginning when you’re cooking the onions, again when you brown the turkey, and again at the end. This builds flavor throughout the cooking process rather than dumping it all in at once.
Watch your heat. Chili can go from simmering to scorched in a hurry. Keep it at a gentle bubble, not a rolling boil. If you see it sticking to the bottom, turn the heat down and stir more frequently.
Make it ahead. This chili actually improves overnight. The flavors meld and deepen, and the texture thickens perfectly. I almost always make this a day before I plan to serve it.
Don’t over-stir the beans. Once you add the beans, stir gently to avoid breaking them apart. Broken beans can make your chili mushy and cloudy.
I once forgot to add the spices entirely. I know, rookie mistake. The chili was bland and sad, and I had to stir in a spice paste at the end. It worked, but it wasn’t the same. Moral of the story: don’t get distracted mid-recipe. Set a timer if you need to.
Variations & Adaptations
This recipe is incredibly flexible. Here are some of my favorite variations:
Vegetarian Version
Swap the ground turkey for two cans of additional beans—try pinto or cannellini. Use vegetable broth instead of chicken broth. The texture will be slightly different, but the flavor is just as satisfying. I’ve made this for vegetarian friends and they always ask for seconds.
Spicy Version
Add one diced jalapeño along with the onions. Include an extra teaspoon of chili powder and a pinch more cayenne. For serious heat, stir in a tablespoon of chipotle peppers in adobo sauce at the end. Just be careful—a little goes a long way.
Slow Cooker Version
Brown the turkey and onions on the stovetop first, then transfer everything to a slow cooker. Cook on low for 6-8 hours or high for 3-4 hours. This is perfect for busy days when you want dinner waiting for you.
Topping Bar
Set up a topping bar for serving. Offer shredded cheese, sour cream, diced avocado, fresh cilantro, sliced green onions, crushed tortilla chips, and hot sauce. Everyone can customize their bowl, which makes dinner more fun and interactive.
I once tried adding a tablespoon of cocoa powder to the chili on a whim. It sounded weird, but it actually added a subtle richness that was surprisingly good. Not something I do every time, but a fun experiment if you’re feeling adventurous.
Serving & Storage Suggestions
This chili is incredibly versatile when it comes to serving and storing.
Serving temperature: Serve piping hot. For thermos lunches, reheat until bubbling before packing. For dinner, let it cool for 5 minutes before serving to allow the flavors to settle.
Presentation: Ladle into bowls and let everyone add their own toppings. A sprinkle of cheese, a dollop of sour cream, and a few cilantro leaves make it look restaurant-worthy.
Complementary dishes: Serve with crusty bread, cornbread, or a simple green salad. For a heartier meal, spoon it over rice or quinoa. Tortilla chips on the side are always a hit.
Storage: Refrigerate in an airtight container for up to 5 days. The chili thickens as it sits, so you might want to add a splash of broth when reheating.
Freezing: This chili freezes beautifully. Portion into freezer-safe containers or zip-top bags, leaving an inch of headroom for expansion. Freeze for up to 3 months. Thaw overnight in the refrigerator before reheating.
Reheating: Reheat on the stovetop over medium-low heat, stirring occasionally. Add a splash of broth or water if it’s too thick. You can also microwave individual portions in 30-second intervals, stirring between each.
The flavors continue to develop over time. Day two is always better than day one, and day three is even better. This is one of those rare dishes that gets better with age.
Nutritional Information & Benefits
Here’s the approximate nutritional breakdown per serving (about 1 ½ cups, without toppings):
- Calories: 320
- Protein: 32g
- Fat: 10g
- Carbohydrates: 28g
- Fiber: 9g
- Sugar: 8g
- Sodium: 680mg
Health benefits: This chili is packed with lean protein from the turkey and fiber from the beans, which keeps you full and satisfied. The tomatoes provide lycopene, a powerful antioxidant. The spices—especially cumin and chili powder—have anti-inflammatory properties. Plus, it’s naturally gluten-free and dairy-free (without the toppings).
Dietary considerations: This recipe is easily adaptable for various dietary needs. Use vegetable broth for a vegetarian version. Skip the cheese and sour cream for a dairy-free option. It’s naturally low-carb if you skip the beans, though I personally love the texture and fiber they add.
I love that this chili feels indulgent but is actually pretty healthy. It’s comfort food that doesn’t leave you feeling guilty or weighed down.
Conclusion
This easy make-ahead turkey chili for thermos lunches has become a staple in my kitchen for good reason. It’s simple, forgiving, and produces consistently delicious results. Whether you’re packing school lunches, meal-prepping for busy weeks, or just craving a warm bowl of comfort, this recipe delivers.
I love that this chili started with a kid’s simple question. It reminds me that sometimes the best recipes come from letting go of perfection and trusting the process. You can customize it to your taste, make it as spicy or mild as you like, and know that it will be just as good—if not better—the next day.
Give it a try this week. I promise you’ll wonder why you ever made chili any other way. And when you do, come back and let me know how it turned out. Did you add any fun toppings? Make any creative substitutions? I’d love to hear about your version. Share your experience in the comments below, and don’t forget to pin this recipe for later!
Frequently Asked Questions
Can I use ground beef instead of turkey?
Absolutely. Ground beef works perfectly in this recipe. Use 80/20 for the most flavor, or 90/10 for a leaner option. You might need to drain off some excess fat after browning, but otherwise the recipe stays the same.
How do I prevent my chili from being too watery?
Simmer it uncovered for the last 10-15 minutes to allow excess liquid to evaporate. Also, make sure you drain and rinse your beans thoroughly. If it’s still too thin, stir in a tablespoon of tomato paste to thicken it up.
Can I make this in an Instant Pot?
Yes! Use the sauté function to brown the turkey and onions, then add the remaining ingredients. Pressure cook on high for 15 minutes, then let the pressure release naturally for 10 minutes before quick releasing the rest. It’s even faster than the stovetop version.
How long will this chili stay hot in a thermos?
With proper pre-heating (filling the thermos with boiling water for 5 minutes before adding the chili), it stays piping hot for 4-6 hours. For best results, make sure the chili is bubbling hot when you pack it, and fill the thermos to the top to minimize air space.
Can I double this recipe?
Absolutely. This recipe doubles beautifully. Just use a larger pot and increase the simmering time by about 10 minutes. It’s perfect for feeding a crowd or stocking your freezer with ready-to-go lunches.
Pin This Recipe!

Easy Make-Ahead Turkey Chili for Thermos Lunches

A simple, one-pot turkey chili that’s perfect for thermos lunches. Made with ground turkey, beans, and pantry spices, it comes together in about 45 minutes and tastes even better the next day.
- Prep Time: 15 minutes
- Cook Time: 30 minutes
- Total Time: 45 minutes
- Yield: 6 servings 1x
- Category: Main Course
- Cuisine: American
Ingredients
- 1 tablespoon olive oil
- 1 large yellow onion, diced
- 3 cloves garlic, minced
- 1 ½ pounds lean ground turkey (93/7)
- 2 tablespoons chili powder
- 1 teaspoon ground cumin
- 1 teaspoon smoked paprika
- ½ teaspoon dried oregano
- ½ teaspoon salt
- ¼ teaspoon black pepper
- ¼ teaspoon cayenne pepper (optional)
- 1 can (15 ounces) fire-roasted diced tomatoes, undrained
- 1 can (15 ounces) tomato sauce
- 1 can (15 ounces) kidney beans, drained and rinsed
- 1 can (15 ounces) black beans, drained and rinsed
- 1 cup low-sodium chicken broth
- Shredded cheddar cheese (optional topping)
- Sour cream or Greek yogurt (optional topping)
- Fresh cilantro, chopped (optional topping)
- Diced avocado (optional topping)
- Crushed tortilla chips (optional topping)
Instructions
- Heat the olive oil in a large Dutch oven or heavy-bottomed pot over medium heat until shimmering.
- Add the diced onion and cook for 5-6 minutes, stirring occasionally, until soft and translucent.
- Stir in the minced garlic and cook for 30 seconds until fragrant.
- Add the ground turkey and cook for 6-8 minutes, breaking it up with a wooden spoon, until no longer pink.
- Sprinkle the chili powder, cumin, smoked paprika, oregano, salt, pepper, and cayenne (if using) over the turkey. Stir well and cook for 1 minute until fragrant.
- Pour in the fire-roasted diced tomatoes (with juices), tomato sauce, and chicken broth. Stir, scraping up any browned bits from the bottom of the pot.
- Stir in the drained and rinsed kidney beans and black beans until evenly distributed.
- Bring the chili to a gentle boil, then reduce heat to low. Cover and simmer for 25-30 minutes, stirring occasionally.
- Taste and adjust seasoning with additional salt, pepper, or spices as needed.
- Let the chili cool completely before transferring to containers. For thermos lunches, portion into individual containers and refrigerate overnight.
Notes
For thermos packing: In the morning, reheat the chili until piping hot. While heating, fill the thermos with boiling water and let sit for 5 minutes. Dump the water, fill with chili, and seal immediately. This pre-heating trick keeps chili hot for hours. The chili improves overnight as flavors meld.
Nutrition
- Serving Size: 1 ½ cups
- Calories: 320
- Sugar: 8
- Sodium: 680
- Fat: 10
- Saturated Fat: 2
- Carbohydrates: 28
- Fiber: 9
- Protein: 32
Keywords: turkey chili, make-ahead chili, thermos lunch, easy chili, healthy chili, one-pot chili


