Love this? Save it for later!
Share the inspiration with your friends
The woman at the campsite next to ours watched me trying to build a fire for what felt like forever. I had the kindling all wrong, the logs were too big, and honestly, I was about to give up and just eat cold hot dogs. She didn’t say anything at first. Then she just walked over with a cast iron skillet and a bag of marshmallows, and said, “Let me show you something easier.”
That was three summers ago at a crowded campground in upstate New York. Her name was Maria, and she had been coming to that same spot for twenty years with her family. She wasn’t teaching me a recipe exactly—she was showing me how to make s’mores without the fire drama. She melted everything together in that skillet, pressed it into a pan, and let it cool. I remember thinking, wait, that’s it? No roasting, no burned fingers, no arguing over who gets the last marshmallow?
I tweaked her method over the years, turning it into these easy s’mores bars for a Labor Day cookout. They have all the classic flavors you love—chocolate, graham cracker, toasted marshmallow—but none of the hassle. You don’t need a campfire, you don’t need special equipment, and you definitely don’t need to fight with sticky marshmallow goo on your fingers. Maybe you’ve been there, right? Standing over a fire, trying to get that perfect golden brown marshmallow while everyone is waiting?
These bars solve all of that. They come together in one pan, they travel beautifully, and they disappear faster than anything else on the dessert table. I keep making them because they remind me of that campsite, of Maria’s kindness, and of how the best recipes often come from someone just showing you a better way.
Why You’ll Love This Recipe
Let me tell you why these easy s’mores bars are going to become your go-to dessert for every cookout this summer. I’ve tested this recipe at least a dozen times, tweaking the chocolate ratio and the baking time until everything comes out perfectly balanced.
- Quick & Easy: From start to finish, you’re looking at about 30 minutes. That’s faster than setting up a campfire and roasting individual marshmallows.
- Simple Ingredients: You probably have graham crackers, chocolate chips, and marshmallows in your pantry right now. No fancy grocery trips needed.
- Perfect for a Labor Day Cookout: These bars hold up beautifully at room temperature, they don’t get soggy, and you can make them a day ahead.
- Crowd-Pleaser: I’ve brought these to potlucks, backyard barbecues, and office parties. Kids grab two, adults pretend they’re only having one, and the pan is always empty within an hour.
- Unbelievably Delicious: The texture is what gets me every time—crunchy graham cracker base, gooey melted chocolate, and that slightly toasted marshmallow top that pulls apart in the most satisfying way.
What makes these different from every other s’mores bar recipe out there? It’s the technique. I use a combination of melted butter and a tiny bit of honey in the crust, which gives it a deeper flavor and helps it hold together better. Plus, I layer the chocolate in two stages—some melted into the base, some left as chips—so you get both a fudgy layer and pockets of melted chocolate in every bite. This isn’t just another version of s’mores bars. It’s the one that makes you close your eyes after the first bite and forget you’re at a picnic table.
What Ingredients You Will Need
This recipe uses simple, mostly pantry-stable ingredients to deliver that classic campfire flavor without the mess. Here’s what you need to grab:
For the Graham Cracker Crust:
- 2 cups graham cracker crumbs (about 14 full sheets, crushed finely)
- 1/2 cup unsalted butter, melted (I use Kerrygold for the rich flavor)
- 2 tablespoons granulated sugar
- 1 tablespoon honey (adds a subtle depth and helps binding)
- 1/4 teaspoon salt
For the Chocolate Layer:
- 1 1/2 cups semi-sweet chocolate chips (I prefer Ghirardelli for consistent melting)
- 1/2 cup milk chocolate chips (adds creaminess)
- 2 tablespoons heavy cream (makes the chocolate layer extra smooth)
For the Marshmallow Topping:
- 3 cups mini marshmallows (about half a standard bag)
- 1 cup regular marshmallows, cut in half (gives you those nice toasted tops)
If you want to swap things around, here are some easy substitutions. Use dairy-free butter and coconut cream instead of heavy cream for a vegan version. Dark chocolate chips work great if you prefer less sweetness. And if you’re gluten-sensitive, look for certified gluten-free graham crackers—they work perfectly here. I’ve also tried this with honey graham crackers, and honestly, they add a nice floral note that pairs well with the chocolate.
One thing I learned the hard way: don’t use the pre-crushed graham cracker crumbs from a box. They’re too fine and make the crust dense. Crush your own in a zip-top bag with a rolling pin, or pulse them in a food processor until you have a mix of fine crumbs and tiny pebbles. That texture difference matters.
Equipment Needed
You don’t need much for these easy s’mores bars, which is part of why I love making them for cookouts. Here’s what to have ready:
- 9×13-inch baking pan (a metal pan gives better browning than glass)
- Parchment paper (trust me on this—it makes lifting the bars out so much easier)
- Mixing bowls (one medium, one small)
- Rolling pin or food processor for crushing graham crackers
- Spatula for pressing the crust
- Small saucepan for melting the chocolate
- Measuring cups and spoons
If you don’t have a 9×13 pan, an 8×8 pan works but you’ll need to increase the baking time by about 5 minutes and expect thicker bars. I’ve also made these in a disposable aluminum pan for camping trips—they work fine, just watch the edges so they don’t burn. A good tip: line your pan with parchment paper with some overhang on the sides. It creates handles that let you lift the entire block of bars out for easy cutting.
Preparation Method
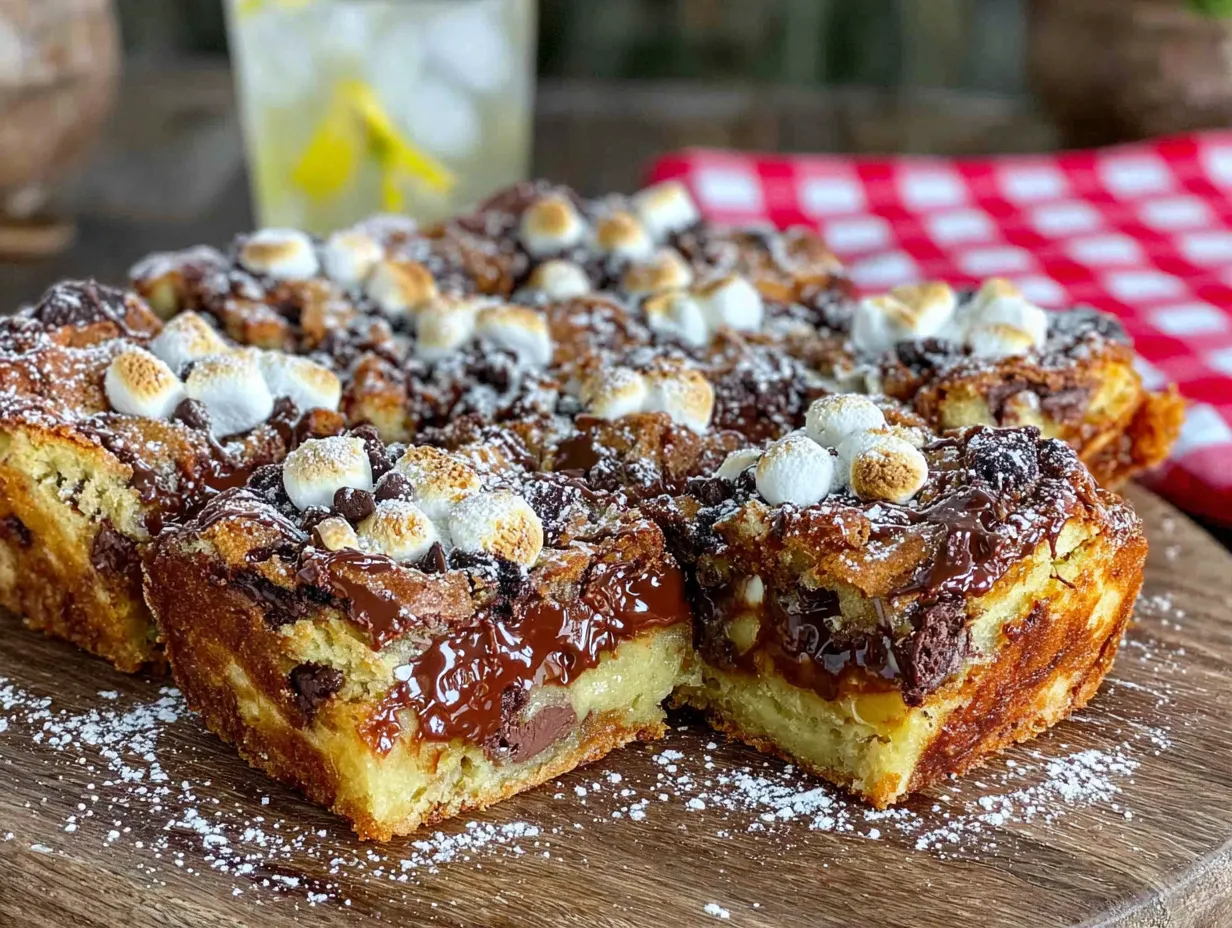
Alright, let’s get into the actual making of these s’mores bars. The whole process takes about 30 minutes, and most of that is hands-off baking time.
- Preheat your oven to 350°F (175°C). Line your 9×13 baking pan with parchment paper, leaving about 2 inches of overhang on the long sides. This is your lifeline later—don’t skip it.
- Make the graham cracker crust. In a medium bowl, combine 2 cups graham cracker crumbs, 2 tablespoons sugar, and 1/4 teaspoon salt. Pour in 1/2 cup melted butter and 1 tablespoon honey. Stir with a fork until everything is evenly moistened. It should look like wet sand and hold together when you squeeze a handful.
- Press the crust into the pan. Dump the crumb mixture into your prepared pan. Use the bottom of a measuring cup or a flat-bottomed glass to press it down firmly and evenly. Don’t just pat it—really press it. An uneven crust will crumble when you cut the bars later. Bake for 10 minutes, until the edges are just starting to turn golden. Set aside to cool slightly while you prepare the chocolate layer.
- Melt the chocolate. In a small saucepan over low heat, combine 1 1/2 cups semi-sweet chocolate chips and 2 tablespoons heavy cream. Stir constantly until the chocolate is completely melted and smooth. This takes about 3-4 minutes. Remove from heat immediately—chocolate burns easily. If you’re nervous about burning it, use a double boiler or microwave in 20-second bursts, stirring between each.
- Pour the chocolate over the crust. Spread it evenly with a spatula. Then sprinkle the remaining 1/2 cup milk chocolate chips over the top while the melted chocolate is still warm. This gives you those pockets of whole melted chips that make every bite different.
- Add the marshmallows. Scatter 3 cups mini marshmallows evenly over the chocolate layer. Then dot the surface with the halved regular marshmallows, cut-side up. This creates those beautiful toasted peaks after baking.
- Bake the bars. Return the pan to the oven and bake for 12-15 minutes. You want the marshmallows to be puffed and golden brown on top, but not completely melted into the chocolate. The edges should be bubbly and the chocolate should look glossy. Watch closely during the last 3 minutes—ovens vary, and you don’t want burned marshmallows.
- Cool completely before cutting. This is the hardest part, I know. Let the bars cool in the pan for at least 30 minutes at room temperature, then refrigerate for another 30 minutes. This sets the chocolate so your bars hold their shape. Use the parchment overhang to lift the entire block out onto a cutting board. Slice into 24 squares with a sharp knife, wiping the blade clean between cuts.
One thing I learned the hard way: if you try to cut these while they’re still warm, the marshmallow will stick to your knife and pull the bars apart. Be patient. Cold bars cut cleanly and look so much better on the serving platter.
Cooking Tips & Techniques
After making these easy s’mores bars at least twenty times, I’ve picked up a few tricks that make a real difference. Let me share what I’ve learned through trial and error.
Don’t overbake the crust. I’ve done it. You pull the crust out, it looks pale, so you give it another 3 minutes. Then suddenly it’s too hard and crumbly. Bake it just until the edges turn golden—about 10 minutes. The center will still be slightly soft, and that’s exactly what you want. It firms up as it cools.
Toast the marshmallows under the broiler for extra drama. If you want that campfire-toasted look, switch your oven to broil for the last 60-90 seconds of baking. Watch it like a hawk. Marshmallows go from golden to black in about 15 seconds. I learned this the hard way when I walked away to answer my phone and came back to a pan of charcoal. Now I stand right there and watch.
Use room temperature ingredients for the crust. Cold butter doesn’t incorporate evenly into the graham cracker crumbs. Let your butter sit out for 15 minutes before melting, or microwave it gently. The honey should also be at room temperature—cold honey is too thick to mix properly.
Layer your chocolate strategically. I mentioned this earlier, but it’s worth repeating. Melting some chocolate into a smooth layer gives you that fudgy base, while leaving some chips whole creates texture. If you just dump all the chocolate in as chips, you get uneven melting. If you melt it all, you lose those satisfying chocolate pockets. The two-stage approach is where the magic lives.
Let the bars set completely. I know you want to eat them immediately. I’ve been there. But the difference between a bar that falls apart and one that holds together beautifully is that 30-minute chill in the fridge. Use that time to make coffee or set up your cookout spread.
Variations & Adaptations
One of the best things about these s’mores bars is how easy they are to customize. Here are some variations I’ve tried and loved:
Peanut Butter S’mores Bars: Swirl 1/3 cup creamy peanut butter into the melted chocolate layer before adding the marshmallows. The salty-sweet combo is absolutely addictive. I made these for a Labor Day cookout last year and they were the first thing to disappear.
Dark Chocolate & Sea Salt: Use all dark chocolate chips (60-70% cacao) and sprinkle flaky sea salt over the marshmallows before baking. The salt cuts through the sweetness and makes the chocolate taste deeper. This version feels a little more grown-up, if you want something less sugary.
Berry S’mores Bars: Scatter 1/2 cup fresh raspberries or sliced strawberries over the chocolate layer before adding the marshmallows. The tart fruit balances the sweetness beautifully. I tried this in July when berries were at their peak, and it was a revelation.
Gluten-Free Version: Use certified gluten-free graham crackers in the crust. Everything else in the recipe is naturally gluten-free. Just double-check your chocolate chips—some brands process them on shared equipment.
Vegan Adaptation: Use vegan butter, dairy-free chocolate chips, and coconut cream instead of heavy cream. Most marshmallows contain gelatin, so look for vegan marshmallows—Dandies brand works really well. The texture is slightly different but still delicious.
If you’re feeling adventurous, try adding a layer of caramel sauce between the chocolate and marshmallows. Drizzle about 1/4 cup of store-bought or homemade caramel over the chocolate before adding the marshmallows. It makes the bars extra gooey and decadent. Perfect for when you want to impress someone.
Serving & Storage Suggestions
These easy s’mores bars are best served at room temperature, which makes them perfect for a Labor Day cookout. Just let them sit out for about 15 minutes after taking them from the fridge so the chocolate softens slightly.
For presentation, I like to arrange them on a wooden board or a simple white platter. They look gorgeous with their golden marshmallow tops and dark chocolate edges. You can dust them with a little powdered sugar or drizzle with extra melted chocolate if you’re feeling fancy. A few fresh berries on the side add color and a tart contrast.
These bars pair beautifully with cold milk, iced coffee, or a scoop of vanilla ice cream. At cookouts, I’ve seen people eat them alongside grilled fruit, and honestly, it works—the smoky char from the grill complements the toasted marshmallow flavor.
Storage: Keep the bars in an airtight container at room temperature for up to 3 days. If your kitchen is warm, store them in the fridge—they’ll last up to a week. Just bring them to room temperature before serving.
Freezing: These freeze beautifully. Wrap individual bars in plastic wrap, then place them in a freezer bag. They’ll keep for up to 3 months. To thaw, just leave them at room temperature for about 30 minutes. I often make a double batch and freeze half for unexpected guests.
One thing to note: the marshmallows will soften over time, especially if stored in a humid environment. If you want to restore some of that toasted texture, pop the bars under the broiler for 30 seconds before serving. Just watch them closely.
The flavors actually develop over the first 24 hours. The chocolate seeps deeper into the crust, and the marshmallow gets slightly chewier. I honestly think these bars taste even better the next day. If you can resist eating them all immediately, try saving a few for the next morning with your coffee.
Nutritional Information & Benefits
Let’s be real—these are dessert bars, not health food. But here’s the estimated nutrition for one bar based on 24 servings:
| Nutrient | Amount Per Serving |
|---|---|
| Calories | 195 |
| Total Fat | 10g |
| Saturated Fat | 6g |
| Cholesterol | 15mg |
| Sodium | 95mg |
| Total Carbohydrates | 27g |
| Dietary Fiber | 1g |
| Sugars | 18g |
| Protein | 2g |
Dark chocolate does contain antioxidants and flavonoids, which are good for heart health. Graham crackers provide a bit of whole grain fiber, and honey has trace amounts of vitamins and minerals. But honestly, I make these because they make people happy, not because they’re a superfood.
If you’re watching your sugar intake, you can reduce the sugar in the crust by half—the marshmallows and chocolate provide plenty of sweetness. For a lower-calorie option, use sugar-free chocolate chips and marshmallows. The texture will be slightly different, but the flavor is still satisfying.
Potential allergens include dairy, gluten (unless you use gluten-free graham crackers), and soy (some chocolate chips contain soy lecithin). Always check labels if you’re serving to guests with allergies.
Conclusion
These easy s’mores bars are everything you want from a Labor Day cookout dessert—they’re simple to make, they feed a crowd, and they taste like the best parts of summer. No fire-building skills required, no sticky fingers, no burnt marshmallows. Just pure, nostalgic flavor in a neat little square that everyone can grab and enjoy.
I love this recipe because it reminds me that the best cooking often comes from someone showing you a shortcut that actually works. Maria didn’t give me a recipe card or a list of measurements. She just showed me what to do, and I figured out the rest through trial and error. That’s how real cooking happens, you know? Through shared moments and a willingness to try something new.
Feel free to make these your own. Swap the chocolate, add some fruit, or go wild with peanut butter. The base recipe is forgiving and adaptable. I’d love to hear what variations you come up with—drop a comment below and tell me how they turned out. And if you bring these to your Labor Day cookout, don’t be surprised if someone asks you for the recipe before the pan is even empty.
Happy cooking, and have a wonderful Labor Day weekend!
Frequently Asked Questions
Can I make these s’mores bars ahead of time?
Absolutely. You can make them a day ahead and store them in an airtight container at room temperature. They actually get better as the flavors meld together. Just wait to cut them until they’re fully set from the fridge.
Can I use a different type of chocolate?
Yes, any chocolate works. Dark chocolate gives a richer, less sweet bar. Milk chocolate makes it more traditional. White chocolate chips add a creamy sweetness. Feel free to mix and match based on what you have on hand.
How do I keep the marshmallows from burning?
Watch the bars closely during the last few minutes of baking. If you’re using the broiler, stand right there and don’t walk away. Marshmallows go from perfectly toasted to burned in seconds. Set a timer for 60 seconds and check them.
Can I make these in a microwave instead of an oven?
You can, but the texture won’t be quite the same. The crust won’t get as crispy, and the marshmallows won’t toast. If you’re in a pinch, microwave the crust for 2 minutes, then add the chocolate and marshmallows and microwave for another 1-2 minutes. Let it cool completely before cutting.
How do I cut clean bars without the marshmallow sticking?
Chill the bars in the fridge for at least 30 minutes before cutting. Use a sharp knife and wipe it clean with a damp paper towel between each cut. If your knife is still sticking, try dipping it in hot water and drying it off before slicing.
Pin This Recipe!
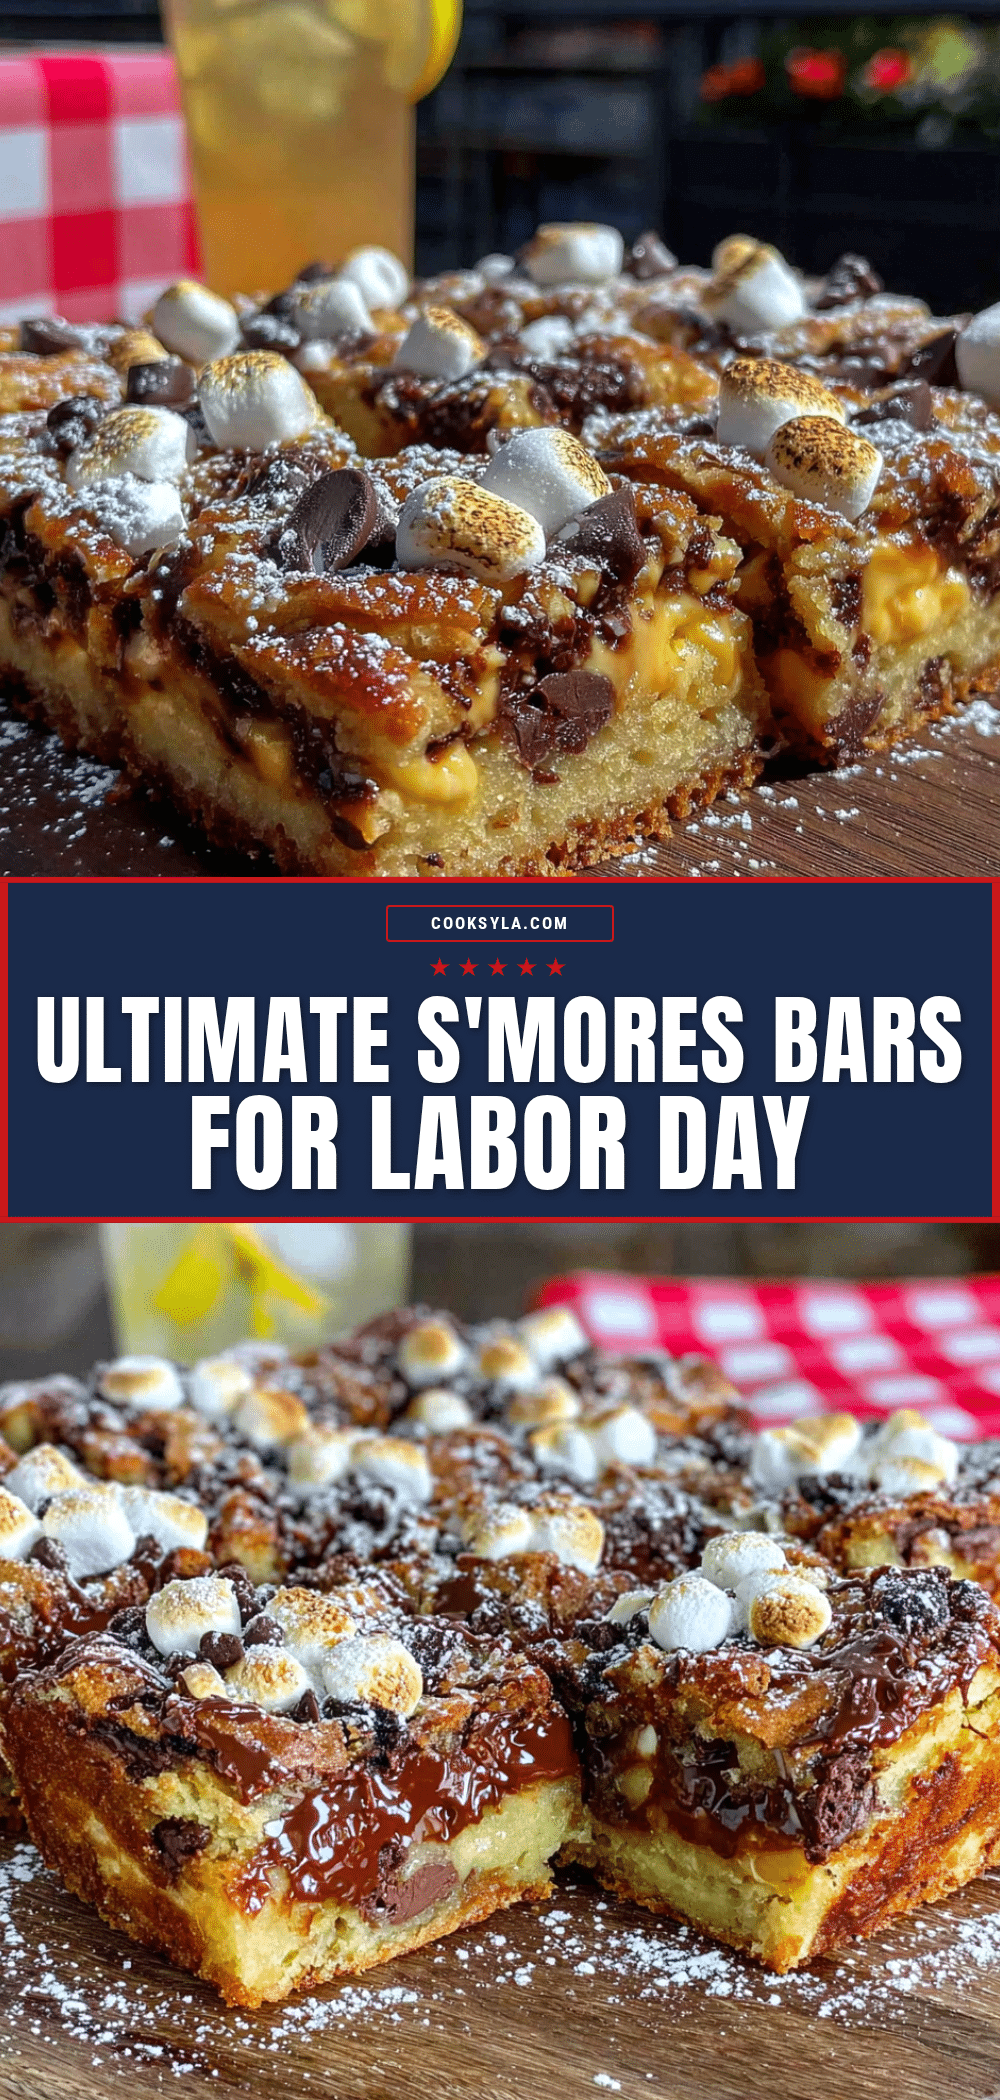
Easy Smores Bars for a Perfect Labor Day Cookout
These easy s’mores bars have all the classic flavors—chocolate, graham cracker, toasted marshmallow—but none of the hassle. They come together in one pan, travel beautifully, and disappear faster than anything else on the dessert table.
- Prep Time: 15 minutes
- Cook Time: 25 minutes
- Total Time: 40 minutes
- Yield: 24 servings 1x
- Category: Dessert
- Cuisine: American
Ingredients
- 2 cups graham cracker crumbs (about 14 full sheets, crushed finely)
- 1/2 cup unsalted butter, melted
- 2 tablespoons granulated sugar
- 1 tablespoon honey
- 1/4 teaspoon salt
- 1 1/2 cups semi-sweet chocolate chips
- 1/2 cup milk chocolate chips
- 2 tablespoons heavy cream
- 3 cups mini marshmallows
- 1 cup regular marshmallows, cut in half
Instructions
- Preheat your oven to 350°F (175°C). Line your 9×13 baking pan with parchment paper, leaving about 2 inches of overhang on the long sides.
- Make the graham cracker crust. In a medium bowl, combine 2 cups graham cracker crumbs, 2 tablespoons sugar, and 1/4 teaspoon salt. Pour in 1/2 cup melted butter and 1 tablespoon honey. Stir with a fork until everything is evenly moistened. It should look like wet sand and hold together when you squeeze a handful.
- Press the crust into the pan. Dump the crumb mixture into your prepared pan. Use the bottom of a measuring cup or a flat-bottomed glass to press it down firmly and evenly. Bake for 10 minutes, until the edges are just starting to turn golden. Set aside to cool slightly while you prepare the chocolate layer.
- Melt the chocolate. In a small saucepan over low heat, combine 1 1/2 cups semi-sweet chocolate chips and 2 tablespoons heavy cream. Stir constantly until the chocolate is completely melted and smooth. This takes about 3-4 minutes. Remove from heat immediately.
- Pour the chocolate over the crust. Spread it evenly with a spatula. Then sprinkle the remaining 1/2 cup milk chocolate chips over the top while the melted chocolate is still warm.
- Add the marshmallows. Scatter 3 cups mini marshmallows evenly over the chocolate layer. Then dot the surface with the halved regular marshmallows, cut-side up.
- Bake the bars. Return the pan to the oven and bake for 12-15 minutes. You want the marshmallows to be puffed and golden brown on top, but not completely melted into the chocolate. Watch closely during the last 3 minutes.
- Cool completely before cutting. Let the bars cool in the pan for at least 30 minutes at room temperature, then refrigerate for another 30 minutes. Use the parchment overhang to lift the entire block out onto a cutting board. Slice into 24 squares with a sharp knife, wiping the blade clean between cuts.
Notes
Don’t overbake the crust. Bake just until edges turn golden. For extra toasted marshmallows, switch to broil for the last 60-90 seconds, watching closely. Use room temperature ingredients for the crust. Let bars set completely in the fridge before cutting for clean slices. Store in an airtight container at room temperature for up to 3 days, or refrigerate for up to a week. Freeze individual bars wrapped in plastic wrap for up to 3 months.
Nutrition
- Serving Size: 1 bar
- Calories: 195
- Sugar: 18
- Sodium: 95
- Fat: 10
- Saturated Fat: 6
- Carbohydrates: 27
- Fiber: 1
- Protein: 2
Keywords: s'mores bars, easy s'mores, Labor Day dessert, graham cracker bars, chocolate marshmallow bars, campfire dessert, no-bake s'mores


