Love this? Save it for later!
Share the inspiration with your friends
My friend Dave asked why I couldn’t just throw everything on one big sheet pan instead of fussing with separate bowls and toppings. I started to explain why that wouldn’t work — then stopped. Honestly, I had no good reason. I’d been overcomplicating nachos for years, treating each component like it needed its own little VIP section. Dave just wanted to eat. So I tried it his way. And let me tell you, watching that single pan come out of the oven, loaded and sizzling, felt like getting a cheat code for game day cooking. I’ve never gone back.
This was a Tuesday night, not even a game day. We were just hungry and tired of making things harder than they needed to be. I’d been holding onto this idea that “loaded nachos” meant meticulously layering each topping, but Dave’s casual suggestion cracked something open. The chips got perfectly crisp, the cheese melted into all the nooks and crannies, and the whole thing came together in under twenty minutes. Maybe you’ve been there — stuck in a cooking rut, convinced your way is the only way, until someone comes along and accidentally shows you a better one.
That’s the story behind this Ultimate Loaded Tailgate Nacho Bar. It’s not precious or complicated. It’s the kind of recipe that makes you wonder why you ever stressed about nachos in the first place. Every single time I make it now, I think of Dave standing in my kitchen, holding a sheet pan, looking way too pleased with himself. And honestly? He should be. This recipe is pure, unapologetic game day magic, and it all started with someone questioning my methods.
Why You’ll Love This Recipe
Let’s be real — nacho recipes are everywhere. But this one actually delivers on the “ultimate” promise. I’ve tested this thing about a dozen times, tweaking the layering, the cheese ratio, and the heat level until it felt absolutely right. It’s the kind of recipe I bring to every tailgate and potluck, and I’ve never brought home leftovers. Not once.
- Quick & Easy: This whole setup comes together in about 20 minutes. Seriously. You can have it on the table before the pre-game show even ends.
- Simple Ingredients: Nothing fancy here. Ground beef, cheese, beans, and your favorite toppings — all stuff you probably already have in your pantry.
- Perfect for Game Day: Whether it’s football, basketball, or just a big family dinner, this recipe feeds a crowd without breaking a sweat.
- Totally Customizable: Everyone can build their own plate. It’s a nacho bar, after all, and that’s half the fun.
- Crowd-Pleaser: Kids go crazy for it. Adults go crazy for it. I’ve seen people who “don’t like nachos” finish an entire plate.
- Unbelievably Delicious: The combination of crispy chips, melty cheese, seasoned meat, and fresh toppings is just… perfect. It hits every single craving at once.
What makes this version different? It’s the layering technique. Most people just dump everything on top and hope for the best. I spread the chips out in a single layer, add the meat and beans, then half the cheese. After a quick bake, I add the rest of the cheese and a few more chips on top. The result? Every single chip gets coated in melty goodness. No sad, bare chips hiding at the bottom. It’s a small thing, but it makes a huge difference.
This recipe isn’t just good — it’s the kind that makes you close your eyes after the first bite. It’s comfort food at its finest, but faster and easier than you’d expect. Perfect for impressing guests without any stress, or turning a regular Saturday into something special.
What Ingredients You Will Need
This recipe uses simple, wholesome ingredients to deliver bold flavor and satisfying texture without any fuss. Most of these are pantry staples, and substitutions are easy if you need them.
For the Nacho Base
- Tortilla chips: 1 large (13-16 oz) bag of sturdy restaurant-style chips. I prefer Tostitos or Juanita’s — they hold up well under all the toppings. Avoid thin or delicate chips; they’ll get soggy.
- Ground beef: 1 lb (450g), 80/20 blend. The fat adds flavor and keeps the meat juicy. You can substitute ground turkey or plant-based crumbles if you prefer.
- Taco seasoning: 1 packet (or 3 tablespoons homemade). I use McCormick for convenience, but making your own with chili powder, cumin, and garlic powder is easy and lets you control the salt.
- Refried beans: 1 can (16 oz / 450g), warmed. They add creaminess and help everything stick together. Rosarita is my go-to brand.
- Shredded cheese: 3 cups (340g) total — a mix of sharp cheddar and Monterey Jack. Pre-shredded works fine, but shredding your own melts more smoothly (it doesn’t have the anti-caking coating).
- Black beans: 1 can (15 oz / 425g), drained and rinsed. Adds fiber and heartiness. You can skip these if you’re not a fan, but they really bulk up the nachos.
For the Toppings Bar
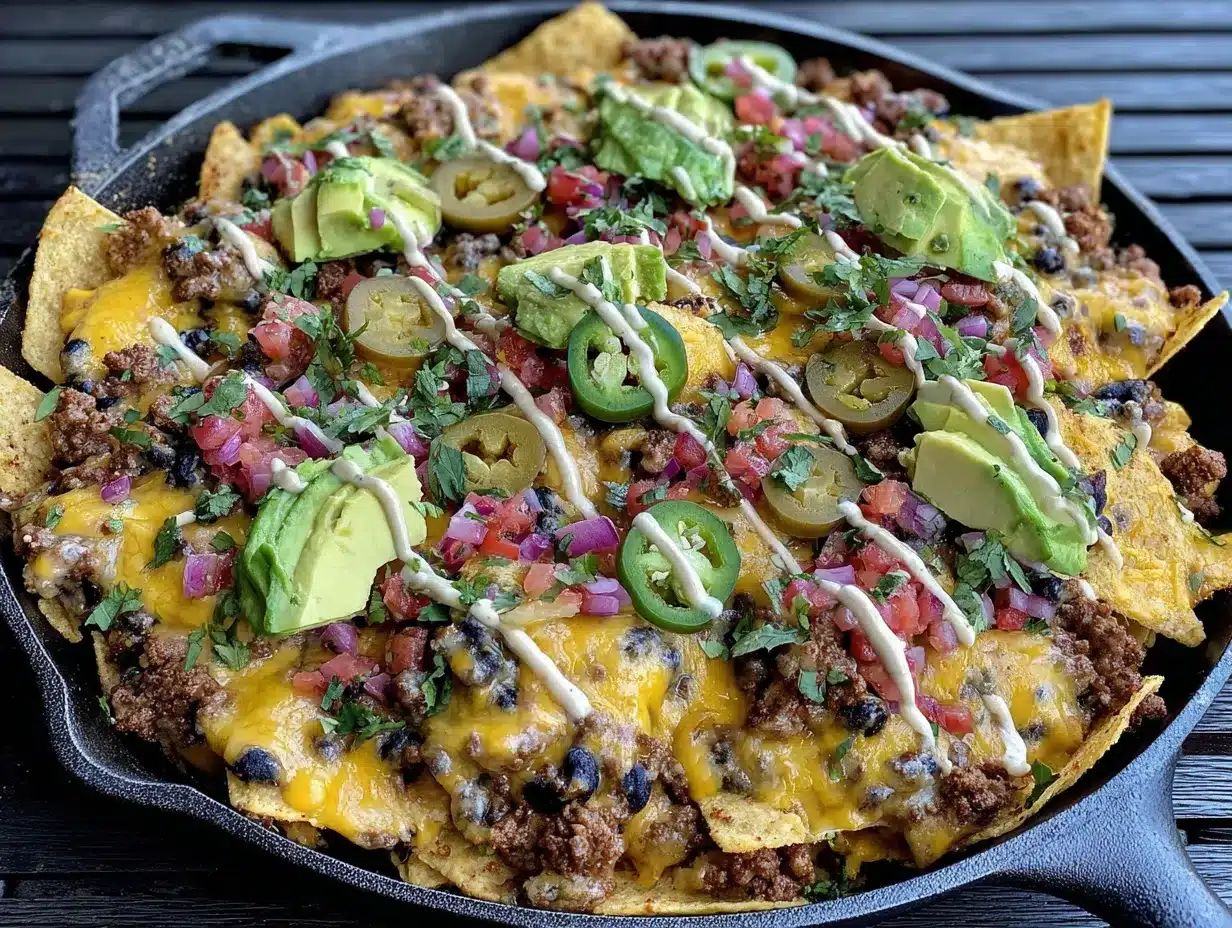
- Pico de gallo: 1 cup (about 250g). Fresh or store-bought is fine. I like Fresh Cravings brand when I’m short on time.
- Guacamole: 1 cup (about 230g). Homemade is best, but store-bought works in a pinch. Wholly Guacamole has good single-serve cups.
- Sour cream: 1/2 cup (120ml). Full-fat or Greek yogurt both work well.
- Jalapeños: 1/4 cup (60g) pickled or fresh, sliced. Adds heat and acidity.
- Fresh cilantro: 1/4 cup (15g), chopped. For brightness and color.
- Green onions: 1/4 cup (25g), sliced. Adds a mild onion kick.
- Black olives: 1/2 cup (60g), sliced. Optional but classic.
- Hot sauce: To taste. Cholula or Tapatío are my favorites for nachos.
Ingredient Selection Tips
For the best results, use full-fat cheese and sour cream. Low-fat versions don’t melt or taste as good. If you’re using fresh jalapeños, remove the seeds for less heat. And please, please don’t skip the refried beans — they’re the secret to nachos that don’t fall apart.
Equipment Needed
You don’t need anything fancy for this recipe, which is part of the beauty. Here’s what you’ll need:
- Large rimmed baking sheet: 13×18 inches (half-sheet pan). The rim is important — it catches any cheese that melts off the chips. No rim means a messy oven.
- Large skillet: For browning the ground beef. A 12-inch non-stick or cast iron works great.
- Small saucepan: For warming the refried beans. You can also microwave them in a bowl.
- Cutting board and knife: For prepping any fresh toppings.
- Spatula or wooden spoon: For breaking up the ground beef.
- Small bowls or ramekins: For serving the toppings. I use a set of 6 small ceramic bowls — they make the nacho bar look intentional and pretty.
If you don’t have a rimmed baking sheet, a 9×13 baking dish works too. Just layer the chips in a slightly thicker pile. And if you’re feeding a really big crowd, use two baking sheets and bake them simultaneously.
Preparation Method
This comes together fast, so I like to get all my ingredients prepped before I start cooking. Trust me, you don’t want to be chopping cilantro while the cheese is melting.
- Preheat your oven to 400°F (200°C). Position the rack in the middle of the oven. This high heat ensures the chips get crispy and the cheese melts quickly.
- Brown the ground beef. Heat your large skillet over medium-high heat. Add the ground beef and cook, breaking it up with a spatula, until browned and cooked through — about 5-7 minutes. Drain off any excess fat (leave about 1 tablespoon for flavor). Add the taco seasoning and 1/4 cup (60ml) water. Stir and let it simmer for 2-3 minutes until thickened. Set aside.
- Warm the refried beans. In a small saucepan over low heat, warm the refried beans, stirring occasionally. If they’re too thick, add a splash of water or chicken broth. You can also microwave them in a bowl for 1-2 minutes, stirring halfway through.
- Prep your toppings. While the meat cooks, slice the jalapeños, chop the cilantro, slice the green onions, and set out your pico, guacamole, and sour cream in small bowls. This makes the final assembly a breeze.
- Layer the chips. Spread half the tortilla chips in a single, even layer on your rimmed baking sheet. Don’t overlap them too much — you want every chip to get some love from the toppings.
- Add the first layer of toppings. Dollop spoonfuls of the refried beans over the chips. Then scatter the seasoned ground beef evenly across the chips. Sprinkle the drained black beans over everything. This is where the flavor starts building.
- Add half the cheese. Sprinkle about 1 1/2 cups (170g) of the shredded cheese evenly over the chips and toppings. Don’t pile it all in one spot — spread it out so every chip gets a little.
- Bake for 5-7 minutes. Place the baking sheet in the preheated oven and bake just until the cheese is melted and bubbly. Keep an eye on it — you don’t want the chips to burn.
- Add the remaining cheese and chips. Pull the sheet out of the oven. Sprinkle the remaining cheese over the top, then scatter the rest of the tortilla chips on top. This second layer of chips and cheese ensures every bite has that perfect melty crunch.
- Bake for another 3-5 minutes. Return the sheet to the oven and bake until the second layer of cheese is fully melted and the chips are lightly golden around the edges. The whole thing should look gloriously messy and irresistible.
- Top and serve immediately. Pull the sheet out of the oven. Let it cool for 2 minutes (the cheese needs a moment to set). Then pile on the fresh toppings — pico de gallo, guacamole, sour cream, jalapeños, cilantro, green onions, and olives. Serve directly from the baking sheet or transfer to a large platter.
Cooking Tips & Techniques
I’ve made this recipe more times than I can count, and I’ve definitely made my share of mistakes. Here’s what I’ve learned:
Don’t overload the chips. It’s tempting to pile everything on, but too many toppings make the chips soggy. Spread them out in a single layer and let the toppings do their job. You can always make a second sheet if you’re feeding a crowd.
Shred your own cheese. I know, I know — pre-shredded is convenient. But it has a coating that prevents it from melting smoothly. Shredding a block of cheddar and Monterey Jack takes two minutes and makes a noticeable difference. The cheese gets stretchy and gooey instead of clumpy.
Warm the refried beans first. Cold beans straight from the can will cool down the whole dish. Warming them beforehand ensures everything stays hot and melty. I usually microwave them for about a minute, stirring halfway.
Watch the oven. Every oven runs a little differently. Start checking your nachos at the 5-minute mark. You want the cheese melted and bubbly, not brown and crusty. If the edges of the chips start looking dark, pull them out immediately.
Let it rest before adding cold toppings. If you pile cold sour cream and pico on piping hot nachos, the cold toppings can make the cheese seize up. Let the nachos sit for 2-3 minutes after baking. It gives the cheese a chance to set slightly, and the toppings stay fresh and bright.
Make it ahead. You can brown the beef and prep all the toppings up to a day in advance. Store everything separately in the fridge. When you’re ready to eat, just layer and bake. It’s a lifesaver for busy game days.
Variations & Adaptations
This recipe is endlessly flexible. Here are a few ways I’ve changed it up over the years:
- Chicken Nachos: Swap the ground beef for shredded rotisserie chicken. Toss it with taco seasoning and a splash of lime juice before adding it to the chips. It’s lighter but just as satisfying.
- Vegetarian Nachos: Skip the meat entirely and double up on the beans. I use both refried beans and black beans, plus sautéed bell peppers and onions. Add a can of corn for sweetness and texture.
- Spicy Nachos: Add diced fresh habanero or serrano peppers to the meat while it cooks. Drizzle with chipotle crema (sour cream mixed with adobo sauce from canned chipotles) before serving. It’s not for the faint of heart, but it’s incredible.
- Breakfast Nachos: This is my personal favorite variation. Swap the beef for crumbled breakfast sausage, add scrambled eggs, and use pepper jack cheese. Top with salsa verde and a dollop of crema. Perfect for a lazy Sunday morning.
- Loaded Sweet Potato Nachos: Use sweet potato rounds instead of tortilla chips. Slice sweet potatoes into 1/4-inch rounds, toss with oil and salt, and roast at 425°F for 20 minutes. Then layer with the same toppings. It’s gluten-free and absolutely delicious.
One time I tried adding pineapple to the pico de gallo — it was a game changer. The sweetness cut through all the savory richness perfectly. Don’t be afraid to experiment. Nachos are forgiving.
Serving & Storage Suggestions
These nachos are best served immediately, straight from the oven. The chips are at their crispiest, the cheese is at its meltiest, and everything just tastes right. I like to set out all the cold toppings in small bowls so everyone can customize their own plate.
What to serve with it: These nachos are a meal on their own, but they pair beautifully with a simple side of Mexican street corn or a crisp green salad with lime vinaigrette. For drinks, a cold Mexican lager like Corona or Modelo is perfect. Margaritas work too — obviously.
Storing leftovers: If you somehow have leftovers (it’s rare in my house), store them in an airtight container in the fridge for up to 2 days. The chips will soften, but the flavor is still great. To reheat, spread them on a baking sheet and warm in a 350°F oven for 5-7 minutes. The microwave will make them mushy — avoid it if you can.
Freezing: I don’t recommend freezing fully assembled nachos. The texture just isn’t the same. But you can freeze the seasoned ground beef for up to 3 months. Just thaw it in the fridge overnight and reheat before assembling.
The flavors actually get better after a day in the fridge — the meat and beans marry together in a way that’s really lovely. I’ve been known to eat cold leftover nachos straight from the container, and I’m not ashamed of it.
Nutritional Information & Benefits
These nachos are indulgent, no question. But they’re made with real ingredients, and that counts for something. Here’s a rough estimate per serving (about 1/6 of the full recipe):
- Calories: ~550-650
- Protein: ~28g
- Fat: ~32g
- Carbohydrates: ~45g
- Fiber: ~8g
- Sugar: ~5g
The black beans and refried beans add a solid dose of fiber and plant-based protein, which helps keep you full. The beef provides iron and B vitamins. And the fresh toppings — tomatoes, cilantro, onions — add vitamins A and C. Is it health food? No. But it’s a balanced-ish meal that makes everyone happy.
If you’re watching your sodium, use low-sodium taco seasoning and beans, and go easy on the cheese. You can also swap the sour cream for Greek yogurt to cut some fat and add protein. Little changes add up.
Conclusion
This Ultimate Loaded Tailgate Nacho Bar is the recipe I turn to when I want to feed a crowd without stress. It’s fast, it’s flexible, and it always gets the job done. Whether you’re hosting a game day party, feeding a hungry family, or just craving something ridiculously satisfying, these nachos deliver every single time.
I love that this recipe started with a friend questioning my methods. It’s a good reminder that sometimes the best cooking comes from letting go of perfection and just going with what feels right. So pile on your favorite toppings, grab a cold drink, and dig in. You deserve it.
I’d love to hear how your nacho bar turns out! Leave a comment below and tell me your favorite topping combination. And if you’re looking for more game day inspiration, don’t miss my crispy buffalo chicken dip — it’s another crowd favorite that disappears fast.
Frequently Asked Questions
Can I make these nachos in a slow cooker?
You can, but the chips will get soft. I’d recommend keeping the chips separate and using the slow cooker to keep the meat and beans warm. Let everyone build their own plate with fresh chips.
What’s the best way to keep nachos warm for a party?
Serve them directly on the baking sheet and place it on a warming tray or in a low oven (200°F) with the door slightly ajar. Just keep an eye on the chips — they can burn if left too long.
Can I use ground turkey instead of beef?
Absolutely. Just add a little olive oil to the pan before cooking, since turkey is leaner. The taco seasoning will add plenty of flavor.
How do I prevent soggy nachos?
Don’t overdress the chips with wet toppings like salsa or guacamole before baking. Keep those for after the cheese melts. Also, make sure your refried beans are thick, not watery.
Can I double this recipe?
Yes! Use two baking sheets and bake them on separate racks. Swap the pans halfway through baking to ensure even cooking. Or just make one batch at a time and keep the second batch warm in the oven.
PrintUltimate Loaded Tailgate Nacho Bar: Easy Game Day Recipe
This Ultimate Loaded Tailgate Nacho Bar is a quick and easy game day recipe that delivers perfectly crispy chips, melty cheese, and seasoned toppings in under 20 minutes. It’s a customizable crowd-pleaser that starts with a simple sheet pan method for maximum flavor and minimum fuss.
- Prep Time: 10 minutes
- Cook Time: 10 minutes
- Total Time: 20 minutes
- Yield: 6 servings 1x
- Category: Main Course
- Cuisine: Mexican
Ingredients
- 1 large (13-16 oz) bag sturdy restaurant-style tortilla chips (e.g., Tostitos or Juanita’s)
- 1 lb (450g) ground beef (80/20 blend)
- 1 packet (or 3 tablespoons) taco seasoning (e.g., McCormick)
- 1 can (16 oz / 450g) refried beans (e.g., Rosarita)
- 3 cups (340g) shredded cheese (mix of sharp cheddar and Monterey Jack)
- 1 can (15 oz / 425g) black beans, drained and rinsed
- 1 cup (about 250g) pico de gallo
- 1 cup (about 230g) guacamole
- 1/2 cup (120ml) sour cream
- 1/4 cup (60g) pickled or fresh jalapeños, sliced
- 1/4 cup (15g) fresh cilantro, chopped
- 1/4 cup (25g) green onions, sliced
- 1/2 cup (60g) black olives, sliced (optional)
- Hot sauce to taste (e.g., Cholula or Tapatío)
Instructions
- Preheat your oven to 400°F (200°C). Position the rack in the middle of the oven.
- Brown the ground beef: Heat a large skillet over medium-high heat. Add the ground beef and cook, breaking it up with a spatula, until browned and cooked through (about 5-7 minutes). Drain off excess fat, leaving about 1 tablespoon. Add taco seasoning and 1/4 cup (60ml) water. Stir and let simmer for 2-3 minutes until thickened. Set aside.
- Warm the refried beans: In a small saucepan over low heat, warm the refried beans, stirring occasionally. If too thick, add a splash of water or chicken broth. Alternatively, microwave in a bowl for 1-2 minutes, stirring halfway.
- Prep your toppings: Slice jalapeños, chop cilantro, slice green onions, and set out pico de gallo, guacamole, and sour cream in small bowls.
- Layer the chips: Spread half the tortilla chips in a single, even layer on a rimmed baking sheet.
- Add the first layer of toppings: Dollop spoonfuls of refried beans over the chips. Scatter the seasoned ground beef evenly across the chips. Sprinkle the drained black beans over everything.
- Add half the cheese: Sprinkle about 1 1/2 cups (170g) of the shredded cheese evenly over the chips and toppings.
- Bake for 5-7 minutes: Place the baking sheet in the preheated oven and bake just until the cheese is melted and bubbly.
- Add the remaining cheese and chips: Pull the sheet out of the oven. Sprinkle the remaining cheese over the top, then scatter the rest of the tortilla chips on top.
- Bake for another 3-5 minutes: Return the sheet to the oven and bake until the second layer of cheese is fully melted and the chips are lightly golden around the edges.
- Top and serve immediately: Pull the sheet out of the oven. Let it cool for 2 minutes. Then pile on the fresh toppings — pico de gallo, guacamole, sour cream, jalapeños, cilantro, green onions, and olives. Serve directly from the baking sheet or transfer to a large platter.
Notes
For best results, shred your own cheese (pre-shredded has anti-caking coating that affects melting). Warm refried beans before adding to keep everything hot. Let nachos rest 2-3 minutes after baking before adding cold toppings to prevent cheese from seizing. Don’t overload chips with toppings to avoid sogginess. Can brown beef and prep toppings up to a day in advance.
Nutrition
- Serving Size: 1/6 of recipe
- Calories: 600
- Sugar: 5
- Sodium: 800
- Fat: 32
- Saturated Fat: 12
- Carbohydrates: 45
- Fiber: 8
- Protein: 28
Keywords: nachos, tailgate, game day, loaded nachos, easy recipe, sheet pan nachos, ground beef nachos


