Love this? Save it for later!
Share the inspiration with your friends
It was 10:47 PM on a rainy Wednesday in October, and I had an aggressive craving for something warm, spiced, and dunkable. Not a cookie—too flat. Not a muffin—too healthy-looking. I wanted a donut, but I did not want to deal with hot oil, a deep fryer, or the lingering smell of frying that sticks to your hair for two days. I didn’t have yeast or any plans to proof dough until midnight. But I had a can of pumpkin puree in the pantry, a bag of all-purpose flour, and a donut pan I had bought on a whim three years ago and used exactly once. Honestly, I almost talked myself out of it. I mean, who makes donuts at 11 PM on a weeknight? But the rain was tapping against the window, the house was quiet, and something about that particular hour made the usual kitchen rules feel optional. So I preheated the oven, dumped the pumpkin into a bowl, and started mixing. I forgot to grease the pan properly on the first batch—classic late-night move—and had to pry six slightly stuck donuts out with a butter knife. But that second batch? Perfect. Golden, tender, with a crackly cinnamon sugar coating that made the whole kitchen smell like a fall festival. I ate two standing at the counter, still warm, and maybe you have been there—that moment when a spontaneous kitchen gamble pays off and you feel like a genius in your pajamas. That is exactly the energy of these Easy Baked Pumpkin Donuts with Cinnamon Sugar Coating. They are the kind of recipe you make because you want to, not because you have to.
Why You Will Love This Recipe
Let me tell you why this recipe has earned a permanent spot in my fall rotation. I have tested it six times over two seasons, tweaking the flour ratio, the spice blend, and the baking time until it was absolutely foolproof. These are not just another pumpkin recipe you pin and forget. These are the donuts that make people at the office potluck ask for the recipe before they have even swallowed the first bite.
- Quick & Easy: From mixing bowl to your plate in under 30 minutes. No yeast, no proofing, no deep frying. Just stir, scoop, bake, and coat.
- Simple Ingredients: You probably have everything in your kitchen right now. Canned pumpkin, flour, sugar, eggs, butter, and pantry spices. No trips to a specialty store required.
- Perfect for Fall Mornings & Cozy Gatherings: Great for Thanksgiving brunch, Halloween parties, or a quiet Sunday with a hot cup of coffee.
- Crowd-Pleaser: Kids love the cinnamon sugar coating, and adults love that they taste bakery-quality without the fuss.
- Unbelievably Delicious: The texture is the real star here. They are soft and tender on the inside with a slight crust from the butter-and-sugar coating. That contrast is pure comfort food magic.
What makes this recipe different from the dozens of other pumpkin donut recipes out there? It is the balance. Some baked donuts turn out dry or rubbery. Not these. The pumpkin puree keeps them incredibly moist, and the melted butter dip before the cinnamon sugar ensures the coating sticks properly without getting soggy. I have tried the “brush with butter” method and the “spray with cooking spray” method, and honestly, nothing beats a quick dunk in melted butter. It is a small extra step that makes a huge difference. This is not just another version. It is the version you will keep coming back to.
What Ingredients You Will Need
This recipe uses simple, wholesome ingredients that come together to create something genuinely special. Most of these are pantry staples, so you can whip up a batch whenever the mood strikes. Here is everything you need and a few notes on why each ingredient matters.
For the Pumpkin Donuts
- All-purpose flour – 1 ¾ cups (210g). Provides structure without making the donuts tough. Spoon and level your flour for the best results; scooping directly from the bag can pack in too much.
- Granulated sugar – ½ cup (100g). Adds sweetness and helps with browning. You can reduce it slightly if you prefer a less sweet donut, but do not go below ⅓ cup.
- Light brown sugar, packed – ½ cup (100g). Adds moisture and a subtle molasses depth that pairs beautifully with pumpkin.
- Baking powder – 1 ½ teaspoons. The main leavening agent. Make sure it is fresh—test it by dropping a bit in hot water; if it fizzes, it is good.
- Baking soda – ½ teaspoon. Helps neutralize the acidity of the pumpkin and adds a bit more lift.
- Pumpkin pie spice – 2 teaspoons. You can use store-bought or make your own with 1 teaspoon cinnamon, ½ teaspoon ginger, ¼ teaspoon nutmeg, ¼ teaspoon allspice, and a pinch of cloves.
- Ground cinnamon – 1 teaspoon. For extra warmth. I recommend Saigon cinnamon for a bolder flavor.
- Salt – ½ teaspoon. Balances the sweetness and enhances all the warm spices.
- Pumpkin puree – 1 cup (245g). Use 100% pure pumpkin puree, not pumpkin pie filling. Libby’s is my go-to brand for consistent texture and moisture content.
- Large eggs – 2, at room temperature. Room temperature eggs incorporate more evenly into the batter, creating a smoother texture.
- Vegetable oil – ¼ cup (60ml). Keeps the donuts tender and moist. You can substitute melted coconut oil or melted butter if you prefer.
- Milk – ¼ cup (60ml). Whole milk works best for richness, but any milk or non-dairy alternative will work. I have used oat milk successfully.
- Vanilla extract – 1 teaspoon. Pure vanilla extract makes a noticeable difference over imitation. It rounds out the spices beautifully.
For the Cinnamon Sugar Coating
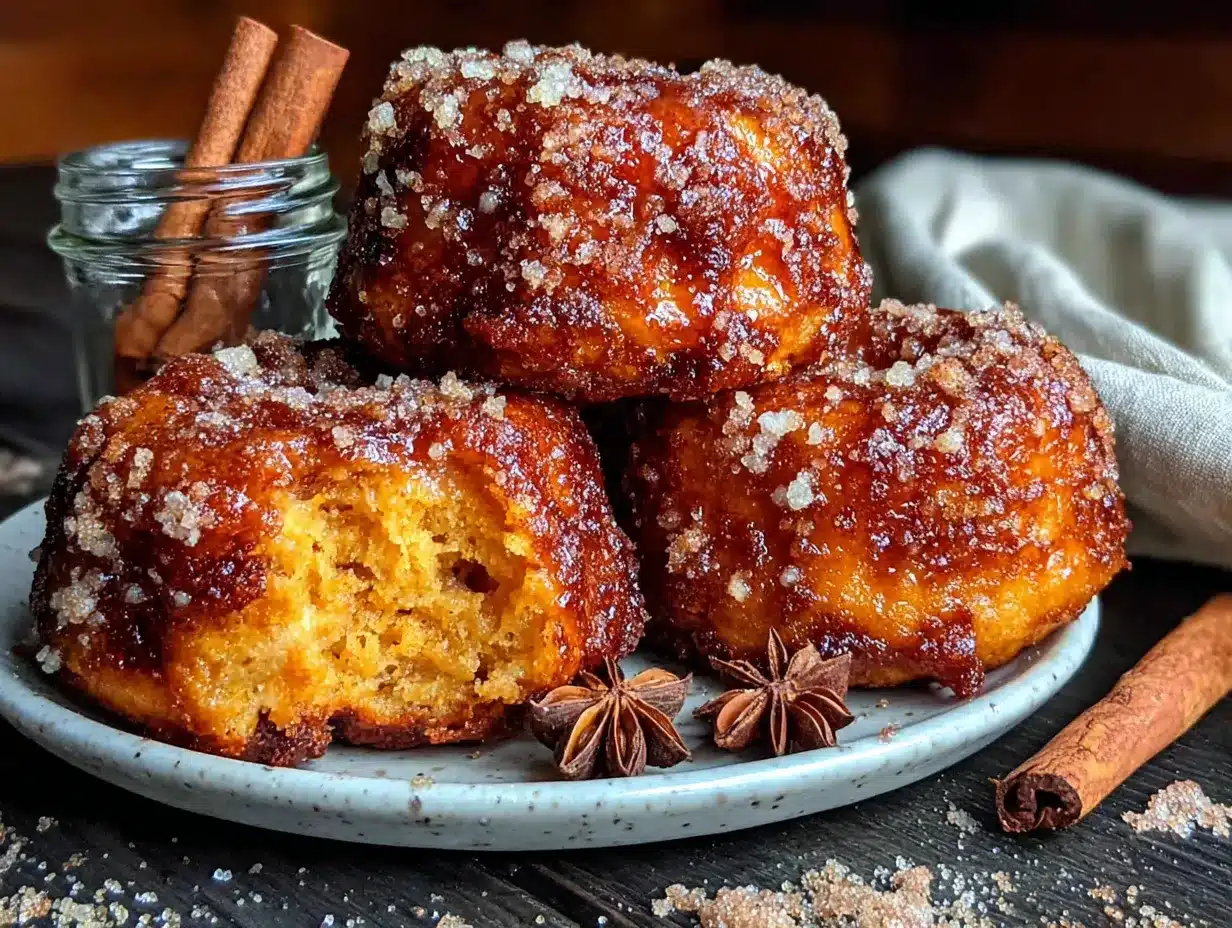
- Unsalted butter – 6 tablespoons (85g), melted. The melted butter creates a sticky surface for the cinnamon sugar to adhere to. Use salted butter if that is what you have, and just skip the pinch of salt.
- Granulated sugar – ½ cup (100g). The base of the coating.
- Ground cinnamon – 2 tablespoons. Yes, a full 2 tablespoons. This is not shy cinnamon sugar. It is the coating that makes you close your eyes after the first bite.
- Pinch of salt – Optional, but it really enhances the flavor and cuts the sweetness.
Equipment Needed
You do not need a professional bakery setup for these donuts, but having the right tools makes the process smoother and more enjoyable. Here is what you will need.
- Donut pan – The most important piece of equipment. A standard 6-cavity donut pan works perfectly. I use the Wilton non-stick pan, and it has held up well after dozens of batches. If you do not have one, you can use a mini muffin pan to make donut holes instead—just reduce the baking time to 8-10 minutes.
- Mixing bowls – You will need at least two medium bowls, one for the dry ingredients and one for the wet ingredients.
- Whisk – For combining the dry ingredients and for mixing the wet ingredients until smooth.
- Rubber spatula – For folding the wet and dry ingredients together without overmixing. Overmixing leads to tough donuts, so a gentle hand is key.
- Piping bag or zip-top bag – To pipe the batter into the donut pan. It is much cleaner and more precise than spooning the batter in. If you do not have a piping bag, just snip a corner off a large zip-top bag.
- Cooling rack – Essential for letting the donuts cool evenly. Placing them directly on a plate can trap steam and make the bottoms soggy.
- Small saucepan or microwave-safe bowl – For melting the butter for the coating.
- Shallow bowl – For the cinnamon sugar mixture. A wide, shallow bowl makes dipping easier.
- Pastry brush – Optional if you want to brush the donuts with butter instead of dipping them. I prefer dipping, but a brush works if you want a lighter coating.
I bought my first donut pan at a discount store for five dollars, and honestly, it worked just fine. You do not need to spend a lot. Just make sure it is non-stick and give it a good spray with baking spray before each use.
Preparation Method
Let me walk you through this step by step. I have included timing estimates and sensory cues so you know exactly what to look for at every stage. Trust me, if I can make these at 11 PM on a rainy night with a sleepy brain, you can absolutely nail them on your first try.
- Preheat your oven to 350°F (175°C). Spray your donut pan generously with non-stick baking spray. Do not skip this step. I learned the hard way that even “non-stick” pans need a good coating, especially with a moist batter like this one. Place the pan on a baking sheet for easier handling.
- In a medium bowl, whisk together the dry ingredients: 1 ¾ cups (210g) all-purpose flour, ½ cup (100g) granulated sugar, ½ cup (100g) packed light brown sugar, 1 ½ teaspoons baking powder, ½ teaspoon baking soda, 2 teaspoons pumpkin pie spice, 1 teaspoon ground cinnamon, and ½ teaspoon salt. Whisk until everything is evenly distributed. The mixture should smell fragrant and look uniform in color. Set it aside.
- In a separate large bowl, whisk together the wet ingredients: 1 cup (245g) pumpkin puree, 2 large eggs (room temperature), ¼ cup (60ml) vegetable oil, ¼ cup (60ml) milk, and 1 teaspoon vanilla extract. Whisk until the mixture is smooth and completely combined. It will be thick and a beautiful deep orange color. Make sure there are no streaks of egg white remaining.
- Pour the dry ingredients into the wet ingredients. Use a rubber spatula to fold them together gently. Stir just until you no longer see streaks of flour. A few small lumps are perfectly fine. Overmixing at this stage will develop gluten and make your donuts tough, so resist the urge to keep stirring. The batter will be thick, like a slightly looser muffin batter.
- Transfer the batter to a piping bag or a large zip-top bag. If using a zip-top bag, snip about ½ inch off one corner. Pipe the batter into each donut cavity, filling it about ¾ full. Do not overfill, or the donuts will lose their hole shape as they bake. If you have leftover batter, bake a second batch after the first pan cools slightly.
- Bake for 10 to 12 minutes. Start checking at the 10-minute mark. The donuts are done when they are golden brown on top and a toothpick inserted into the thickest part comes out clean or with just a few moist crumbs. The tops should spring back when lightly pressed. Do not overbake—these are thin and can dry out quickly.
- Let the donuts cool in the pan for 5 minutes. This allows them to set and makes them easier to remove. After 5 minutes, transfer them to a wire cooling rack. Let them cool for another 2 to 3 minutes. They should be warm but not hot when you coat them. If they are too hot, the butter will soak in instead of creating a sticky surface. If they are too cool, the sugar will not stick as well.
- While the donuts cool, prepare the cinnamon sugar coating. In a small saucepan or microwave-safe bowl, melt 6 tablespoons (85g) unsalted butter. In a shallow bowl, whisk together ½ cup (100g) granulated sugar, 2 tablespoons ground cinnamon, and a pinch of salt.
- One at a time, dip each warm donut into the melted butter. Flip it to coat both sides. Let the excess butter drip off for a second or two, then immediately place the donut into the cinnamon sugar mixture. Use a spoon or your fingers to coat both sides generously. Place the coated donut back on the cooling rack. Repeat with all the donuts.
- Serve immediately. These are absolutely best eaten the same day, ideally within a few hours of baking. The coating stays wonderfully crackly for about 6 to 8 hours before it starts to soften.
Cooking Tips & Techniques
I have made enough mistakes with baked donuts to fill a small notebook, so let me save you some trouble. Here are the tips I wish someone had told me before my first attempt.
Do not overmix the batter. This is the number one mistake people make with baked donuts. Mix until the flour just disappears. A few lumps are your friend. Overmixing develops gluten, and gluten makes donuts tough and rubbery instead of tender and cake-like. I speak from experience—my first batch was dense enough to use as a doorstop.
Use room temperature ingredients. Cold eggs and cold milk can cause the batter to seize up and create an uneven texture. Take your eggs and milk out of the fridge about 20 minutes before you start mixing. If you forget, place the eggs in a bowl of warm water for 5 minutes and microwave the milk for 10 to 15 seconds.
Grease the pan well. Even non-stick pans need a generous coating of baking spray. I use a spray that contains flour, like Baker’s Joy, for the best release. If you only have regular cooking spray, dust the cavities lightly with flour after spraying.
Pipe, do not spoon. I know it is tempting to just spoon the batter into the pan, but piping gives you much more control and results in more uniform donuts. It is also less messy. A zip-top bag with a snipped corner works perfectly if you do not have a piping bag.
Coat the donuts while they are warm. This is crucial. If the donuts are too hot, the butter will soak in and the sugar will not stick properly. If they are too cool, the sugar will fall right off. Aim for the “warm to the touch but not hot” window, which is usually about 2 to 3 minutes after they come out of the pan.
Double dip for extra coating. If you want a thicker, more decadent cinnamon sugar crust, dip each donut in the butter and sugar twice. It is absolutely extra, and it is absolutely worth it.
Use fresh spices. Pumpkin pie spice and cinnamon lose their potency over time. If your spices have been sitting in the cabinet for more than a year, consider replacing them. Fresh spices make a noticeable difference in flavor.
Variations & Adaptations
One of the best things about this recipe is how flexible it is. I have tried several variations over the years, and here are my favorites. Feel free to experiment and make these donuts your own.
Gluten-Free Version: Substitute the all-purpose flour with a 1:1 gluten-free baking flour blend that contains xanthan gum. I have used Bob’s Red Mill 1-to-1 Baking Flour with excellent results. The texture is slightly more delicate, so handle them gently when dipping in the butter. Everything else stays the same.
Maple Glaze Variation: Instead of the cinnamon sugar coating, make a simple maple glaze. Whisk together 1 cup (120g) powdered sugar, 2 tablespoons maple syrup, and 1 to 2 tablespoons milk until smooth. Dip the cooled donuts into the glaze and let it set on a wire rack for about 15 minutes. This version is sweeter and has a lovely fall flavor profile.
Chocolate Chip Pumpkin Donuts: Fold ½ cup (85g) mini chocolate chips into the batter before piping. The chocolate adds a nice contrast to the warm spices. Use semi-sweet or dark chocolate chips to avoid making the donuts overly sweet. Coat them in cinnamon sugar as usual, or leave them plain with a dusting of powdered sugar.
Vegan Adaptation: Replace the eggs with 2 flax eggs (2 tablespoons ground flaxseed mixed with 6 tablespoons water, let sit for 5 minutes). Use melted coconut oil instead of butter in the batter, and use a plant-based milk like oat or almond milk. For the coating, use melted vegan butter or coconut oil. The texture will be slightly denser but still delicious.
Pumpkin Spice Latte Donuts: Add 1 tablespoon instant espresso powder to the dry ingredients and replace the milk with strong brewed coffee. The coffee enhances the pumpkin spice flavors without making the donuts taste like coffee. This version is my personal favorite for a morning treat.
Serving & Storage Suggestions
These donuts are best enjoyed fresh, but I have some tips for making the most of them whether you are serving them immediately or saving some for later.
Serving Temperature: Serve these donuts at room temperature or slightly warm. If you want to reheat them, pop them in a 300°F (150°C) oven for 3 to 5 minutes. Do not microwave them, as the coating will become soggy and the texture will turn rubbery.
Presentation Ideas: Arrange the donuts on a rustic wooden board or a cake stand for a beautiful fall display. Dust them with a little extra cinnamon sugar right before serving for a fresh, bakery-style look. They pair beautifully with a hot latte, spiced apple cider, or a simple cup of black coffee.
Complementary Dishes: Serve these donuts alongside a pumpkin spice latte for the ultimate fall breakfast, or add them to a brunch spread with scrambled eggs, bacon, and fresh fruit. They also make a great dessert option after a hearty soup or chili dinner.
Storage Instructions: Store leftover donuts in an airtight container at room temperature for up to 2 days. Place a paper towel at the bottom of the container to absorb excess moisture, and another paper towel on top. Change the paper towels daily if storing for more than one day. Do not refrigerate them, as the refrigerator will dry them out and make the coating sticky.
Freezing Instructions: You can freeze uncoated donuts for up to 3 months. Let them cool completely, then place them in a single layer on a baking sheet and freeze until solid. Transfer the frozen donuts to a zip-top freezer bag. When you are ready to enjoy them, thaw them at room temperature, then warm them in a 300°F (150°C) oven for 5 minutes before dipping in melted butter and cinnamon sugar. I have done this multiple times, and the texture remains excellent.
Flavor Development: The cinnamon sugar coating is at its crackly best on the first day. By the second day, the coating will have softened slightly, but the donuts will still taste wonderful. The pumpkin flavor actually becomes more pronounced after a day, as the spices have time to meld.
Nutritional Information & Benefits
Here is the estimated nutritional information for one donut, based on a batch of 12 donuts. Please note that these values are approximate and can vary based on specific brands and ingredient substitutions.
| Nutrient | Amount Per Donut |
|---|---|
| Calories | 245 |
| Total Fat | 12g |
| Saturated Fat | 5g |
| Cholesterol | 45mg |
| Sodium | 210mg |
| Total Carbohydrates | 33g |
| Dietary Fiber | 2g |
| Sugars | 20g |
| Protein | 3g |
Health Benefits: Pumpkin puree is packed with vitamin A, which supports eye health and immune function. It is also a good source of fiber, which aids digestion and helps you feel full longer. The cinnamon in the coating has anti-inflammatory properties and can help regulate blood sugar levels. While these donuts are certainly a treat, the pumpkin adds a nutritional boost that you do not get from traditional fried donuts.
Dietary Considerations: This recipe is vegetarian. For a gluten-free version, see the variations section above. For a vegan version, see the variations section as well. These donuts contain dairy (butter and milk), eggs, and gluten, so they are not suitable for those with allergies to those ingredients unless modified.
My Personal Take: I believe in balance. I am not going to tell you these are health food, because they are not. But they are made with real ingredients, and they bring genuine joy. That counts for something. Sometimes a warm, cinnamon-sugar-coated donut on a crisp fall morning is exactly what your soul needs.
Conclusion
These Easy Baked Pumpkin Donuts with Cinnamon Sugar Coating are the kind of recipe that makes you wonder why you ever bothered with the deep fryer. They are quick, forgiving, and deeply satisfying in that cozy, spiced, fall-baking way that is impossible to fake. Whether you are making them for a holiday brunch, a rainy afternoon pick-me-up, or just because you have a can of pumpkin and a quiet evening ahead, they deliver every single time.
I love this recipe because it feels like a secret weapon. It looks impressive, tastes like you spent hours in the kitchen, and comes together in less time than it takes to watch an episode of your favorite show. Plus, the cinnamon sugar coating is so good that I have caught myself eating the leftover mixture straight from the bowl. No judgment here if you do the same.
I would love to hear how these turn out for you. Did you try one of the variations? Did you come up with your own twist? Drop a comment below and let me know. And if you share a photo on Pinterest or Instagram, tag me—I love seeing your kitchen creations. Now go preheat that oven. Your donuts are waiting.
Frequently Asked Questions
Can I make these donuts without a donut pan?
Absolutely. If you do not have a donut pan, you can use a mini muffin pan to make donut holes. Fill each cavity about ¾ full and bake for 8 to 10 minutes instead of 10 to 12. You can also use a standard muffin pan, but the baking time will increase to 15 to 18 minutes, and you will get muffin-shaped donuts instead of rings.
Can I use fresh pumpkin puree instead of canned?
Yes, you can use fresh pumpkin puree, but you need to make sure it is properly drained. Fresh pumpkin puree tends to have more water content than canned. Place the puree in a fine-mesh strainer lined with cheesecloth and let it drain for about 30 minutes. You want it to be as thick as canned puree, or the batter will be too wet and the donuts will be dense.
Why did my donuts turn out dry?
Dry donuts are usually the result of overbaking or overmixing the batter. Check your donuts at the 10-minute mark, and remove them from the oven as soon as a toothpick comes out clean. Also, make sure you are measuring your flour correctly—scooping directly from the bag can pack in too much flour. Spoon the flour into your measuring cup and level it off with a knife.
Can I reduce the sugar in this recipe?
You can reduce the granulated sugar in the batter to ⅓ cup (67g) without significantly affecting the texture. However, I do not recommend reducing the brown sugar, as it contributes to the moisture of the donuts. For the coating, you can use a lighter coating by brushing the donuts with butter and sprinkling the cinnamon sugar on top instead of dipping them.
How do I keep the cinnamon sugar coating from falling off?
The key is the warm donut and the melted butter. Make sure the donuts are warm but not hot when you dip them in the butter. If they are too hot, the butter will soak in completely and the sugar will not stick. If they are too cool, the butter will not adhere properly. Also, press the cinnamon sugar gently into the donut with your fingers to help it stick. A generous coating of butter is essential, so do not skimp on that step.
Pin This Recipe!
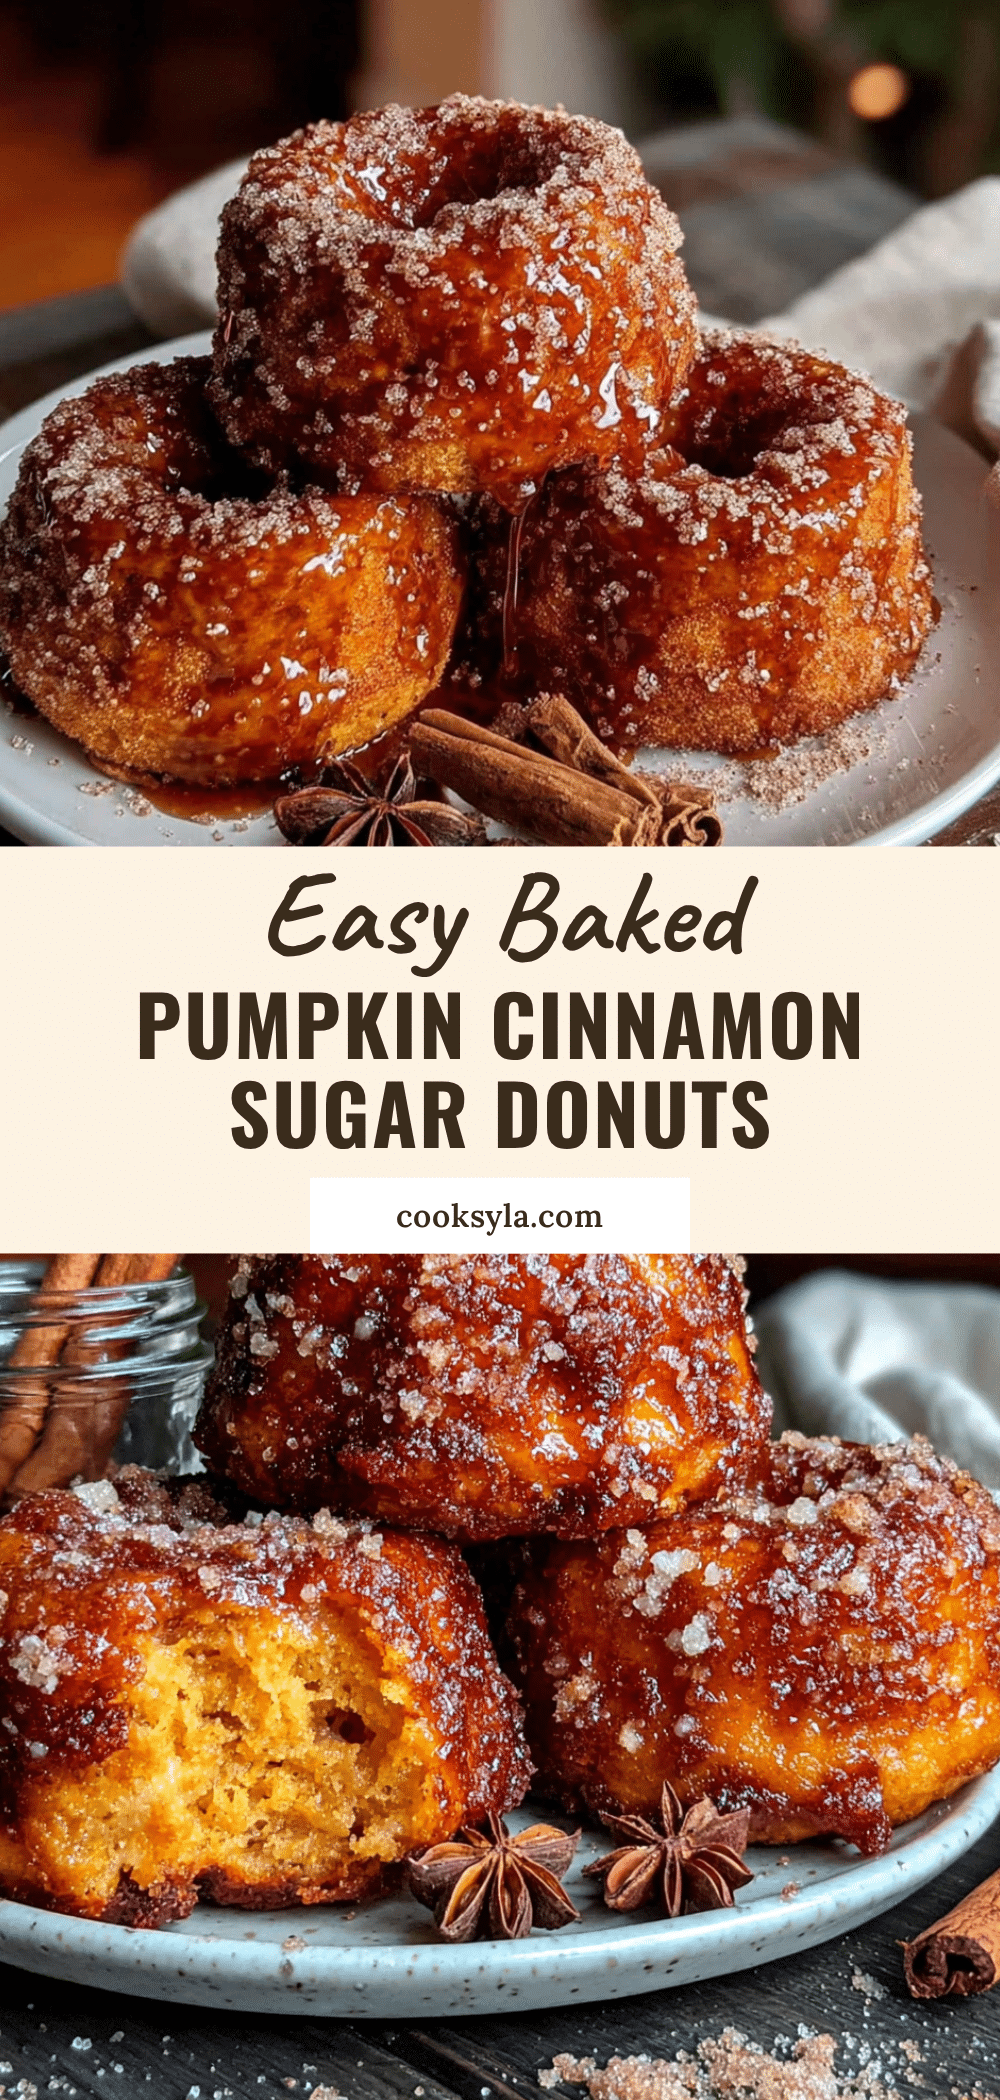
Easy Baked Pumpkin Donuts with Cinnamon Sugar
These Easy Baked Pumpkin Donuts with Cinnamon Sugar Coating are soft, tender, and coated in a crackly cinnamon sugar crust. Made with simple pantry ingredients, they come together in under 30 minutes without any yeast or deep frying—perfect for fall mornings, cozy gatherings, or a spontaneous late-night baking session.
- Prep Time: 15 minutes
- Cook Time: 12 minutes
- Total Time: 27 minutes
- Yield: 12 donuts 1x
- Category: Dessert
- Cuisine: American
Ingredients
- 1 ¾ cups (210g) all-purpose flour
- ½ cup (100g) granulated sugar
- ½ cup (100g) packed light brown sugar
- 1 ½ teaspoons baking powder
- ½ teaspoon baking soda
- 2 teaspoons pumpkin pie spice
- 1 teaspoon ground cinnamon
- ½ teaspoon salt
- 1 cup (245g) pumpkin puree
- 2 large eggs, at room temperature
- ¼ cup (60ml) vegetable oil
- ¼ cup (60ml) milk
- 1 teaspoon vanilla extract
- 6 tablespoons (85g) unsalted butter, melted (for coating)
- ½ cup (100g) granulated sugar (for coating)
- 2 tablespoons ground cinnamon (for coating)
- Pinch of salt (for coating, optional)
Instructions
- Preheat your oven to 350°F (175°C). Spray your donut pan generously with non-stick baking spray. Place the pan on a baking sheet for easier handling.
- In a medium bowl, whisk together the dry ingredients: 1 ¾ cups (210g) all-purpose flour, ½ cup (100g) granulated sugar, ½ cup (100g) packed light brown sugar, 1 ½ teaspoons baking powder, ½ teaspoon baking soda, 2 teaspoons pumpkin pie spice, 1 teaspoon ground cinnamon, and ½ teaspoon salt. Set aside.
- In a separate large bowl, whisk together the wet ingredients: 1 cup (245g) pumpkin puree, 2 large eggs (room temperature), ¼ cup (60ml) vegetable oil, ¼ cup (60ml) milk, and 1 teaspoon vanilla extract. Whisk until smooth and completely combined.
- Pour the dry ingredients into the wet ingredients. Use a rubber spatula to fold them together gently. Stir just until you no longer see streaks of flour. A few small lumps are fine. Do not overmix.
- Transfer the batter to a piping bag or a large zip-top bag. If using a zip-top bag, snip about ½ inch off one corner. Pipe the batter into each donut cavity, filling it about ¾ full.
- Bake for 10 to 12 minutes. Start checking at the 10-minute mark. The donuts are done when they are golden brown on top and a toothpick inserted into the thickest part comes out clean or with just a few moist crumbs.
- Let the donuts cool in the pan for 5 minutes. After 5 minutes, transfer them to a wire cooling rack. Let them cool for another 2 to 3 minutes. They should be warm but not hot when you coat them.
- While the donuts cool, prepare the cinnamon sugar coating. In a small saucepan or microwave-safe bowl, melt 6 tablespoons (85g) unsalted butter. In a shallow bowl, whisk together ½ cup (100g) granulated sugar, 2 tablespoons ground cinnamon, and a pinch of salt.
- One at a time, dip each warm donut into the melted butter. Flip it to coat both sides. Let the excess butter drip off, then immediately place the donut into the cinnamon sugar mixture. Use a spoon or your fingers to coat both sides generously. Place the coated donut back on the cooling rack. Repeat with all the donuts.
- Serve immediately. These are best eaten the same day, ideally within a few hours of baking.
Notes
Do not overmix the batter—a few lumps are fine. Use room temperature ingredients for best texture. Grease the pan well even if it’s non-stick. Pipe the batter for more uniform donuts. Coat the donuts while they are warm (not hot) for the best cinnamon sugar adherence. For a thicker coating, double dip in butter and cinnamon sugar. Use fresh spices for the best flavor. Store leftovers in an airtight container at room temperature for up to 2 days. Freeze uncoated donuts for up to 3 months.
Nutrition
- Serving Size: 1 donut
- Calories: 245
- Sugar: 20
- Sodium: 210
- Fat: 12
- Saturated Fat: 5
- Carbohydrates: 33
- Fiber: 2
- Protein: 3
Keywords: baked pumpkin donuts, cinnamon sugar donuts, easy donut recipe, fall baking, pumpkin spice donuts, baked donuts, no yeast donuts


