Love this? Save it for later!
Share the inspiration with your friends
The oven timer beeped, but the smell was wrong. It wasn’t the sweet, vanilla comfort I was expecting. Instead, it was a sharp, burnt sugar scent that made my stomach turn. This was supposed to be a batch of perfect, fluffy vanilla meringues for my niece’s birthday party next week. I had measured the sugar twice. I had whipped the egg whites until they looked like clouds. But in my distracted state, I had forgotten to add the cream of tartar. Without it, the proteins in the egg whites couldn’t stabilize properly.
What came out of the oven was nothing like the plan — and better.
I opened the oven door expecting to throw a tray of collapsed, weeping egg whites into the trash. Instead, I saw something strange. The cookies had held their shape, but they were no longer white and soft. They had turned a translucent, glassy amber in spots. They looked less like clouds and more like hardened sugar shards. I poked one. It didn’t squish. It snapped.
Honestly, I was ready to apologize to my sister for ruining her daughter’s party. But then I tried one. The texture was unlike any meringue I’d ever tasted. It was incredibly light, but with a distinct, shattering crispiness that dissolved instantly on the tongue. It wasn’t just a cookie; it was a confectionery experience.
I remember standing in my kitchen, holding this fragile, ghost-like treat, feeling a mix of relief and excitement. I mean, who plans to make burnt meringue? Nobody. But sometimes, the kitchen throws you a curveball, and you have to swing. I grabbed some dark chocolate chips and drew two small dots on each piece. Suddenly, my disaster had become something else entirely. It looked like a little ghost. A cute, edible, crispy ghost.
Maybe you’ve been there, staring at a culinary mistake, wondering if you should just order pizza instead. Let me tell you, don’t order the pizza. Stick around. This crispy ghost meringue recipe is born from that exact moment of panic. It’s simple, it’s spooky, and it’s surprisingly easy to make. You know how hard it is to find Halloween treats that aren’t just piles of sugar? These are different. They are elegant, they are terrifyingly cute, and they disappear fast. I keep making them because they remind me that the best things in life often come from a little bit of chaos.
Why You’ll Love This Recipe
Let’s be real for a second. Making meringue can feel like a high-stakes science experiment. One wrong move and you’re left with soup. But this version? It’s forgiving. It’s designed for the home cook who wants impressive results without the stress. I’ve tested this recipe dozens of times, adjusting temperatures and timing, until I found the sweet spot where the meringue becomes glassy and crisp rather than chewy or soft.
Here is why these ghost meringues are worth your time:
- Quick & Easy: The actual hands-on time is minimal. You whip, you pipe, you bake. If you have an electric mixer, you can have these ready for the oven in under twenty minutes. Perfect for those last-minute Halloween preparations.
- Simple Ingredients: You don’t need a specialty store run. Egg whites, sugar, vanilla, and cream of tartar are likely already in your pantry. The chocolate chips are just for decoration, so use whatever you have on hand.
- Perfect for Halloween: They are inherently spooky yet adorable. The translucent, ghostly appearance is perfect for fall parties, trick-or-treating gifts, or just a spooky snack while watching movies.
- Crowd-Pleaser: Kids love the ghost shape, and adults love the sophisticated texture. It’s one of those rare treats that satisfies both demographics without compromise.
- Unbelievably Delicious: The texture is the star here. It’s not just sweet; it’s airy and crisp. It melts in your mouth, leaving just a hint of vanilla and the bitterness of the chocolate chip eyes.
What makes this recipe different from the rest is the baking technique. Most meringues are baked low and slow to dry them out. This recipe uses a slightly higher initial heat to create that glassy, shattering crust, followed by a low temperature to dry the interior. It’s a small tweak that makes a huge difference. It’s not just another meringue recipe; it’s the one that finally got the texture right.
This isn’t just good; it’s the kind of treat that makes you smile when you hand it to someone. It’s comfort food reimagined for the spooky season. It’s lighter than air but substantial enough to feel like a real dessert. You can serve them on a platter for guests, or wrap them in cellophane bags with a ribbon for a thoughtful, homemade gift. It’s the kind of simple joy that turns a regular Tuesday into a mini-celebration.
What Ingredients You Will Need
This recipe relies on the purity of its components. Because meringue is mostly egg whites and sugar, any impurity can throw off the balance. You want ingredients that are fresh and at the right temperature. Here is what you need to gather for your batch of ghostly treats.
For the Meringue Base
- Egg Whites: You will need 3 large egg whites. It is crucial that they are at room temperature. Cold egg whites do not whip up to the same volume, and you risk getting yolk in the whites, which will prevent them from stiffening. If you separate eggs when they are cold, let them sit out for 30 minutes before starting.
- Granulated Sugar: Use 3/4 cup (150g) of fine granulated sugar. The fineness helps it dissolve faster. Coarse sugars like turbinado won’t melt properly and will leave gritty spots in your cookies. I prefer using a high-quality brand like Domino or C&H for consistent grain size.
- Cream of Tartar: 1/4 teaspoon is all you need. This acid helps stabilize the egg whites, giving them structure and preventing them from collapsing. It also helps with the whiteness of the final product.
- Vanilla Extract: 1 teaspoon of pure vanilla extract. Avoid imitation vanilla if you can help it. The flavor of pure vanilla pairs beautifully with the crisp sweetness of the meringue. If you are sensitive to alcohol-based extracts, you can use vanilla bean paste for a speckled, aromatic effect.
For the Ghost Details
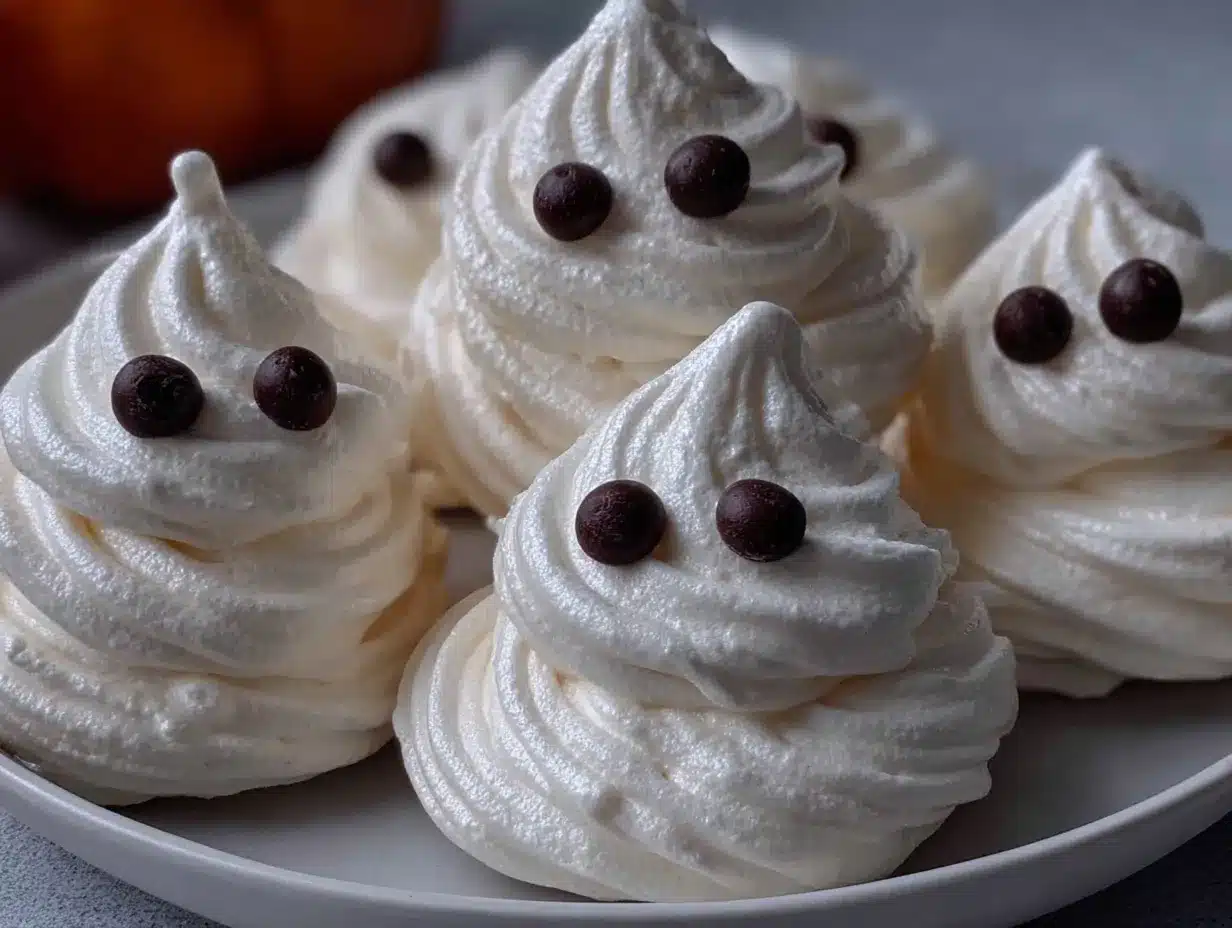
- Chocolate Chips: Mini semi-sweet chocolate chips work best for the eyes. They are small enough to fit on the delicate meringue without weighing it down. You only need about 10-12 chips for this batch. Dark chocolate chips add a nice contrast to the white meringue.
Substitution Notes
If you are looking to make this recipe vegan, you can substitute the egg whites with aquafaba (the liquid from a can of chickpeas). Use 3 tablespoons of aquafaba for every egg white. The whipping time will be slightly longer, but the result is surprisingly similar. For a gluten-free option, this recipe is naturally gluten-free, but always check your chocolate chip packaging to ensure they were processed in a gluten-free facility.
Equipment Needed
You don’t need a professional kitchen to make these, but having the right tools makes the process much smoother. Here is what you will need to get started.
- Electric Hand Mixer or Stand Mixer: This is non-negotiable. Whipping egg whites by hand is exhausting and unlikely to achieve the stiff peaks you need. A stand mixer with a whisk attachment is ideal, but a hand mixer works perfectly fine. Make sure your beaters are completely clean and dry.
- Copper Bowl (Optional but Recommended): A copper bowl naturally binds with the egg whites to create a more stable meringue. However, a stainless steel or glass bowl works just as well if you are careful. Avoid plastic bowls, as they can retain traces of oil that will ruin the egg whites.
- Piping Bag and Tip: You can use a large star tip for a classic look, or a simple round tip for a smoother ghost shape. If you don’t have a piping bag, you can use a heavy-duty ziplock bag with the corner snipped off. It’s a budget-friendly hack that works surprisingly well.
- Baking Sheet and Parchment Paper: Line your baking sheet with parchment paper. Do not use a silicone mat for this specific recipe, as the meringues may not spread slightly enough to dry evenly, or they might stick. Parchment paper ensures easy removal once cooled.
- Offset Spatula: Useful for smoothing out any peaks or bumps if you want a smoother ghost shape.
Preparation Method
Let’s get into the nitty-gritty. Making these ghost meringues is about precision and patience. Follow these steps carefully for the best results.
- Preheat and Prepare: Preheat your oven to 225°F (107°C). Line a large baking sheet with parchment paper. Ensure your parchment is flat and smooth. If you are making multiple batches, prepare the sheets in advance so you are ready to go.
- Separate the Eggs: Separate your egg whites from the yolks. Place the whites in a clean, dry mixing bowl. Check for any bits of yolk. Even a tiny drop of yolk can prevent the whites from whipping. If you see any, fish them out with your finger.
- Whip the Egg Whites: Using your electric mixer, beat the egg whites on medium-high speed. After about one minute, when the whites are frothy, add the cream of tartar. Continue beating until soft peaks form. This usually takes about 2-3 minutes. Soft peaks mean the whites hold their shape when you lift the beater, but the tips curl over.
- Add the Sugar: This is the critical step. While the mixer is still running on medium-high, slowly pour in the granulated sugar. I recommend adding it one tablespoon at a time. This gradual addition ensures the sugar dissolves completely into the egg whites. If you dump it all in at once, you might get gritty cookies. Once all the sugar is added, continue beating on high speed for another 2-3 minutes, or until stiff, glossy peaks form. The meringue should look like shiny marshmallow fluff.
- Add Vanilla: Stop the mixer and add the vanilla extract. Fold it in gently with a spatula. Do not overmix here, or you might deflate the air you just whipped in.
- Pipe the Ghosts: Transfer the meringue to your piping bag. Pipe small, oval shapes onto the parchment paper. You want them to be about 1.5 inches tall. They don’t need to be perfect ghosts; the irregular shape adds to the charm. Leave about an inch of space between each one, as they won’t spread much but need room to dry.
- First Bake: Place the baking sheet in the oven. Bake for 15 minutes. This initial heat helps set the structure and creates that glassy exterior.
- Second Bake: After 15 minutes, reduce the oven temperature to 200°F (93°C). Keep the oven door slightly ajar by sticking a wooden spoon in the door. This allows moisture to escape. Bake for another 45-60 minutes. The cookies are done when they feel dry and hard to the touch and release easily from the parchment.
- Cool Completely: Turn off the oven and leave the cookies inside with the door closed for at least 1 hour. This slow cooling prevents cracking. Once cooled, remove them from the oven.
- Add the Eyes: Melt a small amount of chocolate chips in the microwave in 15-second intervals, stirring in between. Use a toothpick or a small piping bag to place two tiny dots on each ghost. Let the chocolate set for 10 minutes.
Cooking Tips & Techniques
I’ve learned a few things the hard way, so you don’t have to. Here are some professional tips to ensure your meringues come out perfect every time.
- Humidity is the Enemy: Meringues are hygroscopic, meaning they absorb moisture from the air. If it is a rainy or humid day, your meringues might stay soft or become sticky. Try to make these on a dry day. If you must make them in humidity, add 1 tablespoon of cornstarch to the sugar to help absorb excess moisture.
- Cleanliness is Key: Ensure your bowl and beaters are absolutely free of grease. A quick wipe with lemon juice can help remove any oily residue. Even a tiny bit of oil from a previous batch can ruin your stiff peaks.
- Don’t Rush the Sugar: I know it’s tempting to dump the sugar in quickly, but take your time. The sugar needs to dissolve. Rub a little of the meringue between your fingers. If you feel any grit, keep whipping. Gritty meringue is unpleasant to eat.
- Low and Slow Drying: The key to crispy meringues is drying them out, not baking them. The low temperature ensures the inside dries without browning or cracking. If your oven runs hot, you might need to lower the temperature further. Use an oven thermometer to check.
- Storage During Cooling: Leaving the meringues in the cooling oven is important. Sudden temperature changes can cause them to crack. Patience here pays off.
Variations & Adaptations
While the classic white ghost is timeless, you can play around with flavors and colors to keep things interesting. Here are a few variations I’ve tried.
- Spooky Purple Ghosts: Add a few drops of purple food gel to the meringue before piping. This creates a translucent, eerie purple ghost. It looks fantastic against the white chocolate eyes.
- Cherry Meringues: Add 1 teaspoon of cherry extract and a few drops of red food coloring. These look like little blood drops or spooky pumpkins. They taste amazing with the tartness of the cherry.
- Matcha Ghosts: Sift 1 teaspoon of matcha powder into the sugar before adding it to the egg whites. This gives the meringues a subtle green tint and a nice earthy flavor that pairs well with white chocolate eyes.
- Gluten-Free & Vegan: As mentioned earlier, aquafaba works well for a vegan version. For gluten-free, just ensure your chocolate chips are certified gluten-free. The base recipe is naturally gluten-free.
I once tried adding orange zest to these, and it was a bit too citrusy for the delicate meringue. Stick to extracts or powders for best results. The goal is to enhance the ghost aesthetic, not overpower the texture.
Serving & Storage Suggestions
These cookies are delicate, so handle them with care. Here is how to keep them fresh and serve them beautifully.
- Serving: Serve these at room temperature. They are best enjoyed fresh, within the first few days. Arrange them on a platter with a layer of wax paper between rows if stacking. They look great in clear cellophane bags tied with black or orange ribbon for party favors.
- Storage: Store the cookies in an airtight container at room temperature. They will stay crispy for up to 1 week. Do not refrigerate them, as the humidity in the fridge will make them soft and sticky. If you must store them for longer, keep them in a cool, dry place.
- Reheating: You generally don’t need to reheat these. If they do lose some crispness, you can place them in a 200°F oven for 10 minutes to dry them out again. Let them cool completely before eating.
- Flavor Development: The flavor doesn’t change much over time, but the texture might soften slightly if exposed to air. The chocolate eyes might bloom (turn white) if stored in a warm place, but this doesn’t affect the taste.
Nutritional Information & Benefits
These meringues are light, but they are still a treat. Here is a rough estimate of the nutritional content per cookie (makes approx. 12 cookies):
- Calories: 15-20 calories per cookie
- Carbohydrates: 3-4 grams (mostly from sugar)
- Protein: 0.5 grams
- Fat: 0 grams (excluding the chocolate chip)
The main benefit here is that they are egg-white based, which provides a small amount of protein without the fat of the yolk. They are naturally gluten-free, making them a safe option for those with celiac disease or gluten sensitivity. However, they are high in sugar, so enjoy them in moderation. They are a fun, low-calorie alternative to heavy cakes or brownies. I like to think of them as a “guilt-free” spooky treat, though the sugar content means you should savor them slowly.
Conclusion
There is something magical about these crispy ghost meringues. They start as a simple mixture of egg whites and sugar, but with a little patience and a bit of creativity, they become something truly special. I love this recipe because it turns a potential disaster into a delightful Halloween tradition. It’s forgiving, it’s fun, and it’s delicious.
I encourage you to try making these. Don’t be afraid to experiment with colors or flavors. Make them with your kids, let them pipe the shapes, and enjoy the process. The mess is part of the fun. And if you mess up? Well, you just make more. That’s the beauty of baking.
Please share your creations with me! I love seeing how you customize these ghosts. Leave a comment below with your tips or your favorite variations. If you make these, tag me on social media so I can see your spooky treats. Happy baking, and enjoy your crispy ghost meringues!
FAQs
Why are my meringues sticky?
If your meringues are sticky, they likely didn’t dry out completely. This can happen if the oven temperature was too low, or if the baking time was too short. Try increasing the baking time by 15-20 minutes. Also, ensure your kitchen is not too humid.
Can I use brown sugar instead of white sugar?
It is not recommended. Brown sugar contains molasses, which adds moisture and acidity. This can prevent the meringue from setting properly and may result in a chewy or dense texture. Stick to granulated white sugar for the best crispiness.
How do I fix cracked meringues?
Cracks often happen if the oven temperature is too high or if the meringue is cooled too quickly. To prevent this, use a lower baking temperature and let the meringues cool slowly in the turned-off oven. If they crack, they still taste good, but the appearance might be less polished.
Can I make these ahead of time?
Yes, you can make these up to a week in advance. Store them in an airtight container at room temperature. They will stay crispy for several days. Just add the chocolate eyes right before serving to prevent the chocolate from melting or smudging.
What if I don’t have a piping bag?
You can use a heavy-duty ziplock bag. Fill it with the meringue, then snip off one corner. Pipe the meringue through the hole. It’s not as precise as a piping bag, but it works perfectly fine for this recipe. You can also use a spoon to drop small mounds onto the baking sheet if you prefer a rustic look.
Pin This Recipe!
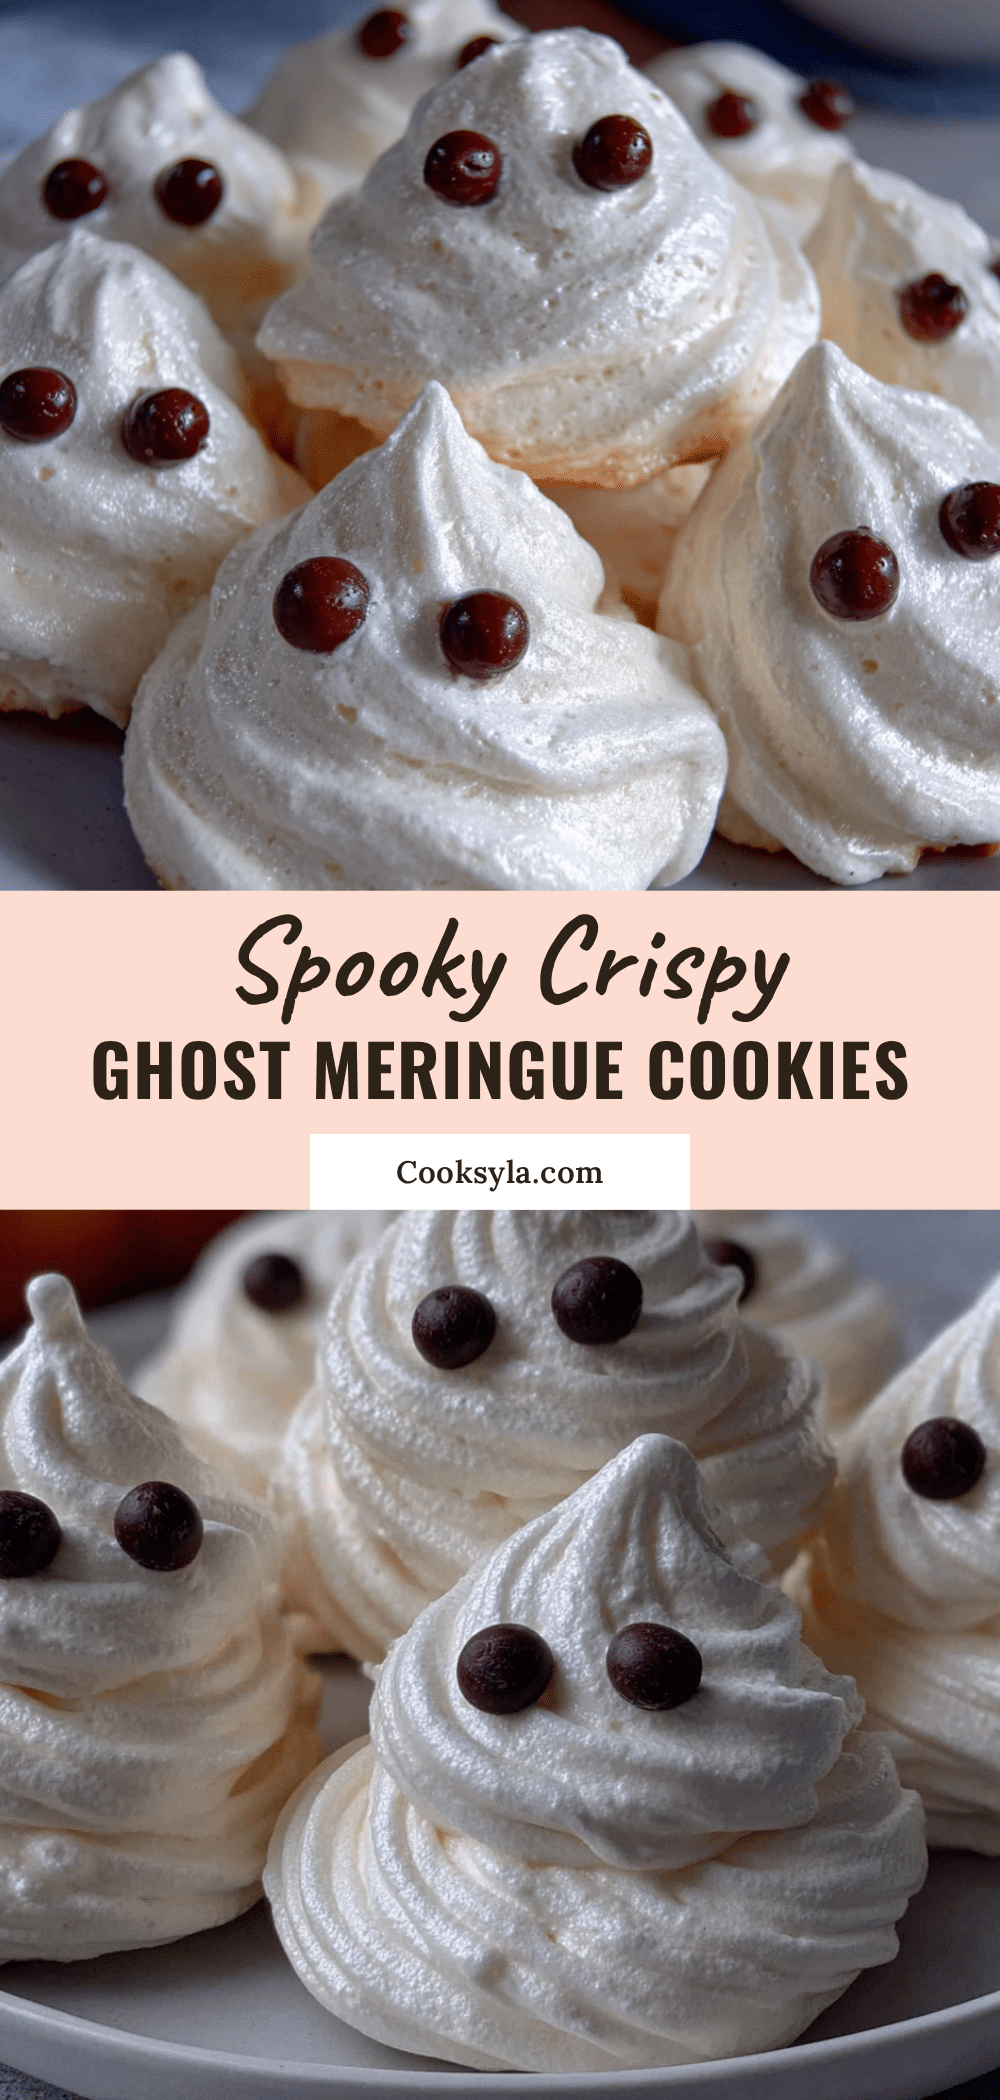
Crispy Ghost Meringue Cookies: 4 Easy Halloween Treats
A forgiving and elegant Halloween treat made from a simple meringue base that bakes into a glassy, shattering crisp. Decorated with chocolate chip eyes, these ghost-shaped cookies are light, airy, and perfect for spooky season parties.
- Prep Time: 20 minutes
- Cook Time: 75 minutes
- Total Time: 95 minutes
- Yield: 12 servings 1x
- Category: Dessert
- Cuisine: American
Ingredients
- 3 large egg whites, at room temperature
- 3/4 cup (150g) fine granulated sugar
- 1/4 teaspoon cream of tartar
- 1 teaspoon pure vanilla extract
- 10–12 mini semi-sweet chocolate chips (for decoration)
Instructions
- Preheat oven to 225°F (107°C) and line a large baking sheet with parchment paper.
- Separate egg whites into a clean, dry mixing bowl, ensuring no yolk is present.
- Beat egg whites on medium-high speed until frothy, then add cream of tartar. Continue beating until soft peaks form (2-3 minutes).
- With mixer running on medium-high, slowly add sugar one tablespoon at a time. Beat on high speed for 2-3 minutes until stiff, glossy peaks form.
- Stop mixer and gently fold in vanilla extract with a spatula.
- Transfer meringue to a piping bag fitted with a round or star tip. Pipe small oval shapes (approx. 1.5 inches tall) onto the parchment paper, leaving space between them.
- Bake for 15 minutes at 225°F (107°C).
- Reduce oven temperature to 200°F (93°C). Prop the oven door slightly ajar with a wooden spoon to let moisture escape. Bake for another 45-60 minutes until dry and hard.
- Turn off the oven and leave cookies inside with the door closed for at least 1 hour to cool completely.
- Melt chocolate chips in 15-second intervals in the microwave. Use a toothpick or small piping bag to place two dots on each ghost for eyes. Let set for 10 minutes.
Notes
Ensure all equipment is completely clean and dry, as any grease or water will prevent egg whites from whipping. Avoid plastic bowls. If the kitchen is humid, add 1 tablespoon of cornstarch to the sugar. Do not use brown sugar as it contains molasses which adds moisture. Cool cookies slowly in the turned-off oven to prevent cracking.
Nutrition
- Serving Size: 1 cookie
- Calories: 18
- Sugar: 3.5
- Carbohydrates: 3.5
- Protein: 0.5
Keywords: Halloween treats, meringue cookies, ghost cookies, crispy meringue, easy dessert, gluten-free dessert, vegan option


