Love this? Save it for later!
Share the inspiration with your friends
I wasn’t expecting cooking advice from the plumber, but there I was, standing in my kitchen with a wrench in one hand and a half-eaten bowl of buffalo chicken dip in the other. He had come to fix a leak under the sink, and somehow, between explaining pipe fittings and wiping his hands on a rag, he started talking about dinner. “You know what I do with that dip?” he said, nodding at the bowl. “I stuff it into bell peppers and bake it. Game changer.” I laughed at first—honestly, who takes food advice from a plumber? But something about the way he said it stuck with me. He wasn’t trying to impress anyone. He just loved good food, and he figured out a way to make it even better.
That conversation happened on a Tuesday, and by Thursday, I had a tray of buffalo chicken dip stuffed peppers cooling on my counter. Let me tell you, the first bite was one of those moments where you just stop and stare at the food in your hands. The creamy, spicy filling, the tender pepper holding it all together—it was comfort food in a completely new form. I mean, buffalo chicken dip is already a classic, but stuffing it into peppers? That turns it into a meal. A real, honest-to-goodness dinner that feels like a warm hug on a cold night.
I’ve made these peppers at least a dozen times since that plumber shared his secret, and they never get old. They’re perfect for those evenings when you need something cozy but don’t want to spend hours in the kitchen. Maybe you’ve been there—standing in front of the fridge, tired from the day, craving something indulgent but also kind of wholesome? That’s exactly when these peppers come to the rescue. They’re quick, they’re satisfying, and they have that buffalo chicken magic we all love, just wrapped up in a neat little pepper package. Honestly, I don’t think I’ll ever go back to serving buffalo chicken dip in a bowl again.
Why You’ll Love This Recipe
This recipe isn’t just another version of buffalo chicken dip—it’s the version that turns a party appetizer into a proper meal. I’ve tested it more times than I can count, tweaking the ratios, trying different peppers, and even sneaking it past my picky-eating friends. Trust me, this one works.
- Quick & Easy: From fridge to table in under 30 minutes. Seriously, you can have dinner on the table faster than delivery.
- Simple Ingredients: No fancy grocery trips needed. You probably already have cream cheese, hot sauce, and chicken in your kitchen right now.
- Perfect for Cozy Nights: Whether it’s a rainy Tuesday or a snowy Sunday, these peppers hit that comfort food spot every time.
- Crowd-Pleaser: I’ve served these to kids, adults, and even my aunt who “doesn’t like spicy food.” She asked for the recipe.
- Unbelievably Delicious: The combination of creamy, spicy filling with sweet roasted peppers is next-level comfort food. You’ll close your eyes after the first bite.
What makes this recipe different from all the other buffalo chicken dips out there? It’s the texture, honestly. The pepper gives you this tender, slightly sweet vessel that balances the heat and creaminess perfectly. Plus, it’s portion-controlled—no more standing over a bowl with a chip. Each pepper is its own little serving, which makes it feel special without being fussy.
This recipe is comfort food reimagined—healthier, faster, but with the same soul-soothing satisfaction. Perfect for impressing guests without stress, or turning a simple weeknight into something memorable. You know that feeling when you take a bite and everything just feels right? That’s what these peppers deliver.
What Ingredients You Will Need
This recipe uses simple, wholesome ingredients that come together to create bold, satisfying flavor without any fuss. Most of these are pantry staples, which makes this dish perfect for last-minute cravings.
- 4 large bell peppers (any color works, but red or orange add sweetness that balances the heat)
- 2 cups cooked chicken, shredded or diced (rotisserie chicken is my go-to for convenience)
- 8 ounces cream cheese, softened (full-fat gives the creamiest texture, but reduced-fat works too)
- ½ cup buffalo hot sauce (I prefer Frank’s RedHot for that classic flavor)
- ½ cup ranch dressing (or blue cheese dressing if you’re feeling bold)
- 1 cup shredded cheddar cheese, divided (sharp cheddar adds more punch)
- ½ cup crumbled blue cheese (optional, but highly recommended for authenticity)
- ¼ cup chopped green onions, plus more for garnish
- ½ teaspoon garlic powder
- ½ teaspoon onion powder
- Salt and black pepper to taste
- 1 tablespoon butter, melted (for brushing the peppers)
Let me talk about a few of these ingredients because they really make a difference. The cream cheese needs to be softened—don’t skip this step. Cold cream cheese will leave you with lumpy filling, and nobody wants that. I usually take it out of the fridge about 30 minutes before I start cooking. For the chicken, rotisserie chicken is a lifesaver. I pick one up from the grocery store, shred it while it’s still warm, and it’s ready to go. If you have leftover grilled chicken, that works beautifully too.
The hot sauce is where the magic happens. Frank’s RedHot is the gold standard for buffalo flavor, but use whatever you love. Just remember, not all hot sauces are created equal—some are vinegary, some are sweet, some are nuclear. Stick with a classic buffalo-style sauce for the best results. And the ranch dressing? I know some people are team blue cheese all the way, and that’s fine. I actually keep both on hand because I never know which mood I’ll be in. Both work great here.
For the bell peppers, pick ones that are firm and have flat bottoms so they stand up nicely in the baking dish. If they’re a little wobbly, just slice a tiny bit off the bottom to level them out. Oh, and don’t throw away the tops! You can chop them up and add them to the filling for extra crunch, or save them for salads later.
Equipment Needed
You don’t need a fancy kitchen to make these stuffed peppers. Here’s what I use every time:
- Baking dish (an 8×8 or 9×9 inch dish works perfectly; a 9×13 is fine too if you’re making a double batch)
- Mixing bowl (medium-sized, for combining the filling)
- Sharp knife (for cutting the peppers—dull knives are dangerous and frustrating)
- Cutting board
- Small skillet or saucepan (if you’re making your own shredded chicken)
- Aluminum foil (for covering the dish while baking)
- Measuring cups and spoons
- Rubber spatula (for mixing and stuffing)
If you don’t have a baking dish that fits the peppers snugly, you can use a cast iron skillet. I’ve done it before, and it works great—just make sure the peppers are standing upright. You can even use a muffin tin if you’re making smaller peppers or want individual portions. That’s actually a fun trick for parties!
One thing I learned the hard way: use a dish that’s just big enough to hold the peppers without them tipping over. If they’re too loose, they’ll fall sideways and all the filling will spill out. Trust me, cleaning melted cheese off the bottom of the oven is not how you want to spend your evening.
Preparation Method
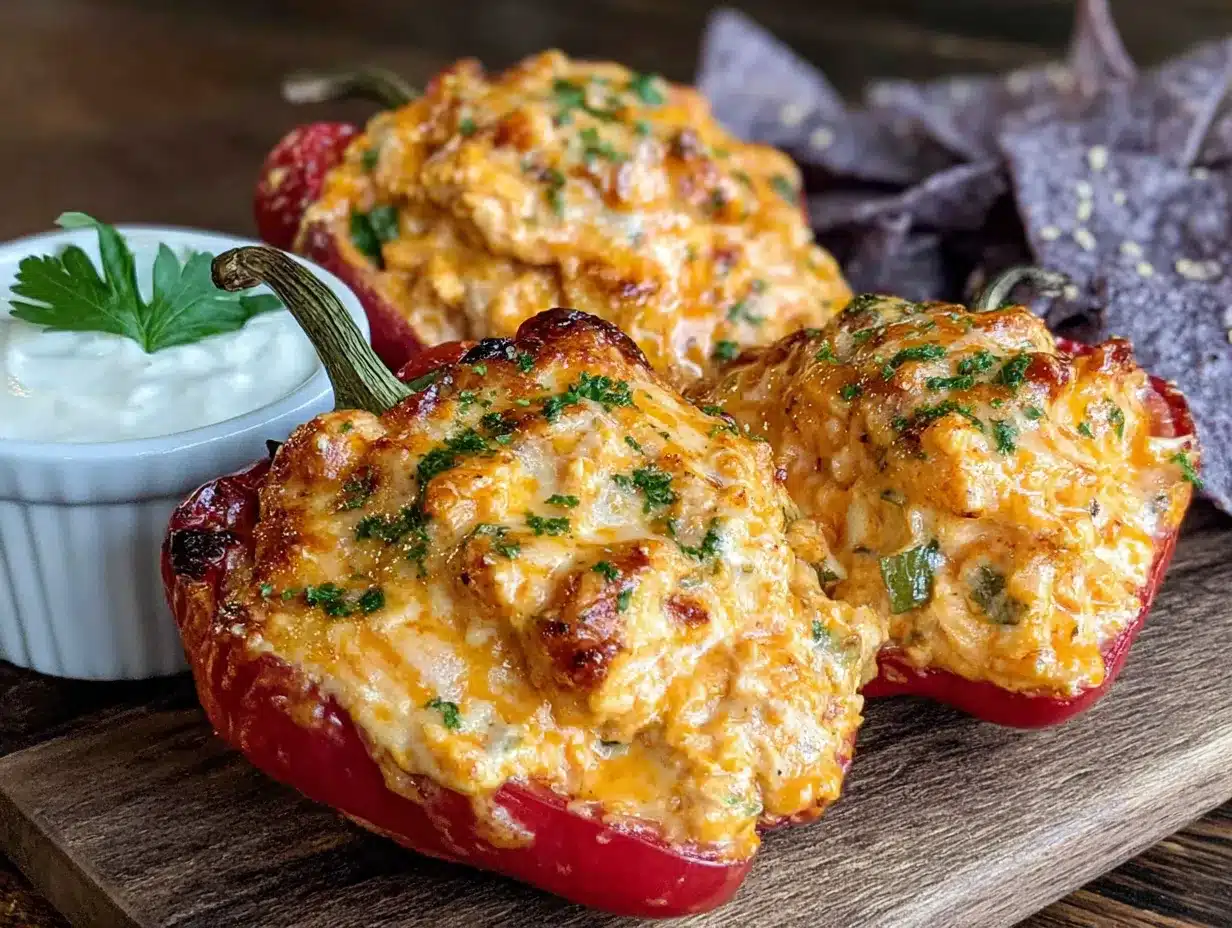
- Preheat your oven to 375°F (190°C). While it’s heating up, prepare your peppers. Slice each bell pepper in half lengthwise through the stem, then remove the seeds and membranes. If the peppers won’t stand flat, trim a tiny slice off the bottom—just enough so they sit steady. Place the pepper halves in your baking dish, cut side up.
- Brush the peppers with melted butter. This step is easy to skip, but don’t. The butter helps the peppers soften and adds a subtle richness that complements the filling. Use a pastry brush or just drizzle it on and rub it around with your fingers. Season the insides with a pinch of salt and pepper.
- Make the filling. In a medium mixing bowl, combine the softened cream cheese, buffalo hot sauce, ranch dressing, garlic powder, and onion powder. Mix until smooth and creamy. I use a rubber spatula for this—it’s easier to scrape the sides and get everything evenly combined. Fold in the shredded chicken, half the shredded cheddar cheese, the crumbled blue cheese (if using), and the chopped green onions. Stir until everything is well coated. Taste the filling and adjust the seasoning if needed. Remember, the peppers will mellow the heat a bit, so don’t be afraid of a little kick.
- Stuff the peppers. Divide the filling evenly among the pepper halves. Don’t be shy—pile it up high. The filling will settle as it bakes, so a generous mound is perfect. Sprinkle the remaining shredded cheddar cheese on top of each pepper.
- Bake covered. Cover the baking dish with aluminum foil and bake for 15 minutes. This steams the peppers so they become tender without drying out. After 15 minutes, remove the foil and bake for another 10-15 minutes, until the cheese is bubbly and lightly golden on top. The peppers should be fork-tender but still hold their shape.
- Let them rest. Take the dish out of the oven and let the peppers sit for about 5 minutes. This is important—the filling needs a moment to set so it doesn’t slide right out when you pick up a pepper. Garnish with extra green onions and a drizzle of ranch or blue cheese dressing if you like.
A few notes from my kitchen to yours: if your peppers are particularly large, they might need an extra 5 minutes of covered baking. Check them by poking with a fork—you want some resistance but not crunch. Also, if you’re using a glass baking dish, reduce the oven temperature by 25°F (about 15°C) to prevent the glass from cracking. I learned that one the hard way, and let me tell you, broken glass and buffalo chicken dip is a tragedy.
One more thing—don’t overmix the filling. You want it creamy and cohesive, but if you stir too much, the chicken can get mushy. Just fold everything together until it’s combined, and you’re good to go.
Cooking Tips & Techniques
I’ve made these peppers enough times to have a few tricks up my sleeve. Let me share what I’ve learned, including the mistakes that taught me the most.
Don’t overcook the peppers. The first time I made these, I left them in the oven too long because I wanted the cheese extra crispy. The peppers turned into sad, wrinkled puddles that barely held their shape. You want them tender but still sturdy enough to pick up with your hands. Think al dente pasta—soft but with a little bite left.
Use room temperature cream cheese. I cannot stress this enough. Cold cream cheese creates lumps that never fully disappear, no matter how much you stir. If you forget to take it out ahead of time, microwave it in 10-second bursts until it’s soft but not melted. You want it spreadable, not liquid.
Toast the peppers first for extra flavor. If you have an extra 10 minutes, try roasting the pepper halves in the oven for 5-7 minutes before stuffing them. It brings out their natural sweetness and adds a subtle char that pairs beautifully with the buffalo filling. Just let them cool slightly before adding the filling.
Make it ahead of time. These peppers are great for meal prep. Assemble them completely, cover the dish, and refrigerate for up to 24 hours before baking. When you’re ready to eat, just add 5-10 minutes to the covered baking time since they’ll be cold from the fridge. This is a lifesaver on busy weeknights.
Watch your heat level. Not all buffalo sauces are created equal. Some are mild and buttery, others are face-meltingly hot. Start with less sauce if you’re unsure, and taste the filling before stuffing. You can always add more heat, but you can’t take it out. I once used a ghost pepper sauce by accident (grabbed the wrong bottle in a hurry), and let’s just say dinner was an adventure.
Variations & Adaptations
One of the best things about this recipe is how flexible it is. Here are some variations I’ve tried and loved:
Make it vegetarian. Swap the chicken for two cans of drained and rinsed chickpeas or a bag of frozen cauliflower florets (thawed and chopped). The texture is different but just as satisfying. For the cauliflower version, roast it first with a little oil and salt to bring out its nuttiness.
Go low-carb or keto. This recipe is already pretty low-carb, but you can make it even more keto-friendly by using full-fat cream cheese and skipping the ranch dressing (or using a homemade keto ranch). Serve the filling in hollowed-out mini peppers for an even lower-carb option.
Try different cheeses. Monterey Jack, pepper jack, or even smoked gouda all work beautifully. I once made a batch with smoked gouda and bacon bits mixed in, and it was honestly one of the best things I’ve ever eaten. The smoky flavor with the buffalo sauce is a match made in heaven.
Make it dairy-free. Use dairy-free cream cheese and shredded cheese alternatives. I’ve tested this with a cashew-based cream cheese, and while the texture is slightly different, the flavor is still fantastic. Just make sure your hot sauce and ranch are dairy-free too.
Turn it into a dip. If you’re not in the mood for peppers, you can bake the filling in a small baking dish at 375°F for 20 minutes, then serve it with chips, celery sticks, or carrot slices. It’s the classic buffalo chicken dip we all know and love, just made with the same ingredients.
Add a crunchy topping. Before the final uncovered bake, sprinkle crushed tortilla chips or panko breadcrumbs mixed with melted butter over the cheese. It adds a lovely crunch that contrasts with the creamy filling. I do this when I’m feeling extra fancy.
Serving & Storage Suggestions
These peppers are best served warm, right out of the oven. Let them rest for 5 minutes so the filling sets, then transfer them to a plate with a spatula. The smell alone will have everyone hovering in the kitchen.
What to serve with them: A simple green salad with a tangy vinaigrette cuts through the richness beautifully. Celery sticks and carrot slices are classic buffalo pairing—they add crunch and freshness. If you want something heartier, serve the peppers over rice or quinoa to soak up any extra sauce. And honestly, they’re amazing on their own with just a cold drink nearby.
For storage: Place leftover peppers in an airtight container and refrigerate for up to 4 days. The flavors actually meld together even more overnight, so leftovers might be even better than the first batch. Just don’t microwave them—the peppers get mushy. Instead, reheat them in a 350°F oven for 10-15 minutes, or until warmed through. If you’re in a hurry, the air fryer works great too: 5 minutes at 350°F.
Freezing instructions: These peppers freeze surprisingly well. Assemble them completely but don’t bake. Place the dish in the freezer until the peppers are solid, then transfer them to a freezer bag or container. They’ll keep for up to 3 months. To bake from frozen, add 15-20 minutes to the covered baking time, then uncover and bake until bubbly.
How flavors develop over time: The first day, the peppers are bright and fresh with a pronounced buffalo kick. By day two, the heat mellows and the flavors blend together into something deeper and more rounded. I actually prefer them on day two, but that might just be me.
Nutritional Information & Benefits
Here’s an approximate breakdown per serving (one stuffed pepper half, assuming 8 servings total):
- Calories: 320-350
- Protein: 22g
- Fat: 22g
- Carbohydrates: 8g
- Fiber: 2g
- Sugar: 4g
These numbers will vary depending on your exact ingredients and portion sizes. If you use reduced-fat cream cheese and skip the blue cheese, you can cut the calories and fat significantly without sacrificing much flavor.
Health benefits of key ingredients: Bell peppers are packed with vitamin C—actually, one red pepper has more vitamin C than an orange. They’re also rich in antioxidants and fiber. Chicken provides lean protein that keeps you full and satisfied. The cream cheese and cheese add calcium, and the hot sauce contains capsaicin, which can boost metabolism and reduce inflammation. So yes, this is comfort food with some real nutritional perks.
Dietary considerations: This recipe is naturally gluten-free and low-carb. It can be made dairy-free with simple substitutions. It’s not suitable for vegans as written, but the vegetarian version with chickpeas and dairy-free cheese works beautifully. Always check your hot sauce and ranch labels for hidden ingredients if you have specific dietary needs.
I’ll be honest—I don’t make these peppers because they’re healthy. I make them because they’re delicious and they make me feel good. But it’s nice to know that comfort food can also be nourishing, you know?
Conclusion
These cozy buffalo chicken dip stuffed peppers have become a staple in my kitchen, and I have a feeling they’ll become one in yours too. They’re everything I want in a weeknight dinner—quick, satisfying, and packed with flavor that feels like a warm hug after a long day. The creamy, spicy filling paired with tender sweet peppers is one of those combinations that just works, and it’s hard to believe something this good comes together in under 30 minutes.
I love how customizable this recipe is. You can make it mild or fiery, dairy-free or extra cheesy, vegetarian or packed with chicken. It’s the kind of dish that adapts to whatever you have in your fridge and whatever mood you’re in. That’s the beauty of simple, honest cooking—it leaves room for you to make it your own.
So here’s my invitation to you: give these peppers a try. Make them on a quiet Tuesday when you need a little comfort. Make them for friends who deserve something special. Make them when you’re tired and hungry and just want a meal that feels like a hug. And when you do, come back and tell me how they turned out. I’d love to hear about your variations, your successes, and even your happy accidents. Because that’s what cooking is all about—sharing good food and the stories that come with it.
Now go preheat your oven. Your new favorite weeknight dinner is waiting.
Frequently Asked Questions
Can I use chicken breast instead of rotisserie chicken?
Absolutely. If you have raw chicken breast, just cook it first. You can poach it in simmering water for about 15 minutes until cooked through, then shred it with two forks. Or you can bake it at 375°F for 20-25 minutes. Any cooked chicken works here—even leftovers from last night’s dinner.
How do I make this less spicy for kids?
Easy! Use a mild buffalo sauce or mix the hot sauce with extra ranch dressing to tone down the heat. You can also substitute the buffalo sauce with a mix of ketchup and a tiny bit of regular hot sauce for a kid-friendly version. The peppers themselves add sweetness that helps balance the spice too.
Can I use mini sweet peppers instead of bell peppers?
Yes, and they make great appetizers! Use about 12-16 mini peppers, cut them in half lengthwise, and remove the seeds. Reduce the baking time to about 10 minutes covered and 5 minutes uncovered since they’re smaller. They’re perfect for parties or game day snacks.
Why did my peppers turn out watery?
This usually happens if the peppers release too much moisture during baking. To prevent it, make sure you’re not overbaking them. Also, pat the peppers dry inside with a paper towel before stuffing. If you’re using frozen chicken, make sure it’s fully thawed and drained. And don’t skip the covered baking step—it helps the peppers steam evenly without getting soggy.
Can I make this in a slow cooker?
You can, but the texture will be different. The peppers will be very soft, almost like they’re braised. To do it, prepare the filling and stuff the peppers, then place them in a slow cooker standing up. Cook on low for 3-4 hours or high for 1.5-2 hours. Add the shredded cheese on top during the last 15 minutes. The peppers won’t hold their shape as well, but the flavor is still fantastic.
Pin This Recipe!

Cozy Buffalo Chicken Dip Stuffed Peppers: Easy 30-Minute Recipe

Creamy, spicy buffalo chicken dip stuffed into tender bell peppers and baked to perfection. This quick and easy 30-minute recipe turns a classic party appetizer into a satisfying weeknight dinner.
- Prep Time: 10 minutes
- Cook Time: 25 minutes
- Total Time: 35 minutes
- Yield: 8 servings 1x
- Category: Main Course
- Cuisine: American
Ingredients
- 4 large bell peppers (any color, red or orange recommended)
- 2 cups cooked chicken, shredded or diced
- 8 ounces cream cheese, softened
- ½ cup buffalo hot sauce (e.g., Frank’s RedHot)
- ½ cup ranch dressing (or blue cheese dressing)
- 1 cup shredded cheddar cheese, divided
- ½ cup crumbled blue cheese (optional)
- ¼ cup chopped green onions, plus more for garnish
- ½ teaspoon garlic powder
- ½ teaspoon onion powder
- Salt and black pepper to taste
- 1 tablespoon butter, melted
Instructions
- Preheat your oven to 375°F (190°C). Slice each bell pepper in half lengthwise through the stem, then remove the seeds and membranes. If the peppers won’t stand flat, trim a tiny slice off the bottom. Place the pepper halves in a baking dish, cut side up.
- Brush the peppers with melted butter. Season the insides with a pinch of salt and pepper.
- In a medium mixing bowl, combine the softened cream cheese, buffalo hot sauce, ranch dressing, garlic powder, and onion powder. Mix until smooth and creamy. Fold in the shredded chicken, half the shredded cheddar cheese, the crumbled blue cheese (if using), and the chopped green onions. Stir until everything is well coated. Taste and adjust seasoning if needed.
- Divide the filling evenly among the pepper halves, piling it high. Sprinkle the remaining shredded cheddar cheese on top of each pepper.
- Cover the baking dish with aluminum foil and bake for 15 minutes. Remove the foil and bake for another 10-15 minutes, until the cheese is bubbly and lightly golden on top and the peppers are fork-tender.
- Let the peppers rest for about 5 minutes. Garnish with extra green onions and a drizzle of ranch or blue cheese dressing if desired.
Notes
Use room temperature cream cheese to avoid lumps. For extra flavor, toast the pepper halves in the oven for 5-7 minutes before stuffing. To make ahead, assemble completely and refrigerate for up to 24 hours; add 5-10 minutes to covered baking time. For a crunchy topping, sprinkle crushed tortilla chips or panko breadcrumbs mixed with melted butter over the cheese before the final uncovered bake.
Nutrition
- Serving Size: 1 stuffed pepper hal
- Calories: 335
- Sugar: 4
- Sodium: 800
- Fat: 22
- Saturated Fat: 10
- Carbohydrates: 8
- Fiber: 2
- Protein: 22
Keywords: buffalo chicken dip, stuffed peppers, buffalo chicken, easy dinner, 30-minute meal, comfort food, game day, appetizer, weeknight dinner


