Love this? Save it for later!
Share the inspiration with your friends
I wasn’t trying to make anything special. Honestly, I’d stopped by my neighbor Jen’s house to grab a Tupperware lid she’d borrowed, and the smell of vanilla and sugar hit me before I even got through the screen door. She was standing at her counter in an old concert t-shirt, piping these tiny little white figures onto a baking sheet like it was the most ordinary thing in the world. “Oh, these?” she said when I asked, barely looking up. “Just some meringues for the kids’ Halloween party.” Just some meringues. Let me tell you, they were the most adorable things I’d ever seen—little ghost shapes on sticks, staring back at me with these tiny chocolate chip eyes. I stood there for a good ten minutes watching her work, completely mesmerized. She made it look like nothing. And that’s exactly why this recipe stuck with me. It’s the kind of thing that looks like you spent hours on it, but really, you’re just letting a few simple ingredients do all the work. Maybe you’ve been there, scrolling through Pinterest looking for that one Halloween treat that won’t have you pulling your hair out. These ghost meringue cookie pops are it. They’re spooky, they’re sweet, and honestly, they’re a total showstopper for any Halloween party.
Why You’ll Love This Recipe
I’ve tested this recipe about six times now, trying to get the texture just right. Not because it’s hard—it’s actually super simple—but because I wanted to make sure the ghosts held their shape and had that perfect crisp-to-chewy bite. After a few batches that were a little too flat (lesson learned: don’t open the oven door!), I landed on a method that works every single time.
Here’s what makes these ghost meringue cookie pops stand out:
- Quick & Easy: You only need about 20 minutes of active prep time. The oven does the rest of the work while you get your costume on.
- Simple Ingredients: Egg whites, sugar, vanilla, and a few chocolate chips. That’s it. No weird specialty items.
- Perfect for Halloween Parties: These are made for a crowd. You can easily double or triple the batch without any extra fuss.
- Crowd-Pleaser: Kids go absolutely wild for them, and adults love how cute they are. I’ve never brought a plate of these anywhere that didn’t get cleaned out.
- Unbelievably Delicious: Light as air, with that signature meringue crunch that melts in your mouth. The chocolate eyes add just the right amount of richness.
What makes this version different is the lollipop stick. That one little addition turns a simple cookie into a party favor that doubles as a decoration. You can stick them in a vase on the dessert table or hand them out as guests leave. It’s comfort food with a spooky twist—fun, festive, and totally stress-free.
What Ingredients You Will Need
This recipe uses simple, pantry-friendly ingredients to create something that looks like it came from a fancy bakery. The magic is all in the technique, not the shopping list.
- Egg Whites: 4 large egg whites, at room temperature. (Room temperature is key here—cold eggs won’t whip up as fluffy.) I prefer using organic eggs for the best flavor and stability.
- Granulated Sugar: 1 cup (200g). Superfine sugar works best because it dissolves faster, but regular granulated sugar is perfectly fine. Just make sure you’re using pure sugar, not a blend with cornstarch.
- Vanilla Extract: 1 teaspoon. Pure vanilla extract gives a richer flavor, but imitation vanilla works in a pinch. You can also use vanilla bean paste for those little specks that look gorgeous in the final cookie.
- Cream of Tartar: 1/4 teaspoon. This stabilizes the egg whites and helps them hold their shape. If you don’t have it, you can substitute with 1/2 teaspoon of lemon juice or white vinegar.
- Salt: A tiny pinch. Just enough to balance the sweetness without making the meringues taste salty.
- Mini Chocolate Chips: About 1/4 cup (45g) for the eyes. I use Ghirardelli or Enjoy Life for a dairy-free option. You want the mini ones so they look like cute little ghost eyes.
- Lollipop Sticks: 12-15 sticks. You can find these at any craft store or online. If you’re in a pinch, you can use sturdy straws or even pretzel sticks for a salty-sweet twist.
For the piping, you’ll need a piping bag fitted with a large round tip. If you don’t have a piping bag, a sturdy zip-top bag with the corner snipped off works just as well. I’ve done it both ways, and honestly, the zip-top bag is less cleanup.
Equipment Needed
You don’t need a professional pastry kitchen to pull these off. Here’s what you’ll need:
- Stand Mixer or Hand Mixer: A stand mixer with a whisk attachment is ideal, but a hand mixer works perfectly fine. You just need something to whip those egg whites into stiff peaks.
- Large Mixing Bowl: Make sure it’s spotless and completely dry. Any grease or moisture will ruin your meringue.
- Piping Bag with Round Tip: A large round tip (like Ateco #806 or Wilton 1A) gives you a nice, smooth ghost shape. If you don’t have a tip, just snip the end of your piping bag.
- Baking Sheets: Two large baking sheets lined with parchment paper. Silicone mats work too, but parchment is easier to peel off the finished meringues.
- Lollipop Sticks: I’ve used both paper and plastic sticks. Paper ones are sturdier for these cookies.
- Cooling Rack: For letting your ghost pops cool completely before decorating.
If you’re on a budget, skip the fancy piping tips and use a zip-top bag. I’ve done it that way plenty of times, and the ghosts come out just as cute. The key is to make sure your bag doesn’t have any holes—trust me on that one.
Preparation Method
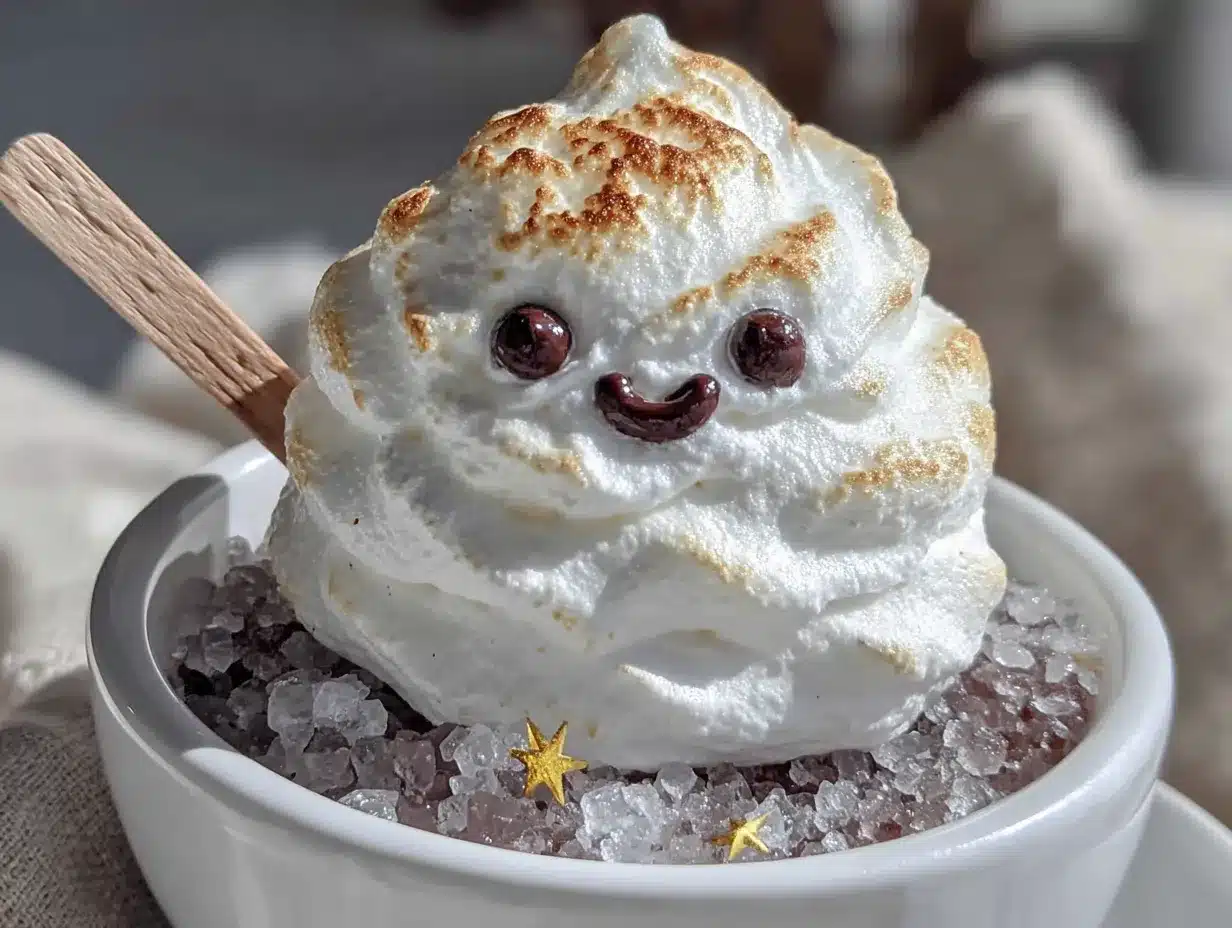
Let’s get into the actual making of these little guys. I’ll walk you through every step so you feel confident.
- Preheat Your Oven: Set your oven to 200°F (95°C). Yes, that low. Meringues bake low and slow to dry out without browning. Line two baking sheets with parchment paper and set aside.
- Prepare Your Egg Whites: Separate your eggs while they’re cold—it’s much easier. Then let the whites sit at room temperature for about 30 minutes. This is crucial. Cold egg whites don’t whip up as well, and you’ll end up with flat, sad ghosts.
- Start Whipping: Add the egg whites and cream of tartar to your mixing bowl. Start on medium speed until the mixture becomes frothy and bubbly, about 2 minutes. You’ll see small bubbles forming across the surface.
- Add the Sugar Slowly: With the mixer running on medium-high, add the sugar one tablespoon at a time. This is the most important step. If you dump all the sugar in at once, your meringue will deflate. Take your time—about 30 seconds between each addition.
- Whip to Stiff Peaks: Once all the sugar is in, increase the speed to high and whip for about 5-7 minutes. You’re looking for stiff, glossy peaks that hold their shape when you lift the whisk. The mixture should feel smooth between your fingers, not gritty. If it feels grainy, keep whipping.
- Add Vanilla and Salt: Gently fold in the vanilla extract and salt with a rubber spatula. Do this gently—you don’t want to deflate all that air you just whipped in.
- Pipe the Ghosts: Transfer the meringue to your piping bag. Hold the bag straight down over your prepared baking sheet. Pipe a tall, teardrop shape about 2 inches tall. To make the ghost shape, pipe a round base, then pull up to create a pointed top. Gently tap the tip of the ghost to smooth it out.
- Insert the Sticks: Gently push a lollipop stick into the bottom of each ghost, about halfway up. The meringue should hold it in place. If it feels wobbly, pipe a little extra meringue around the base to secure it.
- Add the Eyes: While the meringue is still wet, press two mini chocolate chips into each ghost for eyes. Don’t press too hard or the ghost will flatten. Just a gentle push.
- Bake Low and Slow: Place the baking sheets in the oven and bake for 1 hour and 15 minutes. Do not open the oven door! The sudden temperature change can cause your meringues to crack or collapse. After 1 hour 15 minutes, turn off the oven but leave the meringues inside for another hour to dry out completely.
- Cool Completely: Remove from the oven and let the ghost pops cool on the baking sheet for about 10 minutes, then transfer to a wire rack to cool completely. They should be dry to the touch and lift easily off the parchment.
One thing I learned the hard way: if your kitchen is humid, your meringues might get sticky. Try to make these on a dry day, or run a dehumidifier in the room if you have one.
Cooking Tips & Techniques
I’ve made plenty of mistakes with meringues, so you don’t have to. Here’s what I’ve learned:
Don’t overmix your egg whites. I did this once, and the mixture turned into a dry, clumpy mess. Stop as soon as you have stiff peaks. If you see the mixture starting to separate or look grainy, you’ve gone too far.
Weather matters. Meringues are sensitive to humidity. If it’s raining or super humid outside, your meringues might end up chewy instead of crisp. I learned this the hard way when I tried to make them during a summer thunderstorm. Save these for a dry day, or plan to serve them immediately if they don’t crisp up all the way.
Use a timer for your sugar additions. I know it sounds fussy, but setting a timer for 30 seconds between each spoonful of sugar makes a huge difference. You’ll get a much more stable meringue that holds its shape better during baking.
Keep the oven door shut. I cannot stress this enough. I opened the door once to “check on them,” and the cold air caused half my ghosts to crack right down the middle. They still tasted fine, but they looked like sad, broken ghosts instead of cute ones.
Make extra for snacking. These are so light and airy that you’ll probably eat a few before they even make it to the party. I always double the batch so there’s enough for taste-testing.
Variations & Adaptations
These ghost pops are endlessly customizable. Here are some variations I’ve tried:
- Chocolate Ghosts: Swap 2 tablespoons of sugar for cocoa powder. Sift it into the egg whites after you’ve added the sugar. The ghosts will be a pale brown color, but they taste amazing.
- Strawberry Ghosts: Add 1/4 teaspoon of strawberry extract along with the vanilla. You can also add a tiny drop of pink food coloring for a blush tone. My niece loved these.
- Vegan Version: Use aquafaba (the liquid from a can of chickpeas) instead of egg whites. One can of chickpeas gives you about 1/2 cup of aquafaba, which equals roughly 4 egg whites. Whip it the same way, and it works beautifully. The flavor is slightly different, but the texture is spot on.
- Gluten-Free: These are naturally gluten-free, so no changes needed. Just double-check your vanilla extract and chocolate chips to make sure they’re certified gluten-free if that’s a concern.
- Different Shapes: You can pipe these into pumpkins, bats, or even little witch hats. Just adjust your piping technique. For pumpkins, pipe a round ball and add a green chocolate chip stem.
I once tried adding peppermint extract instead of vanilla for a wintery version, and they were incredible. Just a few drops, though—peppermint is strong.
Serving & Storage Suggestions
These ghost pops are best served at room temperature. They have a light, airy texture that melts in your mouth. For a Halloween party, arrange them in a tall vase or a styrofoam block covered in black fabric. They make an incredible centerpiece that guests can grab as they walk by.
For storage, keep them in an airtight container at room temperature. Do not refrigerate them—the moisture will make them sticky and soft. They’ll stay fresh for about 3-4 days, though I doubt they’ll last that long.
If you’re making them ahead of time, store them in a cool, dry place. Avoid stacking them, as they can break easily. I like to store them in a single layer in a cake carrier or a large tupperware with parchment between layers.
These also freeze beautifully. Place them in a single layer on a baking sheet and freeze for an hour, then transfer to a freezer bag. They’ll keep for up to a month. Thaw at room temperature for about 15 minutes before serving.
The flavors actually develop a bit overnight. The vanilla becomes more pronounced, and the chocolate chips set up nicely. I always try to make these a day ahead if I can.
Nutritional Information & Benefits
Each ghost meringue pop (without the stick) contains approximately:
- Calories: 45-55
- Fat: 0.5g
- Carbohydrates: 11g
- Sugar: 10g
- Protein: 1g
These are a lighter treat compared to most Halloween cookies and candies. Meringues are naturally low in fat since they’re made primarily from egg whites and sugar. The egg whites provide a small amount of protein, and the chocolate chips add a touch of antioxidants.
If you’re watching your sugar intake, you can reduce the sugar slightly (use 3/4 cup instead of 1 cup), but the texture will be a bit less stable. For a lower-sugar version, you can try using a sugar substitute like monk fruit sweetener, but I haven’t tested that myself.
These are also dairy-free and nut-free as written, making them a great option for school parties or gatherings where allergies are a concern. Just double-check your chocolate chips for dairy if that’s an issue.
Conclusion
These ghost meringue cookie pops are the kind of recipe that makes you look like a Halloween hero without spending all day in the kitchen. They’re simple enough for a weeknight project but impressive enough for the biggest party of the year. Honestly, the best part is watching people’s faces when they realize you made these from scratch. They always think you bought them from a bakery.
I’d love to hear how yours turn out. Did you try a fun variation? Did your kids help pipe the ghosts? Drop a comment below and let me know. And if you’re looking for more Halloween treats, you might want to check out my spiderweb dip or these pumpkin spice bites for a full spooky spread. Happy haunting, and happy baking!
Frequently Asked Questions
Can I make these ghost pops without a piping bag?
Absolutely. A sturdy zip-top bag with the corner snipped off works perfectly. Just make sure the cut is clean and even, about 1/4 inch wide. You won’t get quite as smooth a shape, but they’ll still look adorable.
Why did my meringues crack in the oven?
This usually happens when the oven temperature fluctuates or if you open the door during baking. Make sure your oven is fully preheated to 200°F and resist the urge to peek. Also, make sure your egg whites are at room temperature before you start whipping.
Can I use liquid egg whites from a carton?
You can, but the results won’t be as stable. Carton egg whites often have additives that affect how well they whip. If you use them, add an extra 1/4 teaspoon of cream of tartar to help stabilize the mixture.
How do I get the ghosts to stand up straight on the sticks?
Make sure you’re inserting the stick at least halfway into the meringue. If it feels wobbly, pipe a small amount of extra meringue around the base to create a little “foot” that supports the stick. You can also prop them up against each other on the baking sheet while they bake.
Can I make these ghost pops dairy-free?
Yes! These are naturally dairy-free as long as you use dairy-free chocolate chips. Enjoy Life and Pascha both make great mini chocolate chips that are dairy-free and taste just like the real thing.
Pin This Recipe!
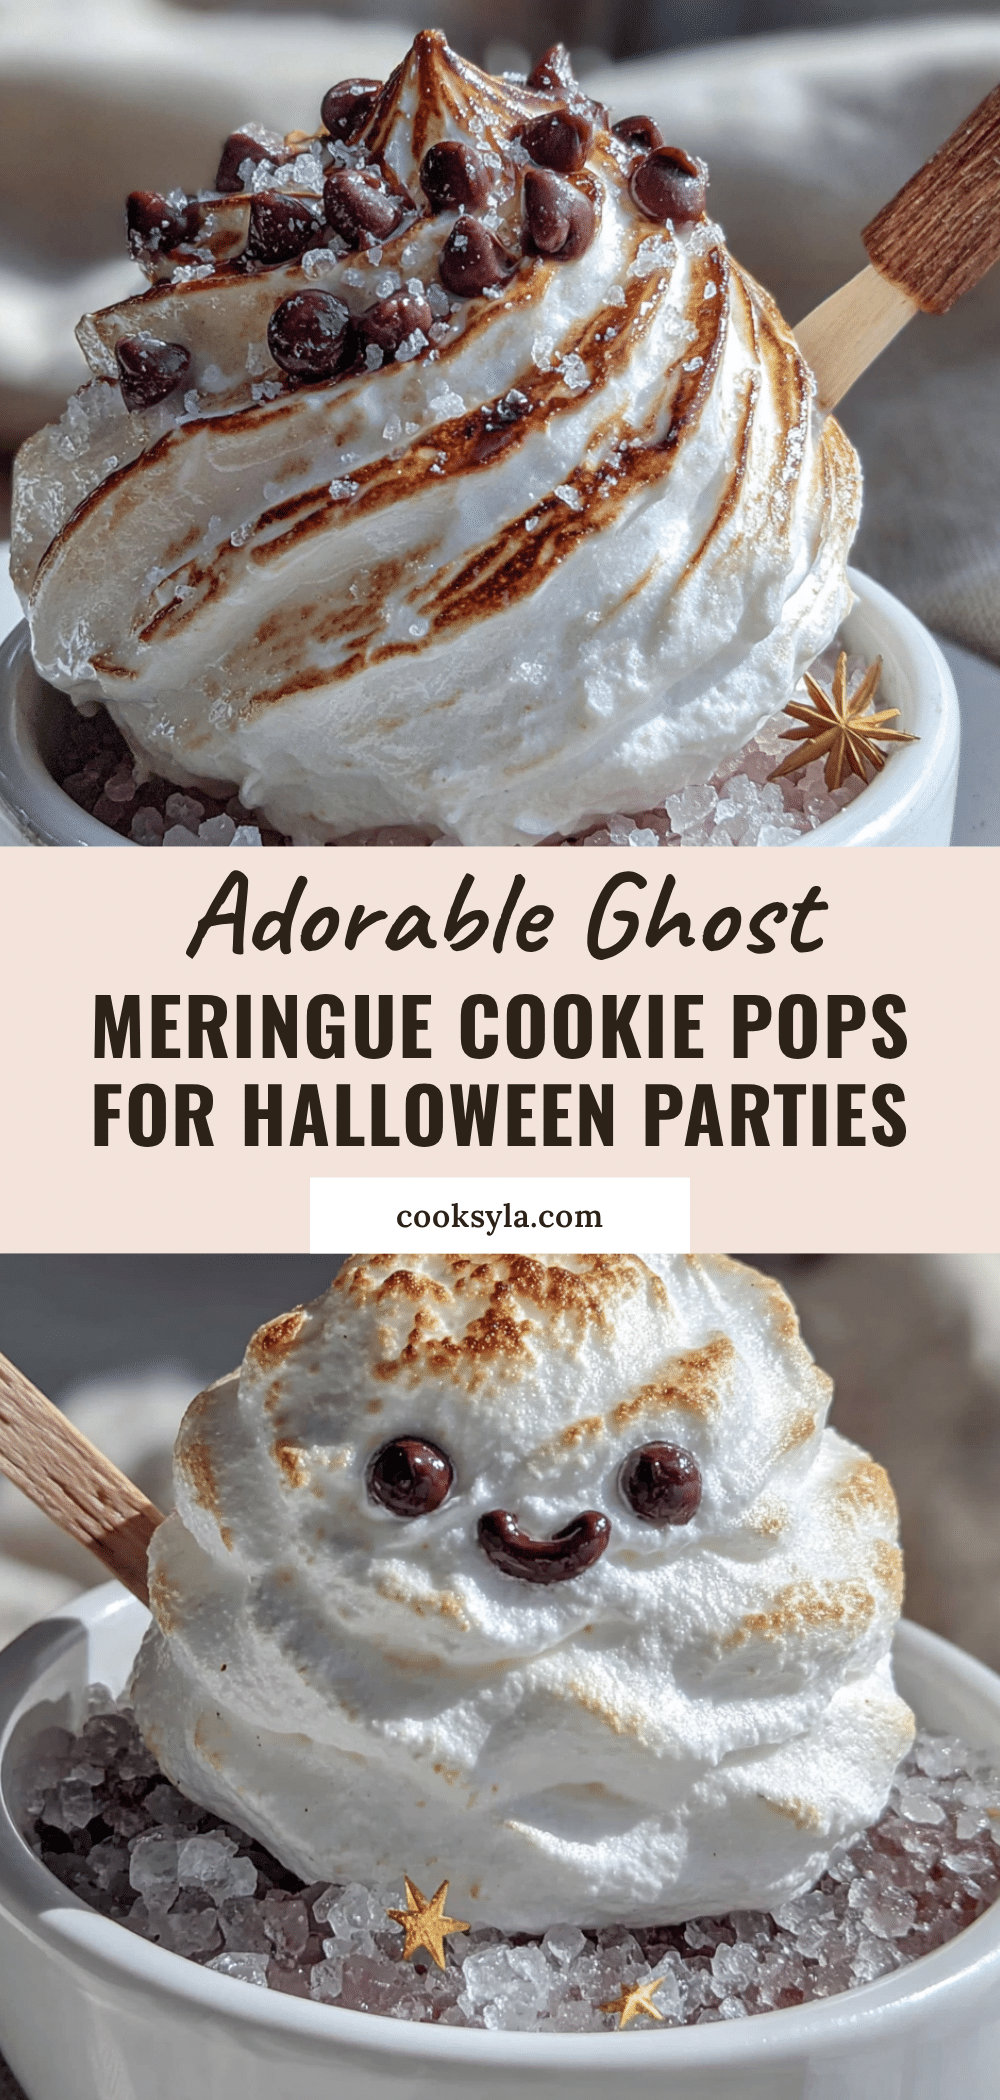
Adorable Ghost Meringue Cookie Pops: Easy Halloween Treats
These ghost meringue cookie pops are spooky, sweet, and a total showstopper for any Halloween party. Made with simple ingredients and minimal active prep time, they look like you spent hours on them but are actually super easy to make.
- Prep Time: 20 minutes
- Cook Time: 1 hour 15 minutes
- Total Time: 2 hours 45 minutes (includes cooling time)
- Yield: 12-15 servings 1x
- Category: Dessert
- Cuisine: American
Ingredients
- 4 large egg whites, at room temperature
- 1 cup (200g) granulated sugar
- 1 teaspoon vanilla extract
- 1/4 teaspoon cream of tartar
- A tiny pinch of salt
- 1/4 cup (45g) mini chocolate chips
- 12–15 lollipop sticks
Instructions
- Preheat your oven to 200°F (95°C). Line two baking sheets with parchment paper.
- Separate the eggs while cold, then let the egg whites sit at room temperature for about 30 minutes.
- Add the egg whites and cream of tartar to a mixing bowl. Beat on medium speed until frothy and bubbly, about 2 minutes.
- With the mixer running on medium-high, add the sugar one tablespoon at a time, waiting about 30 seconds between each addition.
- Once all sugar is added, increase speed to high and whip for 5-7 minutes until stiff, glossy peaks form. The mixture should feel smooth between your fingers, not gritty.
- Gently fold in the vanilla extract and salt with a rubber spatula.
- Transfer the meringue to a piping bag fitted with a large round tip (or a zip-top bag with the corner snipped). Pipe tall teardrop shapes about 2 inches tall onto the prepared baking sheets. To make the ghost shape, pipe a round base, then pull up to create a pointed top. Gently tap the tip to smooth it out.
- Gently push a lollipop stick into the bottom of each ghost, about halfway up. If wobbly, pipe a little extra meringue around the base to secure it.
- While the meringue is still wet, press two mini chocolate chips into each ghost for eyes. Press gently.
- Bake for 1 hour and 15 minutes. Do not open the oven door during baking. After 1 hour 15 minutes, turn off the oven and leave the meringues inside for another hour to dry out completely.
- Remove from the oven and let cool on the baking sheet for about 10 minutes, then transfer to a wire rack to cool completely.
Notes
Make sure your mixing bowl is spotless and completely dry. Any grease or moisture will ruin the meringue. Do not open the oven door during baking, as sudden temperature changes can cause cracking. For best results, make these on a dry day, as humidity can make meringues sticky. Store in an airtight container at room temperature for up to 3-4 days. These also freeze well for up to a month.
Nutrition
- Serving Size: 1 ghost pop
- Calories: 50
- Sugar: 10
- Sodium: 15
- Fat: 0.5
- Carbohydrates: 11
- Protein: 1
Keywords: Halloween treats, ghost cookies, meringue pops, easy Halloween dessert, ghost meringue, cookie pops, spooky treats


