Love this? Save it for later!
Share the inspiration with your friends
My friend Jen asked why I couldn’t just pour the cheesecake filling right over the pumpkin layer without pre-baking the crust. I started to explain why that wouldn’t work—then stopped. Honestly? I had no good reason except that’s how I’d always done it. So I shrugged, handed her the spatula, and said, “Fine, you try it.”
The power went out halfway through baking that afternoon. A thunderstorm rolled in right as the bars were supposed to be setting, and there I was, standing in the dark kitchen with a half-baked pan of pumpkin pie cheesecake bars cooling on the counter. Jen was already scrolling through her phone for takeout options. But I couldn’t shake the feeling that something magical was happening in that pan.
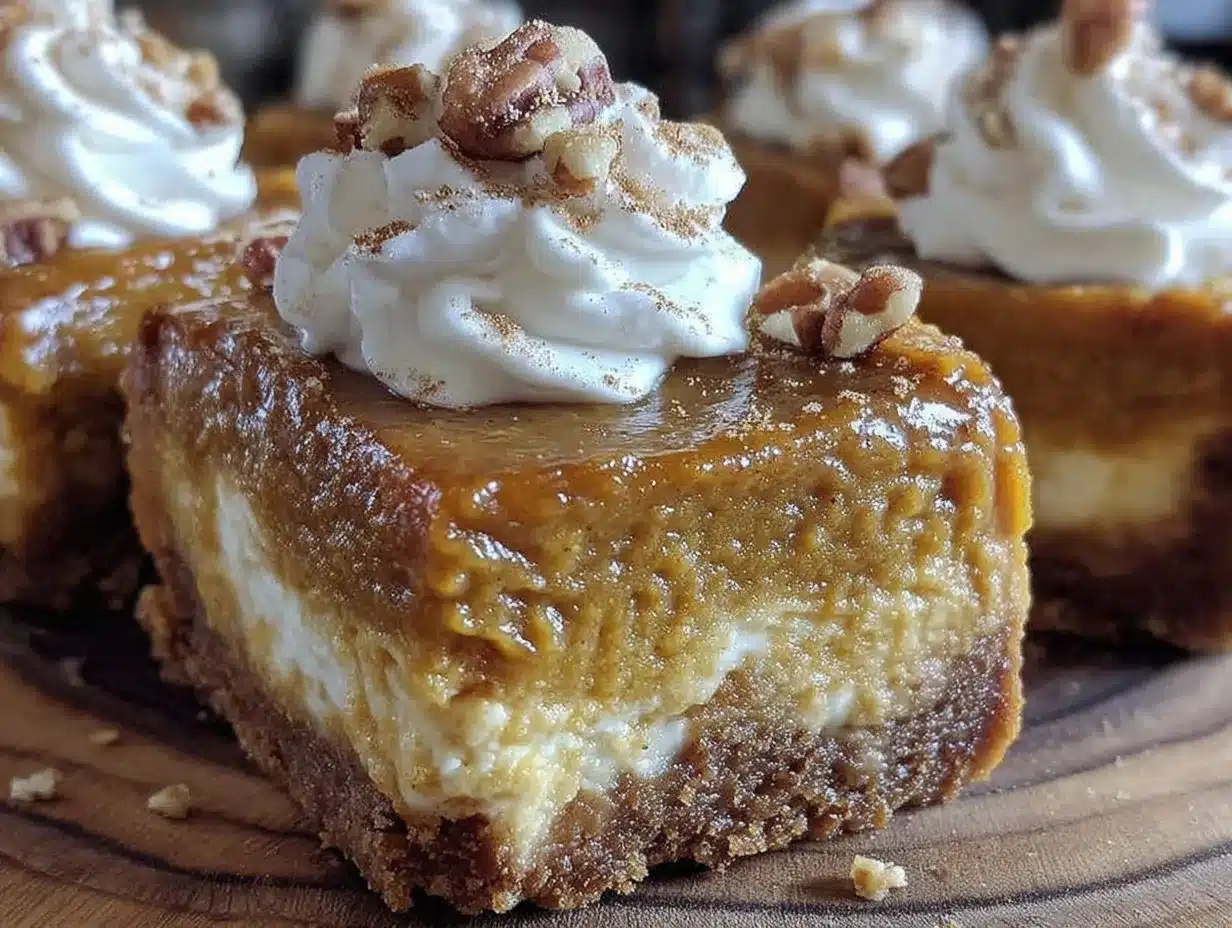
That first bite, when the lights finally came back and the bars had chilled overnight, had this unexpected texture—creamy and firm at the same time, with the pumpkin layer melting just slightly into the cheesecake. I mean, I’d made a lot of dessert bars in my day, but these? These were different. Better. The kind of bar that makes you close your eyes and forget there’s a conversation happening around you.
Maybe you’ve been there—stubborn about a technique, convinced your way is the only way, only to have someone casually prove you wrong. That’s how this recipe landed in my permanent rotation. It’s not just another pumpkin dessert. It’s the one that taught me to stop overcomplicating things. And let me tell you, when you’re hosting a crowd and need something that delivers every single time, these bars are the answer.
Why You’ll Love This Recipe
These crowd-pleasing pumpkin pie cheesecake bars are the dessert you bring to every gathering and watch disappear. I’ve tested this recipe at least a dozen times—through potlucks, Thanksgiving dinners, and random Tuesday nights when I needed something that felt special without the stress.
- Quick & Easy: Comes together in about 30 minutes of active time. The oven does the rest. Perfect for busy hosts who have a million other things to prep.
- Simple Ingredients: No fancy grocery trips. You likely have most of these in your pantry right now. Cream cheese, pumpkin puree, spices, butter—that’s it.
- Perfect for Gatherings: These bars slice cleanly, travel well, and feed a crowd. I’ve brought them to Friendsgiving dinners and watched people go back for thirds.
- Crowd-Pleaser: Kids love the creamy texture. Adults appreciate the sophisticated spice blend. Everyone agrees they’re the best thing on the dessert table.
- Unbelievably Delicious: The combination of tangy cheesecake and warm pumpkin pie spices is next-level comfort food. It’s like two holiday favorites had a perfect baby.
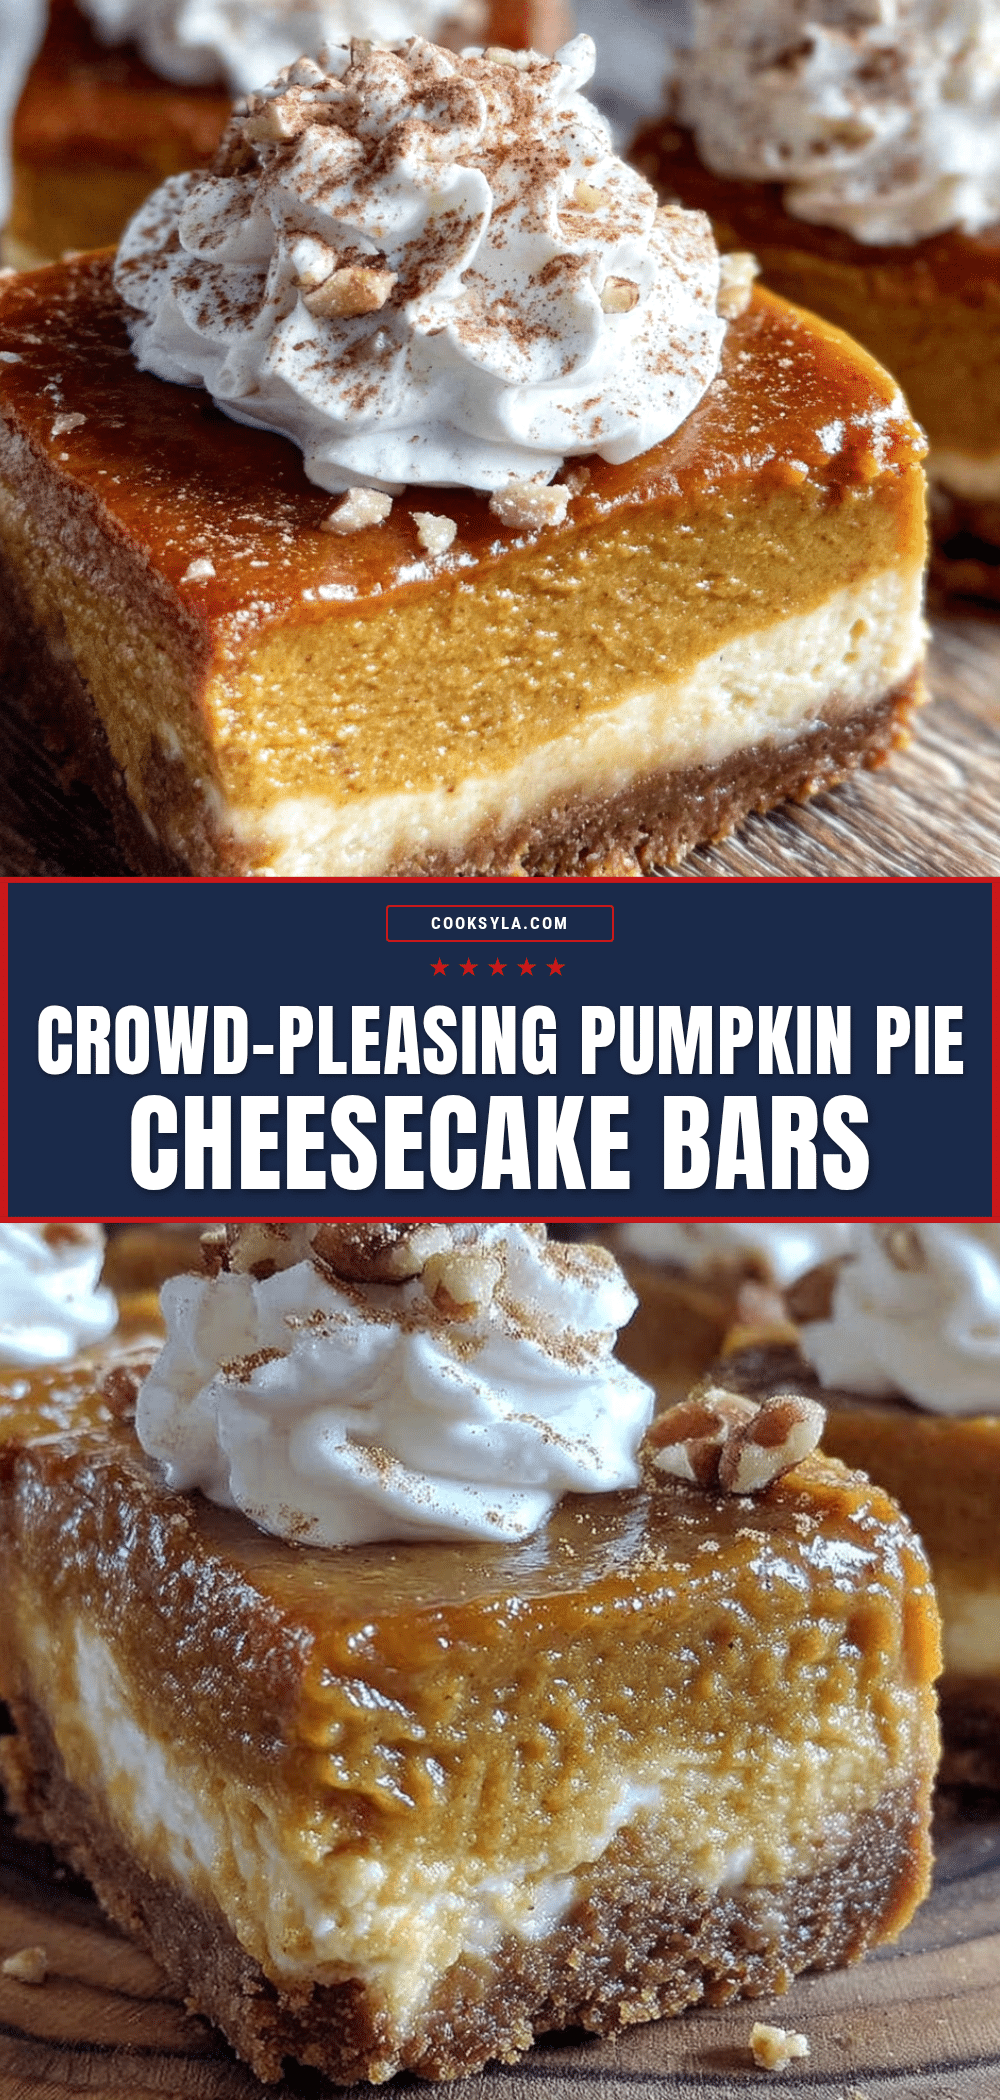
What makes these bars different from every other recipe out there? It’s the technique—pouring the cheesecake layer directly over the pumpkin without pre-baking the crust. That little shortcut Jen suggested creates a seamless, creamy texture that you just don’t get with traditional layered bars. Plus, the shortbread crust stays perfectly crisp underneath all that richness. This isn’t just another version of pumpkin cheesecake bars. It’s the best version.
These bars are the kind that make you close your eyes after the first bite. They’re comfort food reimagined—faster, simpler, but with the same soul-soothing satisfaction. Perfect for impressing guests without breaking a sweat.
What Ingredients You Will Need
This recipe uses simple, mostly pantry-stable ingredients to deliver that bold pumpkin-spice flavor and velvety cheesecake texture. Here’s what you need and why each one matters.
For the Shortbread Crust
- 1 ½ cups (190g) all-purpose flour – Gives the crust structure. I prefer Gold Medal or King Arthur for consistent results.
- ½ cup (100g) granulated sugar – Adds just enough sweetness to balance the tangy filling.
- ½ cup (113g or 1 stick) unsalted butter, cold and cubed – Cold butter creates a flaky, tender crust. Don’t let it soften or you’ll get a dense, greasy base.
- ¼ teaspoon salt – Enhances all the flavors. Use fine sea salt for even distribution.
For the Pumpkin Layer
- 1 can (15 oz or 425g) pumpkin puree – Not pumpkin pie filling. Look for 100% pure pumpkin. Libby’s is my go-to for consistent texture.
- ½ cup (100g) granulated sugar – Sweetens the pumpkin without overpowering the spices.
- ¼ cup (50g) light brown sugar, packed – Adds molasses depth that complements the warm spices.
- 2 large eggs, room temperature – Room-temperature eggs blend more smoothly into the filling. Set them out 30 minutes before starting.
- 1 teaspoon vanilla extract – Pure vanilla makes a difference. Avoid imitation if you can.
- 1 teaspoon ground cinnamon – The backbone of pumpkin spice. I use McCormick for consistent quality.
- ½ teaspoon ground ginger – Adds warmth without heat.
- ¼ teaspoon ground nutmeg – Freshly grated if you have it, but pre-ground works fine.
- ⅛ teaspoon ground cloves – A little goes a long way. Don’t skip it.
For the Cheesecake Layer
- 16 oz (454g) cream cheese, softened – Full-fat is non-negotiable here. Low-fat cream cheese won’t set properly and will make the bars watery. Philadelphia brand is my tried-and-true.
- ½ cup (100g) granulated sugar – Balances the tanginess of the cream cheese.
- 2 large eggs, room temperature – Same as above—room temp ensures a silky smooth cheesecake layer.
- 1 teaspoon vanilla extract – Enhances the creamy flavor.
That’s it. No weird ingredients, no specialty items. Just honest, straightforward baking staples that come together into something truly special.
Equipment Needed
You don’t need a fancy kitchen to make these pumpkin pie cheesecake bars. Here’s what you’ll need:
- 9×13-inch baking pan – This size gives you the perfect thickness. Glass or metal both work, but metal conducts heat more evenly for a crispier crust.
- Parchment paper – Line your pan with two overlapping sheets, leaving overhang on all sides. This makes lifting the bars out a breeze.
- Food processor or pastry cutter – For cutting butter into the flour for the crust. A food processor takes 30 seconds; a pastry cutter takes a few minutes and gives you a good arm workout.
- Electric hand mixer or stand mixer – For beating the cream cheese until smooth. A hand mixer works perfectly—no need to haul out the stand mixer unless you want to.
- Large mixing bowls – You’ll need at least two: one for the pumpkin layer and one for the cheesecake layer.
- Rubber spatula – For scraping every last bit of filling into the pan. Trust me, you don’t want to waste any.
- Measuring cups and spoons – Accurate measurements matter in baking. Use dry measuring cups for dry ingredients and liquid measuring cups for wet ingredients.
Budget-friendly tip: If you don’t have a food processor, freeze your butter and grate it into the flour mixture using a box grater. Works like a charm and costs nothing extra.
Preparation Method
Let’s walk through this step by step. I’ve included timing estimates and sensory cues so you know exactly what to look for at each stage.
Step 1: Preheat and Prep (5 minutes)
Preheat your oven to 350°F (175°C). Line your 9×13-inch pan with parchment paper, leaving about 2 inches of overhang on the long sides. This is your lifting handle later—don’t skip it.
Step 2: Make the Crust (10 minutes)
In a food processor, combine the flour, sugar, and salt. Pulse a few times to mix. Add the cold, cubed butter and pulse until the mixture looks like coarse sand with a few pea-sized butter pieces remaining. If using a pastry cutter, work the butter into the dry ingredients by hand until you get that same texture.
Press the mixture firmly into the bottom of your prepared pan. Use the bottom of a measuring cup to pack it down evenly. Bake for 15-18 minutes, until the edges are just starting to turn golden. The center should look dry and set, not shiny. Set aside to cool slightly while you make the fillings.
Step 3: Make the Pumpkin Layer (10 minutes)
In a large bowl, whisk together the pumpkin puree, granulated sugar, and brown sugar until smooth. Add the eggs one at a time, whisking well after each. Stir in the vanilla, cinnamon, ginger, nutmeg, and cloves. The mixture should be thick, smooth, and deeply orange—like a sunset in a bowl. Set aside.
Step 4: Make the Cheesecake Layer (10 minutes)
In another large bowl, beat the softened cream cheese with an electric mixer on medium speed until completely smooth—about 2 minutes. Scrape down the sides of the bowl. Add the sugar and beat until fluffy, another 2 minutes. Add the eggs one at a time, beating on low speed after each just until combined. Overmixing at this stage adds too much air and can cause cracks later. Stir in the vanilla. The mixture should be silky, pale, and smooth as butter.
Step 5: Assemble the Bars (5 minutes)
Pour the pumpkin mixture over the pre-baked crust and spread it evenly with a spatula. Gently pour the cheesecake mixture on top—don’t dump it all in one spot or it will sink through. Instead, spoon it in dollops across the surface, then gently spread it to the edges. The two layers will stay mostly separate, with a little natural marbling where they meet. That’s exactly what you want.
Step 6: Bake and Cool (1 hour + chilling time)
Bake at 350°F (175°C) for 35-40 minutes. The edges should be set and slightly puffed, but the center should still jiggle slightly when you gently shake the pan. Don’t overbake or the cheesecake layer will crack. Turn off the oven, crack the door open, and let the bars cool inside for 30 minutes. This gradual cooling prevents that dreaded sinking center.
Remove from the oven and cool completely on a wire rack—about 1 hour. Then refrigerate for at least 4 hours, preferably overnight. This is the hardest part, I know. But trust me, those bars need time to set properly. Cutting into them too early is like opening a present before Christmas morning—disappointing and messy.
Cooking Tips & Techniques
I’ve made these pumpkin pie cheesecake bars more times than I can count, and I’ve learned a few things the hard way. Here’s what I wish someone had told me.
Room temperature ingredients matter. I know, I know—everyone says this. But I once tried to rush and used cold cream cheese. The filling was lumpy no matter how long I beat it. Take the cream cheese and eggs out of the fridge 30-45 minutes before starting. Your mixer will thank you, and your bars will be silky smooth.
Don’t overmix the cheesecake layer. This was my biggest mistake early on. I’d beat the cream cheese and sugar until it was super fluffy, then beat in the eggs on high speed. The result? A cracked, puffy cheesecake that deflated into a sad crater. Mix on low speed once the eggs go in, and stop as soon as they disappear into the batter.
Use a water bath—or don’t. Traditional cheesecake recipes call for a water bath to prevent cracking. I’ve tested these bars both ways, and honestly? They work fine without it. The shortbread crust and the two-layer structure make them more forgiving. If you’re nervous, place a pan of hot water on the oven rack below the bars. That steam creates a humid environment that reduces cracking.
Patience is a virtue. The hardest part of this recipe is waiting for the bars to chill. But cutting into warm cheesecake bars is a guaranteed mess. The filling needs time to set into clean, sliceable bars. I once cut into them after only 2 hours of chilling, and it looked like a pumpkin disaster zone. Learn from my impatience.
Variations & Adaptations
One of the best things about this recipe is how adaptable it is. Here are some variations I’ve tried and loved.
Gluten-Free Version: Substitute the all-purpose flour with a 1:1 gluten-free baking flour blend. I’ve used King Arthur Measure for Measure and Bob’s Red Mill with great results. The crust will be slightly more crumbly, but the flavor is spot on.
Dairy-Free Option: Use dairy-free cream cheese (Kite Hill or Violife work well) and substitute the butter with a plant-based butter stick. Miyoko’s European Style Cultured Vegan Butter is my favorite for baking. The texture will be slightly softer, so chill the bars for a full 8 hours before slicing.
Spice It Up: Add a pinch of cayenne pepper or chipotle powder to the pumpkin layer for a subtle heat that plays beautifully with the sweetness. I tried this on a whim last fall, and it was a hit at my Halloween party.
Bourbon Maple Twist: Replace the vanilla extract in the pumpkin layer with 1 tablespoon of bourbon and add 2 tablespoons of maple syrup. The smoky sweetness is incredible with the warm spices.
No-Bake Alternative: For summer gatherings when you don’t want to turn on the oven, use a store-bought graham cracker crust and skip the pre-baking. Prepare the fillings as directed, pour them over the crust, and refrigerate for at least 6 hours. The texture is softer but still delicious.
Serving & Storage Suggestions
These bars are best served cold, straight from the refrigerator. The firm texture makes them easy to slice into clean squares. For the prettiest presentation, run your knife under hot water and wipe it dry between cuts. This gives you those gorgeous, Instagram-worthy edges.
I love serving these bars with a dollop of freshly whipped cream and a light dusting of cinnamon. The creamy topping balances the richness of the cheesecake and adds a lovely visual contrast. For holiday gatherings, arrange the bars on a platter with fresh cranberries and rosemary sprigs for a festive touch.
These bars pair beautifully with a hot cup of coffee or spiced chai. The bitterness of the coffee cuts through the sweetness, while the chai’s warm spices echo the pumpkin pie flavors. For a boozy pairing, try a bourbon old fashioned or a dark rum-spiked eggnog.
Storage: Keep the bars in an airtight container in the refrigerator for up to 5 days. I actually think they taste better on day two and three—the flavors meld together and deepen overnight. To freeze, wrap individual bars tightly in plastic wrap, then place them in a freezer-safe bag. They’ll keep for up to 3 months. Thaw overnight in the refrigerator before serving.
One more thing: these bars freeze beautifully, so don’t hesitate to make a double batch. I always stash a few in the freezer for those random Tuesday nights when I need a little dessert pick-me-up.
Nutritional Information & Benefits
Here’s the estimated nutritional breakdown for one bar (based on 16 servings):
- Calories: 320
- Total Fat: 18g
- Saturated Fat: 11g
- Cholesterol: 95mg
- Sodium: 220mg
- Total Carbohydrates: 35g
- Dietary Fiber: 1g
- Sugars: 24g
- Protein: 6g
Pumpkin is packed with vitamin A, which supports eye health and immune function. It’s also rich in fiber and antioxidants. The cream cheese provides calcium and protein, making this a more balanced dessert option than you might expect. Of course, these are still a treat—but one that offers a few nutritional perks.
If you’re watching your sugar intake, you can reduce the sugar in the pumpkin layer to ⅓ cup without affecting the texture too much. The bars will be slightly less sweet but still delicious.
Conclusion
These crowd-pleasing pumpkin pie cheesecake bars are the dessert that keeps on giving. They’re easy enough for a weekday baking project but impressive enough for your biggest holiday gathering. The combination of buttery shortbread, spiced pumpkin, and creamy cheesecake is simply unbeatable.
I love this recipe because it reminds me that sometimes the best things come from being wrong. Jen’s suggestion to skip the pre-baking step seemed crazy at the time, but it turned into my most-requested dessert recipe. That’s the thing about cooking—you never stop learning, and the best lessons often come from unexpected places.
Now it’s your turn. Make these bars for your next get-together. Customize them with your favorite spices or toppings. Share them with people you love. And when someone asks for the recipe—because they will—send them my way. I’d love to hear how they turned out. Drop a comment below or tag me in your photos. Happy baking!
Frequently Asked Questions
Can I use pumpkin pie filling instead of pumpkin puree?
No, don’t do that. Pumpkin pie filling is already sweetened and spiced, which will throw off the entire recipe. Stick with 100% pure pumpkin puree for the best results.
Why did my cheesecake layer crack?
Cracks usually happen from overbaking or overmixing. Make sure you pull the bars out when the center still jiggles slightly. Also, mix the cheesecake layer on low speed once you add the eggs to avoid incorporating too much air.
Can I make these bars ahead of time?
Absolutely. In fact, they’re better made a day ahead. The flavors meld together as they chill, and the texture firms up perfectly. Just keep them covered in the refrigerator until you’re ready to serve.
How do I get clean, neat slices?
Use a sharp knife and run it under hot water before each cut. Wipe the blade dry between slices. This gives you those beautiful, clean edges every time.
Can I use a different crust?
Yes, graham cracker crust works great. Crush about 1 ½ cups of graham crackers, mix with ¼ cup melted butter and 2 tablespoons sugar, then press into the pan. No need to pre-bake it—just pour the fillings right over.
Pin This Recipe!
Best Easy Pumpkin Pie Cheesecake Bars Recipe
These crowd-pleasing pumpkin pie cheesecake bars combine a buttery shortbread crust, spiced pumpkin layer, and creamy cheesecake for the ultimate fall dessert. Quick to prepare and perfect for gatherings, they deliver rich flavor with minimal effort.
- Prep Time: 30 minutes
- Cook Time: 40 minutes
- Total Time: 5 hours 10 minutes (includes cooling and chilling)
- Yield: 16 servings 1x
- Category: Dessert
- Cuisine: American
Ingredients
- 1 ½ cups (190g) all-purpose flour
- ½ cup (100g) granulated sugar
- ½ cup (113g or 1 stick) unsalted butter, cold and cubed
- ¼ teaspoon salt
- 1 can (15 oz or 425g) pumpkin puree
- ½ cup (100g) granulated sugar
- ¼ cup (50g) light brown sugar, packed
- 2 large eggs, room temperature
- 1 teaspoon vanilla extract
- 1 teaspoon ground cinnamon
- ½ teaspoon ground ginger
- ¼ teaspoon ground nutmeg
- ⅛ teaspoon ground cloves
- 16 oz (454g) cream cheese, softened
- ½ cup (100g) granulated sugar
- 2 large eggs, room temperature
- 1 teaspoon vanilla extract
Instructions
- Preheat oven to 350°F (175°C). Line a 9×13-inch baking pan with parchment paper, leaving overhang on the long sides.
- Make the crust: In a food processor, combine flour, ½ cup sugar, and salt. Pulse to mix. Add cold cubed butter and pulse until mixture resembles coarse sand with a few pea-sized butter pieces. Press firmly into the bottom of the prepared pan. Bake for 15-18 minutes until edges are lightly golden. Set aside to cool slightly.
- Make the pumpkin layer: In a large bowl, whisk together pumpkin puree, ½ cup granulated sugar, and brown sugar until smooth. Add eggs one at a time, whisking well after each. Stir in vanilla, cinnamon, ginger, nutmeg, and cloves. Set aside.
- Make the cheesecake layer: In another large bowl, beat softened cream cheese with an electric mixer on medium speed until smooth (about 2 minutes). Add ½ cup sugar and beat until fluffy (another 2 minutes). Add eggs one at a time, beating on low speed just until combined. Stir in vanilla.
- Assemble: Pour pumpkin mixture over the pre-baked crust and spread evenly. Spoon cheesecake mixture in dollops over the pumpkin layer, then gently spread to the edges.
- Bake at 350°F (175°C) for 35-40 minutes, until edges are set and center jiggles slightly. Turn off oven, crack door open, and let bars cool inside for 30 minutes. Remove and cool completely on a wire rack (about 1 hour). Refrigerate for at least 4 hours, preferably overnight, before slicing.
Notes
Room temperature ingredients are crucial for a smooth cheesecake layer. Do not overmix the cheesecake once eggs are added to prevent cracking. For clean slices, run a sharp knife under hot water and wipe dry between cuts. Bars can be frozen for up to 3 months.
Nutrition
- Serving Size: 1 bar
- Calories: 320
- Sugar: 24
- Sodium: 220
- Fat: 18
- Saturated Fat: 11
- Carbohydrates: 35
- Fiber: 1
- Protein: 6
Keywords: pumpkin pie cheesecake bars, pumpkin cheesecake bars, easy pumpkin dessert, fall dessert, Thanksgiving dessert, cheesecake bars, pumpkin bars


