Love this? Save it for later!
Share the inspiration with your friends
I was standing in line at the hardware store—of all places—holding a new showerhead and feeling very adult about it, when the woman behind me started talking about her Thanksgiving menu. Not just talking. She was mapping it out on a scrap of receipt paper, muttering about timing and oven space. I didn’t catch her name, but I caught her energy. She was the kind of person who hosts Friendsgiving every year and somehow makes it look effortless.
“The secret,” she said, tapping her pen on the counter, “isn’t the turkey. It’s the board you put out while people are arriving. If that’s good, nobody cares if the rolls are a little cold.” She then proceeded to describe exactly what she piles onto her Easy Ultimate Friendsgiving Fall Charcuterie Board—and honestly, I was taking mental notes before I even realized it. I mean, here was a stranger in the plumbing aisle, and she was giving me the blueprint for the entire pre-dinner spread.
I’ll admit, I was skeptical at first. I’ve seen my share of sad cheese plates at gatherings—the kind where the crackers outnumber everything else and the cheese is still cold from the fridge. But she was adamant. “You need contrast,” she told me. “Sweet, salty, tangy, and something that surprises people.” She mentioned adding pickled things and a little honey drizzle, and I remember thinking, okay, this woman knows what she’s talking about.
So I went home, bought a few extra things at the store, and built my first real fall charcuterie board. And let me tell you—she was right. It was the first thing to disappear at dinner. People stood around it like it was a campfire. That’s the kind of energy you want at Friendsgiving, right? Maybe you’ve been there—hovering near the food table, pretending to have a conversation while sneaking another slice of apple.
This board became my go-to for every fall gathering after that. It’s forgiving, it’s flexible, and it looks way more impressive than it actually is to put together. That’s the beauty of it. You don’t need to be a chef or a hostess with the mostest. You just need a few good ingredients and a little bit of strategy.
Why You’ll Love This Recipe
Let’s be honest—Friendsgiving can be a lot. You’re juggling dishes, timing, and a dozen different dietary preferences. The last thing you need is a complicated appetizer that requires last-minute assembly. This Easy Ultimate Friendsgiving Fall Charcuterie Board is designed to take the stress out of the equation. Here’s why it works so well for busy weeknight hosts and weekend entertainers alike:
- Quick & Easy: You can assemble this board in under 20 minutes. No cooking, no baking, no fuss. Just arrange and serve.
- Simple Ingredients: Everything on this board is available at your regular grocery store. No specialty shops or expensive imports required.
- Perfect for Friendsgiving: This board sets the tone for the whole meal. It’s casual enough for a potluck but elegant enough to feel special.
- Crowd-Pleaser: There’s truly something for everyone—meat lovers, cheese fans, veggie enthusiasts, and gluten-free friends alike.
- Unbelievably Delicious: The combination of sweet dried fruit, salty cured meats, creamy cheese, and crunchy nuts is next-level comfort food. That first bite? Pure fall magic.
What makes this board different from the rest is the intentional balance. It’s not just a pile of snacks thrown on a platter. Each component is chosen to complement the others, creating a cohesive eating experience. And because it’s all room temperature, you don’t have to worry about timing or oven space—which, honestly, is the real win during Friendsgiving chaos.
This is the kind of board that makes people close their eyes after the first bite. It’s comfort food reimagined—faster, simpler, but with the same soul-soothing satisfaction. Perfect for impressing guests without the stress, or turning a simple gathering into something memorable.
What Ingredients You Will Need
This recipe uses simple, seasonal ingredients to deliver bold flavor and satisfying texture without the fuss. Most of these are pantry staples or easy to find at any grocery store during the fall months.
For the Cheeses
- Aged Cheddar (8 oz) – Sharp, crumbly, and pairs beautifully with apple slices. I recommend Cabot or Tillamook for consistent quality.
- Brie (8 oz) – Soft, creamy, and decadent. Look for a wheel that gives slightly when pressed near the center.
- Goat Cheese Log (4 oz) – Tangy and spreadable. Adds a bright note that cuts through the richness.
For the Cured Meats
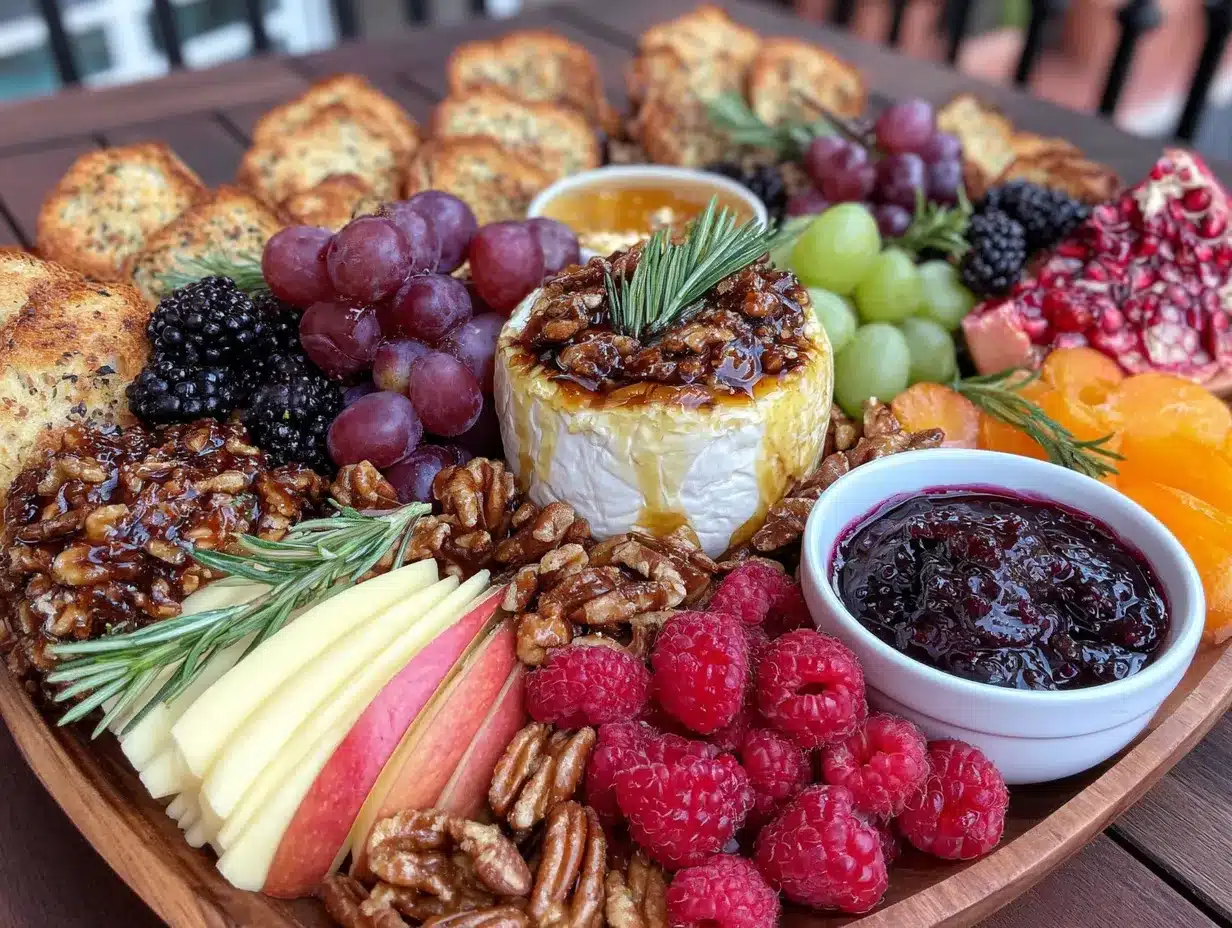
- Prosciutto (4 oz) – Thinly sliced, salty, and delicate. Fold into ribbons for easy grabbing.
- Salami (4 oz) – Choose a hard salami like Genoa or soppressata. Slice into thin rounds or small cubes.
- Capicola (4 oz) – Spicy and slightly fatty. A nice alternative if you want a little heat.
For the Fruits & Vegetables
- Apple (1 large, sliced) – Honeycrisp or Fuji work best. Toss with a little lemon juice to prevent browning.
- Pear (1 large, sliced) – Bosc or Bartlett are firm enough to hold up. Same tip—lemon juice is your friend.
- Red Grapes (1 cup) – Sweet little bursts that are easy to grab by the stem.
- Dried Figs (½ cup) – Chewy, sweet, and very fall-appropriate. Halve them if they’re large.
- Dried Apricots (½ cup) – Tangy and bright. A nice contrast to the richer items.
For the Crunch
- Mixed Nuts (1 cup) – Toasted almonds, pecans, and walnuts. Buy them raw and toast them yourself for better flavor.
- Crackers (1 box) – Choose a neutral water cracker or a seedy multi-grain variety. Avoid anything too heavily flavored.
- Baguette (1 small) – Sliced thin and lightly toasted if you have time. Adds a rustic touch.
For the Accents
- Honey (for drizzling) – Local honey adds a floral note. Drizzle over the brie or goat cheese.
- Fig Jam or Apple Butter (¼ cup) – A sweet spread that ties everything together. I love Bonne Maman fig jam.
- Pickled Shallots or Cornichons (½ cup) – The acidity cuts through the fat. Don’t skip these—they’re the surprise element.
- Fresh Rosemary Sprigs (for garnish) – Adds a pop of green and a subtle woodsy aroma.
Equipment Needed
You don’t need fancy equipment to build a stunning charcuterie board. Here’s what you’ll actually use:
- Large Wooden Board or Slate Platter (at least 12×18 inches) – A cutting board works perfectly if you don’t have a dedicated cheese board. I use an old bamboo board I found at a thrift store—it has character.
- Small Bowls (2-3) – For the jam, honey, and pickled items. Ramekins or small custard cups work great.
- Cheese Knives (2-3) – One for soft cheese, one for hard cheese. If you only have one, just wipe it between uses.
- Serving Spoons or Small Spatulas (2) – For the spreads and pickled items.
- Parchment Paper (optional) – If your board is porous or old, a sheet underneath makes cleanup a breeze.
Pro tip: If you don’t have a big enough board, use a baking sheet lined with parchment. Nobody cares what it’s on when the food is good.
Preparation Method
This board comes together in about 20 minutes. Here’s how to do it without losing your mind.
- Prep the fruit (5 minutes). Wash the grapes and pat them dry. Slice the apple and pear into thin wedges, then toss them with a squeeze of lemon juice to prevent browning. Halve the dried figs if they’re large. Set everything aside in small bowls.
- Prep the cheese (3 minutes). Remove the brie from its packaging and place it whole on the board. Cut the aged cheddar into thin slices or small cubes—whatever feels easier for grabbing. Slice the goat cheese log into rounds about ½-inch thick. Let the cheese sit at room temperature for at least 15 minutes before serving. This is crucial for flavor and texture.
- Prep the meats (3 minutes). Lay the prosciutto slices flat on a cutting board. Fold each slice in half lengthwise, then roll it into a loose ribbon. Arrange the salami slices in a small pile or fan them out. If using capicola, fold it similarly to the prosciutto.
- Toast the nuts (5 minutes). This step is optional but worth it. Spread the mixed nuts on a baking sheet and toast at 350°F for 5-7 minutes, until fragrant. Watch them closely—nuts burn fast. Let them cool completely before adding to the board.
- Arrange the board (5 minutes). Start by placing the small bowls on the board first. Fill one with fig jam or apple butter, one with honey, and one with pickled shallots or cornichons. Place the brie wheel in a prominent spot. Arrange the other cheeses around it, leaving space between them.
- Add the meats (2 minutes). Place the prosciutto ribbons near the brie. Put the salami near the cheddar. Grouping similar flavors together makes it easier for guests to find what they like.
- Fill in the gaps (2 minutes). Scatter the apple and pear slices around the board. Add clusters of grapes. Tuck the dried figs and apricots into empty spaces. Sprinkle the toasted nuts in small piles. Add the crackers and baguette slices in a few different spots.
- Garnish and serve (1 minute). Tuck fresh rosemary sprigs between the cheese and fruit. Drizzle a little honey over the brie or goat cheese if you want. Step back and admire your work—then put it out before anyone sees you taking a photo.
A few notes from experience: Don’t overcrowd the board. You want people to be able to reach items without knocking things over. If you have more ingredients than space, use a second smaller board or a plate. And if you’re making this ahead, cover the board with plastic wrap and refrigerate for up to 4 hours. Just let it come to room temperature for 20 minutes before serving.
Cooking Tips & Techniques
After making this board more times than I can count, I’ve learned a few things the hard way. Here’s what I wish someone had told me:
Temperature matters more than you think. Cheese straight from the fridge is flavorless. Let it sit out for at least 20-30 minutes before serving. The same goes for cured meats—they taste better at room temperature. If you’re short on time, take everything out while you prep the fruit.
Don’t overthink the arrangement. I used to stress about making things look perfect. But honestly, a slightly messy board looks more inviting than one that’s too organized. People like to see that a human made it, not a robot. Leave a little space between items so guests can grab things without a tug-of-war.
Balance is everything. You want a mix of textures and flavors in every bite. Pair a slice of sharp cheddar with a piece of dried fig and a nut. Or spread goat cheese on a cracker and top it with a pickled shallot. The contrast is what makes it memorable.
Watch out for soggy crackers. If you’re serving the board over a long period, place the crackers away from the wet items like pickles and jam. Nobody likes a limp cracker. You can also offer extra crackers on the side.
One mistake I made early on: I put everything on the board straight from the fridge. The brie was hard, the prosciutto was sweaty, and nobody touched the cheese for the first 30 minutes. Learn from my failure. Give everything time to breathe.
Variations & Adaptations
This board is endlessly customizable. Here are a few ways to make it your own:
Vegetarian Version
Skip the cured meats entirely and double up on the cheese and vegetables. Add roasted red peppers, marinated artichoke hearts, and fresh mozzarella balls. The goat cheese and brie are already vegetarian-friendly, so you’re most of the way there.
Gluten-Free Version
Replace the crackers and baguette with gluten-free crackers or rice cakes. Most cured meats and cheeses are naturally gluten-free, but always check the labels on any pre-marinated or flavored items. The nuts, fruit, and vegetables are all safe bets.
Spicy Fall Twist
Add a small bowl of hot honey or red pepper flakes for guests who like heat. Swap the salami for a spicy chorizo or soppressata. The sweetness of the dried fruit and honey balances the heat beautifully.
Dairy-Free Version
Use vegan cheese alternatives (there are some great ones now) or skip the cheese entirely and focus on meats, nuts, and vegetables. Hummus or baba ganoush can replace the creamy element. Roasted vegetables like butternut squash cubes add a fall touch.
Mini Board for Two
Halve all the ingredients and use a smaller board or even a large dinner plate. This is perfect for a cozy night in or a small Friendsgiving gathering. The proportions still work—just scale everything down.
I’ve tried the spicy twist version at a fall potluck, and it was gone in 20 minutes. People kept coming back for “just one more” piece of that hot honey-drizzled brie. It’s now my go-to for smaller gatherings.
Serving & Storage Suggestions
This board is best served at room temperature, so take it out of the fridge about 20 minutes before guests arrive. Arrange everything on the board and let it sit while people settle in. The flavors will be at their peak.
For presentation, I like to place the board in the center of the table so people can gather around it. If you’re serving multiple appetizers, put the board on a coffee table or sideboard to encourage mingling. It’s a natural conversation starter.
As for drinks, this board pairs beautifully with a crisp white wine like Sauvignon Blanc or a light red like Pinot Noir. For non-alcoholic options, sparkling apple cider or a spiced cranberry punch works wonderfully. The sweetness of the fruit and honey plays well with the acidity in the drinks.
Storage: If you have leftovers (unlikely, but possible), separate the components before storing. Cheese should be wrapped in wax paper or cheese paper, then placed in a zip-top bag. Meats can be stored in an airtight container for up to 3 days. Fruit and crackers are best eaten within a day—they don’t hold up well. Nuts can be stored in a sealed container at room temperature for up to a week.
Reheating: Don’t. This board is meant to be served cold or at room temperature. If you want to serve the brie warm, bake it at 350°F for 10 minutes before adding it to the board. But honestly, it’s just as good at room temperature.
One thing I’ve noticed: the flavors actually get better after an hour or so on the board. The cheese softens, the honey soaks in a little, and everything melds together. So don’t be afraid to put it out early and let it sit.
Nutritional Information & Benefits
This board is designed to be shared, so nutritional values will vary depending on what people grab. But here’s a rough estimate for a serving size of about 4-5 ounces of cheese, 2 ounces of meat, and a handful of fruit and nuts:
| Nutrient | Approximate Value |
|---|---|
| Calories | 450-550 |
| Protein | 20-25g |
| Fat | 30-35g |
| Carbohydrates | 25-30g |
| Fiber | 4-6g |
| Sugar | 15-20g (mostly from fruit) |
From a health perspective, this board offers a good balance of protein, healthy fats, and fiber. The nuts provide heart-healthy unsaturated fats, while the fruit adds natural sweetness and antioxidants. Cheese is a good source of calcium and protein. The cured meats are higher in sodium, so enjoy them in moderation.
If you’re watching your sugar intake, focus on the cheese, nuts, and meats rather than the dried fruit. The fresh fruit is a better option than the dried varieties. And if you’re gluten-sensitive, stick to the naturally gluten-free components.
I personally love that this board feels indulgent without being overly heavy. It’s the kind of food that satisfies without weighing you down—which is exactly what you want before a big Thanksgiving meal.
Conclusion
This Easy Ultimate Friendsgiving Fall Charcuterie Board is more than just an appetizer—it’s the centerpiece of your gathering. It sets the mood, sparks conversation, and gives people something to nibble on while they catch up. And the best part? It takes almost no effort to put together.
I still think about that woman in the hardware store sometimes. She had no idea she was giving me the recipe that would become my most-requested party dish. But that’s the thing about good food—it finds you when you least expect it. All you have to do is pay attention and be willing to try something new.
I’d love to hear how your board turns out. Did you add something unexpected? Did your friends fight over the last piece of brie? Drop a comment below and let me know. And if you’re looking for more easy entertaining ideas, check out my easy fall appetizer recipes for more inspiration.
Now go build that board, pour yourself something nice, and enjoy the chaos of Friendsgiving. You’ve got this.
Frequently Asked Questions
How far in advance can I assemble the charcuterie board?
You can assemble the board up to 4 hours ahead of time. Just cover it with plastic wrap and refrigerate. Remember to let it sit at room temperature for 20 minutes before serving so the cheese and meats can soften.
Can I make this board dairy-free?
Absolutely. Skip the cheese and use hummus, baba ganoush, or a dairy-free cheese alternative. Focus on the cured meats, nuts, fruit, and vegetables for a satisfying spread that everyone can enjoy.
What if I don’t have a large board?
No worries. Use a large baking sheet lined with parchment paper, or divide the ingredients between two smaller boards or plates. The presentation will still look beautiful, and nobody will care about the vessel once the food is out.
How do I keep the apple slices from turning brown?
Toss the apple and pear slices in a little lemon juice or lime juice right after slicing. The acidity prevents oxidation and keeps them looking fresh for hours. You can also use a commercial fruit fresh product if you prefer.
Can I add hot elements to this board?
Sure! A small bowl of warm spiced nuts or a baked brie wheel with honey and pecans would be a lovely addition. Just be sure to place the hot items on a separate small plate or in a heat-safe dish to protect your board.
Pin This Recipe!
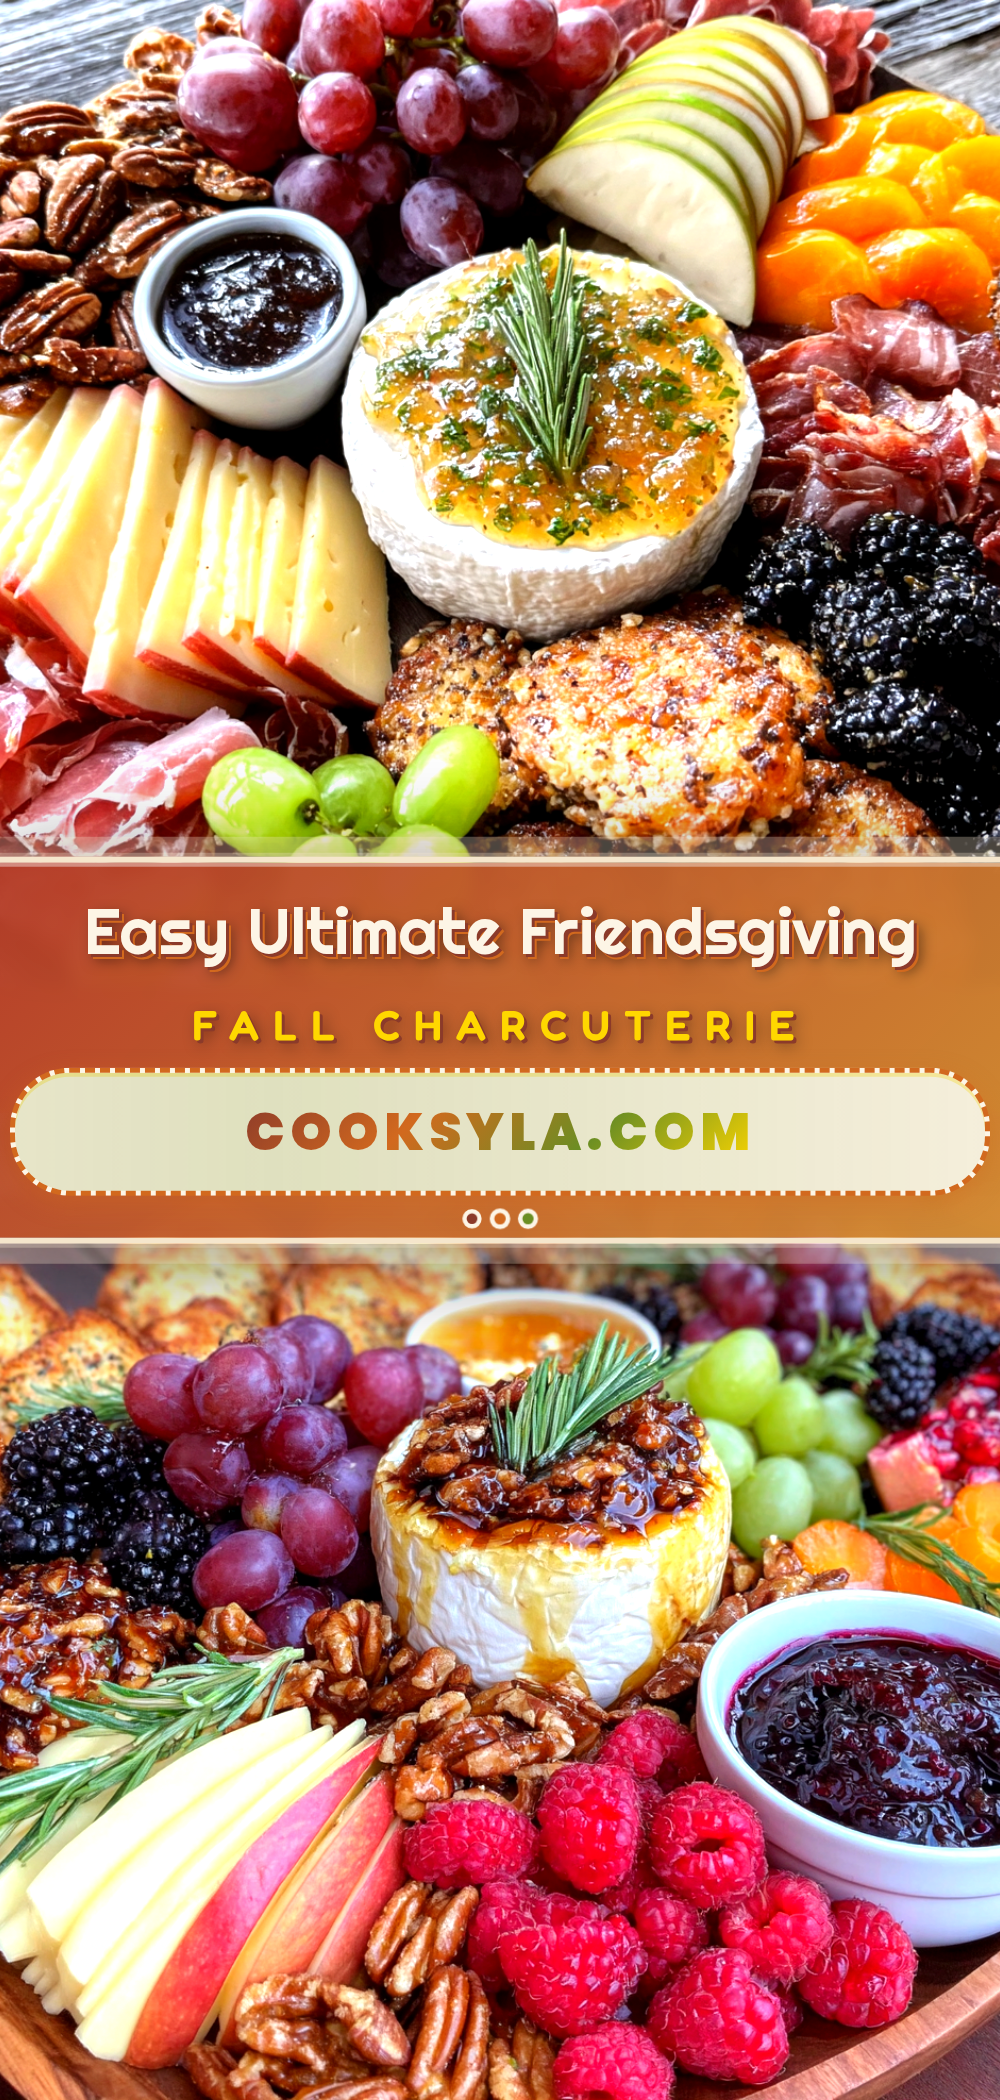
Easy Ultimate Friendsgiving Charcuterie Board for Fall
This Easy Ultimate Friendsgiving Fall Charcuterie Board is designed to take the stress out of the equation. It’s forgiving, flexible, and looks way more impressive than it actually is to put together, featuring a perfect balance of sweet, salty, tangy, and surprising elements.
- Prep Time: 20 minutes
- Cook Time: 5 minutes
- Total Time: 25 minutes
- Yield: 8-10 servings 1x
- Category: Appetizer
- Cuisine: American
Ingredients
- 8 oz Aged Cheddar
- 8 oz Brie
- 4 oz Goat Cheese Log
- 4 oz Prosciutto
- 4 oz Salami (Genoa or soppressata)
- 4 oz Capicola
- 1 large Apple (Honeycrisp or Fuji), sliced
- 1 large Pear (Bosc or Bartlett), sliced
- 1 cup Red Grapes
- ½ cup Dried Figs
- ½ cup Dried Apricots
- 1 cup Mixed Nuts (toasted almonds, pecans, walnuts)
- 1 box Crackers (neutral water cracker or multi-grain)
- 1 small Baguette, sliced
- Honey (for drizzling)
- ¼ cup Fig Jam or Apple Butter
- ½ cup Pickled Shallots or Cornichons
- Fresh Rosemary Sprigs (for garnish)
Instructions
- Prep the fruit (5 minutes): Wash the grapes and pat them dry. Slice the apple and pear into thin wedges, then toss them with a squeeze of lemon juice to prevent browning. Halve the dried figs if they’re large. Set everything aside in small bowls.
- Prep the cheese (3 minutes): Remove the brie from its packaging and place it whole on the board. Cut the aged cheddar into thin slices or small cubes. Slice the goat cheese log into rounds about ½-inch thick. Let the cheese sit at room temperature for at least 15 minutes before serving.
- Prep the meats (3 minutes): Lay the prosciutto slices flat on a cutting board. Fold each slice in half lengthwise, then roll it into a loose ribbon. Arrange the salami slices in a small pile or fan them out. If using capicola, fold it similarly to the prosciutto.
- Toast the nuts (5 minutes, optional): Spread the mixed nuts on a baking sheet and toast at 350°F for 5-7 minutes, until fragrant. Let them cool completely before adding to the board.
- Arrange the board (5 minutes): Start by placing the small bowls on the board first. Fill one with fig jam or apple butter, one with honey, and one with pickled shallots or cornichons. Place the brie wheel in a prominent spot. Arrange the other cheeses around it, leaving space between them.
- Add the meats (2 minutes): Place the prosciutto ribbons near the brie. Put the salami near the cheddar. Grouping similar flavors together makes it easier for guests to find what they like.
- Fill in the gaps (2 minutes): Scatter the apple and pear slices around the board. Add clusters of grapes. Tuck the dried figs and apricots into empty spaces. Sprinkle the toasted nuts in small piles. Add the crackers and baguette slices in a few different spots.
- Garnish and serve (1 minute): Tuck fresh rosemary sprigs between the cheese and fruit. Drizzle a little honey over the brie or goat cheese if you want. Step back and admire your work—then put it out before anyone sees you taking a photo.
Notes
Don’t overcrowd the board. If you have more ingredients than space, use a second smaller board or a plate. If making ahead, cover with plastic wrap and refrigerate for up to 4 hours. Let come to room temperature for 20 minutes before serving. Temperature matters: cheese and meats taste better at room temperature. Balance textures and flavors in every bite. Place crackers away from wet items to prevent sogginess.
Nutrition
- Serving Size: 4-5 ounces of cheese
- Calories: 450550
- Sugar: 1520
- Sodium: 8001000
- Fat: 3035
- Saturated Fat: 1518
- Carbohydrates: 2530
- Fiber: 46
- Protein: 2025
Keywords: Friendsgiving, charcuterie board, fall appetizer, cheese board, easy entertaining, holiday appetizer, party platter


