Love this? Save it for later!
Share the inspiration with your friends
There used to be a tiny bakery tucked between a laundromat and a dusty secondhand bookstore on the south end of town that made the most perfect banana bread I have ever tasted. When they closed suddenly two years ago—just a handwritten sign on the door saying “Thank you for the memories”—I actually stood there for a full minute feeling genuinely lost. After twelve attempts—including one that somehow turned out green inside, don’t ask—I finally got it.
That first bite of my recreation brought me right back to that cramped little shop with its mismatched chairs and the smell of cinnamon hanging in the air. I mean, I was practically sitting there in my own kitchen, and I could see the chipped countertops and hear the creaky floorboards. It was that specific. Honestly, I didn’t think I’d ever get there. The original had this incredible texture—dense but somehow light, sweet but not cloying—and I kept missing the mark by a mile. My family was getting pretty tired of being taste-testers, let me tell you.
What makes this version special is that it requires no mixer whatsoever. No stand mixer, no hand mixer, not even a whisk if you’re in a pinch—though a whisk helps. Just a bowl, a fork, and some good old-fashioned arm work. There’s something almost meditative about mashing bananas by hand, feeling them give under the pressure, watching the brown spots disappear into a creamy mush. And the best part? You probably already have every single ingredient sitting in your kitchen right now. Maybe you’ve been there—staring at three sad, overripe bananas on your counter, knowing you should do something with them before they cross over into the compost bin. This is that something.
Why You’ll Love This Recipe
After testing this recipe on four different occasions with varying banana ripeness levels and even a questionable batch of expired baking soda (don’t do that), I can confidently say this is the banana bread you’ll come back to again and again. Here is why it stands out from the crowd:
- No Mixer Needed : Seriously, you could make this in a hotel room with a fork and a bowl. No heavy equipment required, which means less cleanup and more immediate gratification.
- Simple Ingredients : Flour, sugar, butter, eggs, bananas, baking soda, salt, and vanilla. That is it. No weird specialty items that you will use once and forget about until they expire.
- Perfect for Busy Mornings : You can mix this batter in under ten minutes flat. While it bakes, you can shower, answer emails, or just stand there smelling it and feeling accomplished.
- Crowd-Pleaser Approved : I brought this to a neighborhood brunch and three people asked for the recipe before the loaf was even half gone. One person tried to take the last slice home in a napkin.
- Wholesome Without Being Preachy : This version uses less sugar than traditional recipes and swaps in whole wheat pastry flour for a fraction of the white flour. But you would never know it from the taste—it still feels like a treat, not a compromise.
What makes this recipe different from the dozens of banana bread recipes out there is the texture. I spent weeks figuring out the exact ratio of butter to banana to get that perfect crumb—moist but not gummy, tender but structured enough to hold a slice. The secret turned out to be mashing the bananas thoroughly but leaving a few small chunks for surprise pockets of intense banana flavor. That little detail came from my eighth failed attempt when I got lazy and didn’t mash properly. Sometimes failure really is the best teacher.
This is the kind of bread that makes you close your eyes after the first bite. It is comfort food reimagined—healthier, faster, but with the same soul-soothing satisfaction that makes you want to curl up on the couch with a thick slice and a cup of coffee. Perfect for impressing guests without breaking a sweat, or turning a quiet Tuesday morning into something worth remembering.
What Ingredients You Will Need
This recipe uses simple, wholesome ingredients that work together to create that classic banana bread flavor and texture without any fuss. Most of these are pantry staples you likely already have on hand.
- 3 large ripe bananas , mashed (about 1½ cups) — The riper the better. You want them heavily speckled with brown spots, almost looking past their prime. The natural sweetness of overripe bananas means you can use less added sugar.
- ⅓ cup unsalted butter , melted and slightly cooled — I use Kerrygold for its rich flavor, but any unsalted butter works. If you only have salted butter, just reduce the added salt to ¼ teaspoon.
- ½ cup granulated sugar — Regular white sugar gives the best texture. You can reduce this to ⅓ cup if your bananas are very sweet, but do not go below that or the structure suffers.
- ¼ cup light brown sugar , packed — This adds moisture and a subtle caramel note. Dark brown sugar works too if that is what you have.
- 1 large egg , room temperature — Cold eggs can seize the melted butter. Leave it on the counter for 30 minutes or float it in warm water for five minutes.
- 1 teaspoon vanilla extract — Pure vanilla extract makes a noticeable difference. I have tried imitation and it works fine, but the flavor is noticeably flatter.
- 1½ cups all-purpose flour — You can substitute up to half with whole wheat pastry flour for a heartier loaf. Do not use whole wheat bread flour—it will make the bread dense and heavy.
- 1 teaspoon baking soda — Make sure it is fresh. To test: drop a pinch into vinegar—if it fizzes vigorously, it is good.
- ½ teaspoon salt — Fine sea salt or table salt. Do not skip this—it balances the sweetness and enhances the banana flavor.
- ½ teaspoon ground cinnamon (optional but recommended) — Cinnamon and banana are a classic pairing. I add it every time.
That is genuinely it. No buttermilk, no sour cream, no complicated additions. The beauty of this recipe is its simplicity. I have made it with all-purpose flour and with a half-and-half blend of all-purpose and whole wheat pastry flour, and both versions were delicious. If you want to go gluten-free, use a good quality 1-to-1 gluten-free flour blend that contains xanthan gum—I have had success with Bob’s Red Mill brand. Just note that the texture will be slightly more delicate.
Equipment Needed
One of the best things about this recipe is how little equipment it requires. Here is what you will need:
- Large mixing bowl — Any medium-to-large bowl works. I use a ceramic one because it feels sturdy and doesn’t slide around.
- Fork or potato masher — For mashing the bananas. A fork works perfectly fine, but a potato masher makes it faster and more satisfying.
- Wooden spoon or rubber spatula — For mixing the batter. A wooden spoon gives you more leverage, but a spatula is better for scraping the sides.
- 9×5-inch loaf pan — Standard size. If you use an 8×4-inch pan, increase the baking time by 5-10 minutes. If you use a 10-inch pan, start checking at 45 minutes.
- Parchment paper — Not strictly necessary, but it makes cleanup infinitely easier. Cut a strip long enough to overhang on both long sides of the pan.
- Cooling rack — Essential for getting that perfect crust. If you do not have one, you can use the oven rack turned upside down—just be careful.
- Measuring cups and spoons — For accuracy. I cannot stress this enough: baking is chemistry. Eyeballing ingredients leads to inconsistent results.
If you do not have a loaf pan, you can bake this in a 9-inch round cake pan or even an 8×8-inch square pan. Just adjust the baking time—start checking at 35 minutes for a square pan. I once made this in a cast iron skillet when my loaf pan was in the dishwasher, and honestly, the crust was incredible. Necessity really is the mother of invention.
Preparation Method
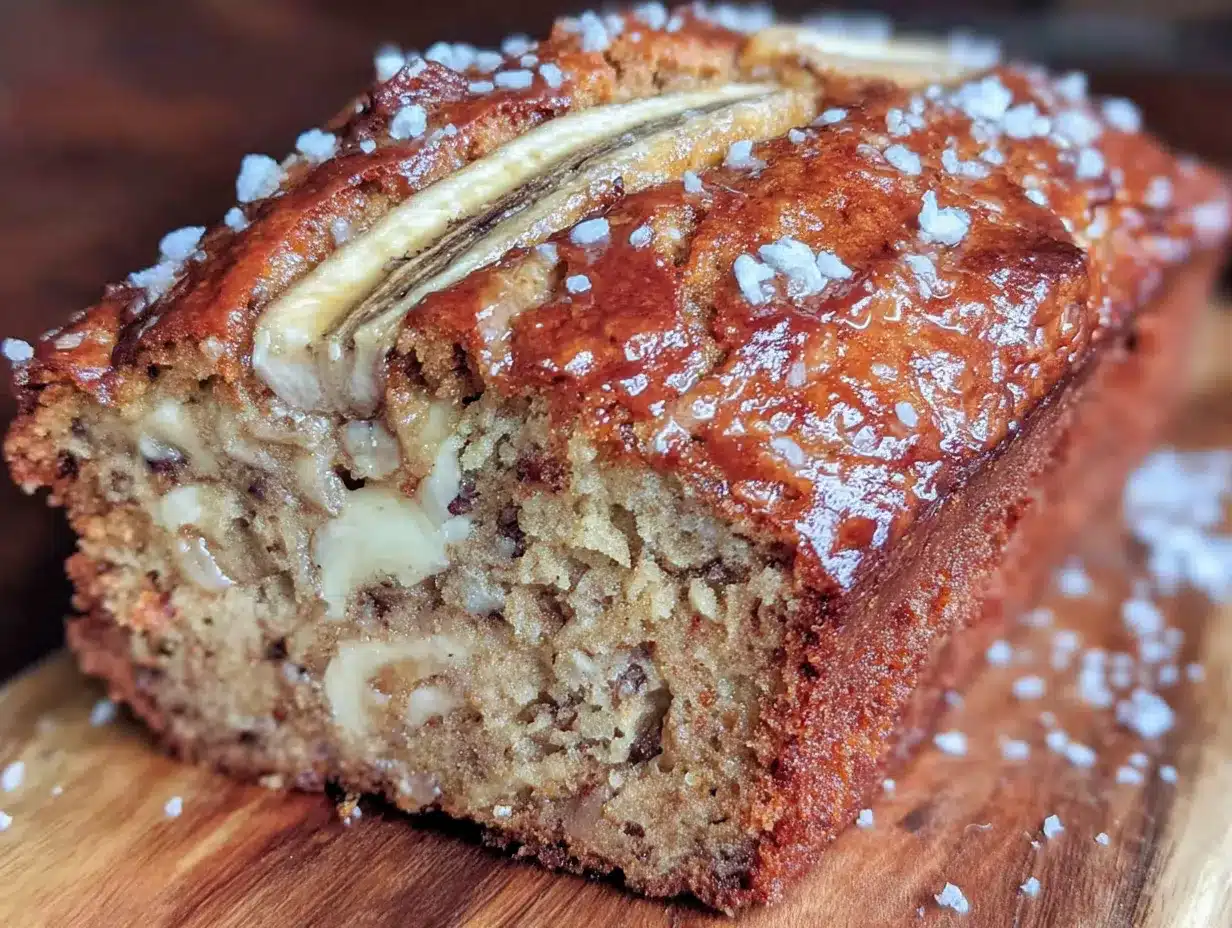
Preheat your oven to 350°F (175°C). Grease a 9×5-inch loaf pan or line it with parchment paper, leaving some overhang on the long sides for easy removal. Set it aside while you prepare the batter.
- Mash the bananas — In a large mixing bowl, mash the three ripe bananas with a fork or potato masher until mostly smooth. Leave a few small chunks—about the size of a pea—for texture. You want about 1½ cups of mashed banana. If you have slightly more or less, do not stress. The recipe is forgiving.
- Add the melted butter — Pour the melted and slightly cooled butter over the mashed bananas. Stir with your wooden spoon or spatula until well combined. The mixture will look a bit separated at first—that is normal. Keep stirring until it comes together into a uniform, slightly glossy mixture.
- Add the sugars — Add the granulated sugar and packed brown sugar. Stir vigorously for about 30 seconds until the sugars are fully incorporated and the mixture looks smooth. You want the sugar to start dissolving into the banana-butter mixture—this helps create that tender crumb.
- Add the egg and vanilla — Crack the room-temperature egg into the bowl and add the vanilla extract. Stir until the egg is fully incorporated and you cannot see any streaks of white. The mixture will look smooth and slightly thick at this point.
- Combine the dry ingredients — In a separate small bowl, whisk together the flour, baking soda, salt, and cinnamon (if using). Whisking ensures the baking soda and salt are evenly distributed throughout the flour—this is important for even rising and consistent flavor.
- Fold the dry ingredients into the wet — Add the flour mixture to the banana mixture. Use a gentle folding motion—cut down through the center, scrape along the bottom, and fold over the top. Do not stir vigorously. Stop as soon as you no longer see streaks of flour. A few small lumps are perfectly fine. Over-mixing develops gluten and will make your banana bread tough and rubbery.
- Pour into the prepared pan — Scrape the batter into your lined or greased loaf pan. Spread it evenly with your spatula. Give the pan a gentle tap on the counter to release any air bubbles.
- Bake — Place the pan in the preheated oven on the middle rack. Bake for 55-65 minutes, or until a toothpick inserted into the center comes out clean or with just a few moist crumbs. If the top is browning too quickly (after about 40 minutes), tent the pan loosely with aluminum foil.
- Cool in the pan — Let the banana bread cool in the pan on a wire rack for 10 minutes. This allows the structure to set so it does not fall apart when you remove it.
- Transfer to wire rack — After 10 minutes, lift the bread out using the parchment paper overhang and transfer it to a wire rack to cool completely. Do not slice it while it is still warm, or it will crumble. Patience here pays off. Let it cool for at least one hour before slicing.
The smell that fills your kitchen during baking is absolutely intoxicating—sweet, buttery, with that warm cinnamon note if you added it. I usually hover near the oven for the last ten minutes, peeking through the window like a kid waiting for cookies.
Cooking Tips & Techniques
After making this recipe more times than I care to count, I have picked up a few tricks that make a real difference. Let me share them so you can skip the trial and error.
Banana ripeness is everything. I cannot overstate this. Green bananas have too much starch and not enough sugar. Yellow bananas with no spots are okay but will produce a less flavorful, less sweet bread. You want bananas that are heavily speckled with brown—almost black in spots. If your bananas are not ripe enough, you can speed things up by placing them on a baking sheet in a 300°F oven for 15-20 minutes until the skins turn black. Let them cool before mashing. I have done this in a pinch, and it works surprisingly well.
Do not over-mix the batter. This is the most common mistake I see. Once you add the flour, use a gentle hand. Mix just until the flour disappears. Over-mixing develops gluten, which will give you a tough, rubbery loaf instead of a tender, cake-like crumb. I learned this the hard way on attempt number three—my bread came out so dense you could have used it as a doorstop.
Check for doneness correctly. A toothpick test is reliable, but make sure you insert it into the center of the loaf where it is thickest. If the toothpick comes out with wet batter, it needs more time. If it comes out with a few moist crumbs, it is perfect. If it comes out completely clean, it might be slightly overdone but still delicious. Every oven runs differently, so start checking at 50 minutes even if the recipe says 55.
Let it cool properly. I know it is tempting to slice into warm banana bread—the smell is practically irresistible. But slicing too early will result in a gummy, crumbly mess. The starches need time to set as the bread cools. One hour on a wire rack is the minimum. I usually wait two hours if I can manage it. The texture is noticeably better.
Here is a mistake I made that you should avoid: I once substituted applesauce for the butter thinking it would make the bread healthier. It did not. The bread was dense, gummy, and had a weird texture. Butter is essential for the right crumb structure. If you need a dairy-free option, use coconut oil or a good vegan butter stick—not margarine or applesauce.
Variations & Adaptations
This recipe is wonderfully adaptable. Here are some variations I have tried and loved:
- Chocolate Chip Banana Bread : Fold in ½ cup of semi-sweet chocolate chips after adding the flour. The chocolate melts into little pockets of richness throughout the loaf. I prefer dark chocolate chips for a less sweet result.
- Nutty Banana Bread : Fold in ½ cup of toasted walnuts or pecans, roughly chopped. Toast them first in a dry pan over medium heat for 3-4 minutes until fragrant—this brings out their oils and adds a deeper flavor.
- Vegan Version : Substitute the butter with melted coconut oil or vegan butter, and replace the egg with a flax egg (1 tablespoon ground flaxseed mixed with 3 tablespoons water, let sit for 5 minutes until gel-like). The texture will be slightly denser but still delicious.
- Gluten-Free Version : Use a 1-to-1 gluten-free flour blend that contains xanthan gum. I have tested this with Bob’s Red Mill brand and it worked beautifully. Add an extra tablespoon of milk or water if the batter seems too thick.
- Spiced Banana Bread : Add ½ teaspoon ground ginger and ¼ teaspoon ground nutmeg along with the cinnamon. This gives the bread a warm, almost holiday-like flavor that pairs beautifully with a smear of butter.
I once made a version with shredded coconut and dark chocolate chips that was absolutely divine—it felt tropical and indulgent at the same time. The coconut added a chewy texture that complemented the tender crumb perfectly. Feel free to experiment with mix-ins based on what you have in your pantry. That is half the fun of baking.
Serving & Storage Suggestions
This banana bread is best served at room temperature, sliced about ½-inch thick. A light toast in a skillet or toaster oven brings out the crust and warms the interior—spread a thin layer of salted butter on top while it is still warm and watch it melt into the bread. Pure heaven.
For a more indulgent serving suggestion, try it with a dollop of Greek yogurt and a drizzle of honey for breakfast, or with a scoop of vanilla ice cream for dessert. It also makes incredible French toast—slice it thick, dip it in an egg-milk mixture, and pan-fry until golden. Trust me on this one.
Storage: Wrap the cooled loaf tightly in plastic wrap or aluminum foil and store at room temperature for up to 4 days. Do not refrigerate—the cold temperature will dry out the bread and make it stale faster. I learned this the hard way after refrigerating a loaf and wondering why it was dry the next day.
Freezing: This banana bread freezes beautifully. Wrap the cooled loaf tightly in plastic wrap, then in a layer of aluminum foil, and freeze for up to 3 months. To thaw, leave it on the counter overnight still wrapped, then unwrap and let it come to room temperature. You can also freeze individual slices wrapped in plastic wrap for quick single servings—perfect for grabbing on busy mornings.
The flavors actually deepen after a day or two. Something about the banana and brown sugar melding together overnight creates an even more complex flavor. If you can resist eating the entire loaf on day one, day two is a real treat.
Nutritional Information & Benefits
Here is the approximate nutritional breakdown for one slice (based on 10 slices per loaf):
- Calories: 210
- Fat: 8g
- Carbohydrates: 33g
- Fiber: 2g
- Sugar: 18g
- Protein: 3g
Bananas are a great source of potassium, vitamin B6, and vitamin C. They also contain resistant starch, which acts as a prebiotic and supports gut health—especially when the bananas are less ripe. Using whole wheat pastry flour adds a bit more fiber than all-purpose flour, and reducing the sugar slightly keeps this bread from being overly indulgent.
This recipe is vegetarian and can easily be made dairy-free or vegan with the substitutions mentioned above. It contains gluten unless you use a gluten-free flour blend. If you have nut allergies, simply skip the nut variations and stick with the plain or chocolate chip version.
I love that this bread feels like a treat but uses real, whole ingredients. It is the kind of thing I feel good about eating for breakfast or packing in a lunchbox—satisfying without the sugar crash that comes from overly processed baked goods.
Conclusion
This wholesome classic banana bread is everything I hoped it would be when I started my quest to recreate that bakery loaf from years ago. It is simple enough for a beginner baker but rewarding enough for someone who has made a hundred loaves. No mixer, no complicated techniques, no obscure ingredients—just honest, delicious banana bread that tastes like comfort.
I encourage you to make this recipe your own. Add chocolate chips if that is your thing. Throw in some walnuts. Swap the cinnamon for nutmeg. The base is solid, and it welcomes your personal touch. That is the beauty of a good recipe—it gives you a foundation to stand on while leaving room for creativity.
I would love to hear how yours turns out. Did you add something unexpected? Did your family devour it in one sitting? Drop a comment below and let me know. And if you loved this recipe, share it with a friend who has been staring at overripe bananas on their counter, wondering what to do with them. Trust me, they will thank you.
Happy baking, friends. May your bananas be spotty and your bread be tender.
Frequently Asked Questions
Can I use frozen bananas for this recipe?
Absolutely. Thaw frozen bananas completely, then drain off any excess liquid before mashing. Frozen bananas tend to be extra watery, so draining is important to avoid a soggy loaf. The flavor is actually more concentrated in frozen bananas, so this can be a great option.
Why did my banana bread sink in the middle?
This usually happens for one of three reasons: the batter was over-mixed, the oven temperature was too low, or the bread was under-baked. Make sure your oven is fully preheated to 350°F and use an oven thermometer to verify accuracy. Also, do not open the oven door during the first 40 minutes of baking—the temperature fluctuation can cause the center to collapse.
Can I make this into muffins instead of a loaf?
Yes! Divide the batter among a greased or lined 12-cup muffin tin. Bake at 350°F for 18-22 minutes, or until a toothpick inserted into the center of a muffin comes out clean. Muffins will bake faster than a loaf, so start checking at 18 minutes. This is a great option for portion control or for packing in lunchboxes.
How do I know when my bananas are ripe enough?
Look for bananas with heavy brown speckling or even completely black skins. They should feel soft to the touch and smell distinctly sweet. If they are still yellow with green tips, they are not ready. If they are completely black and mushy, they are actually perfect—do not throw them away! The darker the banana, the sweeter and more flavorful your bread will be.
Can I reduce the sugar further?
You can reduce the granulated sugar to ⅓ cup without significantly affecting the texture, especially if your bananas are very ripe and sweet. Going below that may result in a less tender crumb and a less sweet loaf. If you want to reduce sugar further, try adding a mashed very ripe banana to compensate for the lost sweetness and moisture.
Pin This Recipe!
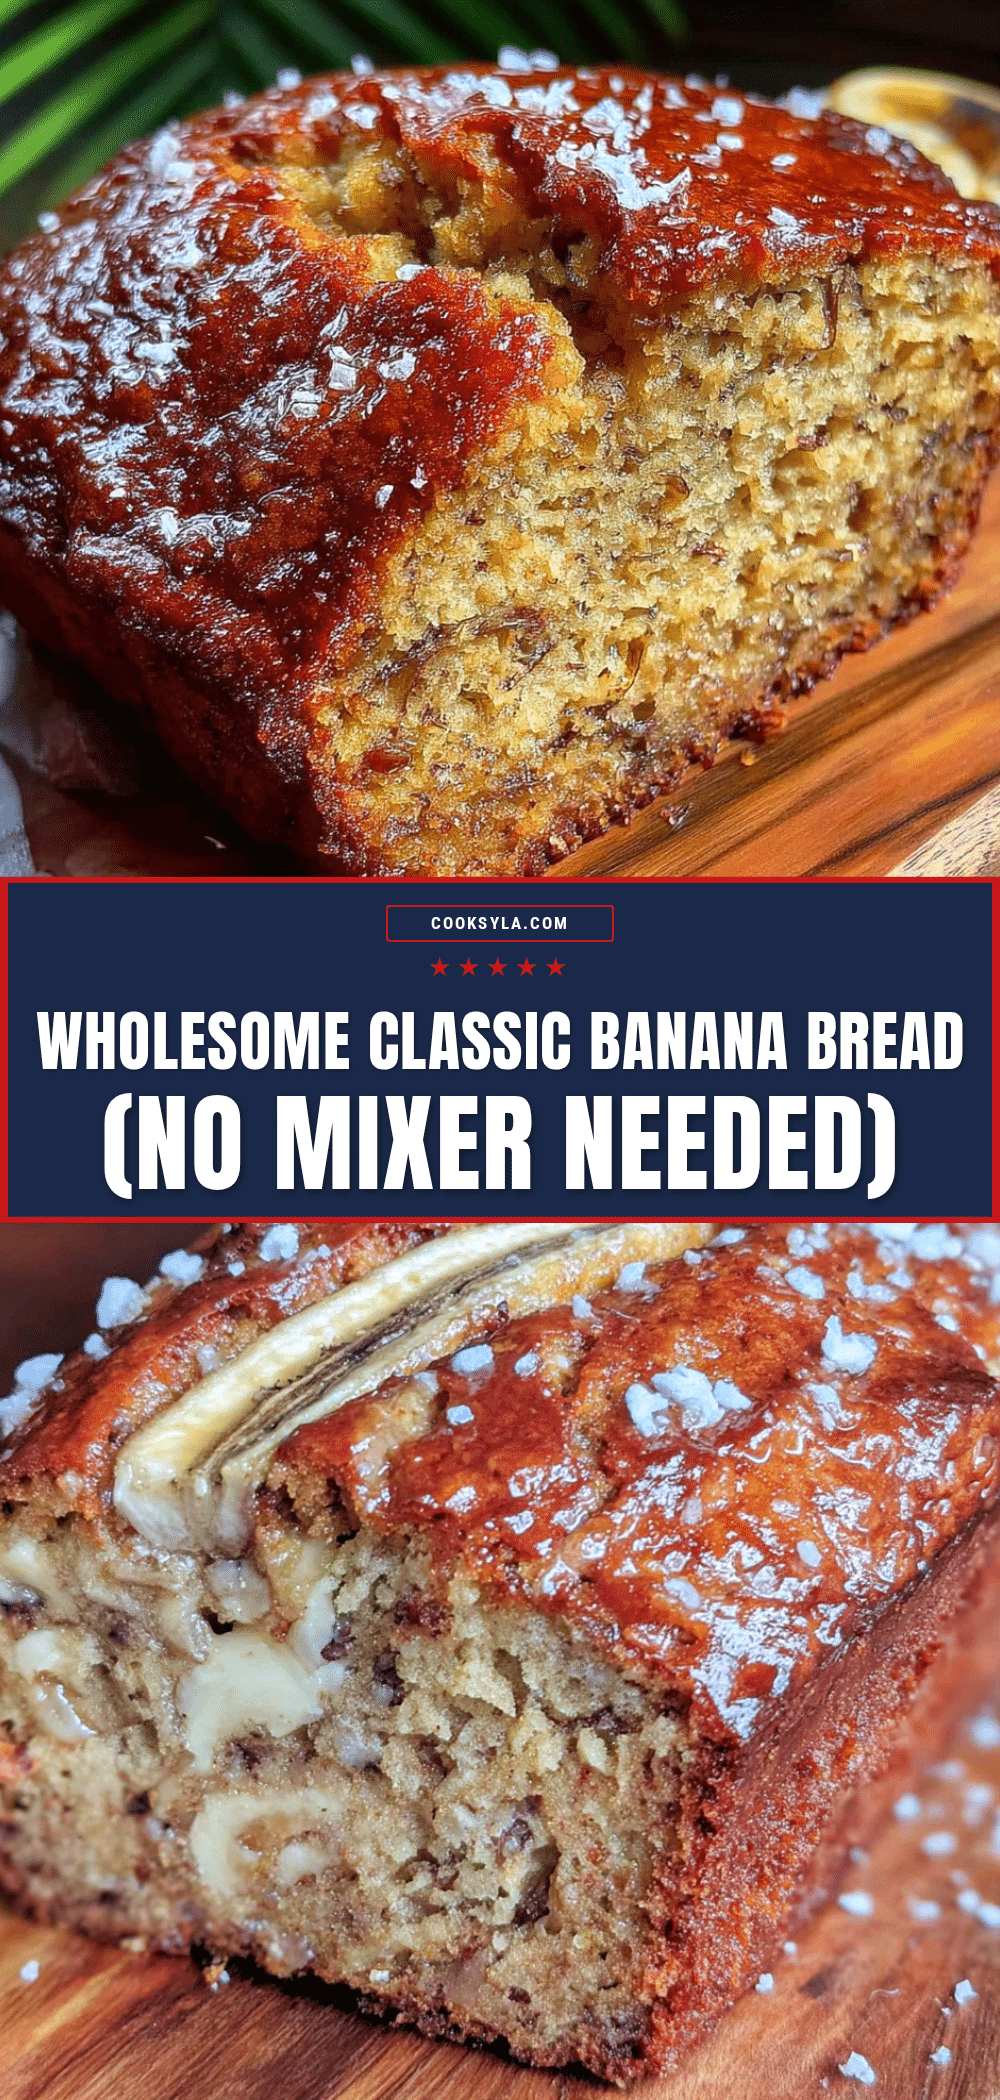
Wholesome Classic Banana Bread: No Mixer Needed
This no-mixer banana bread is dense yet light, sweet but not cloying, and made with simple pantry ingredients. It’s the perfect way to use up overripe bananas for a comforting, crowd-pleasing treat.
- Prep Time: 10 minutes
- Cook Time: 55 minutes
- Total Time: 1 hour 5 minutes
- Yield: 10 servings 1x
- Category: Dessert
- Cuisine: American
Ingredients
- 3 large ripe bananas, mashed (about 1½ cups)
- ⅓ cup unsalted butter, melted and slightly cooled
- ½ cup granulated sugar
- ¼ cup light brown sugar, packed
- 1 large egg, room temperature
- 1 teaspoon vanilla extract
- 1½ cups all-purpose flour
- 1 teaspoon baking soda
- ½ teaspoon salt
- ½ teaspoon ground cinnamon (optional but recommended)
Instructions
- Preheat your oven to 350°F (175°C). Grease a 9×5-inch loaf pan or line it with parchment paper, leaving some overhang on the long sides for easy removal.
- In a large mixing bowl, mash the three ripe bananas with a fork or potato masher until mostly smooth. Leave a few small chunks—about the size of a pea—for texture.
- Pour the melted and slightly cooled butter over the mashed bananas. Stir until well combined.
- Add the granulated sugar and packed brown sugar. Stir vigorously for about 30 seconds until fully incorporated and smooth.
- Add the room-temperature egg and vanilla extract. Stir until the egg is fully incorporated and no streaks of white remain.
- In a separate small bowl, whisk together the flour, baking soda, salt, and cinnamon (if using).
- Add the flour mixture to the banana mixture. Use a gentle folding motion—cut down through the center, scrape along the bottom, and fold over the top. Stop as soon as you no longer see streaks of flour. A few small lumps are fine.
- Scrape the batter into the prepared loaf pan and spread evenly. Give the pan a gentle tap on the counter to release air bubbles.
- Bake on the middle rack for 55-65 minutes, or until a toothpick inserted into the center comes out clean or with just a few moist crumbs. If the top browns too quickly, tent loosely with aluminum foil after about 40 minutes.
- Let the banana bread cool in the pan on a wire rack for 10 minutes.
- After 10 minutes, lift the bread out using the parchment paper overhang and transfer to a wire rack to cool completely. Do not slice for at least one hour.
Notes
For best results, use very ripe bananas with heavy brown speckling. Do not over-mix the batter to avoid a tough loaf. Let the bread cool completely before slicing for the best texture. The flavors deepen after a day or two.
Nutrition
- Serving Size: 1 slice (1/10 of loa
- Calories: 210
- Sugar: 18
- Sodium: 220
- Fat: 8
- Saturated Fat: 4
- Carbohydrates: 33
- Fiber: 2
- Protein: 3
Keywords: banana bread, no mixer, easy banana bread, classic banana bread, wholesome banana bread


