Love this? Save it for later!
Share the inspiration with your friends
I was standing in line at my local hardware store—of all places—waiting to return a paint sprayer that had absolutely defeated me. The guy ahead of me, this older fella named Earl who I’d only ever seen buying birdseed, turns around and says, “You look like you could use some homemade ice cream.” And I laughed, because honestly, I probably looked like I needed a vacation, but ice cream was close enough. He told me about this no-churn salted caramel recipe his wife had been making for their church potlucks for thirty years. Three ingredients. No machine. And apparently, it caused actual arguments over who got the last scoop.
I scribbled it on the back of my receipt while holding a bag of sunflower seeds. Let me tell you, I was skeptical. I mean, salted caramel ice cream without an ice cream maker? It sounded too good to be true. But Earl’s wife, Betty, had apparently been perfecting this recipe since the Carter administration, and she swore by it. So I went home, grabbed some heavy cream, a can of sweetened condensed milk, and a bag of good-quality caramels, and I gave it a shot.
The first batch was a little too soft—I got impatient and didn’t chill the bowl long enough. But the second batch? That was the one. The texture was so creamy and rich, you’d never guess it didn’t come from a fancy machine. And the salted caramel ribbons running through it? Pure magic. I brought it to a backyard barbecue that weekend, and I’m not exaggerating when I say three different people asked for the recipe before they even finished their bowls. Maybe you’ve been there—you bring a dessert to a party and suddenly you’re the most popular person there. This ice cream does that.
So here we are. This is the best no-churn salted caramel ice cream I’ve ever made, and it’s about to become your secret weapon for every summer gathering, holiday dinner, or Tuesday night that needs a little sweetness. Trust me on this one.
Why You’ll Love This Recipe
I’ve tested a lot of no-churn ice cream recipes over the years, and this one wins every single time. It’s not just easy—it’s practically foolproof. You don’t need a degree in pastry arts or a kitchen full of gadgets. You just need a little patience and the right ingredients.
- Only 3 Main Ingredients: Heavy cream, sweetened condensed milk, and soft caramels. That’s it. No eggs, no custard base, no complicated steps.
- No Ice Cream Maker Required: This is the best no-churn salted caramel ice cream for people who don’t own specialty equipment. Just a mixing bowl and a whisk or hand mixer.
- Perfect for Parties: You can make it days ahead, so when guests show up, you’re relaxed and ready. It’s a show-stopping dessert without the last-minute stress.
- Crowd-Pleasing Flavor: Sweet, salty, creamy—it hits every note. Kids love it, adults fight over it, and it pairs beautifully with almost any other dessert.
- Customizable: Add chocolate chunks, crushed pretzels, or a swirl of peanut butter. This base recipe is a springboard for your own creations.
What makes this recipe different from all the other no-churn versions out there? It’s the texture. Most no-churn ice creams can get icy or grainy after a day in the freezer. But by folding in melted caramel at just the right moment, you get a silky, scoopable consistency that stays creamy for days. Plus, the salt balances the sweetness so perfectly, you won’t miss the complicated custard bases. This is comfort food reimagined—faster, simpler, but with the same soul-soothing satisfaction. Perfect for impressing guests without any of the fuss.
What Ingredients You Will Need
This recipe uses simple, everyday ingredients to create something truly special. The magic is in how they come together. Here’s what you’ll need:
For the Ice Cream Base
- 2 cups (480 ml) heavy cream – Also called heavy whipping cream. This is what gives the ice cream its light, airy texture. Make sure it’s very cold—straight from the fridge.
- 1 can (14 ounces / 397 grams) sweetened condensed milk – Not evaporated milk. This is the key to sweetness and creaminess without needing to cook a custard. I prefer Eagle Brand or Borden for consistent results.
- 1 teaspoon vanilla extract – Pure vanilla extract adds depth. Imitation works in a pinch, but the real stuff makes a difference here.
- Pinch of sea salt – Just a small pinch in the base to enhance all the flavors.
For the Salted Caramel Swirl
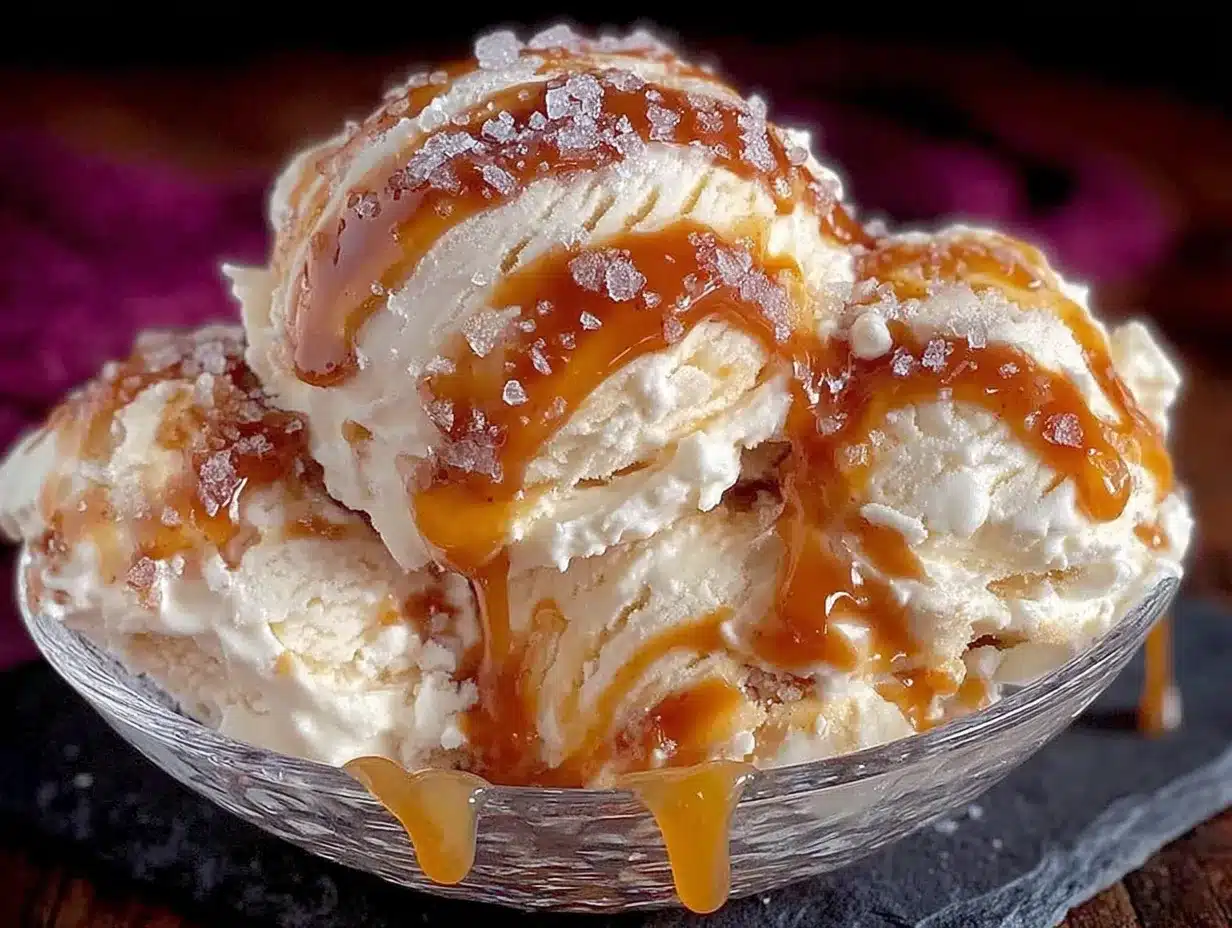
- 11 ounces (about 25-30) soft caramel candies – Look for Kraft Caramels or Werther’s Soft Caramels. Avoid hard caramels—they won’t melt smoothly. Unwrap them while you’re watching TV; it’s tedious but worth it.
- 1/4 cup (60 ml) heavy cream – To help the caramels melt into a pourable sauce.
- 1/2 teaspoon flaky sea salt – Like Maldon or Fleur de Sel. This is for the swirl and the top. It adds that perfect crunchy, salty contrast.
Ingredient Tips & Substitutions
- Dairy-Free Option: Use full-fat coconut cream (chilled) instead of heavy cream, and a dairy-free sweetened condensed milk like Nature’s Charm. The texture will be slightly different but still delicious.
- Caramel Shortcut: If you’re short on time, use 1/2 cup of high-quality store-bought caramel sauce instead of melting candies. Just make sure it’s thick, not runny.
- Flavor Boost: Add 1 tablespoon of bourbon or dark rum to the base before freezing. It lowers the freezing point slightly, making the ice cream even softer and scoopable.
- Salt Level: Taste your caramel before adding salt. Some caramel candies are already quite salty. Adjust the flaky salt to your preference.
Equipment Needed
The beauty of this recipe is that you probably already own everything you need. No fancy gadgets required.
- Large mixing bowl – Metal or glass works best. For best results, chill the bowl in the freezer for 15 minutes before whipping the cream.
- Hand mixer or stand mixer – A hand mixer is perfect. You can also whisk by hand, but your arm will get a workout. I’ve done both, and the mixer saves time and frustration.
- Saucepan – Small to medium-sized, for melting the caramels. Use a heavy-bottomed pan to prevent burning.
- Rubber spatula – For folding the cream into the condensed milk without deflating it. A gentle hand is key.
- Loaf pan or freezer-safe container – A standard 9×5-inch loaf pan works great. You can also use a 2-quart round container. I like using a metal loaf pan because it chills faster.
- Plastic wrap or parchment paper – To press directly onto the surface of the ice cream. This prevents ice crystals from forming.
Budget-Friendly Tip: Don’t have a hand mixer? A whisk and some elbow grease will work. Just make sure the cream is very cold, and whip it in a chilled bowl. It’ll take about 5-7 minutes of steady whisking.
Preparation Method
This is where the magic happens. Follow these steps carefully, and you’ll have the best no-churn salted caramel ice cream you’ve ever tasted.
-
Make the caramel swirl first. Unwrap all your caramel candies and place them in a small saucepan with 1/4 cup of heavy cream. Warm over low heat, stirring constantly with a rubber spatula. This takes about 5-7 minutes. Don’t rush it—high heat will scorch the caramel. Once smooth and fully melted, remove from heat and stir in 1/2 teaspoon of flaky sea salt. Set aside to cool to room temperature. It will thicken as it cools.
-
Whip the heavy cream. Pour 2 cups of cold heavy cream into your chilled mixing bowl. Using a hand mixer on medium-high speed, whip the cream until stiff peaks form. This means when you lift the beaters, the cream stands up straight without drooping. Be careful not to overwhip, or you’ll end up with butter. It should take about 3-4 minutes with a mixer.
-
Combine the base. In a separate large bowl, whisk together the sweetened condensed milk, vanilla extract, and a pinch of sea salt until smooth. Now, gently fold the whipped cream into this mixture. Use a rubber spatula and a cutting motion—fold from the bottom up, turning the bowl as you go. Stop when there are no more white streaks. You want a uniform, airy batter.
-
Layer and swirl. Spoon about one-third of the ice cream base into your loaf pan. Drizzle about one-third of the cooled caramel sauce over the top. Use a knife or skewer to gently swirl it through—don’t mix it completely; you want ribbons of caramel. Repeat with another layer of base, another drizzle of caramel, and swirl again. Finish with the remaining base and caramel. Reserve a tablespoon of caramel for the top if you want a pretty finish.
-
Add a final touch. Sprinkle a little extra flaky sea salt over the top. This isn’t just for looks—it creates that incredible salty crunch with every bite.
-
Freeze. Press a piece of plastic wrap directly onto the surface of the ice cream. This is crucial—it prevents ice crystals from forming. Place the loaf pan in the freezer and let it set for at least 6 hours, but overnight is better. The longer it freezes, the firmer and creamier it gets.
-
Serve. When you’re ready to serve, let the ice cream sit at room temperature for 5-10 minutes to soften slightly. This makes scooping much easier. Use a warm ice cream scoop for clean, beautiful scoops.
Sensory Cues: At step 2, the cream should look like cloud peaks and feel light. At step 4, the caramel should be thick but pourable—if it’s too runny, it will sink to the bottom. The final texture after freezing should be smooth and scoopable, not rock-hard.
Cooking Tips & Techniques
I’ve made this recipe more times than I can count, and I’ve learned a few things the hard way. Let me save you the trouble.
Chill everything. Cold cream whips better. A cold bowl whips better. Even a cold whisk helps. Pop your bowl and beaters in the freezer for 10-15 minutes before you start. It makes a noticeable difference in volume and texture.
Don’t skip the plastic wrap. I know it’s tempting to just put a lid on it, but air exposure leads to ice crystals. Pressing plastic wrap directly onto the surface creates a seal that keeps the ice cream silky smooth. I forgot to do this once, and the top layer was crunchy with ice—lesson learned.
Patience with the caramel. Low and slow is the rule. If you crank up the heat to speed things up, the caramel will seize or burn. Stir constantly and be patient. It’s worth the extra few minutes.
Swirl, don’t stir. When adding the caramel to the ice cream base, use a light hand. Over-mixing will turn your beautiful white base into a brown mess. You want distinct ribbons of caramel running through the vanilla base. A few gentle figure-eight motions with a knife is all it takes.
Taste as you go. Before you freeze, taste the base. Is it sweet enough? Does it need more salt? Adjust now. Once it’s frozen, it’s harder to fix. I like my base just slightly sweeter than I want the final product, because freezing dulls sweetness a bit.
Timing strategy for parties. Make this at least 24 hours before your event. It needs a full night to set properly. Plus, it gives you one less thing to worry about on the day of. I usually make it two days ahead—the flavors actually meld and improve over time.
Variations & Adaptations
This base recipe is incredibly versatile. Here are some of my favorite variations:
Chocolate Salted Caramel
Add 1/4 cup of unsweetened cocoa powder to the condensed milk mixture before folding in the cream. You’ll get a chocolate base with caramel swirls. It’s like a fancy frozen candy bar.
Pretzel Crunch
Crush 1 cup of salted pretzels and fold them into the ice cream base before freezing. The salty crunch against the creamy caramel is addictive. I did this for a Super Bowl party, and it disappeared in minutes.
Boozy Bourbon Caramel
Add 2 tablespoons of bourbon to the caramel sauce after melting. The alcohol keeps the ice cream slightly softer and adds a warm, grown-up flavor. Perfect for holiday dinners.
Vegan Version
Use full-fat coconut cream (chilled overnight) instead of heavy cream. Use a dairy-free sweetened condensed coconut milk. The texture is a bit denser, but the flavor is still incredible. My vegan friend couldn’t tell the difference.
Mocha Swirl
Dissolve 1 tablespoon of instant espresso powder in 1 tablespoon of hot water and swirl it into the base along with the caramel. The coffee flavor enhances the caramel beautifully.
Serving & Storage Suggestions
This ice cream is a showstopper on its own, but here’s how to make it even more impressive.
Serving Temperature: Let the ice cream sit at room temperature for 5-10 minutes before scooping. This softens it to the perfect consistency—creamy but not melty.
Presentation Ideas: Serve in chilled glass bowls or vintage coupe glasses. Top with an extra drizzle of warm caramel sauce, a sprinkle of flaky sea salt, and a few toasted pecans or walnuts. A dollop of whipped cream never hurts either.
What to Serve Alongside: This ice cream pairs beautifully with warm desserts. Try it over a slice of warm apple pie, a brownie sundae, or alongside a piece of chocolate cake. For a party, set up an ice cream bar with toppings like crushed cookies, sprinkles, hot fudge, and cherries.
Storage: Keep the ice cream in the freezer, tightly covered with plastic wrap pressed onto the surface, plus a lid or foil. It will stay fresh for up to 2 weeks. After that, it may start to develop ice crystals, but it’s still perfectly safe to eat.
Reheating Caramel: If your leftover caramel sauce thickens in the fridge, microwave it for 10-15 seconds and stir. Drizzle over the ice cream just before serving.
Flavor Development: The flavors actually deepen after a day or two in the freezer. The salt mellows, the caramel infuses the base, and everything becomes more harmonious. So don’t be afraid to make it ahead.
Nutritional Information & Benefits
Let’s be real—this is a treat. But it’s made with real, simple ingredients, and that counts for something.
Estimated per serving (1/2 cup, based on 12 servings):
- Calories: 380
- Total Fat: 24g
- Saturated Fat: 15g
- Carbohydrates: 38g
- Sugar: 34g
- Protein: 5g
- Sodium: 220mg
Health Benefits of Key Ingredients:
- Heavy cream provides calcium and vitamin A. It’s also a source of healthy fats that help keep you full.
- Sea salt contains trace minerals like magnesium and potassium. Plus, it helps balance blood sugar when paired with sweets.
- Caramel – okay, there’s not much nutritional upside here, but the joy it brings is real. Everything in moderation.
Dietary Considerations: This recipe contains dairy and gluten-free (if you use certified gluten-free caramels). It is not vegan, low-fat, or low-sugar. For a lighter option, use a lower-fat milk and reduce the caramel, but honestly, this is a splurge. Enjoy it as intended.
Potential Allergens: Milk, dairy. Some caramel candies may contain soy or corn syrup. Check labels if you have sensitivities.
From my perspective, this is a dessert that nourishes the soul. It’s the kind of treat that brings people together, sparks conversation, and makes ordinary moments feel special. And that has its own kind of value.
Conclusion
This best no-churn salted caramel ice cream is more than just a recipe—it’s a party in a bowl. It’s the dessert that makes people lean in and ask, “Wait, you made this?” And when you tell them it only took 20 minutes of active time and no special equipment, they’ll never believe you. Until they taste it.
I love this recipe because it reminds me that the best things in life don’t have to be complicated. A few simple ingredients, a little patience, and you’ve got something that feels utterly luxurious. Whether you’re hosting a summer barbecue, a holiday dinner, or just a quiet night in, this ice cream delivers every single time.
So go ahead—give it a try. Customize it with your favorite mix-ins, share it with the people you love, and don’t forget to save a little for yourself. And if you come up with a brilliant variation, I’d love to hear about it. Drop a comment below, share your photos, and let’s keep this delicious conversation going. Happy scooping!
Frequently Asked Questions
Can I use store-bought caramel sauce instead of melting candies?
Absolutely. Use about 1/2 cup of thick, high-quality caramel sauce. Just make sure it’s not too runny, or it will sink to the bottom of your ice cream. Let it cool to room temperature before swirling it in.
Why did my ice cream turn out icy?
Ice crystals usually form when the ice cream is exposed to air or temperature fluctuations. Make sure you press plastic wrap directly onto the surface before freezing. Also, avoid opening the freezer door too often while it’s setting.
Can I make this without a hand mixer?
Yes, you can whisk the cream by hand. It’ll take about 5-7 minutes of steady whisking. Make sure the cream and bowl are very cold, and use a large bowl to allow plenty of movement. It’s a good arm workout!
How long does this ice cream keep in the freezer?
It stays fresh and creamy for up to 2 weeks if stored properly. After that, it may develop some ice crystals, but it’s still safe to eat. Just let it soften slightly before scooping.
Can I double this recipe for a party?
Yes, this recipe doubles beautifully. Use a larger container, like a 9×13-inch dish, or divide it between two loaf pans. Just make sure your mixing bowl is big enough to hold all that whipped cream. You may need to whip the cream in batches if your mixer is small.
Pin This Recipe!
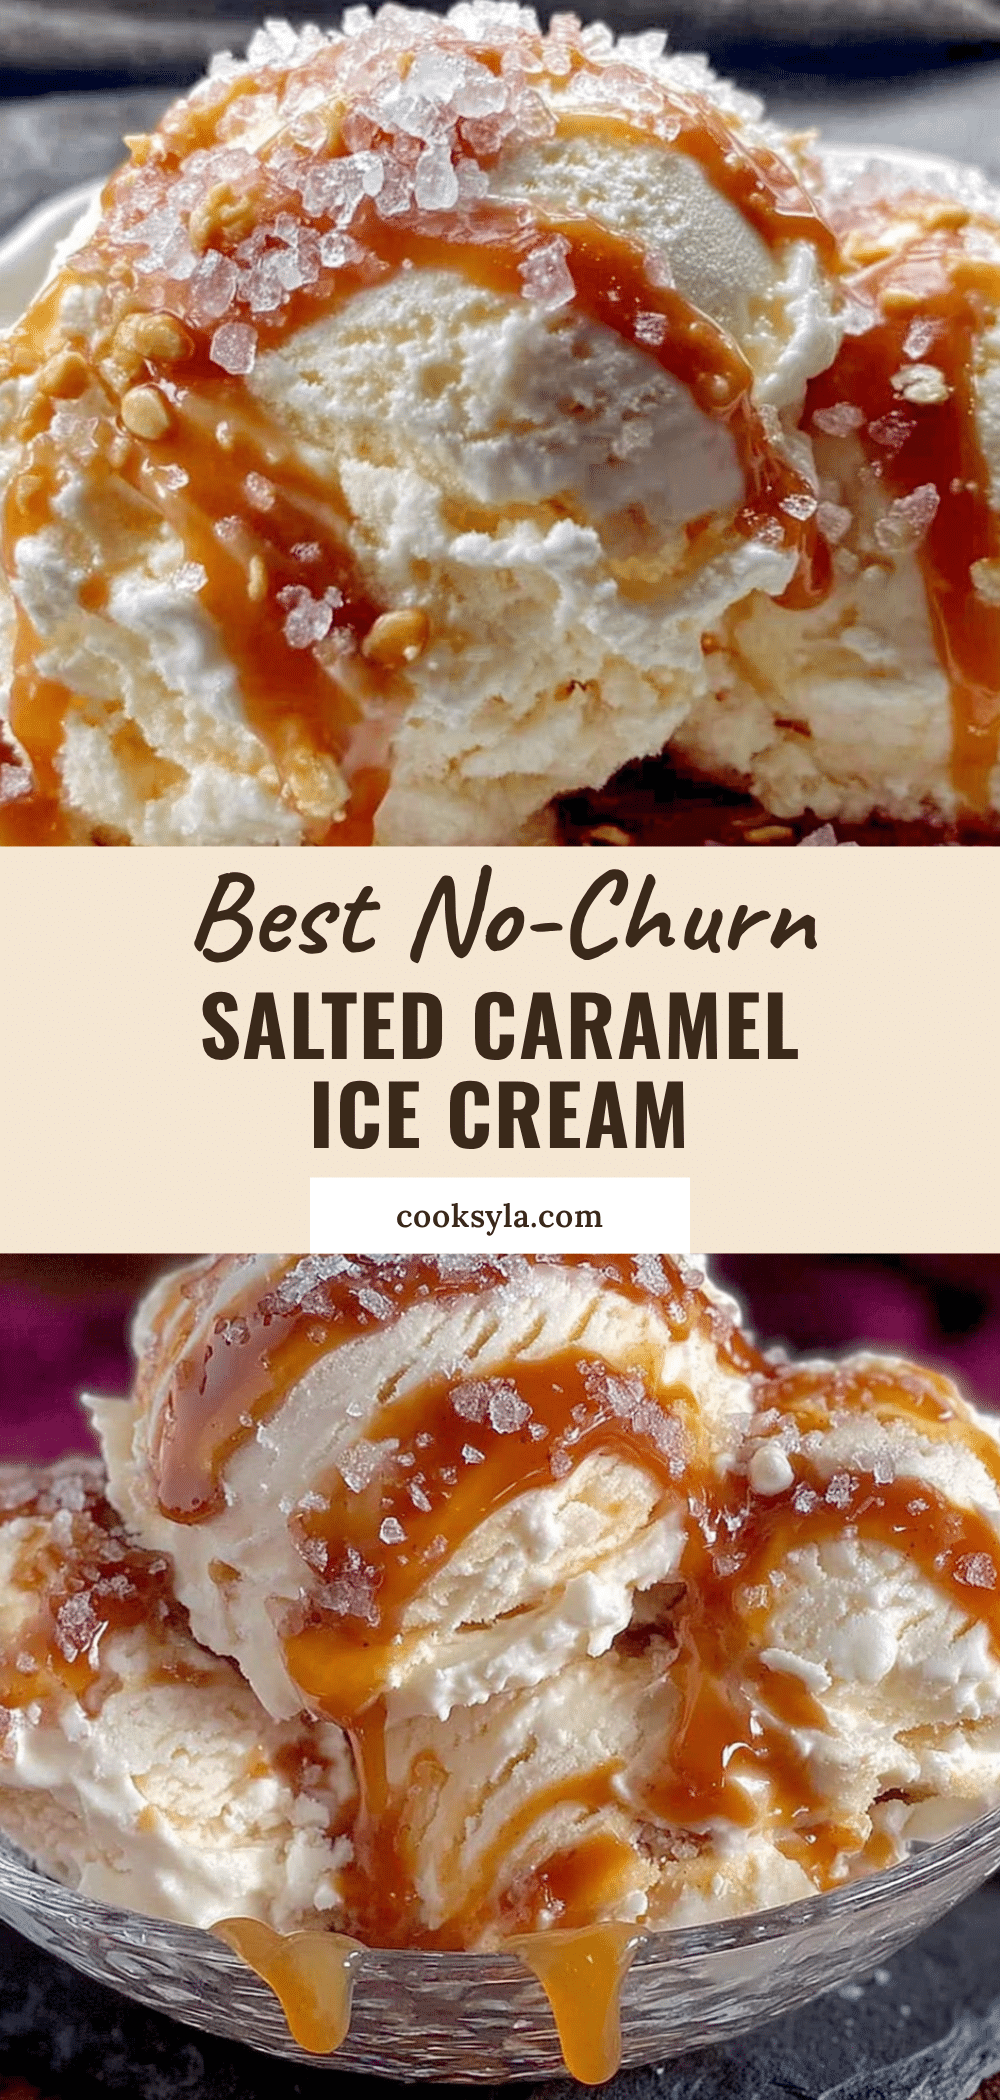
Best No-Churn Salted Caramel Ice Cream Easy 3-Ingredient Recipe
This no-churn salted caramel ice cream is incredibly creamy and rich, made with just three main ingredients and no ice cream maker. It’s a foolproof dessert that will impress at any gathering.
- Prep Time: 20 minutes
- Cook Time: 5 minutes
- Total Time: 6 hours 25 minutes (includes freezing)
- Yield: 12 servings 1x
- Category: Dessert
- Cuisine: American
Ingredients
- 2 cups (480 ml) heavy cream
- 1 can (14 ounces / 397 grams) sweetened condensed milk
- 1 teaspoon vanilla extract
- Pinch of sea salt
- 11 ounces (about 25-30) soft caramel candies
- 1/4 cup (60 ml) heavy cream
- 1/2 teaspoon flaky sea salt
Instructions
- Make the caramel swirl first. Unwrap all your caramel candies and place them in a small saucepan with 1/4 cup of heavy cream. Warm over low heat, stirring constantly with a rubber spatula. This takes about 5-7 minutes. Once smooth and fully melted, remove from heat and stir in 1/2 teaspoon of flaky sea salt. Set aside to cool to room temperature.
- Whip the heavy cream. Pour 2 cups of cold heavy cream into your chilled mixing bowl. Using a hand mixer on medium-high speed, whip the cream until stiff peaks form. Be careful not to overwhip.
- Combine the base. In a separate large bowl, whisk together the sweetened condensed milk, vanilla extract, and a pinch of sea salt until smooth. Gently fold the whipped cream into this mixture using a rubber spatula until no white streaks remain.
- Layer and swirl. Spoon about one-third of the ice cream base into your loaf pan. Drizzle about one-third of the cooled caramel sauce over the top. Use a knife or skewer to gently swirl it through. Repeat with another layer of base, another drizzle of caramel, and swirl again. Finish with the remaining base and caramel.
- Add a final touch. Sprinkle a little extra flaky sea salt over the top.
- Freeze. Press a piece of plastic wrap directly onto the surface of the ice cream. Place the loaf pan in the freezer and let it set for at least 6 hours, but overnight is better.
- Serve. When ready to serve, let the ice cream sit at room temperature for 5-10 minutes to soften slightly. Use a warm ice cream scoop for clean scoops.
Notes
Chill the bowl and beaters before whipping cream for best volume. Press plastic wrap directly onto the surface to prevent ice crystals. Let ice cream sit at room temperature for 5-10 minutes before scooping. For a dairy-free option, use full-fat coconut cream and dairy-free sweetened condensed milk.
Nutrition
- Serving Size: 1/2 cup
- Calories: 380
- Sugar: 34
- Sodium: 220
- Fat: 24
- Saturated Fat: 15
- Carbohydrates: 38
- Protein: 5
Keywords: no-churn ice cream, salted caramel, easy ice cream, 3-ingredient ice cream, homemade ice cream


