Love this? Save it for later!
Share the inspiration with your friends
My neighbor, Rosa, watched me scraping the insides of a pumpkin into the compost bin last October and didn’t say anything at first. Then she just shook her head slowly, a little smile playing on her lips. “You’re throwing away the best part,” she said, and I honestly thought she was joking. I mean, who eats the slimy, stringy guts of a pumpkin? But she walked over to her own porch, grabbed a colander full of seeds she’d just rinsed, and held them out like they were gold. “Come over later,” she said. “I’ll show you.”
That afternoon, sitting at her kitchen table with a cup of coffee that had gone cold, I watched her transform those slippery seeds into something I still dream about. She didn’t use a recipe—she just tossed them with oil, salt, and a few spices from a jar labeled “chili lime” that she’d picked up at the local mercado. The smell that filled her tiny kitchen was ridiculous. Smoky, tangy, with just enough heat to make your nose tingle. When she pulled the baking sheet out of the oven, the seeds were crackling and golden, and she didn’t even wait for them to cool before offering me one. “Try,” she said. And I did. And honestly, I’ve never looked at pumpkin carving the same way since.
I’ve been making this crunchy chili lime roasted pumpkin seeds ever since, tweaking the spice blend until it felt like my own. Rosa’s version was perfect, but I wanted a little more kick, a little more lime, a little more of that addictive crunch that makes you reach for just one more handful. This recipe is the result of probably ten batches—some too burnt, some too bland, and one that I accidentally dumped an entire tablespoon of cayenne into (don’t ask). But this version? This is the one. It’s the kind of snack that disappears at parties, that makes people stop and ask, “Wait, you made these?” And the best part? It’s stupidly easy. You’ve probably got everything you need right now, minus the pumpkin seeds themselves. And maybe you’ve been there—standing over a bowl of pumpkin guts, wondering why anyone would bother. Let me tell you, it’s worth the mess.
Why You’ll Love This Recipe
I’ve tested this recipe more times than I care to admit, and I can say with confidence that it delivers on every single promise. Here’s why this version stands out from every other roasted pumpkin seed recipe you’ve tried:
- Perfect crunch every time: No more chewy or burnt seeds. The boiling method (yes, you read that right) ensures every seed roasts evenly and shatters when you bite into it.
- Bold, balanced flavor: The chili gives warmth without overwhelming, and the lime cuts through the richness of the seeds. It’s not just spicy—it’s complex.
- Ready in under 30 minutes: From prep to snack bowl, this comes together fast. Perfect for last-minute guests or when you’re craving something savory.
- Simple, pantry-friendly ingredients: You likely have chili powder, cumin, and garlic powder in your cabinet. The only special purchase is fresh limes—and maybe some pumpkin seeds if you don’t have a pumpkin to carve.
- Naturally gluten-free and vegan: No weird additives, no hidden allergens. Just clean, whole ingredients that everyone can enjoy.
- Guaranteed crowd-pleaser: I’ve brought these to potlucks, game nights, and holiday parties. They disappear faster than the chips and dip. People always ask for the recipe.
What makes this recipe different from the rest? It’s the boiling step. Most recipes tell you to rinse and dry the seeds, then roast them. But boiling them first in salted water helps the seasoning stick and ensures that every single seed roasts evenly. No more biting into a raw-tasting seed hidden in the middle of the batch. Plus, the chili lime seasoning is perfectly calibrated—not too hot, not too sour, just addictive. This isn’t just another roasted seed recipe. It’s the one I bring to every gathering, the one my friends text me about in October, the one that makes people close their eyes after the first bite and say, “Okay, I get it now.”
And honestly? It’s the kind of recipe that makes you feel like a kitchen wizard without actually working hard. You’ll look like a hero at your next dinner party, and all you did was toss some seeds in a bowl. That’s the kind of cooking I love—big payoff, minimal effort.
What Ingredients You Will Need
This recipe uses simple, wholesome ingredients that work together to create something truly special. Most of these are probably already in your kitchen, which makes this a perfect last-minute snack or party addition.
- Fresh pumpkin seeds (1 ½ cups / about 180g) — Scooped straight from a carving pumpkin or sugar pumpkin. You can also buy raw, hulled pumpkin seeds (pepitas) from the store, but the texture is different. For the best crunch, use seeds from a fresh pumpkin. I prefer using a larger carving pumpkin because the seeds are bigger and have that satisfying shell.
- Water (4 cups / 960ml) — For boiling the seeds. This step is non-negotiable if you want even crunch.
- Salt (2 teaspoons / 12g, plus more for the boiling water) — Use fine sea salt or kosher salt. I use Diamond Crystal kosher salt for its clean taste and easy pinchability. The boiling water gets salted too, which seasons the seeds from the inside out.
- Olive oil or avocado oil (2 tablespoons / 30ml) — Helps the seasoning stick and promotes browning. Avocado oil has a higher smoke point, which I prefer for roasting at high heat, but olive oil works beautifully too.
- Chili powder (1 ½ teaspoons / 4g) — Use a good-quality chili powder blend, not pure cayenne. I like the one from Penzeys or simply the generic store brand—just make sure it’s fresh. Stale chili powder tastes flat.
- Ground cumin (1 teaspoon / 2g) — Adds warmth and earthiness. Toasting it briefly in a dry pan before adding brings out even more flavor, but it’s not necessary.
- Garlic powder (½ teaspoon / 1.5g) — Not garlic salt! Garlic powder adds savory depth without the moisture of fresh garlic, which would make the seeds soggy.
- Smoked paprika (½ teaspoon / 1g) — This is my secret weapon. It adds a subtle smokiness that makes the chili lime flavor feel more complex. Regular paprika works, but smoked is better.
- Fresh lime zest (from 1 medium lime) — This is where the bright, citrusy punch comes from. Zest the lime before you juice it, and make sure you only get the green part—the white pith is bitter.
- Fresh lime juice (1 tablespoon / 15ml) — Adds tanginess that balances the heat. Don’t skip this; bottled lime juice just doesn’t have the same brightness.
- Cayenne pepper (¼ teaspoon / 0.5g, optional) — For extra heat. I add this when I’m making a batch for myself, but I leave it out when serving a crowd with varying spice tolerance.
Substitution notes: If you don’t have fresh pumpkin seeds, you can use raw pepitas—just skip the boiling step since they’re already hulled, and reduce the roasting time by about 5 minutes. For a milder version, reduce or omit the cayenne and use ancho chili powder instead of regular chili powder. If you’re out of limes, lemon zest and juice work in a pinch, but the flavor profile shifts noticeably. And if you want to make this oil-free, you can toss the seeds with a tablespoon of lime juice and the spices, then roast—just watch them closely so they don’t burn.
Equipment Needed
You don’t need any fancy gadgets for this recipe, which is part of its charm. Here’s what you’ll need:
- Large pot (4-quart or larger) — For boiling the seeds. Any pot you use for pasta will work.
- Colander or strainer — For rinsing the seeds after boiling. A fine-mesh strainer is ideal so small seeds don’t slip through.
- Kitchen towel or paper towels — For drying the seeds thoroughly. A clean dish towel works better than paper towels because it doesn’t leave lint, but either is fine.
- Baking sheet (half-sheet pan, about 13×18 inches / 33x46cm) — Rimmed is important so nothing rolls off. I’ve used a cheap nonstick pan for years and it works perfectly.
- Parchment paper or silicone baking mat (optional but recommended) — Makes cleanup a breeze and prevents sticking. I always use parchment because I hate scrubbing pans.
- Mixing bowl (medium) — For tossing the seeds with oil and spices. Any bowl will do.
- Measuring spoons — For accuracy, though I’ll admit I often eyeball the spices now.
- Microplane or fine grater — For zesting the lime. A box grater works too, but a Microplane gives you that fluffy zest that distributes evenly.
- Spatula or wooden spoon — For stirring the seeds halfway through roasting.
Budget-friendly tip: If you don’t have a Microplane, just use the smallest holes on a box grater, or peel the lime with a vegetable peeler and finely chop the peel. It’s not as fine, but it works. And if you don’t have parchment paper, you can grease the baking sheet lightly with oil—just keep an eye on the seeds so they don’t stick.
Preparation Method
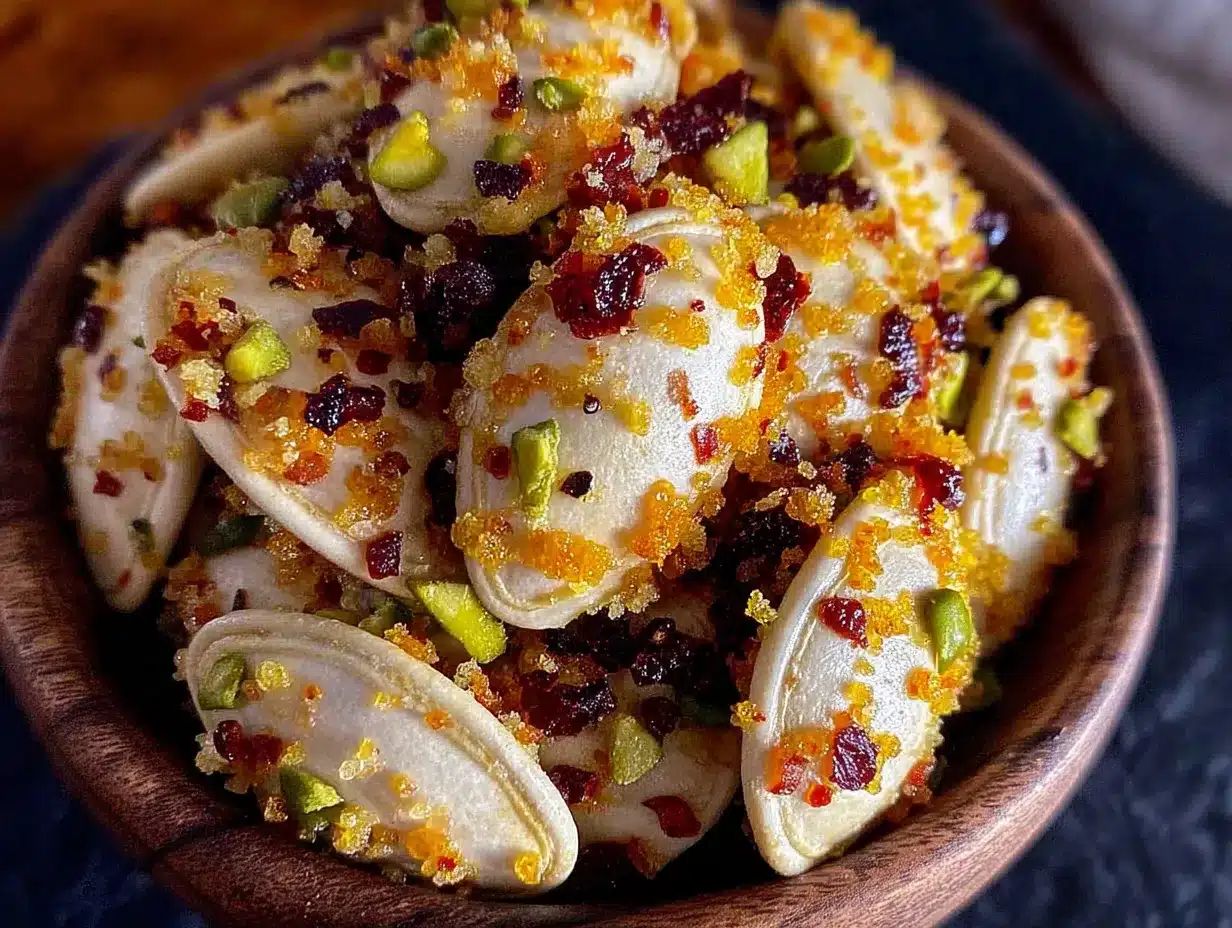
Alright, let’s get to the good part. Follow these steps, and you’ll have a bowl of the best crunchy chili lime roasted pumpkin seeds you’ve ever tasted. Trust the process—especially the boiling part.
- Preheat your oven to 350°F (175°C). Position the rack in the center of the oven. While it’s heating, get your seeds ready.
- Separate the seeds from the pumpkin guts. If you’re working with a fresh pumpkin, scoop out the seeds and strings into a large bowl. Cover with cool water and use your hands to separate the seeds from the pulp. The seeds will float to the top, and the pulp will sink. Scoop the seeds out with your hands or a slotted spoon. Don’t worry if a little pulp sticks—it’ll come off during rinsing.
- Rinse the seeds thoroughly. Place them in a colander and rinse under cold running water, rubbing them gently to remove any remaining stringy bits. Pick out any damaged or tiny seeds—they’ll burn faster than the rest.
- Boil the seeds. Fill your large pot with 4 cups (960ml) of water and add 1 tablespoon (18g) of salt. Bring to a rolling boil. Add the rinsed seeds and boil for exactly 10 minutes. This step softens the seed shells just enough that they roast evenly without becoming tough. Don’t skip it—I learned the hard way when my first batch came out half-raw and half-burnt.
- Drain and dry the seeds. Pour the boiled seeds into the colander and let them drain for a minute. Then spread them out on a clean kitchen towel or layers of paper towels. Pat them very dry—I mean really dry. Any excess moisture will steam the seeds instead of roasting them, and you’ll lose that crunch. Let them sit for 5-10 minutes while you prepare the seasoning.
- Make the chili lime seasoning. In a small bowl, combine 1½ teaspoons chili powder, 1 teaspoon ground cumin, ½ teaspoon garlic powder, ½ teaspoon smoked paprika, ¼ teaspoon cayenne (if using), and ½ teaspoon salt. Stir to mix. Zest your lime directly into the bowl and rub the zest into the spices with your fingers—this releases the oils and makes the flavor pop.
- Toss the seeds with oil and seasoning. Place the dried seeds in a medium mixing bowl. Drizzle with 2 tablespoons (30ml) of olive or avocado oil and toss to coat evenly. Sprinkle the seasoning mixture over the seeds and toss again until every seed is coated. Add 1 tablespoon (15ml) of fresh lime juice and toss one more time.
- Spread on a baking sheet. Line your baking sheet with parchment paper or a silicone mat. Spread the seasoned seeds in a single, even layer. Don’t overcrowd—if they’re piled on top of each other, they’ll steam instead of roast. If you have a lot of seeds, use two baking sheets.
- Roast for 20-25 minutes, stirring halfway. Place the baking sheet in the preheated oven. After 12 minutes, pull it out and give the seeds a good stir with a spatula. This ensures even browning. Return to the oven and roast for another 8-13 minutes. The seeds are done when they’re golden brown and fragrant. They’ll continue to crisp up as they cool, so don’t wait until they look fully crunchy in the oven.
- Cool completely. Remove the baking sheet from the oven and let the seeds cool on the pan for at least 15 minutes. Don’t skip this—they need to cool to reach maximum crunchiness. I know it’s tempting, but resist eating them right away. Trust me, I’ve burned my tongue more than once.
- Optional: Add extra lime zest. Once the seeds are cool, you can zest a little more lime over the top for an extra burst of citrus. This is purely for looks and flavor, but it does make them look gorgeous in a serving bowl.
Visual cue: The seeds should be a deep golden brown with slightly darker edges. You’ll smell the chili and lime as soon as they start roasting—that’s your cue that things are going well. If you see any seeds turning black, pull them out immediately; they’ll taste bitter.
Cooking Tips & Techniques
Over the years, I’ve made plenty of mistakes with roasted pumpkin seeds. Here’s what I’ve learned so you don’t have to repeat my errors.
Don’t skip the boil. I know it seems like an extra step, but boiling the seeds in salted water does two things: it seasons them from the inside out, and it ensures even roasting. The first time I made these, I just rinsed and roasted, and half the seeds were chewy while the others were burnt. The boil fixes that completely.
Dry the seeds thoroughly. This is the step where most people mess up. If the seeds are still wet when they go into the oven, they’ll steam instead of roast. You’ll end up with tough, leathery seeds instead of crunchy ones. Pat them dry with a towel, then let them air-dry for a few minutes. I sometimes spread them on a baking sheet and let them sit while the oven preheats.
Watch the oven like a hawk. Every oven runs differently. My old oven would burn seeds at 350°F in 18 minutes, while my current one takes a full 25 minutes. Start checking at 15 minutes and go from there. The seeds can go from perfectly golden to burnt in about 90 seconds, so stay close.
Stir halfway through. This isn’t optional. The seeds on the edges of the pan cook faster than the ones in the middle. Stirring ensures even browning and prevents hot spots from ruining your batch. I set a timer on my phone so I don’t forget.
Let them cool completely. I cannot stress this enough. Hot seeds are soft seeds. As they cool, the moisture evaporates and the shells become brittle and crunchy. If you eat them warm, they’ll taste good but not great. Wait the full 15-20 minutes, and you’ll be rewarded with that perfect shatter-crunch.
Double the batch. Seriously. These disappear fast, and they store beautifully. I always make at least two cups of seeds because one batch never lasts more than a day in my house. Plus, they make an amazing gift—just put them in a mason jar with a cute label.
Variations & Adaptations
One of the best things about this recipe is how easy it is to customize. Here are some variations I’ve tried and loved:
- Extra Spicy: Add ½ teaspoon of cayenne pepper and 1 teaspoon of red pepper flakes to the seasoning mix. For even more heat, toss in a finely chopped chipotle pepper in adobo sauce—just be prepared for serious fire.
- Sweet and Spicy: Add 1 tablespoon of brown sugar or coconut sugar to the seasoning mix. The sweetness balances the heat beautifully, and it creates a slightly caramelized coating that’s irresistible. I made this version for a Halloween party and it was gone in 10 minutes.
- Garlic Lovers: Increase the garlic powder to 1 teaspoon and add ½ teaspoon of onion powder. You can also toss in some roasted garlic cloves after the seeds are done—just mash them and mix with the seeds for an intense garlic kick.
- Herbaceous: Add 1 teaspoon of dried oregano or thyme to the seasoning mix. Fresh herbs don’t work well here because they burn, but dried herbs add a lovely earthy note that complements the chili and lime.
- Smoky BBQ: Swap the chili powder for ancho chili powder and add 1 teaspoon of smoked paprika (instead of ½). The result is a deep, smoky flavor that tastes like summer barbecue. I’ve served these alongside pulled pork and they were a hit.
- Cheesy: After roasting, toss the hot seeds with 2 tablespoons of nutritional yeast for a dairy-free “cheesy” flavor. Or, if you eat dairy, sprinkle with finely grated Parmesan cheese while they’re still warm. The cheese melts slightly and creates a savory crust.
Dietary adaptations: This recipe is naturally gluten-free, vegan, and dairy-free as written. For a lower-sodium version, reduce the salt in the boiling water to 1 teaspoon and skip the additional salt in the seasoning. For an oil-free version, toss the seeds with lime juice only and roast at 325°F (160°C) for a few extra minutes—just watch them closely.
Serving & Storage Suggestions
These crunchy chili lime roasted pumpkin seeds are incredibly versatile. Here’s how to serve and store them for maximum enjoyment.
Serving temperature: Serve at room temperature. They’re best within a few hours of roasting, when the crunch is at its peak. If you’re serving them at a party, set them out in a pretty bowl and watch them disappear. I like to serve them alongside a bowl of homemade salsa or guacamole for dipping—the creamy texture contrasts perfectly with the crunch.
What to serve with them: These seeds are fantastic on their own as a snack, but they also shine as a topping. Sprinkle them over salads for extra crunch, use them as a garnish for soups (especially butternut squash or black bean soup), or add them to a charcuterie board for a spicy, crunchy element. I’ve even crushed them up and used them as a crust for chicken or fish—it’s amazing.
Beverage pairings: A cold beer (especially a Mexican lager like Modelo or Corona) is the perfect match. For cocktails, try a margarita or a spicy michelada. If you’re not drinking alcohol, a tart limeade or sparkling water with a squeeze of lime works beautifully.
Storing leftovers: If you have any leftovers (unlikely, but possible), store them in an airtight container at room temperature. They’ll stay crunchy for up to 2 weeks. Do not refrigerate them—the moisture in the fridge will make them soft. If they do lose their crunch, you can refresh them in a 300°F (150°C) oven for 5 minutes. Let them cool completely before storing again.
Freezing: You can freeze roasted pumpkin seeds for up to 3 months. Place them in a freezer-safe bag or container, squeeze out as much air as possible, and freeze. Thaw at room temperature for about 30 minutes before serving. They might lose a tiny bit of crunch, but they’ll still be delicious.
Flavor development: The chili and lime flavors actually mellow and meld together after a day or two. Some people prefer them on day two because the heat becomes more rounded. I like them fresh, but my husband swears they’re better the next day. Try both and see which you prefer!
Nutritional Information & Benefits
Pumpkin seeds are a nutritional powerhouse, and this recipe keeps them healthy without sacrificing flavor. Here’s what you’re getting in a ¼-cup (about 30g) serving:
- Calories: Approximately 150-170
- Protein: 7-8g
- Healthy Fats: 12-14g (mostly unsaturated)
- Fiber: 3-4g
- Carbohydrates: 5-6g
- Magnesium: 30% of the Daily Value (DV)
- Zinc: 20% of the DV
- Iron: 15% of the DV
- Potassium: 10% of the DV
Health benefits: Pumpkin seeds are rich in antioxidants, including vitamin E and carotenoids, which help fight inflammation. The high magnesium content supports muscle function, sleep quality, and bone health. Zinc is crucial for immune function and skin health, making these seeds a great snack during cold and flu season. The fiber and protein combination keeps you feeling full and satisfied, which is why they make such a great between-meal snack.
Dietary considerations: This recipe is naturally gluten-free, vegan, and dairy-free. It’s also low in sugar and can be made low-sodium by reducing the salt. The seeds are a good source of plant-based protein, making them a great option for vegetarians and vegans. If you have a nut allergy, pumpkin seeds are a safe and delicious alternative to nuts in most recipes.
I personally love that I can feel good about snacking on these. They’re not empty calories—they’re packed with nutrients that actually support my health. And honestly, knowing that makes that second handful a little easier to justify.
Conclusion
So there you have it—the best crunchy chili lime roasted pumpkin seeds you’ll ever make. I know that’s a bold claim, but after years of testing and tweaking, I can say with confidence that this recipe delivers. It’s the perfect balance of spicy, tangy, and salty, with a crunch that honestly can’t be beat.
What I love most about this recipe is how it turns something you’d normally throw away into the star of the snack table. It’s resourceful, it’s delicious, and it’s ridiculously easy. Plus, it’s the kind of recipe that makes you look like a kitchen genius without any actual effort. Who doesn’t love that?
I hope you give this recipe a try, whether you’re carving pumpkins for Halloween, hosting a fall gathering, or just craving a spicy, crunchy snack. Don’t be afraid to tweak the seasoning to your taste—make it hotter, sweeter, or smokier. That’s the beauty of cooking: you get to make it your own.
If you do make these, I’d love to hear about it. Leave a comment below and let me know how they turned out, or share your own twist on the recipe. And if you’re feeling generous, share this post with a friend who loves pumpkin seeds as much as we do. Happy roasting, and remember—save those seeds!
Frequently Asked Questions
Can I use store-bought pepitas instead of fresh pumpkin seeds?
Yes, you can use raw pepitas (hulled pumpkin seeds). Skip the boiling step since they don’t have the tough outer shell, and reduce the roasting time to 12-15 minutes. Keep a close eye on them because they burn faster than whole seeds.
Why did my pumpkin seeds turn out chewy instead of crunchy?
Chewy seeds usually mean they weren’t dried thoroughly before roasting, or they were undercooked. Make sure to pat the seeds very dry after boiling, and roast until they’re golden brown and fragrant. Also, let them cool completely on the baking sheet—they continue to crisp up as they cool.
Can I make these in an air fryer?
Absolutely! Cook at 350°F (175°C) for 10-12 minutes, shaking the basket halfway through. Check frequently because air fryers cook faster than ovens. You may need to reduce the oil slightly to prevent smoking.
How long do these stay fresh?
Stored in an airtight container at room temperature, they’ll stay crunchy for up to 2 weeks. If they start to soften, refresh them in a 300°F (150°C) oven for 5 minutes. Do not refrigerate them—the moisture will make them soft.
Can I skip the lime and make them just chili flavored?
Of course! Simply omit the lime zest and juice from the recipe. You might want to add an extra teaspoon of vinegar (apple cider or white) to maintain some acidity, but it’s not necessary. The chili flavor will still be delicious on its own.
Pin This Recipe!
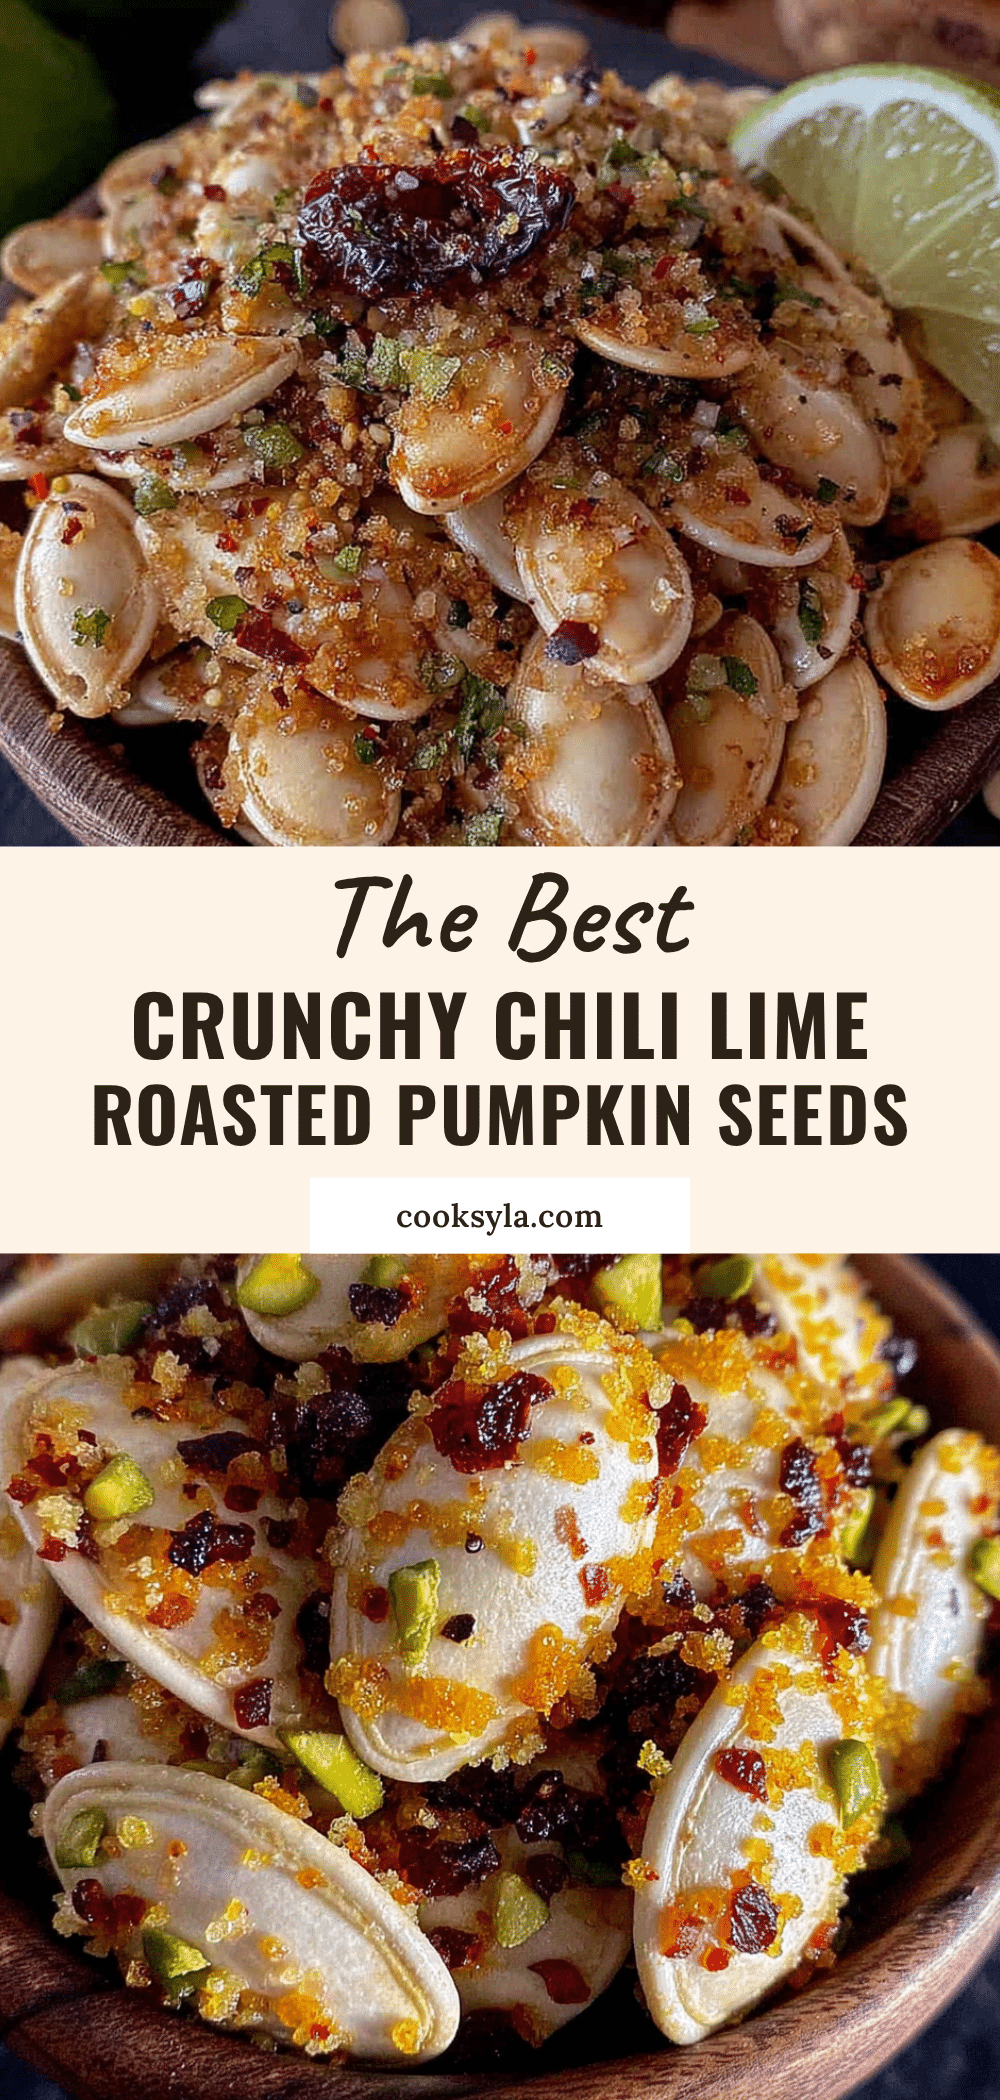
Best Crunchy Chili Lime Roasted Pumpkin Seeds Recipe

Transform fresh pumpkin seeds into an addictive, crunchy snack with bold chili and bright lime flavors. This easy recipe delivers perfect crunch every time thanks to a simple boiling step that ensures even roasting.
- Prep Time: 15 minutes
- Cook Time: 25 minutes
- Total Time: 40 minutes
- Yield: 4 servings 1x
- Category: Snack
- Cuisine: Mexican
Ingredients
- 1 ½ cups (180g) fresh pumpkin seeds
- 4 cups (960ml) water
- 2 teaspoons (12g) salt, plus more for boiling water
- 2 tablespoons (30ml) olive oil or avocado oil
- 1 ½ teaspoons (4g) chili powder
- 1 teaspoon (2g) ground cumin
- ½ teaspoon (1.5g) garlic powder
- ½ teaspoon (1g) smoked paprika
- 1 medium lime, zested and juiced (1 tablespoon / 15ml juice)
- ¼ teaspoon (0.5g) cayenne pepper (optional)
Instructions
- Preheat oven to 350°F (175°C). Position rack in center.
- Separate seeds from pumpkin guts: scoop seeds and strings into a bowl, cover with cool water, and use hands to separate seeds from pulp. Seeds float; scoop out.
- Rinse seeds thoroughly in a colander under cold water, rubbing gently to remove remaining strings. Discard damaged or tiny seeds.
- Boil seeds: In a large pot, bring 4 cups water and 1 tablespoon (18g) salt to a rolling boil. Add seeds and boil exactly 10 minutes.
- Drain and dry seeds: Pour into colander, drain, then spread on a clean kitchen towel or paper towels. Pat very dry; let sit 5-10 minutes.
- Make seasoning: In a small bowl, combine chili powder, cumin, garlic powder, smoked paprika, cayenne (if using), and ½ teaspoon salt. Zest lime directly into bowl and rub zest into spices with fingers.
- Toss seeds with oil and seasoning: Place dried seeds in a medium bowl. Drizzle with oil and toss to coat. Sprinkle seasoning mixture over seeds and toss again. Add lime juice and toss once more.
- Spread on baking sheet: Line a rimmed baking sheet with parchment paper. Spread seeds in a single, even layer.
- Roast 20-25 minutes, stirring halfway: After 12 minutes, stir seeds with a spatula. Return to oven and roast 8-13 more minutes until golden brown and fragrant.
- Cool completely: Let seeds cool on pan at least 15 minutes. They will crisp up as they cool.
- Optional: Add extra lime zest over cooled seeds for garnish.
Notes
Boiling seeds in salted water ensures even roasting and seasons from inside out. Dry seeds thoroughly to avoid steaming. Watch oven closely as seeds can burn quickly. Let cool completely for maximum crunch. Store in airtight container at room temperature up to 2 weeks; refresh in 300°F oven for 5 minutes if needed.
Nutrition
- Serving Size: ¼ cup (about 30g)
- Calories: 160
- Sugar: 1
- Sodium: 200
- Fat: 13
- Saturated Fat: 2
- Carbohydrates: 6
- Fiber: 3
- Protein: 8
Keywords: roasted pumpkin seeds, chili lime, crunchy snack, Halloween, fall recipe, gluten-free, vegan


