Love this? Save it for later!
Share the inspiration with your friends
I wasn’t even hungry in the traditional sense. My stomach was full from dinner, but my brain was screaming for something warm, salty, and impossibly crunchy. You know that feeling when the house is quiet, the kids are finally asleep, and you’re alone with your thoughts and a fridge that’s half-empty? That was me. I didn’t have the fancy brie or the artisanal sourdough I usually save for guests. I had stale sandwich bread, a block of sharp cheddar that was starting to dry out, and three Honeycrisp apples that had been sitting in the crisper drawer for a week.
Most people would have made a sandwich and moved on. But something about the late hour loosened the rules. I remember staring at those apples, thinking about how sweet they were, and wondering if they could stand up to the heat of a skillet. It felt weird, I know. Fruit in a grilled cheese? Sounds like a dessert, not a snack. But honestly, I had nothing to lose at midnight. I grabbed a knife, sliced the apples thin as paper, and started buttering the bread. The smell of melting butter mixed with the tart apple scent was intoxicating. I mean, it was a little messy. I actually dropped a slice of apple on the floor (rude, kitchen floor), but I picked it up and tossed it in the pan anyway. No one was watching.
The sizzle was different this time. It wasn’t just cheese bubbling; it was the sugar in the apples caramelizing against the hot metal. When I finally took that first bite, standing over the sink in my pajamas, the crunch was so loud it echoed in the empty kitchen. The sharp cheddar cut through the sweetness perfectly, creating this balance that felt like a secret victory. That’s why I keep making this recipe. It’s not about being fancy. It’s about that late-night vindication when you turn pantry scraps into something that tastes like you tried really hard, even though you were just trying to sleep. If you’ve ever stared into the void of your fridge at midnight, this Crispy Honeycrisp Apple and Cheddar Grilled Cheese is your answer.
Why You’ll Love This Recipe
Let’s be real for a second. Grilled cheese is often treated as a lazy meal, something you throw together when you don’t care. But this version? This is where the magic happens. I’ve spent years testing different breads, cheeses, and add-ins, and I can tell you with authority that the combination of sweet fruit and savory dairy is a game-changer. It’s not just good; it’s the kind of sandwich that makes you close your eyes after the first bite and forget about your to-do list.
- Quick & Easy: This comes together in under 15 minutes, perfect for those busy weeknights or last-minute cravings when you need comfort fast.
- Simple Ingredients: No fancy grocery trips needed. You likely already have bread, butter, cheddar, and apples in your house right now.
- Perfect for Any Occasion: Great for a cozy dinner, a light lunch, or even an elevated afternoon snack.
- Crowd-Pleaser: Kids usually love the sweetness, and adults appreciate the sharp cheddar. It bridges the gap beautifully.
- Unbelievably Delicious: The texture contrast between the crispy, buttery bread and the soft, gooey cheese is next-level comfort food.
What makes this recipe different from the rest is the specific choice of Honeycrisp apples. They hold their shape better than Granny Smiths but offer a juicier crunch than Gala apples. I’ve tried many variations, but this one feels like the sweet spot. It’s comfort food reimagined—slightly healthier because of the fruit, but with the same soul-soothing satisfaction of a classic melt. It’s perfect for impressing guests without stress, or just turning a simple meal into something memorable that feels like a hug in food form.
What Ingredients You Will Need
This recipe relies on simple, wholesome ingredients to deliver bold flavor and satisfying texture without the fuss. The key is quality over quantity, especially since there are only five main components. You want ingredients that can shine on their own.
- Sourdough or Country White Bread (8 slices): I recommend using a sturdy bread like sourdough because it won’t get soggy too quickly. Thick-cut slices hold up better to the moisture from the apples. If you prefer a milder flavor, a dense white bread works too, just keep an eye on the toasting.
- Sharp Cheddar Cheese (1 cup, shredded): This is the star of the savory side. I personally prefer aged sharp cheddar for its tangy bite, which cuts through the sweetness. Look for blocks of cheese and shred them yourself; pre-shredded cheese contains anti-caking agents that prevent smooth melting. Brands like Tillamook or Cabot are reliable staples I trust for best texture.
- Honeycrisp Apples (2 medium, thinly sliced): Honeycrisps are ideal because they are crisp and juicy. You want slices that are about 1/8 inch thick. If you can’t find Honeycrisp, Pink Lady apples are a good substitute for their tartness.
- Unsalted Butter (4 tablespoons, softened): Softened butter spreads easily and creates an even golden crust. Using unsalted allows you to control the sodium level, letting the natural flavors of the cheese and apple take center stage.
- Honey (2 tablespoons, optional drizzle): For that extra touch of sweetness and gloss. If you’re using very sweet apples, you might skip this, but a light drizzle enhances the caramelization.
You can swap the cheddar for Gruyère if you want a nuttier flavor, or use almond flour bread if you need a gluten-free option. For the butter, olive oil works if you want a lighter option, though it changes the classic grilled cheese profile slightly.
What Equipment Do You Need?
You don’t need much here, which is part of the appeal. A heavy-bottomed skillet is essential. Cast iron is my go-to because it retains heat evenly and gives you that perfect, consistent crunch. If you don’t have cast iron, a stainless steel pan works well too, just keep the heat moderate. You’ll also need a good spatula for flipping without breaking the bread. I’ve ruined sandwiches with flimsy spatulas before—learn from my mistake. A sharp knife is necessary for slicing the apples uniformly. If you have a mandoline, use it with caution; it gives perfect slices but is risky if you’re tired. For maintenance, just wipe your cast iron pan down after it cools; don’t scrub it with soap unless absolutely necessary. Budget-friendly? Just stick to a standard non-stick skillet if cast iron isn’t in your budget, but know you might need to use more butter to prevent sticking.
Preparation Method

Getting this right is about patience and heat management. Here is how to build the perfect Crispy Honeycrisp Apple and Cheddar Grilled Cheese.
- Prep the Apples (5 minutes): Wash the apples thoroughly. Core them and slice them into thin, even rounds. Aim for about 1/8 inch thickness. If the slices are too thick, they won’t cook down enough and will make the sandwich soggy. If they are too thin, they might burn. Place the slices in a bowl. If you have time, toss them lightly with a tiny pinch of cinnamon, but it’s not required.
- Butter the Bread (2 minutes): Take your four slices of bread. Spread softened unsalted butter on one side of each slice, all the way to the edges. This buttered side will be the outside of your sandwich, creating the crust. Make sure the layer is even; thin spots will burn, thick spots will stay pale.
- Assemble the Sandwich (3 minutes): Lay two slices of bread butter-side down on your counter. Layer the shredded cheddar cheese evenly over these slices. Next, arrange the apple slices in a single layer over the cheese. If the apples are very juicy, pat them dry with a paper towel first to avoid excess moisture. Top with the remaining two slices of bread, buttered side up. Press down gently to compact the layers.
- Heat the Pan (2 minutes): Place your cast iron skillet over medium-low heat. Let it warm up for about two minutes. You want the pan hot, but not smoking. Too high heat will burn the bread before the cheese melts.
- Grill the First Side (4-5 minutes): Carefully place two sandwiches into the skillet. Do not overcrowd the pan; cook in batches if necessary. Listen to the sizzle. It should be a steady, gentle pop, not a violent roar. Cook until the bottom is deep golden brown and crispy. This takes time, so be patient. Use a spatula to check the color.
- Flip and Grill the Second Side (3-4 minutes): Once the bottom is perfect, flip the sandwiches. Press down lightly with the spatula. Add a tiny bit more butter to the pan if it looks dry. Cook until the second side is golden and the cheese is completely melted. You should see the cheese oozing out slightly from the edges.
- Rest and Serve (2 minutes): Remove the sandwiches from the pan and let them rest on a cutting board for two minutes. This is crucial. If you cut immediately, the hot cheese will run out, and the structure will collapse. After resting, slice diagonally and drizzle with honey if desired.
Cooking Tips & Techniques
The biggest mistake people make is turning up the heat too high. I learned this the hard way during a dinner party once. I wanted it done fast, so I cranked the burner. Result? Burnt bread and cold, unmelted cheese in the middle. Lesson learned: low and slow is the way to go for stuffed sandwiches. Another tip is to use medium-low heat consistently. You want the cheese to melt through before the bread burns. If you find the bread is browning too fast, lower the heat. Multitasking isn’t really needed here; just watch the pan. If you’re making multiple batches, keep the finished ones warm in a low oven (200°F) on a wire rack to keep them crispy. For consistency, ensure your apples are at room temperature, not ice cold, as this helps them soften slightly in the pan, integrating better with the cheese. Also, don’t skip the resting step. It allows the starches in the bread to set and the cheese to thicken slightly, making each bite clean and satisfying.
Variations & Adaptations
While the classic combo is unbeatable, you can tweak this to suit your mood. For a spicy kick, add a few slices of jalapeño or a dash of cayenne pepper to the cheese layer. This creates a sweet-heat profile that is addictive. If you are vegan, swap the cheddar for a high-quality vegan melting cheese and use a plant-based butter spread. For a gluten-free version, use certified gluten-free sourdough bread, but be careful as some GF breads burn faster, so reduce the heat slightly. I also love adding a thin layer of apple butter or fig jam under the cheese for a deeper, more complex sweetness. For a protein boost, try adding a slice of turkey or ham, turning it into a more substantial lunch option. Each variation changes the dynamic, so taste as you go.
Serving & Storage Suggestions
This sandwich is best served immediately while it’s hot and crispy. Pair it with a simple green salad with a vinaigrette to cut through the richness, or a bowl of tomato basil soup for dipping. For beverages, a cold glass of milk or a crisp apple cider complements the flavors perfectly. If you have leftovers (unlikely, but possible), store them in an airtight container in the refrigerator for up to two days. To reheat, use a skillet over medium heat rather than a microwave, which will make the bread soggy. Reheat for 2-3 minutes per side to restore the crispness. The flavors meld together nicely over time, becoming slightly more cohesive the next day, though the texture will soften.
Nutritional Information & Benefits
Each sandwich contains approximately 450-500 calories, depending on the amount of butter and cheese used. The cheddar provides a good source of calcium and protein, while the Honeycrisp apples add fiber and Vitamin C. This recipe is naturally nut-free, making it safer for many school lunches or gatherings. However, it is high in dairy and gluten. For a lighter option, use less cheese and whole-grain bread. From a wellness perspective, I appreciate that this isn’t just empty carbs; the fruit adds nutritional value, and the protein helps keep you satisfied longer than a plain grilled cheese would.
Conclusion
This Crispy Honeycrisp Apple and Cheddar Grilled Cheese is more than just a snack; it’s a reminder that the best meals often come from improvisation and simple ingredients. It’s worth trying because it balances sweet, salty, and savory in a way that feels indulgent yet grounded. I encourage you to experiment with the types of apples or cheeses you use to make it your own. I love this recipe because it turns ordinary evenings into something special, even when I’m cooking alone at midnight. Give it a try and let me know how it turns out in the comments below. Share your variations with me, and don’t forget to pin this for your next craving. Happy cooking!
Frequently Asked Questions
Can I use other types of apples?
Yes, you can use Granny Smith for a tarter flavor or Pink Lady for a similar balance. Avoid soft apples like Red Delicious, as they will turn mushy when cooked.
Why is my bread burning before the cheese melts?
This usually means the heat is too high. Lower your stove temperature to medium-low and cook slower. The cheese needs time to melt through the layers.
Can I make this ahead of time?
You can assemble the sandwiches ahead of time and refrigerate them for up to 4 hours before cooking. Just add a few extra seconds to the cooking time if they are cold from the fridge.
Is there a dairy-free alternative?
Yes, use dairy-free butter and a high-quality vegan cheese that melts well. Brands like Violife or Miyoko’s work nicely for grilled cheese applications.
How do I prevent the sandwich from falling apart?
Ensure your apples are sliced thin and patted dry. Press the sandwich gently while cooking, and let it rest for two minutes after cooking to allow the cheese to set.
Pin This Recipe!
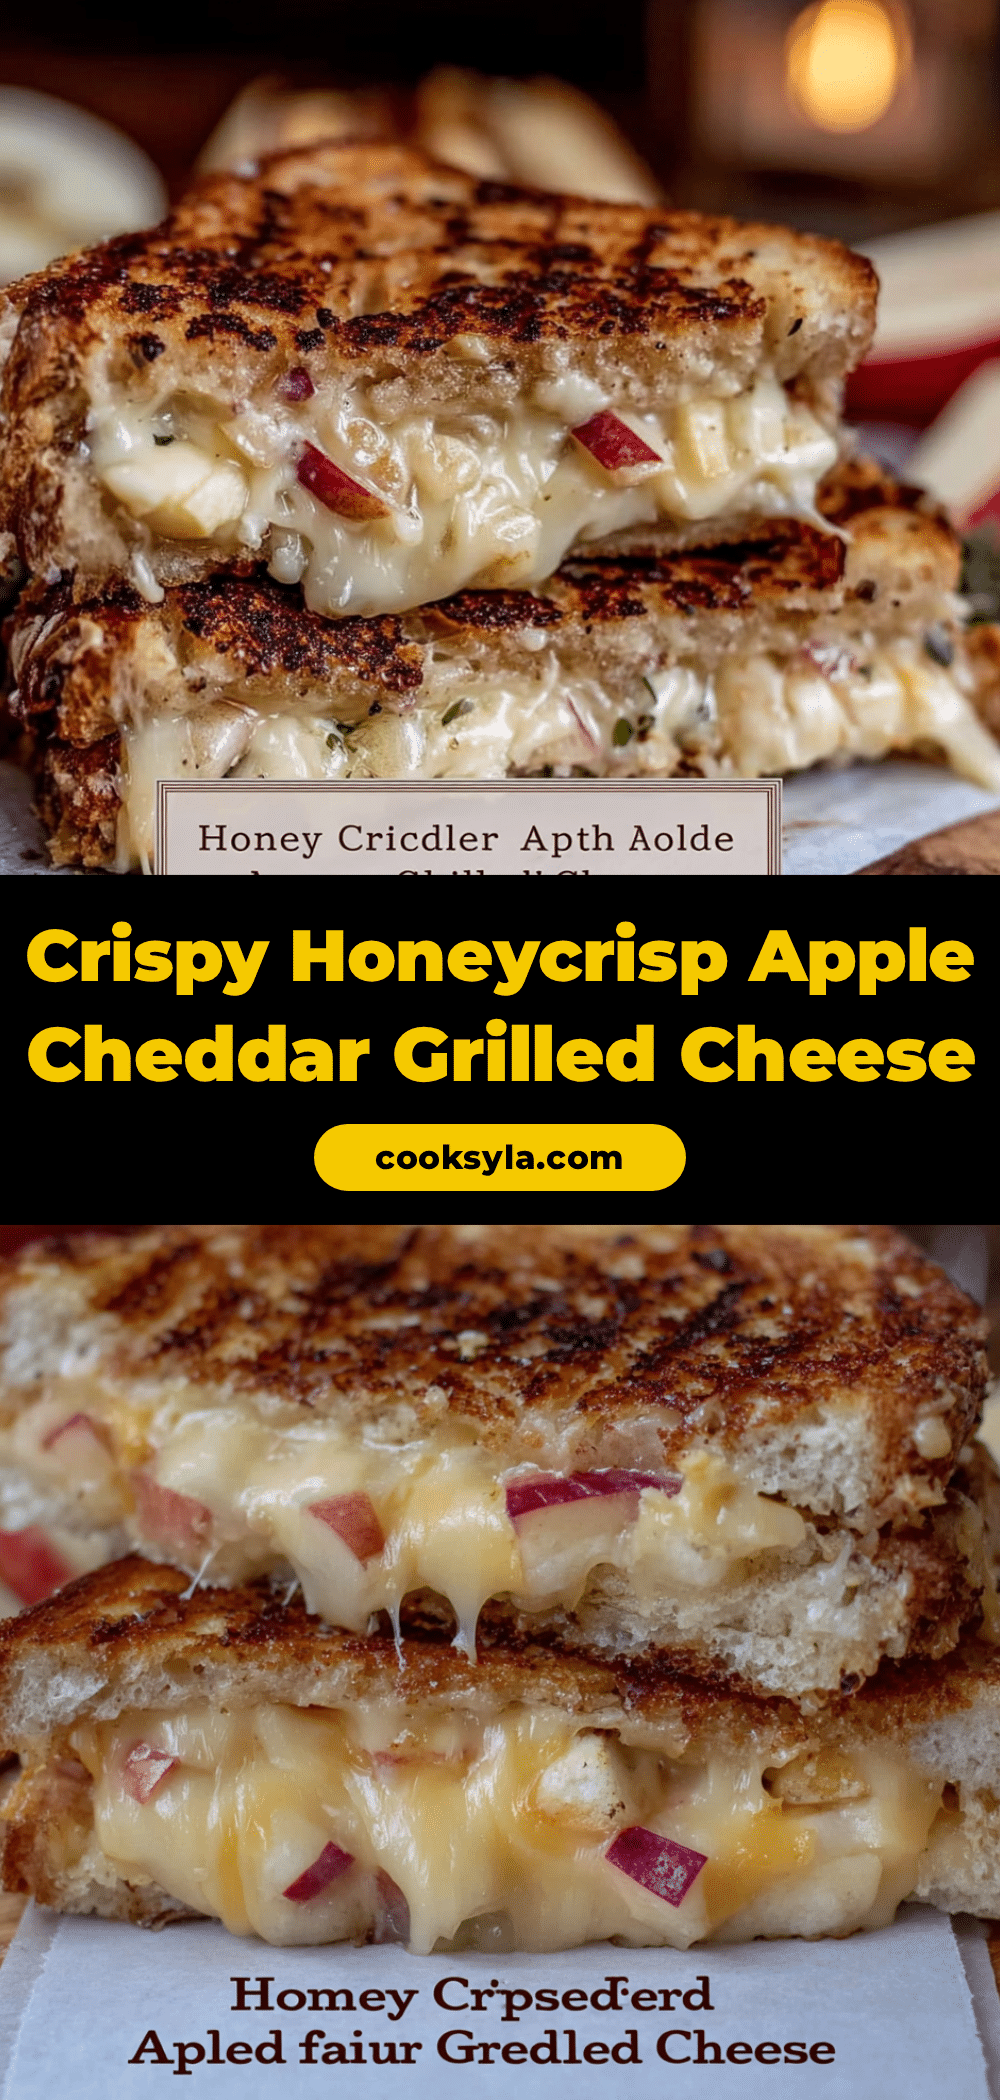
Crispy Honeycrisp Apple and Cheddar Grilled Cheese

A quick and easy 5-ingredient grilled cheese sandwich featuring sweet Honeycrisp apples and sharp cheddar cheese, cooked to golden perfection in a skillet.
- Prep Time: 10 minutes
- Cook Time: 10 minutes
- Total Time: 20 minutes
- Yield: 2 servings 1x
- Category: Lunch
- Cuisine: American
Ingredients
- 8 slices Sourdough or Country White Bread
- 1 cup Sharp Cheddar Cheese, shredded
- 2 medium Honeycrisp Apples, thinly sliced (1/8 inch)
- 4 tablespoons Unsalted Butter, softened
- 2 tablespoons Honey, optional drizzle
Instructions
- Wash, core, and slice the apples into thin, even rounds (about 1/8 inch thick).
- Spread softened unsalted butter on one side of each of the four bread slices, ensuring coverage to the edges.
- Lay two slices of bread butter-side down. Layer shredded cheddar cheese evenly over the bread.
- Arrange apple slices in a single layer over the cheese. If apples are juicy, pat them dry first.
- Top with the remaining two slices of bread, buttered side up. Press down gently.
- Heat a heavy-bottomed skillet (cast iron recommended) over medium-low heat for about 2 minutes.
- Place sandwiches in the skillet. Cook for 4-5 minutes until the bottom is deep golden brown and crispy.
- Flip the sandwiches carefully. Press down lightly and cook for another 3-4 minutes until the second side is golden and cheese is melted.
- Remove from pan and let rest on a cutting board for 2 minutes before slicing diagonally.
- Drizzle with honey if desired and serve immediately.
Notes
Use medium-low heat to prevent burning the bread before the cheese melts. Let the sandwich rest for 2 minutes after cooking to allow the cheese to set and prevent it from running out. If using cold apples, they may take slightly longer to soften. For a gluten-free option, use certified gluten-free sourdough bread.
Nutrition
- Serving Size: 1 sandwich
- Calories: 475
- Sugar: 18
- Sodium: 650
- Fat: 28
- Saturated Fat: 14
- Carbohydrates: 42
- Fiber: 3
- Protein: 16
Keywords: grilled cheese, apple grilled cheese, honeycrisp apple, cheddar cheese, easy lunch, comfort food, 5 ingredient recipe, quick dinner


