Love this? Save it for later!
Share the inspiration with your friends
My sister-in-law, Jen, wasn’t trying to impress anyone. I’d stopped by her place on a crisp Tuesday afternoon to drop off a library book she’d left at my house, and the smell hit me before I even got through the front door. It wasn’t a fancy perfume or a scented candle. It was warm, spicy, and undeniably like autumn had exploded in her kitchen. She was elbow-deep in flour, a smear of something buttery on her cheek, and she barely looked up. “Oh, those? Just some bars for the kids’ school bake sale.” Just some bars, she said. I took one look at the pan cooling on the counter—a beautiful, golden-brown top with a crumbly, nutty-looking crust—and I knew she was being modest. Honestly, I’ve never seen a bake sale item cause such a commotion. I made her scribble the recipe on a sticky note before I left, and let me tell you, it’s been a staple in my house every fall since. Maybe you’ve been there—you find a recipe that’s so good, so easy, and so loved by everyone, that it just becomes part of your family’s story. That’s these bars.
These Kid-Approved Pumpkin Cheesecake Bars with Pecan Crust aren’t just a dessert; they are a moment. They’re the thing you bring to the PTA meeting that gets devoured in minutes. They’re the treat you make on a rainy Saturday that fills your home with the best kind of comfort. The best part? The pecan crust isn’t just a crust—it’s a buttery, slightly sweet, and incredibly forgiving base that even the most novice baker can nail. It’s the perfect, crunchy contrast to the creamy, spiced pumpkin cheesecake layer on top. I mean, who knew that a simple swap from a traditional graham cracker crust could make such a difference? It was one of those happy accidents that turned into a signature recipe.
Why You’ll Love This Recipe
Let’s be real. Finding a dessert that pleases the kids, impresses the adults, and doesn’t cost a fortune or take all day is like finding a unicorn. These Kid-Approved Pumpkin Cheesecake Bars with Pecan Crust are that unicorn. I’ve tested this recipe more times than I can count, and it’s a winner every single time. Here’s why it’s earned a permanent spot in my fall baking rotation:
- Surprisingly Simple: You don’t need a stand mixer or any fancy gadgets. A bowl, a spoon, and a 9×13 pan are all you need. It’s a perfect recipe for a busy weeknight or a lazy Sunday afternoon.
- Budget-Friendly Ingredients: No weird, expensive ingredients here. You probably have most of the spices in your pantry already. The pecans are the biggest splurge, but you can often find them on sale, and a little goes a long way in this crust.
- The Ultimate Crowd-Pleaser: This is the dessert that disappears first at potlucks. Kids love the creamy, sweet filling, and adults go crazy for that nutty, buttery crust. It’s a guaranteed hit.
- Make-Ahead Magic: These bars actually taste better the next day. The flavors meld together beautifully, and they cut cleaner after a good chill in the fridge. It’s the perfect stress-free dessert for Thanksgiving or any holiday gathering.
- Unbelievably Delicious: The combination of the crunchy pecan crust, the velvety pumpkin cheesecake, and the warm fall spices is pure comfort. It’s the kind of dessert that makes you close your eyes after the first bite. Seriously.
What makes these bars different from every other pumpkin cheesecake recipe out there? It’s that crust. Most recipes use a boring graham cracker crust that gets soggy. This pecan crust stays perfectly crunchy, adding a wonderful texture and a rich, toasty flavor that takes the whole dessert to the next level. It’s not just a supporting player; it’s a star. This isn’t just another version of pumpkin cheesecake bars—it’s my best version, perfected over many, many batches. It’s comfort food reimagined—a little bit special, but totally doable for a regular family meal.
What Ingredients You Will Need
This recipe uses simple, wholesome ingredients to deliver that big, bold fall flavor. The magic is in how they all come together. You’ll notice everything is pretty standard—things you can find at any grocery store without breaking the bank.
For the Pecan Crust
- 1 ½ cups (150g) pecans: I like to use raw, unsalted pecans. You can buy them pre-chopped to save time, but whole pecans are often fresher. (Toasting them lightly before grinding brings out an incredible depth of flavor).
- 1 ½ cups (180g) all-purpose flour: This gives the crust structure. You can substitute a 1:1 gluten-free baking flour blend if needed, but the texture will be slightly more crumbly.
- ½ cup (100g) packed light brown sugar: Adds a molasses-like sweetness that pairs perfectly with the pecans. Dark brown sugar works too, for an even richer flavor.
- ½ teaspoon salt: Balances the sweetness and enhances all the other flavors. Don’t skip it!
- ½ cup (113g or 1 stick) cold unsalted butter, cut into small cubes: The key to a flaky, tender crust. The butter must be cold so it creates little pockets of steam in the oven, making the crust light and crisp. I prefer unsalted so I can control the salt level.
For the Pumpkin Cheesecake Filling
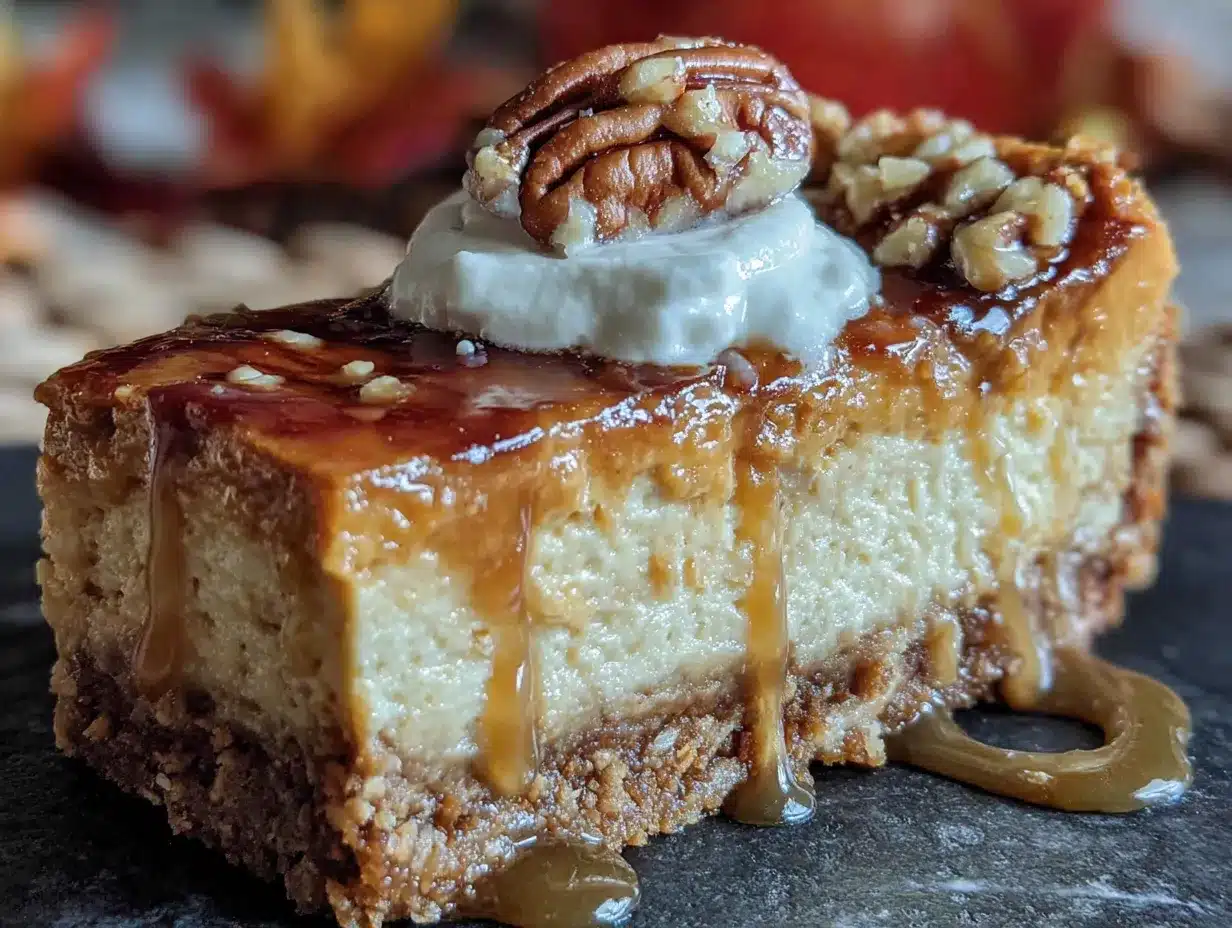
- 16 ounces (452g) full-fat cream cheese, softened to room temperature: This is non-negotiable for a smooth, creamy filling. Low-fat cream cheese has more water and can make the filling grainy or cause it to crack. Let it sit on the counter for at least an hour.
- 1 cup (200g) granulated sugar: Sweetens the tangy cream cheese and helps it set up properly.
- 1 cup (245g) canned pumpkin purée: Not pumpkin pie filling! Make sure you get 100% pure pumpkin purée. Libby’s is my go-to brand for its consistent texture and flavor.
- 3 large eggs, room temperature: Room temperature eggs emulsify into the batter much better than cold ones, creating a silkier texture. Place them in a bowl of warm water for 5 minutes if you’re in a hurry.
- 1 teaspoon vanilla extract: Enhances the sweetness and rounds out the pumpkin spice flavors.
- 1 ½ teaspoons pumpkin pie spice: The perfect blend of cinnamon, nutmeg, ginger, and cloves. If you don’t have it, use 1 teaspoon cinnamon, ¼ teaspoon nutmeg, ¼ teaspoon ginger, and a pinch of cloves.
- ½ teaspoon ground cinnamon: Because you can never have too much cinnamon in a pumpkin dessert!
Equipment Needed
You don’t need a professional bakery setup for these bars, which is part of their beauty. Here’s what you’ll need to pull them off:
- 9×13-inch baking pan: This is the perfect size for these bars. A glass or metal pan both work well. If you use metal, be aware that the crust may brown a little faster, so keep an eye on it.
- Food processor: This makes the pecan crust a breeze. You can pulse the pecans and flour together before cutting in the butter. If you don’t have one, you can chop the pecans very finely by hand and use a pastry cutter or your fingers to work the butter into the dry ingredients. It takes a bit more elbow grease, but it works!
- Electric hand mixer or stand mixer: A hand mixer is perfect for this. A stand mixer works too, but be careful not to overmix the cheesecake batter once the eggs are added. Overmixing incorporates too much air, which can cause cracks.
- Large mixing bowls: You’ll need one for the crust and one for the filling.
- Parchment paper: Lining your pan with parchment paper (with some overhang) is the secret to getting perfectly clean, beautiful bars. It allows you to lift the entire slab out of the pan to cut them.
- Sharp knife: A sharp chef’s knife is best for cutting clean slices. A dull knife will drag through the creamy filling and ruin the look. Wipe the knife clean between cuts for the neatest results.
Preparation Method
Let’s get baking! This recipe is broken down into simple steps. Don’t rush, and you’ll be rewarded with the most incredible fall dessert.
- Prep the Oven and Pan (10 minutes): Preheat your oven to 350°F (175°C). Line your 9×13-inch baking pan with a long sheet of parchment paper, leaving a couple of inches of overhang on the two long sides. This will be your “handles” to lift the bars out later. Lightly spray the parchment with non-stick cooking spray.
- Make the Pecan Crust (15 minutes): In the bowl of your food processor, add the pecans, flour, brown sugar, and salt. Pulse 8-10 times until the pecans are finely ground and the mixture looks like coarse sand. Add the cold, cubed butter. Pulse again, about 15-20 times, until the mixture looks like wet sand and small clumps start to form. It should hold together when you pinch it. Don’t over-process, or the crust will be tough. If you’re doing this by hand, mix the dry ingredients, then use a pastry cutter to cut in the butter until the mixture resembles coarse crumbs.
- Bake the Crust (15 minutes): Pour the crust mixture into your prepared pan. Use the bottom of a flat measuring cup or a glass to press it down firmly and evenly. This is an important step! A tightly packed crust won’t crumble when you cut the bars. Bake the crust for 15 minutes, until it is lightly golden and smells wonderfully toasty. Set it aside to cool slightly while you make the filling. (Don’t turn off the oven!)
- Make the Cheesecake Filling (10 minutes): In a large mixing bowl, beat the softened cream cheese with an electric hand mixer on medium speed until it’s completely smooth and fluffy—about 2 minutes. Scrape down the sides and the bottom of the bowl with a spatula. Add the granulated sugar and beat again until combined. Add the pumpkin purée, vanilla, pumpkin pie spice, and cinnamon, and beat on low speed until just combined. The mixture will look a little thick and luscious.
- Add the Eggs (5 minutes): Crack the eggs into a small bowl (this way if you get a shell, you can fish it out without ruining the whole batter). With the mixer on low speed, add the eggs one at a time, mixing just until the yellow disappears after each addition. Remember: do not overmix! Overmixing at this stage adds too much air, which can cause the cheesecake to puff up and then crack as it cools. You want a smooth, homogenous batter.
- Assemble and Bake (45-50 minutes): Pour the creamy pumpkin cheesecake filling over the warm pecan crust. Gently spread it into an even layer with your spatula. Place the pan in the oven and bake for 45-50 minutes, or until the edges are set and the center is just slightly jiggly—it should wobble a little when you gently shake the pan, like firm Jell-O. A toothpick inserted 2 inches from the edge should come out clean. The center will firm up as it cools.
- Cool Completely (3+ hours): This is the hardest part! Place the pan on a wire rack and let it cool to room temperature. This will take about 1-2 hours. Then, cover the pan with plastic wrap or foil and transfer it to the refrigerator to chill for at least 2 hours, but preferably 4 hours or overnight. Chilling is essential for clean slices and the best texture. The flavors really develop overnight, making it even more delicious.
- Slice and Serve (15 minutes): Once fully chilled, use the parchment paper “handles” to lift the entire slab of bars out of the pan and onto a cutting board. Use a sharp knife to slice them into squares. For the cleanest cuts, wipe the knife clean with a damp paper towel between each slice. Serve cold or let them sit at room temperature for 10 minutes to take the chill off.
Cooking Tips & Techniques
Over the years, I’ve learned a few things the hard way so you don’t have to. Here are my best tips for perfect Kid-Approved Pumpkin Cheesecake Bars with Pecan Crust every single time.
- The Room Temperature Rule: I cannot stress this enough. Your cream cheese and eggs must be at room temperature. Cold cream cheese will leave you with a lumpy batter. I once tried to rush this step, and I ended up with a filling that looked like cottage cheese. It still tasted okay, but the texture was a disaster. Set them out an hour before you start.
- Don’t Over-Bake! This is the most common mistake with cheesecake. It’s better to pull it out when the center is still a little jiggly than to over-bake it. An over-baked cheesecake will be dry and develop large cracks. The residual heat will finish cooking the center as it cools.
- The Water Bath Shortcut: Traditional cheesecakes are baked in a water bath to prevent cracking. For these bars, I’ve found it’s completely unnecessary. The pecan crust does a great job of insulating the filling, and the bars are so thick that minor cracks aren’t noticeable. If you do get a crack, a dollop of whipped cream hides it perfectly! No stress needed.
- Pressing the Crust: Use the bottom of a flat, dry measuring cup to press the crust into the pan. The pressure helps the crust bind together. If you just pat it down with your fingers, it will be too loose and crumbly.
- Patience is a Virtue: I know you want to dig in as soon as they come out of the oven, but don’t do it! The bars need time to set. Cutting them while they’re warm will result in a gooey, messy puddle. The 4-hour chill is your friend.
Variations & Adaptations
This recipe is a fantastic base for experimentation. Here are a few ways I’ve adapted it for different tastes and needs.
- Gluten-Free Version: This is a simple swap! Just substitute the all-purpose flour in the crust with a high-quality 1:1 gluten-free baking flour blend that contains xanthan gum. I’ve used Bob’s Red Mill with great results. The texture will be slightly more delicate, but the flavor is just as amazing.
- Dairy-Free Adaptation: You can make this dairy-free by using a plant-based cream cheese and a plant-based butter stick. I’ve had good luck with the Kite Hill brand for cream cheese and Miyoko’s for butter. The texture might be slightly less firm, but it’s still delicious. Just make sure your butter is very cold.
- Chocolate Twist: For the chocoholics in your life, stir ½ cup of mini chocolate chips into the cheesecake batter before pouring it over the crust. The little bursts of chocolate go surprisingly well with the pumpkin and pecan flavors. I tried this one Halloween, and the kids went crazy for it.
- Maple Pecan Variation: Swap the brown sugar in the crust for ⅓ cup of pure maple syrup, and reduce the butter by 1 tablespoon. The maple flavor complements the pecans beautifully. Just be aware that this makes the crust a little stickier to press into the pan. You can also drizzle a little maple glaze over the top of the finished bars.
- Different Spice Profile: If pumpkin pie spice isn’t your favorite, you can get creative. Try a chai spice blend (cardamom, cinnamon, ginger, cloves) or even a pinch of cayenne pepper for a sweet and spicy kick. A little orange zest in the filling also brightens up the pumpkin flavor.
Serving & Storage Suggestions
These bars are incredibly versatile when it comes to serving. They are a showstopper on a dessert table but also perfect for a simple after-school treat.
- How to Serve: These bars are best served cold, straight from the fridge. The texture is firm and creamy. If you prefer a softer, more melt-in-your-mouth texture, let them sit at room temperature for 15-20 minutes before serving. For an extra-special touch, top each bar with a dollop of fresh whipped cream and a light dusting of cinnamon or nutmeg. A drizzle of caramel sauce is also divine!
- What to Serve With: They are perfect on their own, but they pair wonderfully with a hot cup of coffee, a mug of spiced apple cider, or a glass of cold milk. For a full fall dessert spread, serve them alongside a warm apple crisp or a slice of pumpkin bread.
- Storing Leftovers: Store any leftover bars in an airtight container in the refrigerator. They will stay fresh for up to 5 days. I actually find they taste even better on day two or three as the flavors continue to meld together! The pecan crust also stays perfectly crunchy.
- Freezing Instructions: These bars freeze beautifully! Once they are fully chilled and sliced, arrange them in a single layer on a baking sheet and freeze for about an hour, or until they are solid. Then, transfer the frozen bars to a freezer-safe bag or container, placing a piece of parchment paper between layers to prevent sticking. They will keep for up to 3 months. To thaw, simply place them in the refrigerator overnight or let them sit at room temperature for about 30 minutes.
Nutritional Information & Benefits
Let’s be honest, this is a treat, but it’s made with some ingredients that offer a few perks. Here’s a breakdown of what you’re getting in one bar (based on 24 servings).
Estimated Nutritional Values (per bar):
- Calories: 285 kcal
- Fat: 19g
- Carbohydrates: 24g
- Protein: 5g
- Fiber: 2g
- Sugar: 16g
Health Highlights: The pecans in the crust are a great source of healthy fats, fiber, and magnesium. Pumpkin is packed with Vitamin A, which is great for your eyes and immune system—a perfect boost during cold and flu season. While this is definitely a dessert, it’s a more wholesome option than a lot of processed sweets. It’s a treat you can feel a little bit better about giving your family.
Dietary Considerations: This recipe contains dairy (cream cheese, butter), eggs, and tree nuts (pecans). As mentioned in the variations, it can be adapted to be gluten-free and dairy-free.
Conclusion
If you’re looking for a dessert that captures the cozy, comforting spirit of fall without a ton of fuss, this is it. These Kid-Approved Pumpkin Cheesecake Bars with Pecan Crust have become a non-negotiable part of my autumn baking, and I have a feeling they’ll become a staple in your home, too. They’re everything I want in a fall dessert—rich, spiced, creamy, and with that incredible crunch from the pecan crust. I love how forgiving they are; they don’t require any special skills, and they always turn out beautifully. Honestly, they make me look like a hero at every family dinner and school event.
I’d love to hear how they turn out for you! Did your kids go back for seconds? Did you try one of the variations? Please leave a comment below and share your experience. Don’t forget to pin this recipe for later and share it with a friend who needs a little more pumpkin in their life. Happy baking, friends!
Frequently Asked Questions
Can I use a pre-made graham cracker crust instead of making the pecan crust?
Technically, yes, but you will be missing out on the best part of this recipe! The pecan crust is what makes these bars so special. It provides a wonderful buttery, nutty flavor and a crunchy texture that a plain graham cracker crust just can’t match. If you are in a huge rush, you could use a store-bought shortbread crust, but I really encourage you to try the pecan version at least once.
My cheesecake filling cracked. What did I do wrong?
Don’t worry, it happens to the best of us! Cracks are usually caused by overmixing the batter (which adds too much air) or overbaking. Make sure you mix on low speed once the eggs are added, and pull the bars out of the oven when the center is still slightly jiggly. A sudden change in temperature can also cause cracking, so let the bars cool to room temperature gradually before putting them in the fridge. And remember, a little whipped cream covers a multitude of sins!
Can I make these bars ahead of time for a party?
Absolutely! In fact, I highly recommend it. These bars need to chill for at least 4 hours anyway, so they are perfect for making a day ahead. They actually taste better the next day after the flavors have had time to meld together. You can make them up to 2 days in advance and keep them covered in the refrigerator. Just slice them right before serving.
Can I use fresh pumpkin instead of canned?
You can, but you need to be careful. Fresh pumpkin has a much higher water content than canned pumpkin purée. If you use fresh, you will need to roast it, then drain the pulp in a cheesecloth-lined sieve for several hours to remove the excess moisture. Otherwise, your cheesecake filling will be watery and may not set properly. For the most consistent and reliable results, I always recommend using good quality canned pumpkin purée like Libby’s.
How do I get perfectly clean, sharp slices?
The secret is all in the chilling and the knife! First, make sure the bars are fully chilled—at least 4 hours in the fridge, or overnight. Then, use a long, sharp chef’s knife. Before each cut, run the knife under hot water and wipe it completely dry with a clean paper towel. The hot knife will glide through the cheesecake without dragging. This little step makes all the difference between messy slices and picture-perfect bars.
Pin This Recipe!
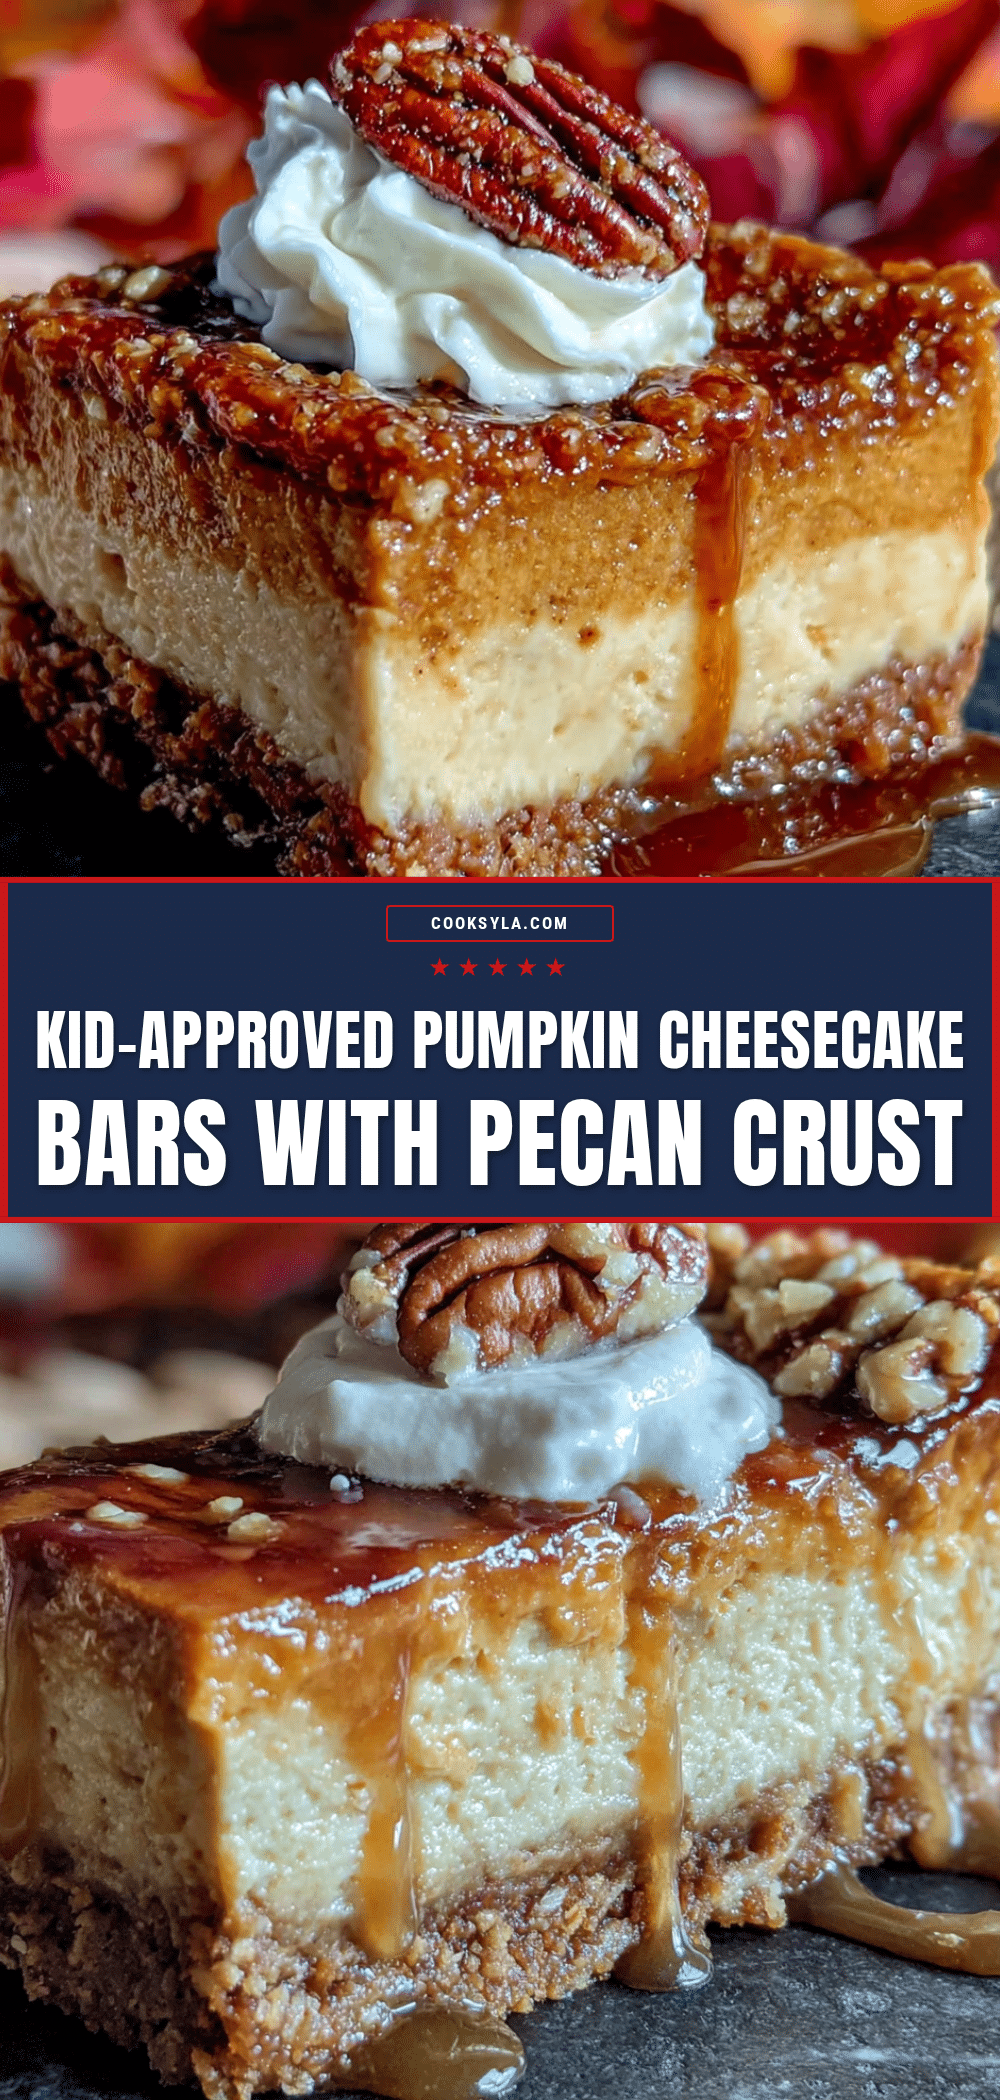
Kid-Approved Pumpkin Cheesecake Bars
These Kid-Approved Pumpkin Cheesecake Bars with a buttery pecan crust are the ultimate easy fall dessert. Creamy, spiced pumpkin cheesecake on a crunchy, nutty base—perfect for bake sales, holidays, or any autumn gathering.
- Prep Time: 20 minutes
- Cook Time: 50 minutes
- Total Time: 5 hours 10 minutes (includes chilling)
- Yield: 24 bars 1x
- Category: Dessert
- Cuisine: American
Ingredients
- 1 ½ cups (150g) pecans
- 1 ½ cups (180g) all-purpose flour
- ½ cup (100g) packed light brown sugar
- ½ teaspoon salt
- ½ cup (113g or 1 stick) cold unsalted butter, cut into small cubes
- 16 ounces (452g) full-fat cream cheese, softened to room temperature
- 1 cup (200g) granulated sugar
- 1 cup (245g) canned pumpkin purée
- 3 large eggs, room temperature
- 1 teaspoon vanilla extract
- 1 ½ teaspoons pumpkin pie spice
- ½ teaspoon ground cinnamon
Instructions
- Preheat oven to 350°F (175°C). Line a 9×13-inch baking pan with parchment paper, leaving overhang on two long sides. Lightly spray with non-stick cooking spray.
- In a food processor, combine pecans, flour, brown sugar, and salt. Pulse until pecans are finely ground and mixture resembles coarse sand. Add cold butter cubes and pulse until mixture looks like wet sand and holds together when pinched.
- Pour crust mixture into prepared pan. Press firmly and evenly into the bottom using a flat measuring cup or glass. Bake for 15 minutes until lightly golden. Set aside to cool slightly.
- In a large bowl, beat softened cream cheese with an electric mixer on medium speed until smooth and fluffy, about 2 minutes. Add granulated sugar and beat until combined. Add pumpkin purée, vanilla, pumpkin pie spice, and cinnamon; beat on low until just combined.
- Add eggs one at a time, mixing on low speed just until each yolk disappears. Do not overmix.
- Pour cheesecake filling over warm crust and spread evenly. Bake for 45-50 minutes, until edges are set and center is slightly jiggly (like firm Jell-O).
- Cool completely on a wire rack (about 1-2 hours), then cover and refrigerate for at least 4 hours or overnight.
- Use parchment handles to lift bars onto a cutting board. Slice into squares with a sharp knife, wiping blade clean between cuts. Serve cold or at room temperature.
Notes
For best results, ensure cream cheese and eggs are at room temperature. Do not overbake; center should be slightly jiggly. Chilling overnight enhances flavor and makes slicing easier. Cracks can be hidden with whipped cream.
Nutrition
- Serving Size: 1 bar
- Calories: 285
- Sugar: 16
- Sodium: 180
- Fat: 19
- Saturated Fat: 8
- Carbohydrates: 24
- Fiber: 2
- Protein: 5
Keywords: pumpkin cheesecake bars, pecan crust, fall dessert, kid-approved, easy pumpkin dessert, bake sale recipe


