Love this? Save it for later!
Share the inspiration with your friends
My cousin wasn’t trying to impress anyone. I’d stopped by her place on a random Tuesday in October to drop off a slow cooker I’d borrowed, and the smell of toasted sugar hit me before I even got through the door. Not candy corn. Not pumpkin spice. Just this clean, sweet, almost vanilla-kissed air that made me stop mid-step and just breathe.
I found her in the kitchen, piping these tiny white peaks onto a baking sheet while her toddler sat on the counter eating Goldfish crackers and “helping” by occasionally poking the batter. She looked up, shrugged, and said, “Oh, these? They’re just ghost cookies. No big deal.”
No big deal? Let me tell you, I nearly fell over. The ones from the first batch were already cooling on the rack — these perfect little white ghosts with tiny chocolate eyes, all lined up like a miniature haunted parade. They were the most adorable things I’d ever seen, and she was acting like she’d just made toast.
That’s the thing about the best recipes, honestly. They don’t come from some fancy cooking class or a viral video. They come from someone’s kitchen on a random weekday, made with whatever’s in the pantry, and served with zero fanfare. Maybe you’ve been there — you taste something at a friend’s house and suddenly you’re asking for the recipe before you’ve even swallowed.
I’ve been making these ghost meringue cookies every Halloween since that afternoon. They’re my secret weapon for potlucks, classroom parties, and any gathering where I need to show up with something that looks like I spent hours on it. (Spoiler: I didn’t.) And honestly, the fact that they only need four ingredients still blows my mind. Let me show you how it’s done.
Why You’ll Love This Recipe
These ghost meringue cookies aren’t just cute — they’re practically magic. I’ve tested this recipe at least a dozen times across different ovens, different humidity levels, and even different brands of sugar. Every single time, they come out light, crisp, and perfectly spooky. Here’s why they work so well for hosting:
- Only 4 Ingredients : Egg whites, sugar, vanilla, and chocolate chips. That’s it. No cream of tartar, no fancy extracts, no special stabilizers. You probably have everything right now.
- Naturally Gluten-Free & Low-Fat : These cookies are basically air with a little sugar. Guests with dietary restrictions can grab a handful without worry.
- Make-Ahead Friendly : Pipe them the night before and bake them while you’re getting ready. Or bake them days ahead — they keep beautifully in an airtight container.
- Guaranteed Crowd-Stopper : I’ve brought these to Halloween parties, work potlucks, and family dinners. Adults lose their minds over them even more than kids do. There’s something about a tiny ghost cookie that makes everyone smile.
- Impressively Simple : Here’s the thing — meringue sounds fancy. It sounds technical. But once you understand the basic rhythm of whipping egg whites and adding sugar slowly, it’s actually one of the most forgiving recipes out there.
What makes this version different from other meringue recipes is the texture. These cookies are crisp all the way through with no chewy center, which means they snap when you bite them. The chocolate eyes add just enough richness to balance the sweetness, and the ghost shape is forgiving enough that even sloppy piping looks intentional. This isn’t just another Halloween cookie — it’s the one people will ask you for year after year.
What Ingredients You Will Need
This recipe uses simple, pantry-friendly ingredients that come together to create something genuinely special. The magic is in the technique, not the shopping list. Here’s what you’ll need and why each ingredient matters:
For the Meringue Base
- 4 large egg whites (room temperature) — The foundation of the whole recipe. Room-temperature egg whites whip up higher and hold more air than cold ones. Separate your eggs carefully — any trace of yolk will prevent the whites from reaching stiff peaks. I usually separate them while the eggs are still cold, then let the whites sit on the counter for about 30 minutes.
- 1 cup (200g) granulated sugar — Not powdered sugar, not brown sugar. Regular white granulated sugar dissolves cleanly into the egg whites and creates that stable, glossy structure. I’ve tested this with superfine sugar and it works great too, but standard granulated is totally fine.
- 1 teaspoon vanilla extract — Pure vanilla adds warmth and depth. You can use imitation vanilla in a pinch, but pure vanilla really does taste noticeably better here since the flavor is so simple. I’m partial to Nielsen-Massey, but any brand works.
- ¼ teaspoon salt — A tiny pinch balances the sweetness and helps stabilize the egg whites. Don’t skip it, even if you’re watching your sodium.
For the Eyes
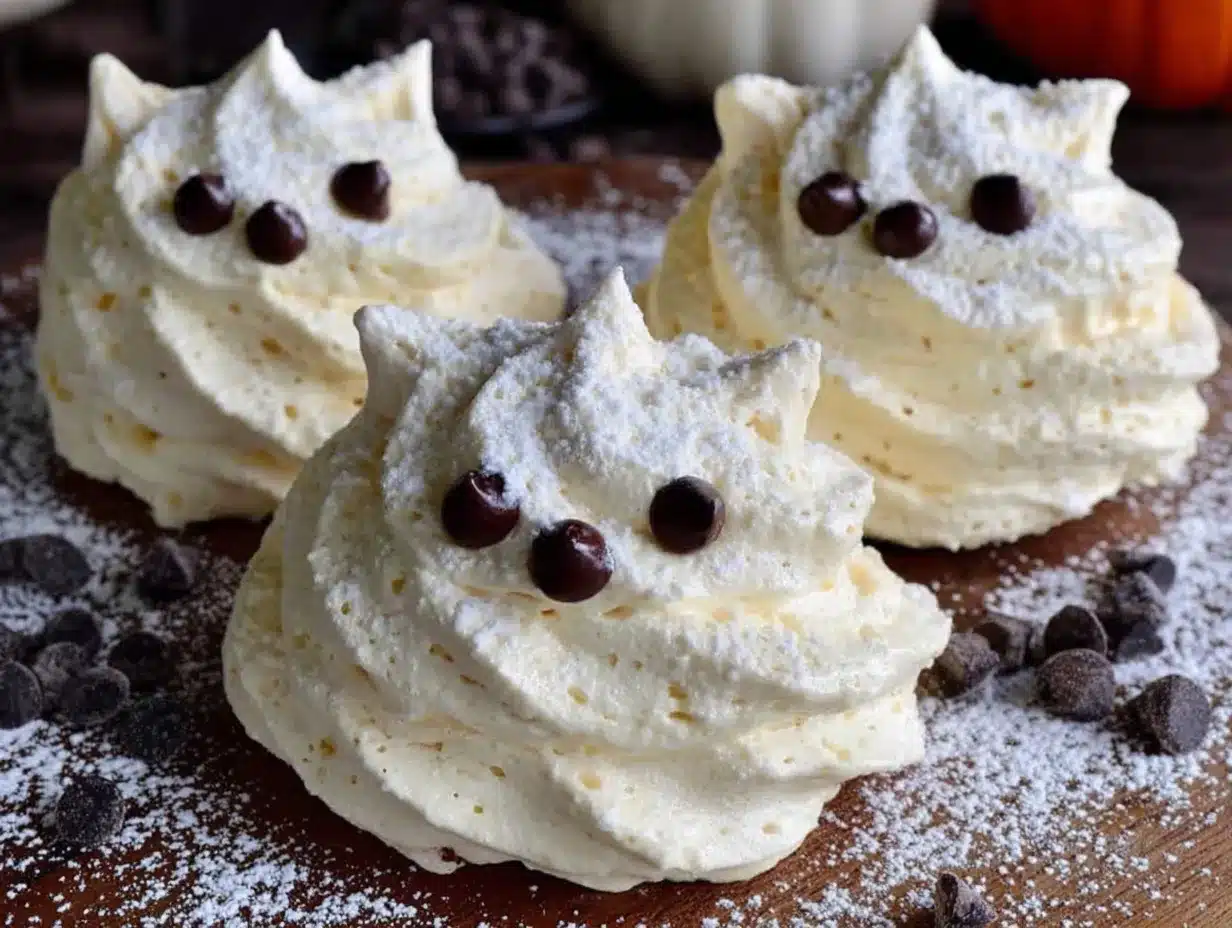
- ¼ cup mini chocolate chips — Regular chocolate chips are too big for ghost faces. Look for mini chips, or take regular chips and chop them into smaller pieces. You need tiny dots that look like eyes, not giant googly eyes. Guittard and Ghirardelli both make good mini chips.
Ingredient Tips & Substitutions
If you’re serving guests with dietary needs, here are some swaps that work: Use coconut sugar instead of granulated sugar for a slightly caramelized flavor and darker color (though the ghosts won’t be pure white). For a vegan version, aquafaba (the liquid from a can of chickpeas) whips up almost exactly like egg whites — use 3 tablespoons of aquafaba per egg white. The texture is slightly less stable but still works beautifully. And if someone can’t have chocolate, skip the eyes entirely or use tiny dots of melted dark chocolate drizzled on after baking.
One thing I’ve learned the hard way: don’t use old eggs. Fresh eggs whip up better and hold their structure longer. If your eggs are more than two weeks old, buy a fresh carton for this recipe. Your ghosts will thank you.
Equipment Needed
You don’t need a professional bakery setup for these cookies, but having the right tools makes the process smoother. Here’s what you’ll need:
- Stand mixer or hand mixer — Whipping egg whites by hand is possible but honestly miserable. A stand mixer with the whisk attachment makes this recipe almost effortless. If you’re using a hand mixer, expect to hold it for about 8-10 minutes.
- Large mixing bowl — Make sure it’s completely clean and dry. Any grease or residue will ruin your meringue. Glass or metal bowls work best — plastic bowls can hold onto oils even after washing.
- Piping bags (2-3) — Disposable piping bags are cheap and make cleanup easy. I buy the 12-inch size and they work perfectly.
- Large round piping tip (Wilton 1A or similar) — A plain round tip creates the classic ghost shape. You can also just snip the end off a piping bag if you don’t have tips, but the shape won’t be as clean.
- Baking sheets (2-3) — Light-colored aluminum sheets work best. Dark sheets can cause the bottoms of the cookies to brown too quickly.
- Parchment paper — Essential for easy removal. Silicone baking mats also work, but parchment gives you more control over placement.
- Cooling rack — For letting the cookies cool completely after baking.
If you don’t have a piping bag, a sturdy zip-top bag with the corner snipped off works in a pinch. Just be careful not to squeeze too hard or the bag might burst. I learned that one the messy way.
Preparation Method
Making these ghost meringue cookies is a two-part process: first you make the meringue, then you pipe and bake. Take your time with the whipping step — it’s the most important part. Here’s exactly how to do it:
Step 1: Prep Your Equipment
Preheat your oven to 200°F (95°C). Line two baking sheets with parchment paper. Make sure your mixing bowl and whisk attachment are spotlessly clean — wipe them with a little white vinegar if you’re worried about residue. Set up your piping bag with the round tip and set it aside.
Step 2: Whip the Egg Whites
Place the room-temperature egg whites and salt in your mixing bowl. Beat on medium speed until foamy and opaque, about 2 minutes. The bubbles should be small and uniform — not big and soapy. This is where patience pays off.
Step 3: Add the Sugar Slowly
With the mixer running on medium-low speed, start adding the sugar one tablespoon at a time. I know it feels tedious, but dumping all the sugar in at once will deflate the egg whites and you’ll end up with flat cookies. Each addition should be fully incorporated before you add the next. This takes about 5-6 minutes total.
Step 4: Whip to Stiff Peaks
Once all the sugar is in, increase the speed to medium-high and beat until the meringue is glossy and holds stiff peaks. To test this, stop the mixer and lift the whisk — the meringue should stand up straight without drooping. Rub a tiny bit between your fingers — if it feels gritty, the sugar hasn’t dissolved yet. Keep whipping until it feels smooth. This usually takes another 3-5 minutes.
Step 5: Add Vanilla
Add the vanilla extract and beat on low speed for about 15 seconds until just combined. Don’t overmix at this stage — you don’t want to deflate all that beautiful air you just whipped in.
Step 6: Pipe the Ghosts
Transfer the meringue to your prepared piping bag. Hold the bag vertically about ½ inch above the parchment paper. Pipe a small mound for the body, then pull straight up to create a little peak for the head. Release pressure and pull away. Space them about 1 inch apart — they don’t spread much, but they need a little breathing room. Don’t worry if they look uneven. Ghosts are supposed to look a little wonky.
Step 7: Add the Eyes
Before the meringue starts to dry, gently press two mini chocolate chips into each ghost for eyes. Press them in just enough that they stay put — don’t push them all the way through to the parchment. If the meringue starts to form a skin, the chips won’t stick, so work quickly on this step.
Step 8: Bake Low and Slow
Place the baking sheets in the preheated oven and bake for 1 hour and 30 minutes. The cookies should be dry to the touch and lift easily off the parchment when done. They won’t brown at all — they should stay pure white. If they start to turn golden, your oven is too hot.
Step 9: Cool Completely
Turn off the oven and leave the cookies inside with the door slightly ajar for at least 30 minutes. This gradual cooling prevents cracking. After that, transfer them to a cooling rack and let them sit until completely cool, about 15 more minutes.
Cooking Tips & Techniques
After making these ghost meringue cookies more times than I can count, I’ve collected a few tricks that make the process smoother. Here’s what I wish I’d known from the start:
Humidity is the enemy. Meringue absorbs moisture from the air, which makes it sticky and prevents it from drying properly. If it’s a rainy or humid day, save this recipe for a drier time. I once made these during a summer thunderstorm and they never crisped up — just stayed chewy and sad.
Don’t rush the sugar. I know I said this already, but it bears repeating. Adding sugar too quickly is the number one mistake people make. The meringue will look grainy and won’t hold its shape. Take your time. Put on a podcast. This is not a race.
Test for doneness with a lift test. After the baking time, try lifting one cookie off the parchment. If it comes off cleanly without sticking, they’re done. If it sticks, give them another 10-15 minutes. Every oven runs slightly differently, so trust the cookie, not the timer.
Make extra for mistakes. The first time I made these, I dropped a piping bag on the floor and had to start over. Now I always make a slightly larger batch than I think I’ll need. The extra cookies never go to waste anyway.
Use a toothpick for precision. If you’re struggling to place the chocolate eyes exactly where you want them, use a toothpick to nudge them into position. Your fingers will thank you for not getting sticky.
Variations & Adaptations
Once you’ve mastered the basic ghost, the possibilities are endless. Here are some variations I’ve tried and loved:
Spooky Spider Webs: After baking, drizzle melted dark chocolate over the cookies in a zigzag pattern to look like spider webs. It adds drama and an extra layer of chocolate flavor. I did this for a Halloween party last year and people lost their minds.
Pumpkin Spice Ghosts: Add 1 teaspoon of pumpkin pie spice to the sugar before whipping. The ghosts will be slightly tan, but the flavor is incredible. Perfect for fall gatherings where you want something that tastes like autumn.
Mint Chocolate Ghosts: Substitute the vanilla extract with peppermint extract for a refreshing twist. These are especially good after a heavy meal — the mint cuts through the richness. Just be careful, peppermint is strong. Start with ½ teaspoon.
Vegan Aquafaba Ghosts: Replace each egg white with 3 tablespoons of aquafaba (chickpea liquid). Whip it exactly the same way. The texture is slightly less stable, so pipe them smaller and bake a little longer. They won’t be quite as crisp, but they’re still delicious and completely plant-based.
Colorful Ghosts: Add a drop of food coloring to the meringue before piping for colored ghosts. Purple, green, or orange work great for Halloween. Just don’t add too much liquid or the meringue will deflate. Gel food coloring works best.
Serving & Storage Suggestions
These ghost meringue cookies are at their best when served at room temperature. The texture is perfectly crisp and they melt in your mouth. Here’s how to serve and store them:
Presentation Ideas: Arrange them on a white platter to make the ghosts pop. Or stick them upright in a small bowl of powdered sugar to look like they’re floating in a graveyard. For Halloween parties, I like to scatter them across a black tablecloth with a few fake spider webs — it’s spooky and beautiful at the same time.
What to Serve Alongside: These cookies pair beautifully with hot chocolate, coffee, or apple cider. For a dessert board, arrange them with chocolate-dipped pretzels, caramel popcorn, and pumpkin bread. They’re also perfect on their own — honestly, they’re light enough that guests can grab a handful without feeling stuffed.
Storage Instructions: Store the cookies in an airtight container at room temperature for up to 2 weeks. Do not refrigerate — the moisture in the fridge will make them sticky. If you’re making them ahead for a party, bake them up to 5 days in advance and keep them in a cool, dry place.
Freezing: You can freeze baked meringues for up to 3 months. Place them in a single layer in a freezer-safe container with parchment between layers. Thaw at room temperature for about 30 minutes before serving. They won’t be quite as crisp as fresh, but they’re still delicious.
Flavor Development: These cookies actually taste better the day after baking. The flavors mellow and the texture becomes even more delicate. If you can resist eating them all on day one, you’ll be rewarded on day two.
Nutritional Information & Benefits
Per serving (3 cookies): Approximately 85 calories, 0g fat, 19g carbohydrates, 2g protein, 18g sugar. These are a lighter option compared to traditional Halloween cookies, which is always nice when you’re hosting a party with multiple desserts.
The main ingredient — egg whites — is packed with protein without the fat and cholesterol of the yolk. They’re also a good source of selenium and riboflavin. The sugar content is higher than I’d like, but honestly, they’re a treat. No one’s eating these for breakfast.
For guests with dietary concerns: These cookies are naturally gluten-free, dairy-free, and nut-free (assuming your chocolate chips are processed in a nut-free facility). They’re also low in fat, which makes them a good option for anyone watching their fat intake. Just be mindful of the sugar if you’re serving someone with diabetes — they might want to stick to one or two.
Frequently Asked Questions
Can I make these ghost meringue cookies without a piping bag?
Absolutely. Use a sturdy zip-top bag with the corner snipped off. The shape won’t be as precise, but it still works. You can also use a small spoon to drop mounds of meringue onto the parchment and shape them gently with the back of the spoon.
Why did my meringue turn out flat and runny?
This usually happens for one of three reasons: the egg whites had yolk in them, the bowl or whisk had grease residue, or the sugar was added too quickly. Make sure everything is perfectly clean and add sugar slowly. If your meringue is runny, start over with fresh ingredients.
Can I use liquid egg whites from a carton?
I don’t recommend it. Carton egg whites are pasteurized at high temperatures, which changes their protein structure and makes them much harder to whip to stiff peaks. Fresh egg whites from whole eggs give you the best results.
How do I know when the meringue is fully baked?
The cookies should lift cleanly off the parchment without sticking. They should feel dry to the touch and sound hollow when tapped. If they feel soft or sticky, give them more time in the oven. Every oven runs differently, so trust your senses over the timer.
Can I double this recipe?
Yes, but don’t try to whip more than 8 egg whites at once in a standard stand mixer. The volume of meringue expands significantly, and you need room for the whisk to work properly. If you’re doubling, make two separate batches or use a commercial mixer.
Conclusion
These ghost meringue cookies are the kind of recipe that makes you look like a hero with almost no effort. They’re spooky, they’re adorable, and they taste like little clouds of vanilla sweetness. Every time I bring them to a gathering, someone asks for the recipe. Every single time.
What I love most about them is how forgiving they are. Your first batch might look a little lopsided. Some ghosts might have three eyes because you sneezed while placing the chocolate chips. That’s fine. That’s character. That’s what makes them yours.
So go ahead — make a batch for your next Halloween party, your kid’s classroom celebration, or just because it’s Tuesday and you want something beautiful in your kitchen. And when someone asks where you got the recipe, tell them it’s no big deal. Just a little something you whipped up.
I’d love to hear how yours turn out! Drop a comment below with your ghost variations, or tag me in your photos. Happy haunting, friends.
Pin This Recipe!
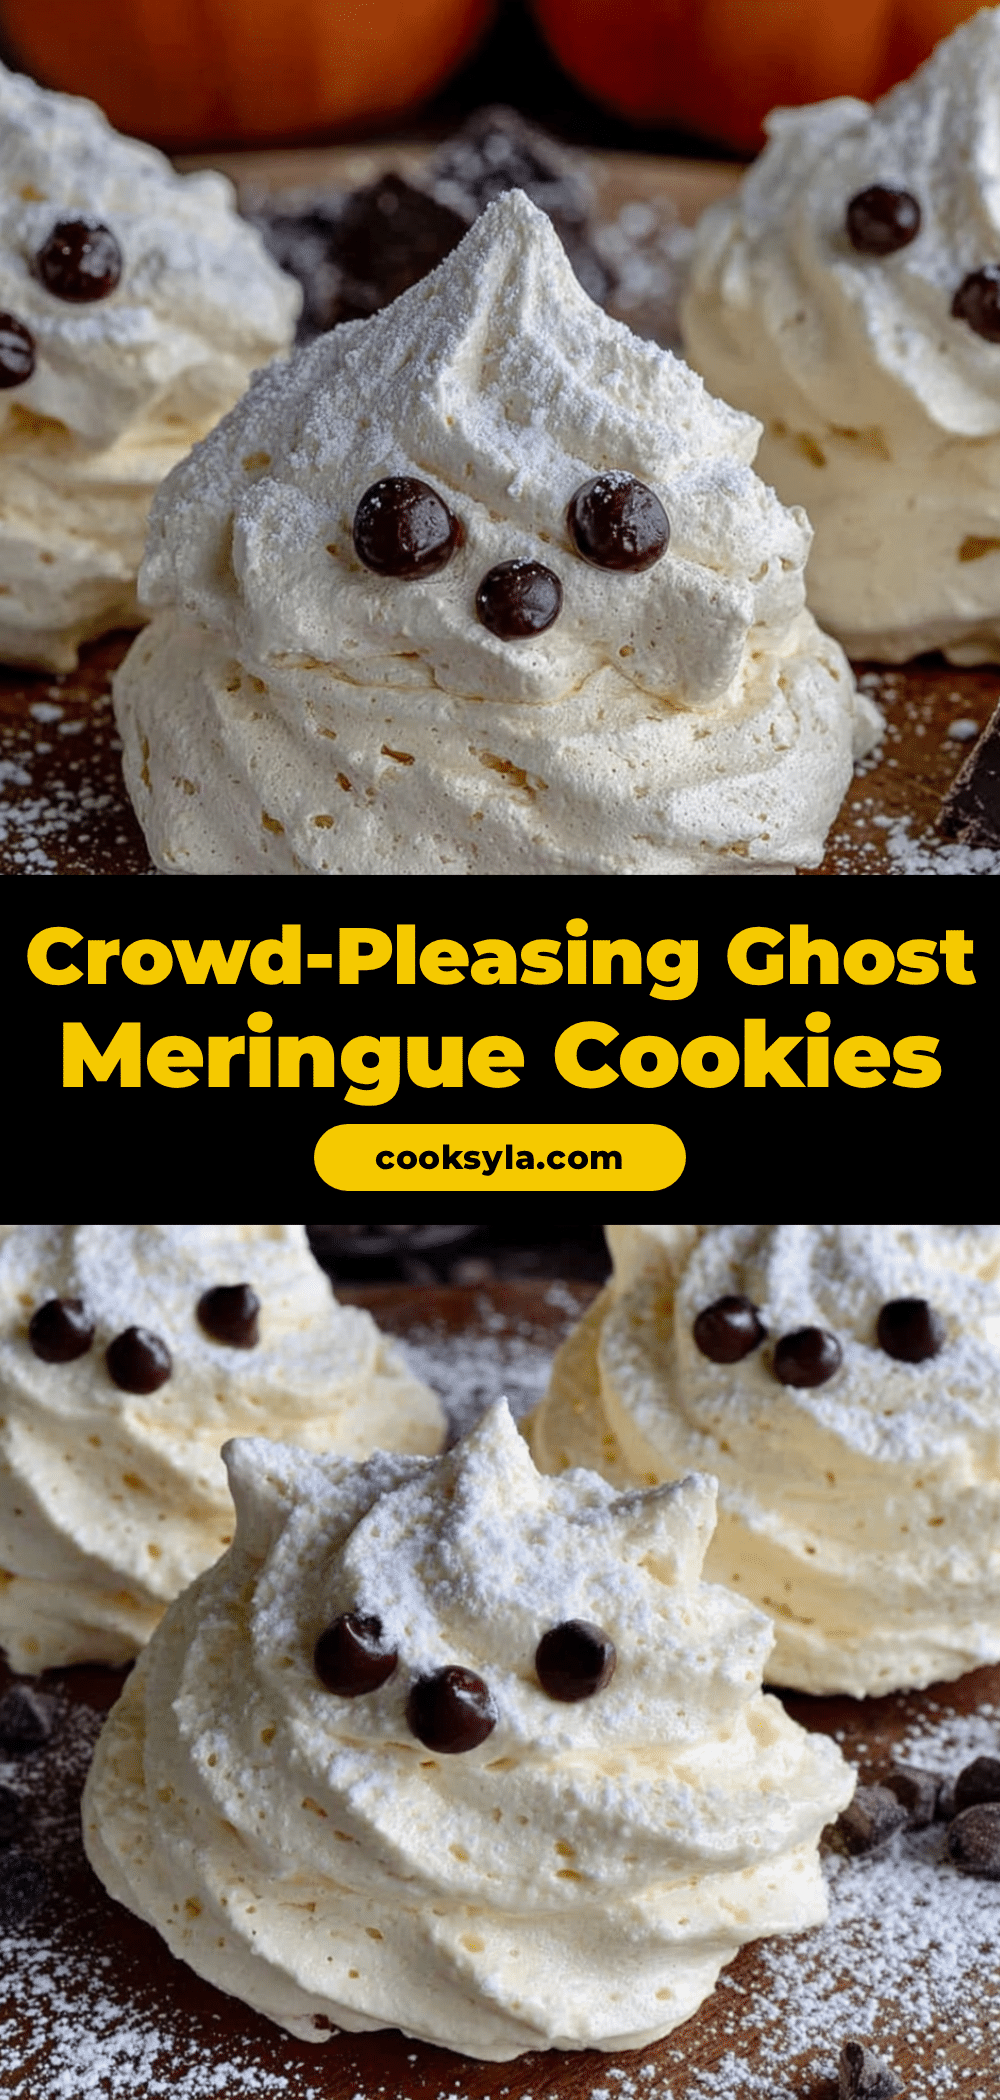
Best Ghost Meringue Cookies: Easy 4-Ingredient Halloween Treat
These ghost meringue cookies are light, crisp, and perfectly spooky with only 4 ingredients. They’re naturally gluten-free, low-fat, and make a crowd-stopping Halloween treat that looks impressive but is surprisingly simple to make.
- Prep Time: 20 minutes
- Cook Time: 1 hour 30 minutes
- Total Time: 2 hours 5 minutes
- Yield: 24 servings 1x
- Category: Dessert
- Cuisine: American
Ingredients
- 4 large egg whites (room temperature)
- 1 cup (200g) granulated sugar
- 1 teaspoon vanilla extract
- ¼ teaspoon salt
- ¼ cup mini chocolate chips
Instructions
- Preheat your oven to 200°F (95°C). Line two baking sheets with parchment paper. Make sure your mixing bowl and whisk attachment are spotlessly clean.
- Place the room-temperature egg whites and salt in your mixing bowl. Beat on medium speed until foamy and opaque, about 2 minutes.
- With the mixer running on medium-low speed, add the sugar one tablespoon at a time, fully incorporating each addition before adding the next. This takes about 5-6 minutes.
- Increase speed to medium-high and beat until the meringue is glossy and holds stiff peaks. Rub a tiny bit between your fingers—if it feels gritty, keep whipping until smooth. This takes another 3-5 minutes.
- Add the vanilla extract and beat on low speed for about 15 seconds until just combined.
- Transfer the meringue to a piping bag fitted with a large round tip (Wilton 1A or similar). Pipe small mounds onto the parchment, pulling straight up to create a peak for the head. Space them about 1 inch apart.
- Before the meringue starts to dry, gently press two mini chocolate chips into each ghost for eyes.
- Bake for 1 hour and 30 minutes. The cookies should be dry to the touch and lift easily off the parchment when done.
- Turn off the oven and leave the cookies inside with the door slightly ajar for at least 30 minutes. Then transfer to a cooling rack and let cool completely, about 15 more minutes.
Notes
Humidity is the enemy of meringue—avoid making these on rainy or humid days. Don’t rush adding the sugar; adding it too quickly is the most common mistake. Use fresh eggs for best results. The cookies actually taste better the day after baking. Store in an airtight container at room temperature for up to 2 weeks; do not refrigerate.
Nutrition
- Serving Size: 3 cookies
- Calories: 85
- Sugar: 18
- Sodium: 30
- Carbohydrates: 19
- Protein: 2
Keywords: ghost meringue cookies, Halloween cookies, meringue cookies, 4-ingredient cookies, gluten-free cookies, low-fat cookies, spooky treats


