Love this? Save it for later!
Share the inspiration with your friends
This was supposed to be apple pie. Honestly, I had it all planned out—a beautiful, lattice-topped pie for a last-minute dinner invitation. I’d even bought the fancy apples. But then my oven decided it was going to run about 50 degrees cooler than what the dial said, and I didn’t realize it until the pie crust was already in there, turning into a pale, greasy mess. I stood there, staring at the sad-looking crust, the bowl of sliced apples, and the bottle of apple cider on the counter. I was already running late, the kitchen was a disaster zone, and I was this close to just ordering pizza.
In a moment of pure desperation—and maybe a little stubbornness—I just started throwing things together. I figured if the pie wasn’t going to work, maybe a cake would. I swapped the pie crust for a simple batter, dumped in way more apple cider than I probably should have, and decided to bake it in a loaf pan because that’s what was clean. I didn’t even have time to make a proper frosting, so I whisked together some cream cheese, powdered sugar, and a heavy hand of cinnamon. The whole thing felt like a gamble, and honestly, I was half-expecting it to be a soggy, sweet mess.
When I pulled it out of the oven, it didn’t look like much. Just a simple, brown loaf. But the smell—that warm, spiced, apple-cider smell—filled the whole house. I let it cool for maybe ten minutes (I was in a hurry, remember?) and then poured that tangy, creamy glaze all over the top. The first bite was a shock. It was so much better than what I had planned. The cake was incredibly moist, with a deep apple flavor that wasn’t too sweet. That glaze was the perfect finishing touch. I brought it to dinner, told everyone it was a “new recipe I was trying out,” and watched it disappear in minutes. This cake is my little secret weapon now. It tastes like you spent hours in the kitchen, but we both know the truth—it’s the happy accident that saved the night. And you know what? It’s way easier than pie anyway.
Why You’ll Love This Recipe
Let’s be real—weeknights are a blur. You’re tired, you’re hungry, and the last thing you want to do is a complicated baking project. This quick apple cider cake is the answer to that problem. It’s the kind of recipe that feels special but takes almost no effort, which is exactly what you need when you’re short on time but still craving something homemade.
- Quick & Easy: This cake comes together in about 15 minutes of active prep time. From start to finish, you’re looking at under an hour to have a warm, glazed cake on your counter.
- Simple Ingredients: You probably have most of these in your pantry right now. No weird extracts, no hard-to-find spices. Just basic baking staples and a bottle of apple cider.
- Perfect for Weeknights: It’s not too heavy, not too sweet. It’s the perfect little dessert after a simple dinner, or even a special breakfast treat with your morning coffee.
- Crowd-Pleaser: I’ve brought this to potlucks, book club, and even to a neighbor’s house. It always gets the same reaction—people asking for the recipe and looking surprised when I tell them how simple it is.
- Unbelievably Delicious: The texture is what gets me. It’s incredibly moist and tender, almost like a pound cake but lighter. And that cinnamon cream cheese glaze? It’s the perfect balance of tangy and sweet. It’s not just another apple cake—it’s the one I keep coming back to.
What makes this different from other apple cakes is the technique. By reducing the apple cider on the stove, you concentrate all that fruity flavor without adding extra liquid. It’s a small step that makes a huge difference. Plus, the glaze is a total game-changer. It’s not a thick, stiff frosting but a silky, pourable glaze that soaks into the warm cake just a little bit. This recipe isn’t just good—it’s the kind that makes you close your eyes after the first bite. It’s comfort food reimagined for a busy life: faster, simpler, but with the same soul-soothing satisfaction.
What Ingredients You Will Need
This recipe uses simple, wholesome ingredients to deliver that deep, cozy apple flavor without any fuss. Most of these are pantry staples, which means you can make this cake on a whim. Here is exactly what you will need:
For the Quick Apple Cider Cake
- 1 cup (240 ml) apple cider: This is the star of the show. Use a good quality, unfiltered apple cider for the best flavor. I personally love the taste of a local orchard’s cider, but any brand will work. Do not use apple juice—it’s thinner and won’t have that same rich, tangy flavor.
- 1 ¾ cups (220 g) all-purpose flour: Spoon and level your flour for the best results. Scooping directly from the bag can pack in too much flour, making the cake dry.
- 1 teaspoon baking soda: This helps the cake rise and gives it a nice, tender crumb.
- ½ teaspoon baking powder: For a little extra lift.
- ½ teaspoon salt: Don’t skip this! Salt balances the sweetness and brings out the flavor of the apples and spices.
- 1 teaspoon ground cinnamon: The classic apple spice. It adds warmth and that unmistakable fall flavor.
- ½ teaspoon ground nutmeg: Freshly grated is best, but pre-ground works perfectly fine too. It adds a subtle, nutty warmth.
- ¼ teaspoon ground cloves: Just a pinch. Cloves are strong, so a little goes a long way in adding depth.
- ½ cup (113 g) unsalted butter, softened: Make sure your butter is at room temperature. This helps it cream properly with the sugar, creating a light and airy texture.
- ¾ cup (150 g) granulated sugar: Adds sweetness and helps with browning.
- ¼ cup (50 g) packed light brown sugar: This adds a touch of molasses flavor and extra moisture.
- 2 large eggs, room temperature: Room temperature eggs incorporate into the batter more easily, creating a smoother, more consistent cake.
- 1 teaspoon vanilla extract: Pure vanilla extract is always a good idea.
- ½ cup (120 ml) buttermilk, room temperature: Buttermilk makes the cake incredibly tender. If you don’t have buttermilk, you can make a quick substitute by adding 1 ½ teaspoons of lemon juice or white vinegar to ½ cup of regular milk and letting it sit for 5 minutes.
For the Cinnamon Cream Cheese Glaze
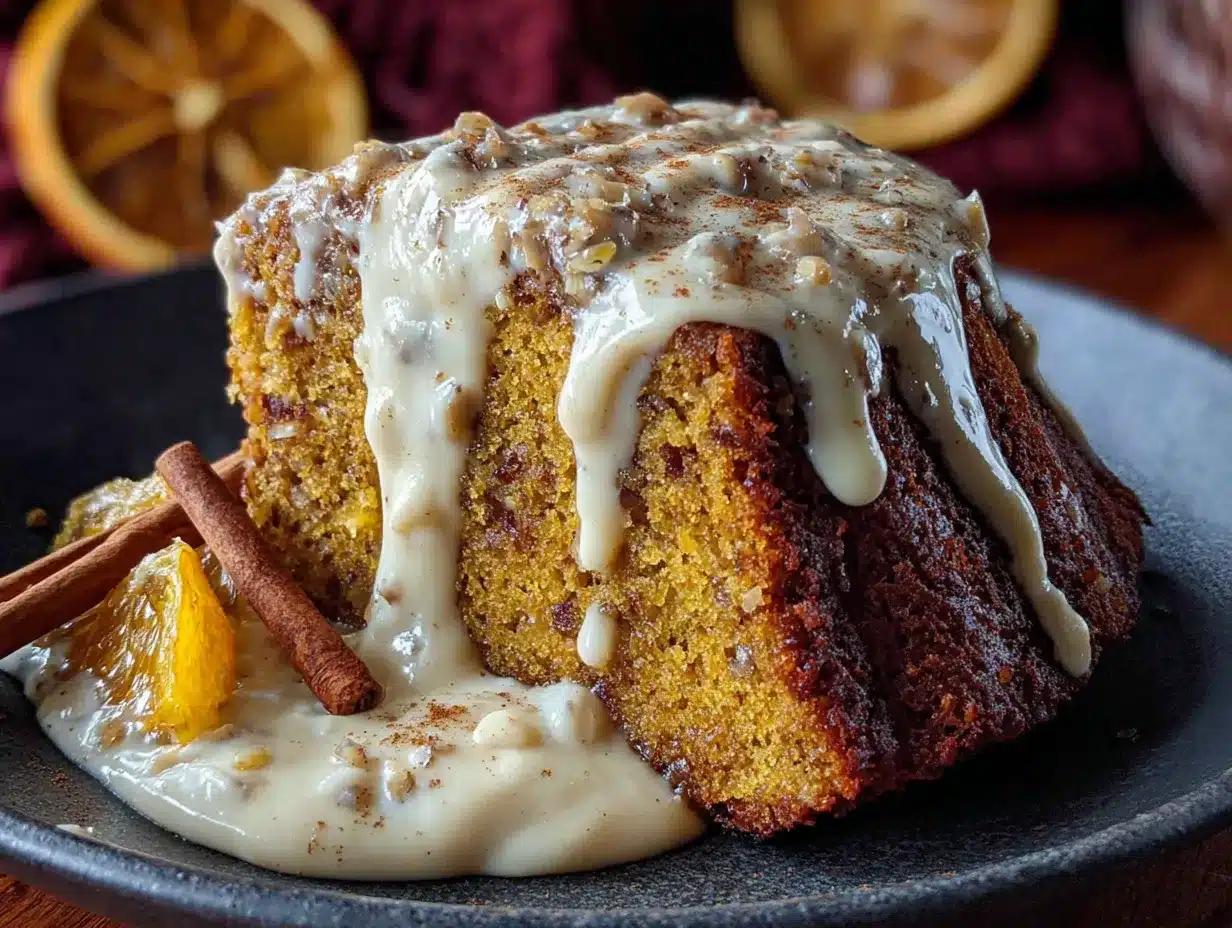
- 4 oz (113 g) cream cheese, softened: Use full-fat cream cheese for the richest, creamiest glaze. Let it sit out for about 30 minutes to soften.
- 2 tablespoons (28 g) unsalted butter, softened: Adds richness and helps the glaze come together smoothly.
- 1 cup (120 g) powdered sugar: Sift it if it’s lumpy to ensure a silky smooth glaze.
- ½ teaspoon ground cinnamon: For that warm, spicy kick that pairs so well with the tangy cream cheese.
- ¼ teaspoon vanilla extract: A little extra flavor boost.
- 2-3 tablespoons (30-45 ml) milk or heavy cream: To thin the glaze to a pourable consistency. Start with 2 tablespoons and add more if needed.
Equipment Needed
You don’t need a fancy bakery setup for this cake. A few basic tools will get the job done perfectly. Here’s what you’ll need:
- 9×5-inch Loaf Pan: This is the perfect size for this cake. If you only have an 8×4-inch pan, your cake will take a few minutes longer to bake and will have a higher dome. You can also use a 9-inch round cake pan, but you’ll need to adjust the baking time.
- Medium Saucepan: For reducing the apple cider. A small or medium saucepan works best.
- Large Mixing Bowls: You’ll need at least two—one for the dry ingredients and one for the wet ingredients.
- Electric Hand Mixer or Stand Mixer: A hand mixer is totally fine for this recipe. A stand mixer with the paddle attachment makes it even easier, but it’s not necessary. You can even do it by hand with a whisk and some muscle, but the butter and sugar won’t get quite as fluffy.
- Whisk and Rubber Spatula: A whisk for the dry ingredients and a spatula for folding everything together.
- Parchment Paper: Lining your loaf pan with parchment paper makes lifting the cake out a breeze. I always leave a little overhang on the sides for handles.
- Cooling Rack: Essential for letting the cake cool evenly. If you don’t have one, you can use the inverted loaf pan lid or even the grates of your oven (turned off, of course).
My favorite loaf pan is a simple, heavy-duty metal one. It heats evenly and gives the cake a nice, golden crust. I’ve used glass pans before, and they tend to take longer to bake and can sometimes make the edges a bit tough. Stick with metal if you can!
Preparation Method
Alright, let’s get to the good part. Follow these steps, and you’ll have a beautiful, delicious cake in about an hour. Trust the process—it’s simpler than it looks.
- Preheat and Prep: First, preheat your oven to 350°F (175°C). While it’s heating, grease your 9×5-inch loaf pan with butter or non-stick spray. Then, line it with a strip of parchment paper, leaving an overhang on the two long sides. This will be your “handle” to lift the cake out later.
- Reduce the Apple Cider: Pour the 1 cup of apple cider into your small saucepan. Bring it to a boil over medium-high heat, then reduce the heat to a simmer. Let it bubble away for about 8-10 minutes, stirring occasionally, until it has reduced to about ¼ cup. It will be thick, syrupy, and smell intensely of apples. Set it aside to cool for a few minutes. This step is crucial—it concentrates the flavor so your cake isn’t watery.
- Whisk the Dry Ingredients: In a medium bowl, whisk together the flour, baking soda, baking powder, salt, cinnamon, nutmeg, and cloves. Set this aside. This ensures your spices and leavening agents are evenly distributed.
- Cream the Butter and Sugars: In a large bowl, using your hand mixer or stand mixer with the paddle attachment, beat the softened butter, granulated sugar, and brown sugar together on medium speed until it’s light, fluffy, and pale in color. This should take about 3-4 minutes. Don’t rush this step—creaming the butter and sugar properly is what gives the cake its tender crumb.
- Add the Eggs and Vanilla: Add the eggs one at a time, beating well after each addition until fully incorporated. Then, beat in the vanilla extract. Scrape down the sides and bottom of the bowl with your spatula to make sure everything is mixed in.
- Combine the Wet and Dry: With the mixer on low speed, add about one-third of the dry ingredients to the butter mixture. Mix until just combined. Then, add half of the buttermilk and mix again. Repeat with another third of the dry ingredients, the remaining buttermilk, and finally the last of the dry ingredients. Mix only until you no longer see streaks of flour. Overmixing at this stage will make the cake tough.
- Add the Reduced Cider: Gently fold in the cooled, reduced apple cider with your rubber spatula. The batter will be thick and smell amazing. Don’t worry if it looks a little lumpy—that’s fine.
- Bake the Cake: Pour the batter into your prepared loaf pan and spread it into an even layer. Bake for 45-55 minutes, or until a toothpick inserted into the center comes out clean or with a few moist crumbs. The top should be a deep golden brown. If the top is browning too quickly, you can tent the pan loosely with foil for the last 10 minutes of baking.
- Cool the Cake: Let the cake cool in the pan on a wire rack for about 15 minutes. Then, using the parchment paper handles, lift the cake out of the pan and transfer it to the rack to cool completely. This is important—if you glaze it while it’s still hot, the glaze will just melt and run right off.
- Make the Glaze: While the cake is cooling, make the glaze. In a medium bowl, beat the softened cream cheese and butter together until smooth and creamy. Add the powdered sugar, cinnamon, and vanilla extract, and beat until combined. Then, add the milk or heavy cream, one tablespoon at a time, beating until you reach a smooth, pourable consistency. You want it to be thick enough to coat the back of a spoon but thin enough to drizzle.
- Glaze and Serve: Once the cake is completely cool, pour the glaze over the top. Let it drip down the sides naturally. For the best presentation, let the glaze set for about 10-15 minutes before slicing. Then, cut yourself a thick slice and enjoy!
Cooking Tips & Techniques
I’ve made this cake a dozen times now, and I’ve learned a few things along the way. These tips will help you avoid the same mistakes I made and get perfect results every single time.
Don’t Skip the Cider Reduction: I know it seems like an extra step, and the first time I made this, I was tempted to just pour the cider straight into the batter. Big mistake. The cake was dense and almost soggy. Reducing the cider concentrates the flavor and removes excess water, which is key for a light, moist texture. It’s a non-negotiable step in my book.
Room Temperature Ingredients Matter: This is one of those baking rules that actually makes a difference. Cold butter won’t cream properly with the sugar, and cold eggs can cause the batter to curdle. I’ve been in a hurry and used cold ingredients, and the cake turned out a little denser and less tender. Take the butter, eggs, and buttermilk out of the fridge about 30 minutes before you start baking. It’s a small thing that pays off big time.
The Toothpick Test is Your Friend: Ovens can be liars. My old oven would say it’s at 350°F when it was really running hot. So, don’t rely solely on the timer. Start checking your cake at the 45-minute mark. Insert a toothpick into the center. If it comes out clean, it’s done. If it has wet batter on it, give it another 5 minutes and check again. A few moist crumbs are fine, but you don’t want raw batter.
Let It Cool Completely: I know it’s hard to wait, especially when your kitchen smells like a fall festival. But glazing a warm cake is a recipe for a puddle of glaze at the bottom of your plate. I learned this the hard way when I was rushing to get to a friend’s house. The glaze just slid right off. Patience is a virtue here. Let the cake cool completely on the rack—it usually takes about an hour.
Make the Glaze Just Before Serving: The glaze is best when it’s fresh. If you make it too far in advance, it can thicken up in the fridge. I usually make it while the cake is cooling. That way, it’s ready to go as soon as the cake is cool enough.
Variations & Adaptations
One of the best things about this cake is how easy it is to change up. It’s a great base recipe that you can adapt to whatever you have on hand or whatever you’re craving. Here are a few of my favorite ways to switch it up.
Spiced Apple Walnut Cake: This is probably my favorite variation. After you fold in the reduced cider, gently fold in ½ cup of chopped, toasted walnuts. They add a wonderful crunch and a nutty flavor that pairs beautifully with the apples and cinnamon. I also like to sprinkle a few extra walnuts on top of the glaze before it sets.
Dairy-Free & Vegan Version: It’s totally possible to make this cake without any dairy or eggs. Use a good quality vegan butter stick (not the spreadable kind) and replace the buttermilk with ½ cup of unsweetened almond milk mixed with 1 ½ teaspoons of apple cider vinegar. For the eggs, use 2 flax eggs (2 tablespoons of ground flaxseed mixed with 6 tablespoons of water, let sit for 5 minutes). The texture will be slightly different—a bit more dense—but it’s still delicious. For the glaze, use a vegan cream cheese and vegan butter. I’ve tried this version for a friend with dairy allergies, and it was a big hit.
Gluten-Free Option: I’ve made this with a 1:1 gluten-free baking flour blend (like King Arthur or Bob’s Red Mill) and it worked great. The cake was a little more delicate, so be careful when you’re lifting it out of the pan. But the flavor and moisture were spot on. Just make sure your blend contains xanthan gum, which helps mimic the structure of gluten.
Apple Cider Bundt Cake: If you want a fancier presentation, you can bake this batter in a well-greased 10-cup Bundt pan. You’ll need to increase the baking time to about 50-60 minutes. Let it cool in the pan for 15 minutes, then invert it onto a rack to cool completely. The glaze will look beautiful drizzled over the ridges of the Bundt cake.
Add Some Fresh Apple: For even more apple flavor, you can fold in one peeled and finely diced apple (like a Honeycrisp or Fuji) into the batter along with the reduced cider. It adds little pockets of tender fruit throughout the cake. Just make sure you dice it small so it doesn’t sink to the bottom.
Serving & Storage Suggestions
This cake is delicious in so many ways. Here’s how I like to serve it and how to keep it fresh so you can enjoy it for days.
Serving: This cake is best served at room temperature. The glaze is perfectly set, and the cake is at its most tender. A thick slice with a cup of hot coffee or a glass of cold milk is my idea of a perfect afternoon treat. It’s also wonderful slightly warmed. Just pop a slice in the microwave for about 10-15 seconds, or in a 300°F oven for 5 minutes. The warmth makes the glaze a little gooey and the cake extra soft. For a special dessert, serve it with a scoop of vanilla ice cream or a dollop of lightly sweetened whipped cream. The cold, creamy element is a fantastic contrast to the warm, spiced cake.
Storage: Once the cake is completely cool and glazed, store it in an airtight container at room temperature for up to 3 days. I find it actually gets even more moist on the second day! If your kitchen is particularly warm, you can store it in the refrigerator, but let it come to room temperature before serving for the best texture.
Freezing: This cake freezes beautifully. You can freeze it whole or in individual slices. If you’re freezing it whole, I recommend freezing it without the glaze. Wrap the cooled, unglazed cake tightly in a layer of plastic wrap, then a layer of aluminum foil. It will keep for up to 3 months. When you’re ready to serve it, thaw it overnight in the refrigerator, bring it to room temperature, and then make the glaze fresh. If you have leftover glazed slices, you can freeze them, but the glaze might get a little sticky when it thaws. It’s still delicious, just not as pretty.
Reheating: For a single slice, the microwave is your best friend. About 10-15 seconds is all it needs. For a whole cake, you can warm it in a 300°F oven for about 10-15 minutes. Just keep an eye on it so the glaze doesn’t melt too much.
Nutritional Information & Benefits
Let’s be honest—this is a treat. But it’s made with real, simple ingredients, and that counts for something. Here’s a rough breakdown of what you’re getting in one slice (based on 8 servings).
| Nutrient | Amount per Serving |
|---|---|
| Calories | ~380 |
| Fat | 18g |
| Carbohydrates | 52g |
| Protein | 5g |
| Fiber | 1g |
| Sugar | 35g |
The apples in the cider provide a little bit of vitamin C and antioxidants. Cinnamon is known for its anti-inflammatory properties. And while this isn’t a health food, it’s a much better choice than a boxed cake mix. You control the quality of the ingredients—the real butter, the fresh eggs, the pure vanilla. It’s a small, homemade indulgence that feels good to eat. If you’re watching your sugar intake, you could reduce the granulated sugar to ½ cup, but the cake will be a little less tender and sweet. For a lower-fat option, you can substitute half of the butter with unsweetened applesauce, but the texture will be more like a muffin than a cake.
Frequently Asked Questions
Can I use apple juice instead of apple cider?
I wouldn’t recommend it. Apple juice is much thinner and less flavorful than apple cider. It also has a higher water content, which can make your cake soggy. The reduced cider is what gives this cake its intense apple flavor, so stick with the real deal if you can.
My glaze turned out too thick. How do I fix it?
No problem at all! Just add a little more milk or heavy cream, one teaspoon at a time, and whisk until it reaches your desired consistency. If it gets too thin, you can add a bit more powdered sugar to thicken it back up.
Can I make this cake in a different pan?
Absolutely! You can use a 9-inch round cake pan, but you’ll need to reduce the baking time to about 30-35 minutes. A 9×13-inch pan will work, too, but the cake will be much thinner. You’ll only need to bake it for about 20-25 minutes. Just keep an eye on it and use the toothpick test.
How do I know when the apple cider is reduced enough?
You’re looking for a thick, syrupy consistency. It should coat the back of a spoon and measure about ¼ cup. It will also smell intensely of cooked apples. If you let it go too long, it can turn into a hard, sticky candy, so keep an eye on it.
Can I skip the cream cheese glaze?
You can, but I really think it’s the best part! The tangy, creamy glaze is the perfect counterpoint to the sweet, spiced cake. If you want a lighter option, you can dust the cooled cake with powdered sugar or just serve it plain. It’s still a great cake, but the glaze really takes it over the top.
Conclusion
This quick apple cider cake with cinnamon cream cheese glaze is more than just a recipe—it’s a reminder that sometimes the best things come from happy accidents. It’s the cake I turn to when I need a guaranteed win with minimal effort. It’s forgiving, it’s flexible, and it’s absolutely delicious. Whether you’re a seasoned baker or someone who’s just starting out, this cake is for you.
I hope you give it a try and make it your own. Maybe you’ll add some walnuts, or a handful of dried cranberries, or double the cinnamon in the glaze. That’s the beauty of a simple recipe like this—it’s a canvas for your own creativity. When you make it, I’d love to hear how it turned out. Did you try a variation? Did your family love it as much as mine does? Drop a comment below and let me know! And if you’re looking for another easy, weeknight-friendly dessert, you should check out my simple pear crisp—it has the same kind of cozy, no-fuss vibe. Happy baking, friend. You’ve got this.
Pin This Recipe!
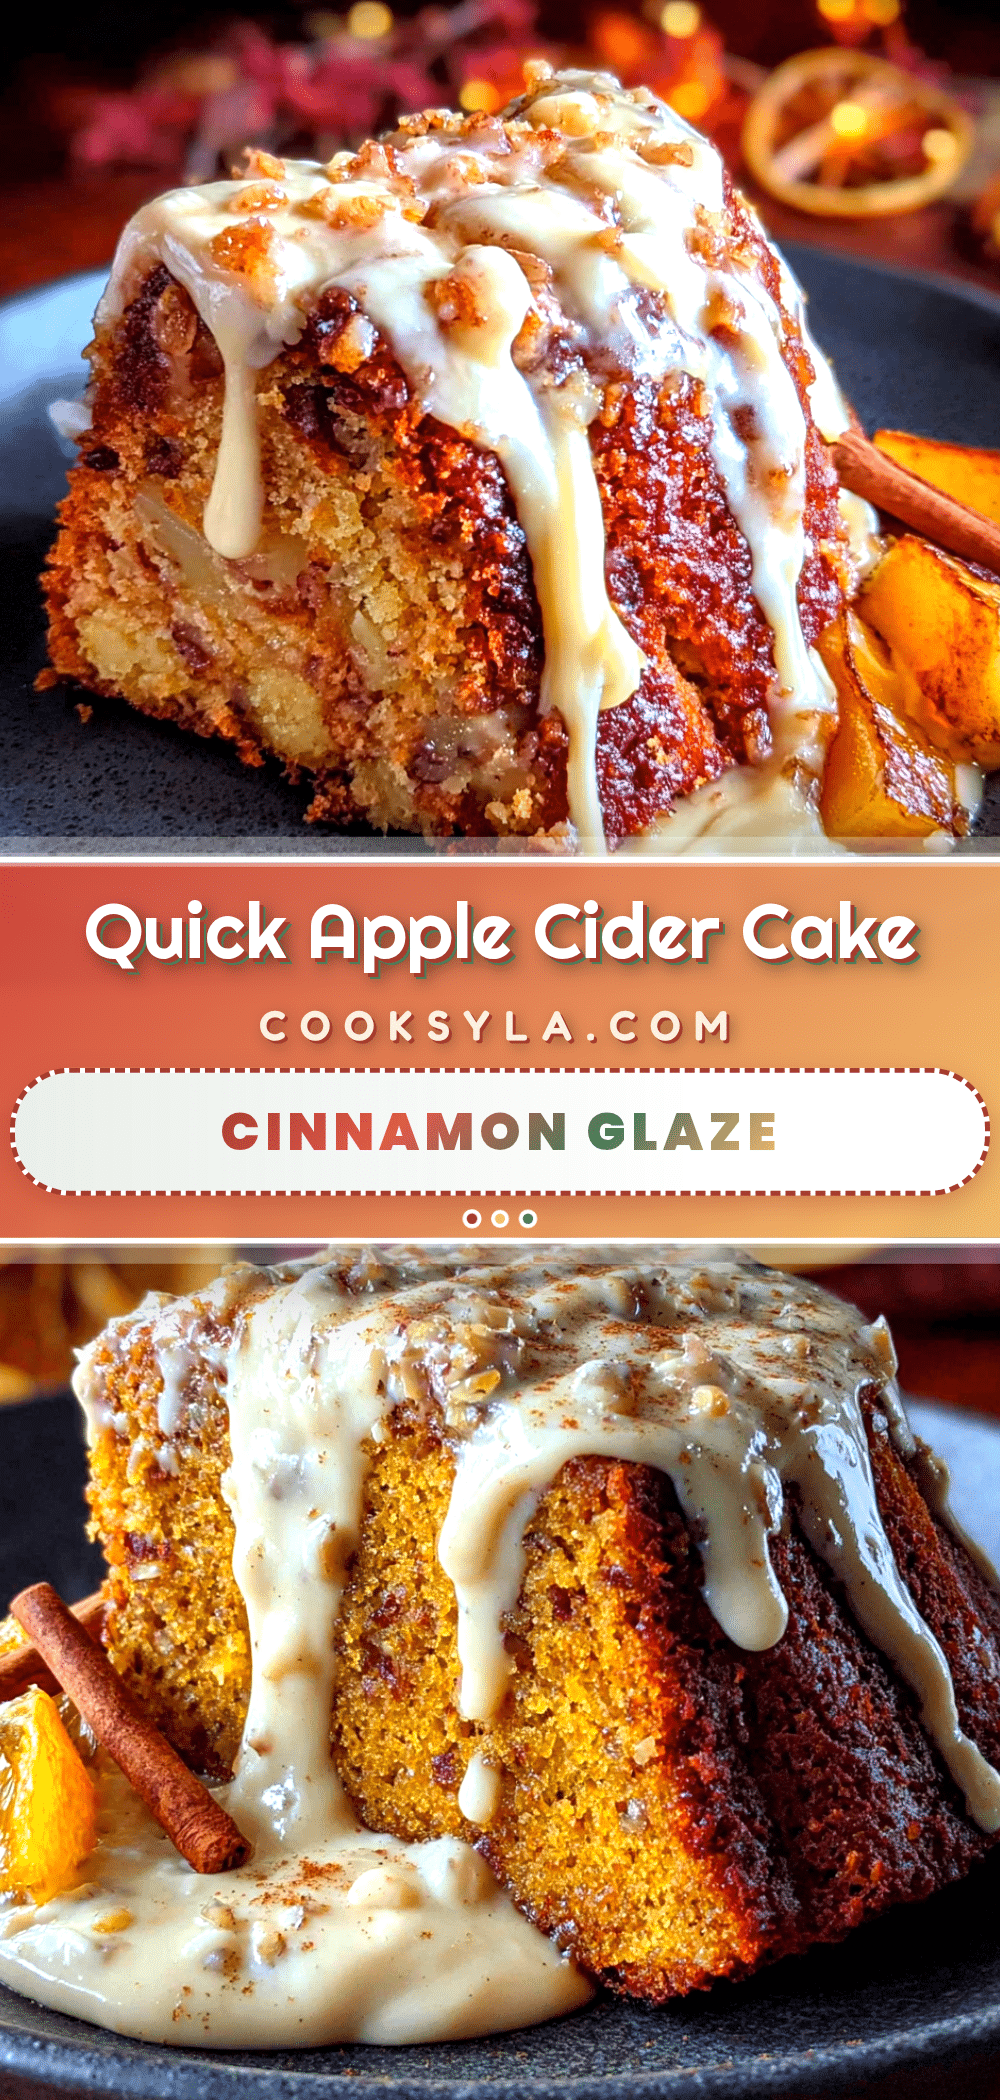
Best Quick Apple Cider Cake with Cinnamon Cream Cheese Glaze

This incredibly moist and tender apple cider cake is a happy accident that turned into a weeknight favorite. Topped with a tangy cinnamon cream cheese glaze, it tastes like you spent hours in the kitchen but comes together in under an hour.
- Prep Time: 15 minutes
- Cook Time: 50 minutes
- Total Time: 1 hour 5 minutes
- Yield: 8 servings 1x
- Category: Dessert
- Cuisine: American
Ingredients
- 1 cup (240 ml) apple cider
- 1 ¾ cups (220 g) all-purpose flour
- 1 teaspoon baking soda
- ½ teaspoon baking powder
- ½ teaspoon salt
- 1 teaspoon ground cinnamon
- ½ teaspoon ground nutmeg
- ¼ teaspoon ground cloves
- ½ cup (113 g) unsalted butter, softened
- ¾ cup (150 g) granulated sugar
- ¼ cup (50 g) packed light brown sugar
- 2 large eggs, room temperature
- 1 teaspoon vanilla extract
- ½ cup (120 ml) buttermilk, room temperature
- 4 oz (113 g) cream cheese, softened
- 2 tablespoons (28 g) unsalted butter, softened
- 1 cup (120 g) powdered sugar
- ½ teaspoon ground cinnamon
- ¼ teaspoon vanilla extract
- 2–3 tablespoons (30–45 ml) milk or heavy cream
Instructions
- Preheat your oven to 350°F (175°C). Grease a 9×5-inch loaf pan and line it with parchment paper, leaving an overhang on the long sides.
- Pour the apple cider into a small saucepan. Bring to a boil over medium-high heat, then reduce to a simmer. Cook for 8-10 minutes, stirring occasionally, until reduced to about ¼ cup. Set aside to cool.
- In a medium bowl, whisk together the flour, baking soda, baking powder, salt, cinnamon, nutmeg, and cloves.
- In a large bowl, beat the softened butter, granulated sugar, and brown sugar together with an electric mixer on medium speed until light and fluffy, about 3-4 minutes.
- Add the eggs one at a time, beating well after each addition. Beat in the vanilla extract. Scrape down the sides of the bowl.
- With the mixer on low speed, add about one-third of the dry ingredients to the butter mixture, mixing until just combined. Add half of the buttermilk and mix. Repeat with another third of the dry ingredients, the remaining buttermilk, and the last of the dry ingredients. Mix only until no streaks of flour remain.
- Gently fold in the cooled, reduced apple cider with a rubber spatula.
- Pour the batter into the prepared loaf pan and spread into an even layer. Bake for 45-55 minutes, or until a toothpick inserted into the center comes out clean or with a few moist crumbs.
- Let the cake cool in the pan on a wire rack for 15 minutes. Then, using the parchment paper handles, lift the cake out and transfer it to the rack to cool completely.
- While the cake cools, make the glaze: In a medium bowl, beat the softened cream cheese and butter together until smooth. Add the powdered sugar, cinnamon, and vanilla extract, and beat until combined. Add the milk or heavy cream, one tablespoon at a time, beating until you reach a smooth, pourable consistency.
- Once the cake is completely cool, pour the glaze over the top. Let it set for 10-15 minutes before slicing and serving.
Notes
Don’t skip reducing the apple cider—it concentrates the flavor and prevents a soggy cake. Room temperature ingredients are key for a tender crumb. Let the cake cool completely before glazing to prevent the glaze from melting off. The cake can be stored in an airtight container at room temperature for up to 3 days, or frozen (unglazed) for up to 3 months.
Nutrition
- Serving Size: 1 slice
- Calories: 380
- Sugar: 35
- Fat: 18
- Carbohydrates: 52
- Fiber: 1
- Protein: 5
Keywords: apple cider cake, quick cake, fall dessert, cream cheese glaze, cinnamon, easy baking, weeknight dessert


