Love this? Save it for later!
Share the inspiration with your friends
The autumn wind was whipping through the farmer’s market, and I was shivering over a crate of apples, trying to decide between Honeycrisp and Granny Smith for a pie I hadn’t even planned on making. An older woman next to me, her scarf wrapped twice around her neck, watched me pick up and put down the same apple three times. She didn’t say anything at first. Then she just pointed at my basket and said, “You’re overthinking it. The real star of your table isn’t the pie. It’s the cookie you make the morning after, when the turkey’s gone and everyone’s still hungry.”
I laughed, a little embarrassed, because she was absolutely right. I had this habit of obsessing over the main event—the roast, the bird, the centerpiece—and completely forgetting the quiet, wonderful little things that make a holiday meal feel complete. She told me her name was Margaret, and she’d been making the same sugar cookies for forty-seven Thanksgivings. “But I didn’t share the frosting recipe for the first twenty years,” she said with a wink. “That’s the secret.” She scribbled it on a napkin—a simple maple cream frosting that she swore by. Honestly, I almost lost that napkin twice, but I’ve kept it tucked in my favorite cookbook ever since.
These Classic Thanksgiving Sugar Cookies with Maple Cream Frosting are exactly what you need when the big meal is done and the house is quiet. They’re not fussy, they don’t require a stand mixer or a pastry bag, and they use ingredients you probably already have in your pantry. Maybe you’ve been there—staring at a mountain of leftovers, wondering what to do with the rest of the afternoon. These cookies are the answer. They’re buttery, soft, and topped with a frosting that tastes like pure autumn. The maple flavor isn’t overwhelming; it’s just enough to make you close your eyes for a second and remember that crisp air and good company are what this season is really about. I’ve made them every year since that market encounter, and honestly, they’ve become the thing my family looks forward to most.
Why You’ll Love This Recipe
Let me tell you why these cookies have earned a permanent spot on my Thanksgiving table. I’ve tested this recipe more times than I can count, tweaking the butter temperature, adjusting the maple syrup ratio, and even burning a batch or two (that’s a story for another day). What I landed on is a cookie that is genuinely foolproof and deeply satisfying.
- Simple Ingredients : You won’t need to hunt down specialty flours or obscure extracts. Butter, sugar, flour, eggs, and a good maple syrup are all it takes. Most of this is probably in your kitchen right now.
- Budget-Friendly : This recipe stretches a long way. A single batch makes about three dozen cookies, which is a lot of happy faces for very little money. Perfect for feeding a family without breaking the weekly grocery budget.
- Kid-Approved and Adult-Loved : The maple cream frosting is sweet but not cloying, and the cookie itself is soft with just a hint of vanilla. I’ve seen picky eaters go back for thirds, and I’ve watched grandparents sneak one into their coat pocket for later.
- Make-Ahead Friendly : The dough freezes beautifully, and the frosting keeps in the fridge for days. You can spread the work out over a week, which is a lifesaver when you’re already juggling a turkey and a dozen side dishes.
- Unbelievably Delicious : The texture is what gets me every time. The cookies are soft in the center with slightly crisp edges, and the frosting is creamy without being too heavy. It’s the kind of cookie that makes you reach for another one before you’ve even finished the first.
What makes this recipe different from the dozens of sugar cookie recipes out there is the frosting. Most cream cheese frostings are tangy, and most buttercream frostings are too sweet. This maple cream frosting hits a perfect middle ground. It’s rich, but the maple flavor keeps it tasting fresh and seasonal. I’ve had friends ask for the recipe at parties, and I’ve had neighbors knock on my door just to ask what that smell was. It’s that good.
What Ingredients You Will Need
This recipe uses simple, wholesome ingredients to deliver a cookie that tastes like it came from a fancy bakery. The magic is in the balance—the butter gives richness, the maple syrup adds depth, and the cream cheese in the frosting makes everything smooth and dreamy.
For the Sugar Cookies
- Unsalted butter, softened (1 cup / 226g) — I always use unsalted so I can control the salt level. Let it sit out for about 30 minutes before you start.
- Granulated sugar (1 cup / 200g) — Regular white sugar works perfectly here. No need for anything fancy.
- Large egg (1) — Room temperature is best. If you forgot to take it out, place it in a bowl of warm water for 5 minutes.
- Vanilla extract (1 teaspoon) — Pure vanilla makes a difference, but imitation is fine if that’s what you have.
- All-purpose flour (2 ½ cups / 312g) — Spoon and level your flour for the most accurate measurement. Scooping directly can pack it down and make your cookies dry.
- Baking powder (1 teaspoon) — This gives the cookies a gentle lift without making them puffy.
- Salt (½ teaspoon) — Don’t skip this. It balances the sweetness and brings out the maple flavor in the frosting.
For the Maple Cream Frosting
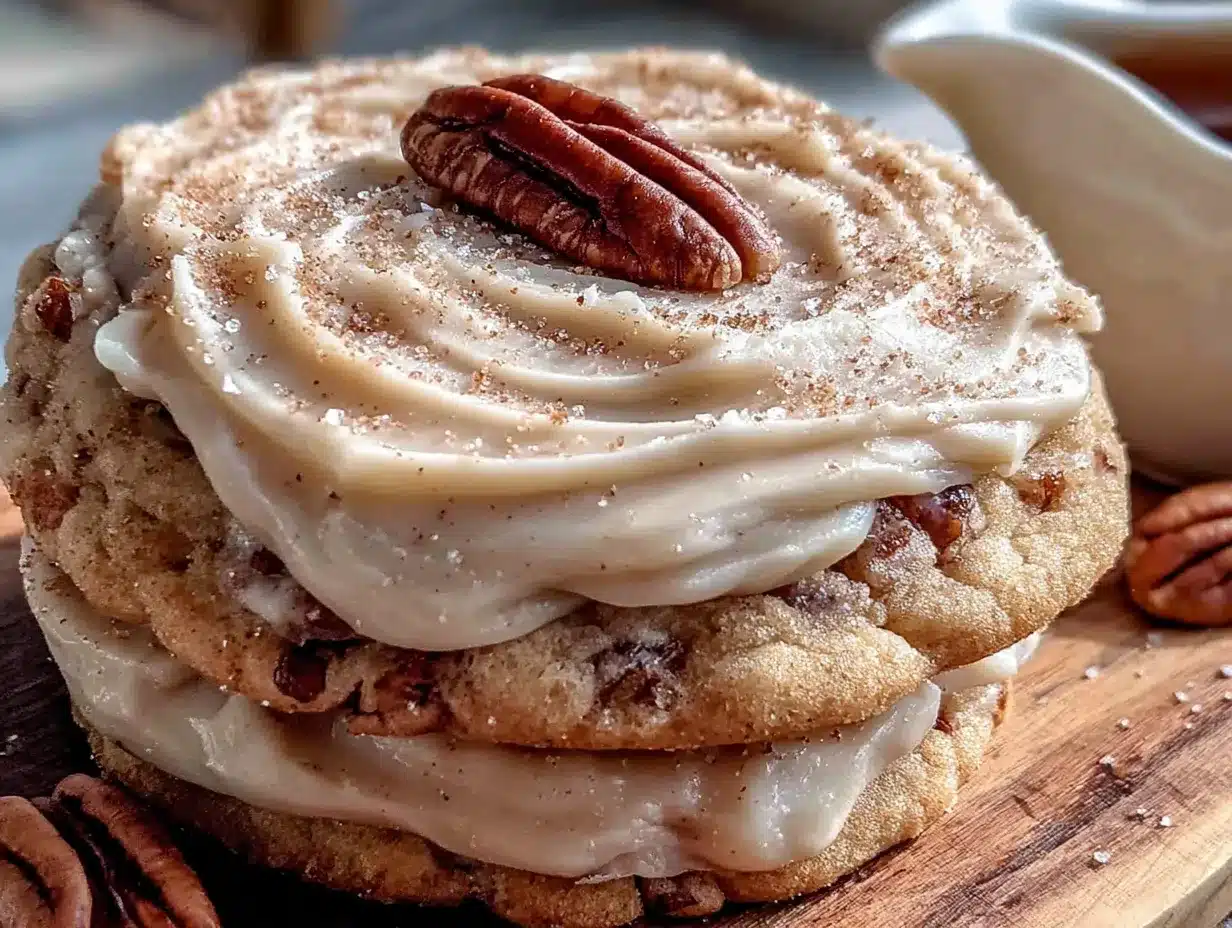
- Cream cheese, softened (4 oz / 113g) — Use full-fat for the creamiest texture. Low-fat can make the frosting runny.
- Unsalted butter, softened (¼ cup / 56g) — Again, room temperature is key.
- Pure maple syrup (¼ cup / 60ml) — This is where you want the real stuff, not pancake syrup. The flavor is deeper and less sugary. I recommend Grade A Dark Amber for a robust maple taste.
- Powdered sugar (1 ½ cups / 180g) — Sift it if you can. Lumps in powdered sugar are the enemy of smooth frosting.
- Vanilla extract (½ teaspoon) — A tiny bit rounds out the maple flavor beautifully.
- Pinch of salt — Just a whisper to cut the sweetness.
Equipment Needed
You don’t need a professional bakery setup for these cookies. Here’s what you’ll need, along with a few honest thoughts from my own kitchen.
- Electric mixer (handheld or stand) — A handheld mixer works perfectly and is easier to clean. I’ve made the frosting by hand with a whisk before, and honestly, it’s doable but your arm will thank you for using a mixer.
- Mixing bowls — You’ll need at least two: one for the dry ingredients and one for the wet.
- Baking sheets — I recommend light-colored aluminum sheets. Dark sheets can cause the bottoms of the cookies to brown too quickly.
- Parchment paper or silicone baking mat — Parchment paper is cheap and makes cleanup a breeze. Silicone mats are reusable and work just as well.
- Wire cooling rack — Essential for letting the cookies cool evenly before frosting. If you frost them while they’re warm, the frosting will slide right off.
- Cookie scoop or tablespoon — A 1.5-tablespoon cookie scoop gives you perfectly uniform cookies. If you don’t have one, just use a regular tablespoon and roll the dough into balls.
- Offset spatula or butter knife — For spreading the frosting. An offset spatula makes it look professional, but a butter knife works fine for a rustic, homemade look.
I bought my first cookie scoop at a dollar store, and it lasted me five years. You really don’t need to spend a lot of money on equipment. Just make sure your baking sheets are in good shape—warped pans can cause uneven baking.
Preparation Method
Alright, let’s get to the fun part. I’ve broken this down into clear steps, and I’ve added some notes from my own kitchen mishaps so you can avoid them.
Step 1: Make the Cookie Dough
In a medium bowl, whisk together the flour, baking powder, and salt. Set it aside. In a large bowl, beat the softened butter and granulated sugar together until light and fluffy. This takes about 2-3 minutes with a mixer on medium speed. You want the mixture to look pale and airy. Add the egg and vanilla extract, and beat until combined. It might look a little curdled at this point—don’t panic, that’s normal.
Gradually add the dry ingredients to the wet mixture, mixing on low speed just until the flour disappears. Overmixing will make the cookies tough, so stop as soon as you don’t see any more white streaks. The dough will be soft and slightly sticky. That’s exactly what you want.
Step 2: Chill the Dough
This step is non-negotiable, I’m sorry to say. Wrap the dough in plastic wrap and flatten it into a disk. Refrigerate for at least 1 hour, or up to 3 days. Chilling solidifies the butter, which prevents the cookies from spreading too much in the oven. I once skipped this step because I was in a hurry, and my cookies turned into flat, greasy puddles. Learn from my mistake!
Step 3: Preheat and Prep
When you’re ready to bake, preheat your oven to 350°F (175°C). Line your baking sheets with parchment paper. Take the dough out of the fridge and let it sit at room temperature for about 5 minutes so it’s easier to scoop.
Step 4: Scoop and Shape
Using a 1.5-tablespoon cookie scoop or a regular tablespoon, scoop out portions of dough and roll them into balls. Place them on the prepared baking sheets, spacing them about 2 inches apart. You don’t need to flatten them—they’ll spread on their own. If you want perfectly round cookies, you can gently roll each ball between your palms until smooth.
Step 5: Bake
Bake for 10-12 minutes, or until the edges are just barely golden and the centers look set but still soft. The cookies will look slightly underdone in the middle—that’s good. They’ll continue to cook on the hot baking sheet after you take them out. If you wait until they look fully baked in the oven, they’ll be overbaked and dry when they cool.
Step 6: Cool Completely
Let the cookies rest on the baking sheet for 5 minutes. Then transfer them to a wire cooling rack to cool completely. This is important—if you try to frost them while they’re still warm, the frosting will melt into a sugary puddle. I speak from experience.
Step 7: Make the Maple Cream Frosting
While the cookies are cooling, make the frosting. In a large bowl, beat the softened cream cheese and butter together until smooth and creamy. This takes about 2 minutes. Add the maple syrup and vanilla extract, and beat until combined. Gradually add the powdered sugar, beating on low speed to avoid a sugar cloud. Once all the sugar is incorporated, increase the speed to medium and beat for another minute until the frosting is light and fluffy. Taste it—if you want a stronger maple flavor, add another tablespoon of syrup.
Step 8: Frost and Serve
Once the cookies are completely cool, spread a generous amount of frosting on each one. I like to use an offset spatula, but a butter knife works great too. For a festive touch, you can sprinkle a little cinnamon or crushed pecans on top. Serve immediately, or store as directed below.
Cooking Tips & Techniques
I’ve made these cookies more times than I can count, and I’ve learned a few things the hard way. Here are my best tips for getting perfect results every time.
Room temperature ingredients matter. I know it’s tempting to use cold butter straight from the fridge, but it won’t cream properly with the sugar. Your cookies will end up dense instead of tender. Set your butter and egg out on the counter 30 minutes before you start. If you’re in a rush, cut the butter into small cubes—it’ll soften faster.
Don’t overbake. This is the number one mistake I see home cooks make. The cookies should look pale and soft when you take them out. They’ll firm up as they cool. If you wait for them to look golden all over, they’ll be too crisp. Aim for lightly golden edges and a soft, pale center.
Use real maple syrup. I cannot stress this enough. Pancake syrup is mostly corn syrup and artificial flavoring. It will make your frosting taste fake and overly sweet. Real maple syrup costs a little more, but it’s worth it for the deep, complex flavor. A bottle lasts a long time if you store it in the fridge.
Chill your dough if it gets too soft. If you’re working in a warm kitchen, the dough might become sticky and hard to handle. Just pop it back in the fridge for 15 minutes. I’ve had to do this mid-batch more times than I’d like to admit.
Make the frosting ahead. The frosting can be made up to 3 days in advance and stored in an airtight container in the fridge. Let it come to room temperature and give it a quick stir before using. This is a huge time-saver on Thanksgiving morning.
Variations & Adaptations
One of the best things about this recipe is how adaptable it is. Here are a few ways I’ve changed it up over the years.
Gluten-Free Version: Substitute the all-purpose flour with a 1:1 gluten-free baking flour blend. I’ve used Bob’s Red Mill and King Arthur brands with great success. Just make sure the blend contains xanthan gum, which helps with structure. The texture will be slightly more tender, but still delicious.
Dairy-Free Adaptation: Use vegan butter and a dairy-free cream cheese alternative. I recommend Miyoko’s brand for the butter and Violife for the cream cheese. The frosting will be a little softer, so you might need to chill it for 10 minutes before spreading.
Maple Pecan Variation: Add ½ cup of finely chopped toasted pecans to the cookie dough. Toast them in a dry skillet over medium heat for 3-4 minutes until fragrant, then let them cool before adding. Sprinkle extra pecans on top of the frosting for a beautiful presentation.
Spiced Sugar Cookies: Add 1 teaspoon of cinnamon and ½ teaspoon of nutmeg to the dry ingredients. This gives the cookies a warm, chai-like flavor that pairs beautifully with the maple frosting. I make this version for my fall baking swaps, and it always disappears first.
Pumpkin Maple Twist: Replace ¼ cup of the butter with ¼ cup of pumpkin puree. Reduce the flour by 2 tablespoons to compensate for the extra moisture. The cookies will be slightly cake-like and incredibly soft. Top with a dusting of cinnamon instead of frosting for a lighter option.
Serving & Storage Suggestions
These cookies are best served at room temperature, which lets the frosting soften to a perfect creamy texture. I like to arrange them on a large platter with a few sprigs of rosemary or cinnamon sticks for a rustic, Thanksgiving-themed display. They’re wonderful with a cup of hot coffee or a glass of cold milk.
Room Temperature Storage: Store frosted cookies in an airtight container at room temperature for up to 3 days. Layer them between sheets of parchment paper to prevent the frosting from sticking. Keep them away from direct sunlight or heat sources.
Refrigerator Storage: If your kitchen runs warm, you can store them in the fridge for up to 5 days. Let them sit out for 15 minutes before serving to take the chill off. The frosting will firm up in the fridge, which actually makes it easier to stack the cookies.
Freezer Instructions: You can freeze the unfrosted cookies for up to 3 months. Place them in a single layer on a baking sheet and freeze until solid, then transfer to a freezer-safe bag. Thaw at room temperature before frosting. The frosting itself can also be frozen in an airtight container for up to 2 months. Thaw overnight in the fridge and re-whip before using.
Flavor Development: Honestly, these cookies taste even better the next day. The maple flavor in the frosting deepens and melds with the cookie overnight. If you can resist eating them all on day one, you’re in for a treat on day two.
Nutritional Information & Benefits
Let’s be real—these are a treat, not a health food. But that doesn’t mean they can’t fit into a balanced lifestyle. Here’s the estimated nutritional breakdown per cookie (based on 36 cookies):
- Calories: 145
- Fat: 8g
- Carbohydrates: 18g
- Sugar: 12g
- Protein: 1.5g
The cream cheese in the frosting adds a small amount of calcium and protein, and the maple syrup contains trace amounts of zinc and manganese. The butter provides vitamin A. Is this a superfood? No. But it’s a cookie made with real ingredients, and there’s something to be said for that.
If you’re watching your sugar intake, you can reduce the powdered sugar in the frosting by a quarter cup. The frosting will be less sweet but still creamy and delicious. For a lower-fat option, use Neufchâtel cream cheese instead of full-fat. The texture will be slightly less rich, but still very good.
These cookies are not gluten-free, dairy-free, or vegan as written, but I’ve included substitution options above. Always check your labels if you’re cooking for someone with allergies.
Conclusion
I still think about Margaret every time I make these cookies. She was right, you know—the real star of the Thanksgiving table isn’t always the turkey or the pie. Sometimes it’s the simple, buttery cookie you make when the chaos has settled and everyone is just happy to be together. These Classic Thanksgiving Sugar Cookies with Maple Cream Frosting have become a tradition in my house, and I hope they become one in yours too.
The best part is that you can make them your own. Add a sprinkle of sea salt, swap the maple for honey, or press a pecan into the center of each cookie before baking. There’s no wrong way to enjoy them. They’re forgiving, they’re delicious, and they’re made with love—which is really what the holidays are all about.
I’d love to hear how they turn out for you! Drop a comment below and let me know if you tried any variations, or tag me in your photos on social media. Happy baking, and here’s to a Thanksgiving full of warm cookies and even warmer memories.
Frequently Asked Questions
Can I make the dough ahead of time?
Absolutely. The dough can be refrigerated for up to 3 days or frozen for up to 3 months. If freezing, wrap it tightly in plastic wrap and place it in a freezer bag. Thaw overnight in the fridge before scooping and baking.
Why did my cookies spread too much?
This usually happens for one of two reasons: the dough wasn’t chilled long enough, or the butter was too soft. Make sure your dough chills for at least 1 hour, and if your kitchen is warm, pop the scooped dough balls in the fridge for 10 minutes before baking.
Can I use pancake syrup instead of maple syrup?
You can, but I wouldn’t recommend it. Pancake syrup is made with corn syrup and artificial flavors, which will make the frosting taste overly sweet and artificial. Real maple syrup gives a much deeper, more authentic flavor.
How do I get perfectly round cookies?
Right after you take the cookies out of the oven, use a round cookie cutter or a glass that’s slightly larger than the cookie to gently scoot the edges into a perfect circle. This works best while the cookies are still warm and pliable.
Can I double this recipe?
Yes, this recipe doubles beautifully. Just make sure your mixing bowl is large enough to accommodate the extra dough. You may need to bake in batches, but the dough will hold up well in the fridge while you work through it.
Pin This Recipe!
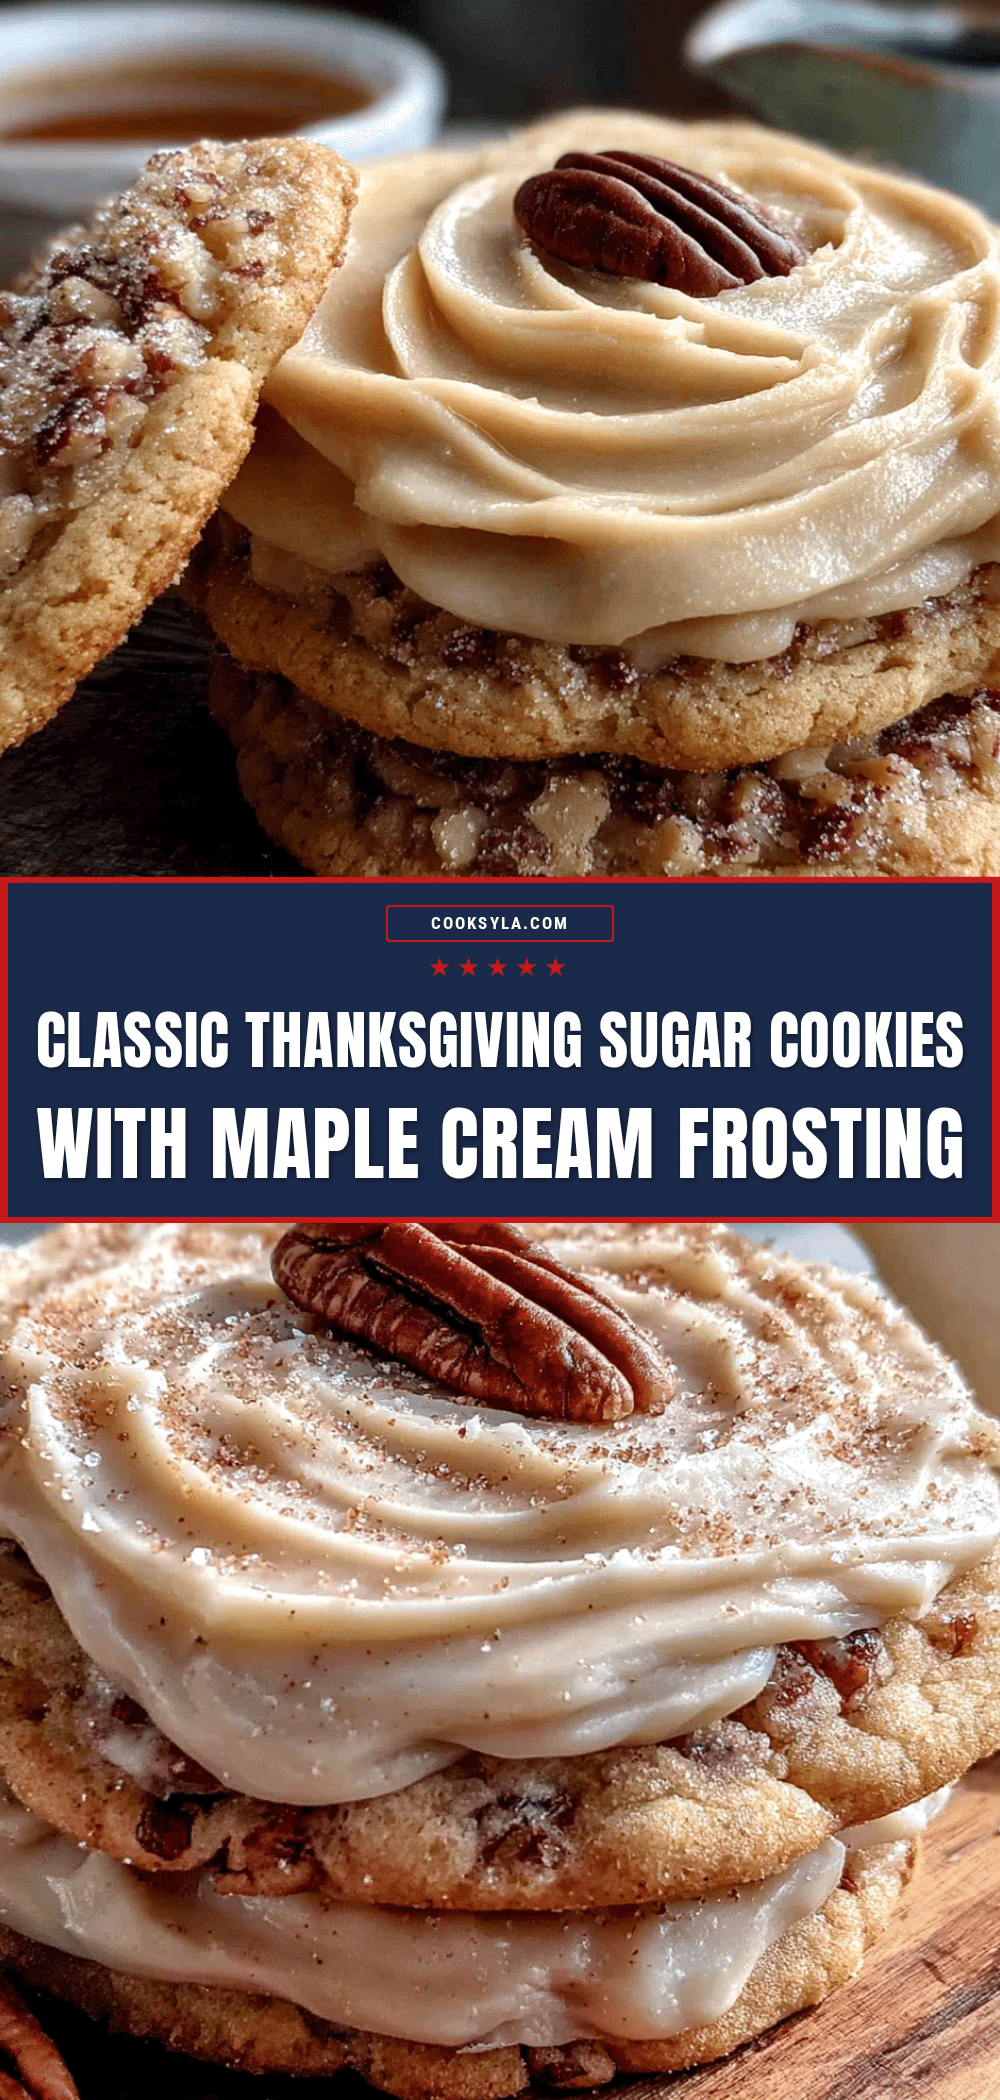
Classic Thanksgiving Sugar Cookies with Easy Maple Cream Frosting
Buttery, soft sugar cookies topped with a rich maple cream frosting that tastes like pure autumn. Perfect for Thanksgiving leftovers or any fall gathering.
- Prep Time: 15 minutes
- Cook Time: 12 minutes
- Total Time: 1 hour 27 minutes (includes 1 hour chilling)
- Yield: 36 cookies 1x
- Category: Dessert
- Cuisine: American
Ingredients
- 1 cup (226g) unsalted butter, softened
- 1 cup (200g) granulated sugar
- 1 large egg, room temperature
- 1 teaspoon vanilla extract
- 2 ½ cups (312g) all-purpose flour
- 1 teaspoon baking powder
- ½ teaspoon salt
- 4 oz (113g) cream cheese, softened
- ¼ cup (56g) unsalted butter, softened
- ¼ cup (60ml) pure maple syrup
- 1 ½ cups (180g) powdered sugar, sifted
- ½ teaspoon vanilla extract
- Pinch of salt
Instructions
- In a medium bowl, whisk together flour, baking powder, and salt. Set aside.
- In a large bowl, beat softened butter and granulated sugar together until light and fluffy, about 2-3 minutes.
- Add egg and vanilla extract, beat until combined.
- Gradually add dry ingredients to wet mixture, mixing on low speed just until flour disappears. Do not overmix.
- Wrap dough in plastic wrap, flatten into a disk, and refrigerate for at least 1 hour or up to 3 days.
- Preheat oven to 350°F (175°C). Line baking sheets with parchment paper.
- Let dough sit at room temperature for 5 minutes. Scoop 1.5-tablespoon portions and roll into balls. Place 2 inches apart on prepared sheets.
- Bake for 10-12 minutes until edges are just golden and centers look set but soft.
- Let cookies rest on baking sheet for 5 minutes, then transfer to wire rack to cool completely.
- For frosting: Beat softened cream cheese and butter together until smooth and creamy, about 2 minutes.
- Add maple syrup and vanilla extract, beat until combined.
- Gradually add powdered sugar, beating on low speed to avoid a sugar cloud. Once incorporated, beat on medium speed for 1 minute until light and fluffy.
- Once cookies are completely cool, spread frosting on each cookie. Serve immediately or store as directed.
Notes
Chill dough for at least 1 hour to prevent spreading. Use real maple syrup, not pancake syrup. Cookies can be stored at room temperature for up to 3 days or refrigerated for up to 5 days. Unfrosted cookies can be frozen for up to 3 months. Frosting can be made up to 3 days ahead.
Nutrition
- Serving Size: 1 cookie
- Calories: 145
- Sugar: 12
- Sodium: 75
- Fat: 8
- Saturated Fat: 5
- Carbohydrates: 18
- Protein: 1.5
Keywords: sugar cookies, maple frosting, Thanksgiving cookies, fall cookies, cream cheese frosting, maple cream, holiday baking


