Love this? Save it for later!
Share the inspiration with your friends
I swore I’d never get an air fryer.
For two years, I watched everyone around me fall for the hype. My sister-in-law raved about hers. My neighbor brought over “air-fried” everything. A coworker told me it changed her life. And I just nodded along, thinking: another gadget. Another thing taking up counter space. Another trend I’d politely sit out.
Then last November, on a cold Tuesday night, I walked into my brother’s kitchen and caught him standing over the counter, eating straight from the air fryer basket. He didn’t even hear me come in. He was just standing there, in the dim light of his kitchen, holding a crispy chicken thigh in his fingers like it was the most natural thing in the world. He froze when he saw me. “Don’t say a word,” he mumbled, sauce on his chin. I didn’t. I just reached for one myself.
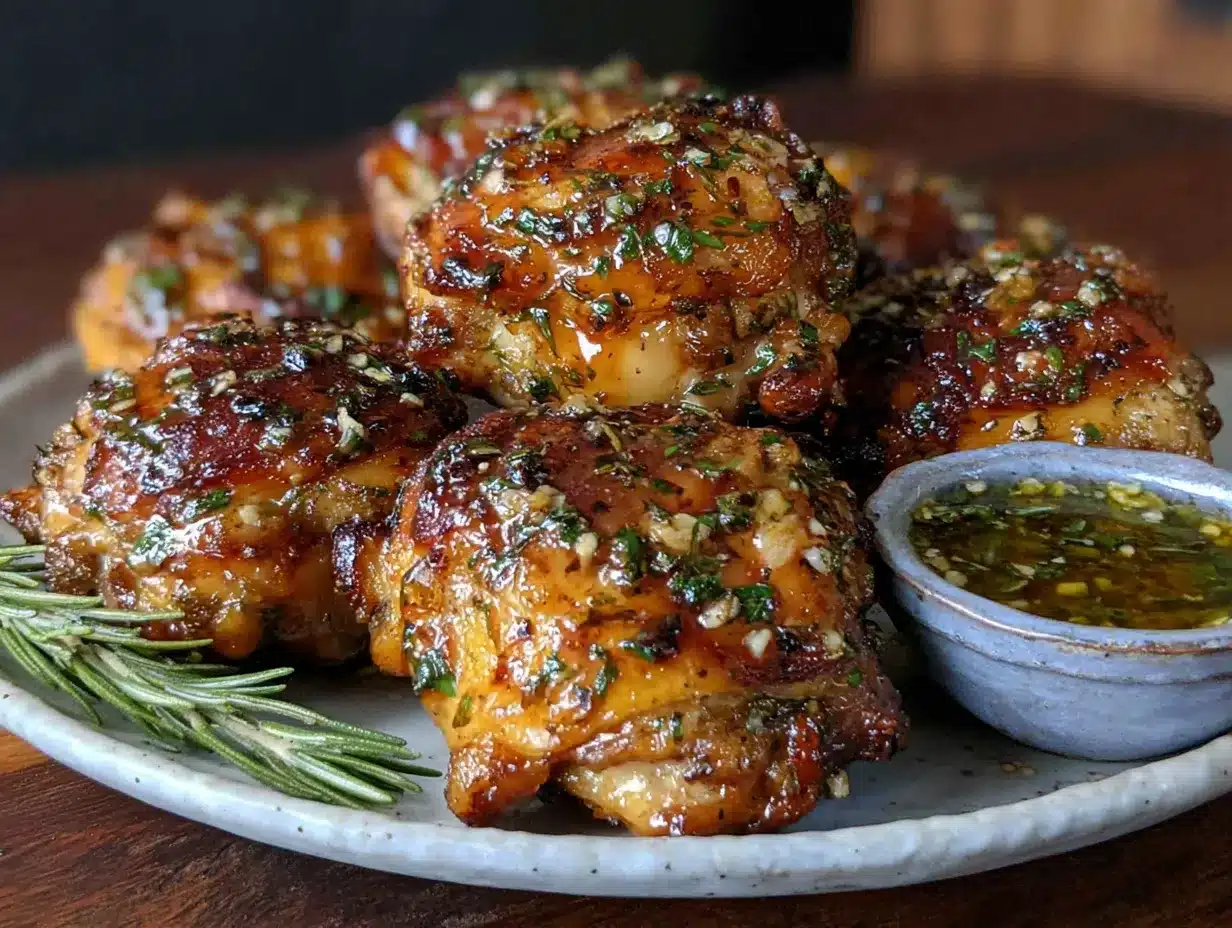
That was the moment. That first bite of Cozy Crispy Air Fryer Chicken Thighs with Garlic Herb Rub was so good I actually laughed out loud. The skin was crackling, the meat was impossibly juicy, and the garlic-herb flavor hit every single note. I went home that night and ordered an air fryer. Honestly? Best decision I’ve made in a long time.
Maybe you’ve been there — skeptical, holding out, convinced your oven does just fine. I get it. But this recipe changed my mind. It might change yours too.
Why You’ll Love This Recipe
Let me tell you why these air fryer chicken thighs have become my go-to comfort meal. I’ve tested this recipe at least a dozen times, tweaking the rub, adjusting the temperature, and figuring out exactly what makes the skin shatter and the inside stay tender. This is the version I keep coming back to.
- Quick & Easy : These come together in under 30 minutes. No marinating overnight, no complicated steps. Perfect for those nights when you need dinner on the table fast.
- Simple Ingredients : You probably have everything in your pantry right now. Garlic powder, dried herbs, salt, pepper — that’s it. No fancy grocery store trips required.
- Perfect for Cozy Nights : Cold weather, rainy evenings, or just one of those days when you need something warm and satisfying. This is the recipe you’ll crave.
- Crowd-Pleaser : I’ve served these to picky eaters, health-conscious friends, and kids. Every single person goes back for seconds. The crispy skin wins everyone over.
- Unbelievably Delicious : The contrast between the crunchy exterior and the juicy, fall-apart meat is next-level comfort food. It feels indulgent, but it’s actually pretty smart cooking.
What makes this different from every other chicken thigh recipe? It’s the way the air fryer circulates heat around the skin, crisping it evenly without drying out the meat. Plus, the garlic herb rub isn’t just a dusting — it’s a full-flavored coating that sticks to every ridge and crevice. I’ve tried baking, pan-searing, and grilling. This method wins every time.
This recipe isn’t just good. It’s the kind that makes you close your eyes after the first bite. It’s comfort food reimagined — faster, easier, but with the same soul-soothing satisfaction. Perfect for impressing guests without stress, or turning a simple Tuesday night into something memorable.
What Ingredients You Will Need
This recipe uses simple, wholesome ingredients to deliver bold flavor and satisfying texture without the fuss. Most of these are pantry staples, which makes this dish perfect for last-minute cravings.
- Bone-in, skin-on chicken thighs (4-6 thighs, about 2 lbs total) — The skin is what gets beautifully crispy in the air fryer. I prefer bone-in for extra juiciness, but boneless works too (just reduce cooking time by 5 minutes).
- Garlic powder (2 teaspoons) — Not fresh garlic here. Garlic powder coats evenly and doesn’t burn at high air fryer temperatures. I use McCormick for consistent flavor.
- Onion powder (1 teaspoon) — Adds depth without being overpowering. Balances the garlic nicely.
- Dried thyme (1 teaspoon) — Earthy and aromatic. Rub it between your fingers before adding to release the oils.
- Dried rosemary (1 teaspoon) — Crush it slightly for more flavor. Rosemary and chicken are a classic pairing for a reason.
- Dried oregano (1/2 teaspoon) — Adds a subtle Mediterranean note. Optional but recommended.
- Smoked paprika (1 teaspoon) — This is my secret weapon. It adds color and a gentle smokiness that makes the chicken taste like it cooked for hours.
- Salt (1 1/2 teaspoons) — Use kosher salt if you have it. It distributes better and doesn’t clump.
- Black pepper (1/2 teaspoon, freshly ground) — Freshly ground makes a real difference here.
- Olive oil (1 tablespoon) — Just enough to help the rub stick and encourage browning. Don’t overdo it or the skin won’t crisp properly.
Ingredient Selection Tips: Look for chicken thighs with the skin still attached and intact. If the skin is torn, it won’t crisp as evenly. I recommend buying from a local butcher or Bell & Evans brand for the best quality. For the herbs, make sure they’re not expired — old dried herbs lose their punch. If you’re using fresh herbs instead (and you can!), triple the amount and chop them finely.
Substitution Guidance: Use avocado oil instead of olive oil for a higher smoke point. Swap dried thyme with dried basil or marjoram if needed. For a spicy kick, add 1/4 teaspoon of cayenne pepper to the rub. No smoked paprika? Regular paprika works, but you’ll miss that subtle smokiness.
Equipment Needed
You don’t need much for this recipe, which is part of the beauty.
- Air fryer (any size that fits 4-6 thighs in a single layer) — I use a Cosori 5.8-quart and it works perfectly. If yours is smaller, cook in batches.
- Mixing bowl — For combining the rub ingredients. A medium-sized bowl is fine.
- Tongs — For flipping the chicken without breaking the skin. Silicone-tipped ones won’t scratch your air fryer basket.
- Paper towels — Essential for patting the chicken dry. Don’t skip this step.
- Meat thermometer — Not optional for me anymore. I learned the hard way that guessing doneness leads to dry chicken. An instant-read thermometer is cheap and worth it.
- Cutting board — For resting the chicken after cooking. Let it sit for 5 minutes before serving.
Budget-Friendly Options: If you don’t have an air fryer, you can use a convection oven or regular oven at 425°F for 30-35 minutes. The skin won’t be quite as crispy, but it’ll still taste great. I’ve also used a wire rack on a baking sheet to mimic air circulation — it helps!
Preparation Method
- Pat the chicken thighs completely dry with paper towels. This is the most important step. Wet skin won’t crisp. Take your time here — really get into all the crevices. (I once skipped this and ended up with soggy, sad chicken. Never again.)
- In a small bowl, combine the garlic powder, onion powder, dried thyme, dried rosemary, dried oregano, smoked paprika, salt, and black pepper. Mix them together with a fork until evenly distributed. Smell it — that’s the aroma of dinner coming together.
- Drizzle the olive oil over the chicken thighs. Use your hands to rub it into the skin, making sure every surface gets a thin coating. Don’t drown them — just a light sheen.
- Sprinkle the herb rub generously over both sides of each thigh. Pat it in gently so it sticks. I like to use my fingers to press the rub into the skin. Flip and repeat. Make sure the underside gets some love too.
- Preheat your air fryer to 400°F (200°C) for 3 minutes. I know some people skip preheating, but I’ve found it makes a real difference in getting that initial sizzle. Your chicken starts cooking immediately, which means better browning.
- Place the chicken thighs in the air fryer basket, skin-side down, in a single layer. Don’t overcrowd them. If they’re touching, they won’t crisp evenly. Cook in batches if you need to. (I learned this after a sad, steam-cooked batch.)
- Cook at 400°F for 12 minutes. Don’t open the basket during this time. Let the air fryer do its magic. You’ll start smelling that garlic-herb aroma around minute 8 — that’s when you know it’s working.
- Carefully flip the chicken thighs using tongs. The skin should be golden and starting to crisp. Flip them gently so you don’t tear the skin. If it sticks a little, that’s okay — just wiggle it loose.
- Cook for another 10-12 minutes, or until the internal temperature reaches 185°F (85°C). Yes, that’s higher than the standard 165°F. Chicken thighs have more fat and collagen, and cooking them to 185°F breaks down the connective tissue, making them incredibly tender. Trust me on this one.
- Remove the chicken thighs from the air fryer and let them rest on a cutting board for 5 minutes. This allows the juices to redistribute. If you cut into them immediately, all that goodness will run out onto the board instead of staying in the meat.
Sensory Cues: The skin should be deep golden brown and crackle when you touch it. When you insert a thermometer, it should slide in with little resistance. If you hear a satisfying crunch when you bite into it, you nailed it.
Cooking Tips & Techniques
I’ve made this recipe more times than I can count, and I’ve learned a few things along the way. Here are the tips that actually matter.
Don’t skip patting the chicken dry. I know I said it before, but it bears repeating. Moisture is the enemy of crispiness. If your chicken thighs are even slightly damp, the skin will steam instead of crisp. Take an extra 30 seconds with the paper towels. Your future self will thank you.
Let the rub sit for 10 minutes if you have time. After you season the chicken, let it rest at room temperature for 10-15 minutes before cooking. This gives the salt time to penetrate the meat and the herbs time to bloom. I’ve done side-by-side tests, and the rested version always tastes more flavorful.
Spray the basket lightly with oil. Even though air fryer baskets are non-stick, a quick spritz of cooking spray helps the skin release easily when you flip. I use avocado oil spray for its high smoke point.
Don’t crowd the basket. I made this mistake the first time I cooked for a crowd. I crammed eight thighs into my air fryer, and they came out more steamed than crispy. Leave at least half an inch between each piece. If you need to cook more, do it in batches. The extra 12 minutes is worth it.
Use a meat thermometer every time. I know it feels fussy, but chicken thighs can vary in thickness. One thigh might be done at 18 minutes while another needs 22. The only way to know for sure is to check the temperature. I use a Thermapen and it’s never let me down.
Let them rest. I know you’re hungry. I know they smell incredible. But those 5 minutes of resting make a real difference. The juices settle, the skin stays crisp, and every bite is more satisfying.
Variations & Adaptations
This recipe is flexible, and I’ve tried several variations over the months. Here are my favorites.
Lemon Herb Version: Add 1 teaspoon of lemon zest to the herb rub and squeeze fresh lemon juice over the cooked chicken before serving. The brightness cuts through the richness beautifully. I made this for a summer dinner and it was a hit.
Spicy Cajun Style: Replace the dried herbs with 2 teaspoons of Cajun seasoning, add 1/2 teaspoon of cayenne, and swap the smoked paprika for regular paprika. The heat builds gradually and pairs wonderfully with the crispy skin. My brother-in-law requests this version every time he visits.
Garlic Butter Finish: After cooking, brush the hot chicken thighs with melted butter mixed with minced garlic and fresh parsley. It adds a glossy finish and an extra layer of flavor. This is my go-to when I want something a little more indulgent.
Dietary Adaptations: This recipe is naturally gluten-free and low-carb. For a keto-friendly version, skip the olive oil and use avocado oil instead. If you need dairy-free, you’re already set — there’s no dairy in the base recipe. For a lower sodium option, reduce the salt to 1 teaspoon and add extra herbs for flavor.
Different Cooking Methods: If you don’t have an air fryer, bake the chicken thighs on a wire rack over a baking sheet at 425°F for 30-35 minutes. The skin won’t be quite as crispy, but it’ll still be delicious. You can also pan-sear them skin-side down in an oven-safe skillet for 5 minutes, then finish in the oven at 400°F for 20 minutes.
Serving & Storage Suggestions
These chicken thighs are versatile and pair well with so many sides. Here’s how I like to serve them.
Serving Temperature: Serve hot, straight from the air fryer. The skin is at its crispiest within the first 15 minutes. If you need to hold them, keep them in a warm oven (200°F) on a wire rack, not covered, so the skin stays crunchy.
What to Serve With: Mashed potatoes are my top pick — the creamy texture contrasts perfectly with the crispy skin. A simple green salad with lemon vinaigrette cuts through the richness. Roasted vegetables like asparagus or Brussels sprouts work beautifully too. For a cozy meal, serve with warm crusty bread and butter.
Storage Instructions: Store leftover chicken thighs in an airtight container in the refrigerator for up to 4 days. The skin will soften, but the flavor will still be great. To reheat, place them back in the air fryer at 375°F for 4-5 minutes. This brings back some of the crispiness. Avoid microwaving — it makes the skin rubbery.
Freezer Tips: These freeze well for up to 3 months. Let them cool completely, then wrap each thigh individually in plastic wrap and place in a freezer bag. To reheat, thaw in the refrigerator overnight, then air fry at 375°F for 6-8 minutes. The texture won’t be quite as good as fresh, but it’s still satisfying.
Flavor Development: The flavors actually deepen after a day in the fridge. I’ve eaten these cold, straight from the container, and they’re surprisingly good. The garlic and herbs meld together even more overnight.
Nutritional Information & Benefits
Here’s the nutritional breakdown per serving (based on 4 servings, one thigh each):
| Nutrient | Amount |
|---|---|
| Calories | 320 |
| Protein | 28g |
| Fat | 22g |
| Saturated Fat | 6g |
| Carbohydrates | 2g |
| Fiber | 0.5g |
| Sugar | 0.3g |
| Sodium | 680mg |
Health Benefits: Chicken thighs are rich in protein, which supports muscle health and keeps you feeling full. They also contain iron, zinc, and B vitamins, especially B6 and B12, which are important for energy metabolism. The skin does add fat, but much of it renders out during cooking. Plus, using an air fryer means you need less oil than traditional frying methods.
Dietary Considerations: This recipe is naturally gluten-free and low-carb, making it suitable for keto and paleo diets. It contains no dairy, soy, or nuts. If you’re watching your sodium, reduce the salt to 1 teaspoon. The herbs provide plenty of flavor without extra salt.
Personal Note: I love that this recipe feels indulgent but is actually pretty balanced. It’s the kind of meal that satisfies a craving without leaving you feeling heavy. For me, that’s the sweet spot.
Conclusion
These Cozy Crispy Air Fryer Chicken Thighs with Garlic Herb Rub have become a staple in my kitchen for good reason. They’re quick, they’re forgiving, and they deliver that perfect combination of crispy skin and juicy meat that feels like a hug on a plate. Whether you’re cooking for yourself on a quiet night or feeding a crowd, this recipe works.
I love that you can tweak the rub to match your mood — go spicy, go lemony, go garlic-buttery. It’s a base recipe that invites creativity. And honestly? It’s hard to mess up. Even my first attempt, which was a little overcrowded and not quite as crispy, was still delicious.
If you give these a try, I’d love to hear how they turn out. Leave a comment below and let me know what variations you tried. Did you go spicy? Did you add lemon? Did someone catch you eating one straight from the basket? (No judgment here.) Share your experience, tag a friend who needs comfort food in their life, and happy cooking!
Frequently Asked Questions
Can I use boneless, skinless chicken thighs?
Yes, but the cooking time will be shorter — about 10-12 minutes total at 400°F. The skin won’t be there to crisp, so the texture will be different. I recommend brushing them with a little extra oil to prevent drying out.
Do I need to flip the chicken halfway through?
Yes, flipping ensures even cooking and crispiness on both sides. If you skip this step, the bottom side will be softer and less browned. Set a timer so you don’t forget.
Can I use fresh herbs instead of dried?
Absolutely. Use about three times the amount of fresh herbs as dried. Chop them finely and mix them into the rub. Keep in mind that fresh herbs have more moisture, so the rub won’t be as dry. It still works great.
Why is my chicken skin not crispy?
Most likely, the chicken wasn’t dried thoroughly before seasoning. Moisture is the number one enemy of crispy skin. Also, make sure your air fryer is fully preheated and the thighs aren’t overcrowded in the basket. A little space goes a long way.
Can I meal prep these for the week?
Yes! Cook the chicken thighs ahead of time and store them in the refrigerator. Reheat in the air fryer at 375°F for 4-5 minutes to restore some crispiness. They’re great on salads, in wraps, or just on their own throughout the week.
Pin This Recipe!

Cozy Crispy Air Fryer Chicken Thighs with Garlic Herb Rub

These air fryer chicken thighs are perfectly crispy on the outside and juicy on the inside, thanks to a flavorful garlic herb rub. Ready in under 30 minutes, they’re the ultimate comfort food for busy weeknights.
- Prep Time: 10 minutes
- Cook Time: 22-24 minutes
- Total Time: 32-34 minutes
- Yield: 4 servings 1x
- Category: Main Course
- Cuisine: American
Ingredients
- 4–6 bone-in, skin-on chicken thighs (about 2 lbs total)
- 2 teaspoons garlic powder
- 1 teaspoon onion powder
- 1 teaspoon dried thyme
- 1 teaspoon dried rosemary
- 1/2 teaspoon dried oregano
- 1 teaspoon smoked paprika
- 1 1/2 teaspoons kosher salt
- 1/2 teaspoon freshly ground black pepper
- 1 tablespoon olive oil
Instructions
- Pat the chicken thighs completely dry with paper towels.
- In a small bowl, combine garlic powder, onion powder, dried thyme, dried rosemary, dried oregano, smoked paprika, salt, and black pepper. Mix until evenly distributed.
- Drizzle olive oil over the chicken thighs and rub into the skin to coat lightly.
- Sprinkle the herb rub generously over both sides of each thigh, patting gently to adhere.
- Preheat the air fryer to 400°F (200°C) for 3 minutes.
- Place the chicken thighs in the air fryer basket, skin-side down, in a single layer without overcrowding.
- Cook at 400°F for 12 minutes. Do not open the basket during this time.
- Carefully flip the chicken thighs using tongs.
- Cook for another 10-12 minutes, or until the internal temperature reaches 185°F (85°C).
- Remove the chicken thighs from the air fryer and let them rest on a cutting board for 5 minutes before serving.
Notes
Pat the chicken very dry for maximum crispiness. Do not overcrowd the basket; cook in batches if needed. Let the chicken rest for 5 minutes after cooking to keep it juicy. For extra flavor, let the seasoned chicken sit at room temperature for 10-15 minutes before cooking.
Nutrition
- Serving Size: 1 chicken thigh
- Calories: 320
- Sugar: 0.3
- Sodium: 680
- Fat: 22
- Saturated Fat: 6
- Carbohydrates: 2
- Fiber: 0.5
- Protein: 28
Keywords: air fryer chicken thighs, crispy chicken thighs, garlic herb chicken, easy chicken recipe, quick dinner, comfort food


