Love this? Save it for later!
Share the inspiration with your friends
My neighbor, Mrs. Gable, watched me struggling with a box of marshmallows that refused to melt evenly and didn’t say anything at first. Then she leaned over her fence, pointed a flour-dusted finger at my saucepan, and told me to turn the heat down to a whisper. We were neighbors in a way that felt more like family, having shared garden cuttings and broken fences for years, but this particular exchange was about something much sweeter and slightly more sinister. She had just moved from a small town in Louisiana where Halloween wasn’t just a date on the calendar but a full-blown community event, and she brought with her a recipe that turned simple cereal treats into something that looked like it had crawled out of a swamp.
I was trying to make the standard, boring squares that kids usually get for school parties, but Mrs. Gable had other ideas. She handed me a bag of gummy eyeballs she’d made herself and a packet of black food coloring that stained everything it touched. Honestly, I was skeptical. Candy eyeballs in rice krispie treats? It sounded like a recipe for a sugar crash and a nightmare. But let me tell you, when she showed me how to swirl the black coloring into the white marshmallow mixture, creating these eerie, cloudy veins, I was hooked. The visual impact was immediate, and the smell of vanilla mixed with a hint of burnt sugar from the pan made the whole kitchen feel like a cozy haunted house.
We spent the next hour laughing as we tried to arrange the eyeballs so they looked like they were staring at us from the darkness. There was a moment when I accidentally dropped a handful of cereal on the floor, and instead of being annoyed, Mrs. Gable just laughed and said, “The ghosts eat first.” That little human mistake became part of the story, and now, every time I make these creepy Halloween rice krispie treats, I remember her advice about keeping the heat low and the mood light. It’s not just about the sugar rush; it’s about that shared moment of creativity with someone who sees cooking as a conversation.
This recipe stayed with me because it taught me that you don’t need complex techniques to make something memorable. You just need a good neighbor, a little bit of black food coloring, and the willingness to embrace the weird. Maybe you’ve been there, trying to impress guests with something that looks fancy but is actually super simple. This dish is perfect for that. It’s spooky, it’s fun, and it’s surprisingly easy to pull off without stressing out. I mean, who doesn’t love a treat that looks like it belongs in a horror movie but tastes like pure comfort? Honestly, it’s the kind of recipe that turns a regular Tuesday into a mini-celebration, even if the only audience is your family staring at you with wide, candy-filled eyes.
Why You’ll Love This Recipe
This isn’t just another marshmallow treat; it is the kind of recipe that makes you close your eyes after the first bite and smile because it hits all the right notes of nostalgia and novelty. I have tested this version dozens of times, adjusting the ratio of cereal to marshmallow to ensure it holds its shape but still melts in your mouth. Here is why this specific version of creepy Halloween rice krispie treats with candy eyeballs stands out from the rest:
- Quick & Easy: Comes together in under 20 minutes, perfect for busy weeknights or last-minute Halloween prep when you realize you forgot to buy decorations.
- Simple Ingredients: No fancy grocery trips needed; you likely already have everything in your kitchen except the eyeballs, which are easy to find in the baking aisle.
- Perfect for Parties: Great for school Halloween parties, haunted house events, or cozy dinners where you want to add a touch of whimsy without spending hours in the kitchen.
- Crowd-Pleaser: Always gets rave reviews from kids and adults alike. The kids love the spooky look, and the adults love that it isn’t filled with artificial junk beyond the fun decorations.
- Unbelievably Delicious: The texture and flavor combo is next-level comfort food. The slight chew of the cereal balanced with the soft, gooey marshmallow is pure magic.
- Unique Visual Impact: Whether it is the swirling black food coloring that creates those eerie cloud-like patterns or the perfectly placed candy eyes, this isn’t just another version—it’s your best version. It looks like it came from a professional bakery but is made with love in your own home.
What makes this recipe different is the technique of swirling the black coloring. Most people just dump it in and stir, but if you do that, it turns gray. By gently folding it in, you keep those stark contrasts that make the eyeballs pop. It’s a small detail, but it makes all the difference in the final presentation. This recipe isn’t just good—it is the kind that makes you feel like a culinary wizard for five minutes. It’s comfort food reimagined—spookier, faster, but with the same soul-soothing satisfaction. Perfect for impressing guests without stress, or turning a simple meal into something memorable.
What Ingredients You Will Need
This recipe uses simple, wholesome ingredients to deliver bold flavor and satisfying texture without the fuss. The key is balancing the sweetness of the marshmallows with the crunch of the cereal and the visual shock of the decorations. You want ingredients that are easy to source and reliable in performance.
- Unsalted Butter (1/2 cup / 113g): I recommend using high-quality butter for the best flavor. Salted butter can work, but you may need to reduce any added salt in other recipes. Room temperature butter melts faster and more evenly.
- Large Marshmallows (10 oz / 283g): Standard large marshmallows are perfect here. Avoid mini marshmallows as they take longer to melt and can result in a denser treat. Look for fresh marshmallows to ensure they melt smoothly.
- Vanilla Extract (1 teaspoon): A good quality vanilla adds depth to the sweetness. Pure vanilla is preferred over imitation for a richer taste.
- Rice Krispies Cereal (6 cups / approx. 210g): The classic puffed rice cereal is essential for that signature crunch. Make sure it is fresh; old cereal can become stale and lose its snap.
- Black Gel Food Coloring (1-2 teaspoons): Gel coloring is crucial here because liquid coloring will thin out the marshmallow mixture and make it sticky. Gel gives you that deep, dark swirl without altering the texture. I prefer Wilton brand for its intense pigmentation.
- Gummy Candy Eyeballs (1 bag): These are the star of the show. Look for brands that use real fruit juice for coloring if you want a more natural option, though most standard brands work fine. Ensure they are soft and chewy, not hard.
- Optional: White Chocolate Drizzle: For an extra spooky effect, you can drizzle melted white chocolate over the top to create web-like patterns. This is optional but adds a nice touch for special occasions.
For those with dietary restrictions, you can easily swap the butter for a dairy-free alternative like vegan butter sticks, which melt similarly. The marshmallows are the tricky part for vegans, as most contain gelatin, but there are plant-based marshmallow brands available now. If you are looking for a gluten-free option, ensure your cereal is certified gluten-free, as standard Rice Krispies are processed in facilities that handle wheat. In summer, you might find seasonal flavors of marshmallows that could add a fun twist, though the classic white is best for the spooky aesthetic.
Equipment Needed
You don’t need a lot of fancy gadgets to make these treats, but having the right tools makes the process much smoother. Here is what you will need:
- Large Saucepan: A heavy-bottomed 4-quart saucepan is ideal. It distributes heat evenly and prevents the marshmallows from burning on the bottom. I have ruined batches before using thin aluminum pans, so invest in something sturdy.
- Silicone Spatula: A heat-resistant silicone spatula is essential for stirring the melting marshmallows. It scrapes the sides of the pan effectively and doesn’t scratch the surface. Avoid wooden spoons as they can get stuck in the sticky mixture.
- Large Mixing Bowl: A bowl large enough to hold all the cereal and the marshmallow mixture. A glass or stainless steel bowl works best because it is easy to clean.
- 9×13 Inch Baking Pan: This is the standard size for these treats. Grease it well with butter or non-stick spray to prevent sticking. You can also line it with parchment paper for easy removal.
- Measuring Cups and Spoons: Accurate measurements are key, especially for the cereal. Too much cereal and the treats are dry; too little and they are mushy.
If you don’t have a large saucepan, you can use a microwave-safe bowl and melt the marshmallows in short bursts, stirring frequently. This method gives you more control over the melting process but requires more attention. For budget-friendly options, any large pot you have in the cupboard will work, just keep an eye on the heat. Maintenance tip: Clean your saucepan immediately after use, as burnt marshmallow is nearly impossible to scrub off later.
Preparation Method
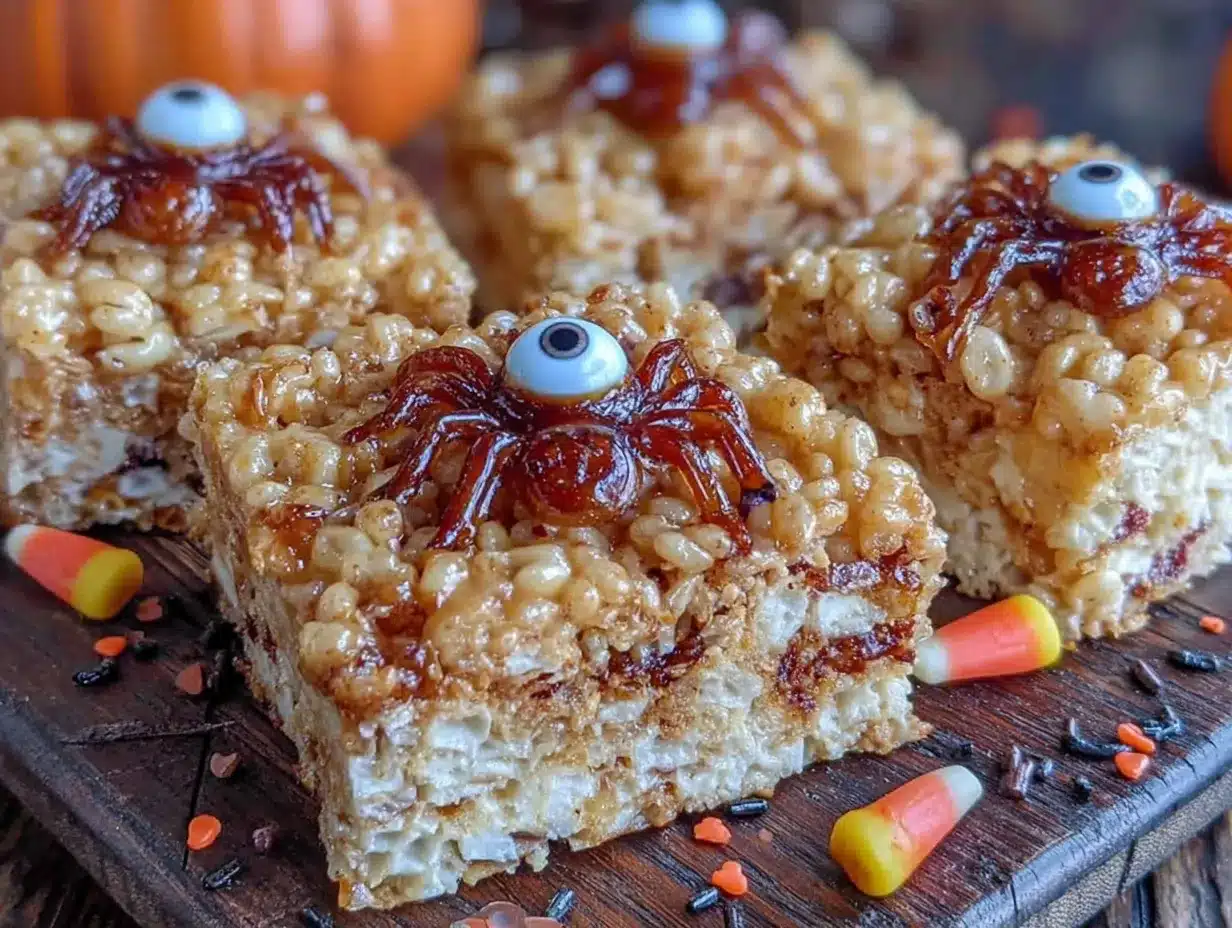
Getting these creepy Halloween rice krispie treats with candy eyeballs right comes down to timing and temperature. Follow these steps carefully for the best results.
- Prep Your Pan (5 minutes): Lightly grease your 9×13 inch baking pan with butter or cooking spray. If you are feeling extra cautious, line the pan with parchment paper, leaving an overhang on the sides. This makes it easier to lift the treats out later for cutting. Set the pan aside.
- Melt the Butter (2 minutes): Place your large saucepan over medium-low heat. Add the unsalted butter and let it melt completely. Swirl the pan occasionally to ensure it melts evenly without browning. You want a clear, golden liquid, not a dark, burnt one.
- Melt the Marshmallows (3-4 minutes): Add the marshmallows to the melted butter. Stir constantly with your silicone spatula. This is the most critical step. Do not walk away. The marshmallows will start to melt and clump together before turning into a smooth, glossy mixture. Keep stirring until there are no dry pockets left. This usually takes about 3 minutes. If the mixture looks too dry, add a splash of milk, but this is rarely needed.
- Add Flavor and Color (1 minute): Remove the pan from the heat. Stir in the vanilla extract. Now, add the black gel food coloring. Start with 1 teaspoon. Fold it into the mixture gently. You want swirls of black, not a uniform gray. If you want it darker, add more coloring a little at a time. The key is to preserve the contrast.
- Incorporate the Cereal (2 minutes): Immediately add the Rice Krispies cereal to the marshmallow mixture. Use your spatula to fold the cereal in. You need to coat every piece thoroughly. This happens fast, so work quickly before the marshmallow starts to set. If the mixture is too stiff to stir, return the pan to low heat for 10 seconds, but be careful not to overheat it.
- Press into Pan (5 minutes): Transfer the mixture into your prepared baking pan. Use a lightly buttered piece of wax paper or your greased hands to press the mixture down firmly. Do not pack it too tightly, or the treats will be hard. Aim for an even layer. Let it cool for about 10-15 minutes until it is firm enough to handle.
- Add the Eyeballs (5 minutes): Once the treats are firm, take your gummy candy eyeballs and press them into the surface. Arrange them randomly for a creepy effect. You can push them in slightly so they don’t roll off. For extra spookiness, you can use a toothpick to add tiny black dots for pupils if your eyeballs don’t have them.
- Set and Serve: Let the treats cool completely at room temperature for at least 30 minutes before cutting. This ensures clean cuts. Cut into squares or rectangles and serve immediately.
Troubleshooting tip: If the marshmallow mixture becomes too hard to stir, add a teaspoon of warm water or milk to loosen it up. If the treats are too sticky, you didn’t press them down firmly enough or the mixture was too wet. Always err on the side of slightly under-melting the marshmallows to avoid a gummy texture.
Cooking Tips & Techniques
There are a few professional tricks that can take your rice krispie treats from good to great. First, heat management is everything. I once burned a batch because I walked away to answer the phone, and the smell was terrible. Always stay by the stove. Medium-low heat is your friend. High heat will scorch the sugar and give you a bitter taste.
Another common mistake is over-stirring the black food coloring. If you stir too vigorously, you lose that eerie, cloud-like effect. Think of it like painting; you want distinct strokes, not a muddy blend. Also, make sure your cereal is fresh. Old cereal absorbs the marshmallow too quickly and becomes soggy. If you have a box that has been open for a while, toast it lightly in the oven for 5 minutes at 300°F to restore the crunch.
Multitasking is key here. While the marshmallows are melting, get your pan ready and measure out your cereal. This way, when the marshmallows are done, you can add the cereal instantly. Timing is everything because the marshmallow mixture starts to set as soon as you remove it from the heat. If you are making a large batch, consider making two smaller batches to ensure even melting. It is better to control two small pans than one huge, messy one. Finally, let your hands cool before pressing the mixture into the pan. Hot hands will make the marshmallow stick to you instead of the pan, which is frustrating and messy.
Variations & Adaptations
While the classic black and white spooky look is iconic, there are plenty of ways to adapt this recipe to suit different tastes or dietary needs. Here are a few variations I have tried:
- Pumpkin Spice Twist: Add a teaspoon of pumpkin pie spice to the melted marshmallow mixture for a fall-flavored version. Use orange food coloring instead of black for a more traditional Halloween palette.
- Gluten-Free Option: Use certified gluten-free puffed rice cereal. Most major brands offer this now. The texture and taste are virtually identical to the standard version.
- Vegan Version: Use vegan butter and plant-based marshmallows. Be sure to check the candy eyeballs for gelatin; some brands use pectin instead. This version holds up surprisingly well, though it may be slightly less chewy.
- Chocolate Drizzle: Melt some white or dark chocolate and drizzle it over the cooled treats. Use a toothpick to drag the chocolate into web patterns. This adds a nice crunch and visual complexity.
- Fruit Loop Spooky: Swap half the rice cereal for fruity loops for a colorful, sugary alternative. This is great for younger kids who prefer bright colors over the creepy aesthetic.
For allergen substitutions, you can use sunflower seed butter instead of peanut butter if you are making a version with nut butter, though this recipe is naturally nut-free if you avoid cross-contamination. Always check labels if you are cooking for others with allergies. I personally love the pumpkin spice variation for autumn gatherings, as it bridges the gap between Halloween and Thanksgiving.
Serving & Storage Suggestions
These treats are best served at room temperature, where the marshmallow is soft but the cereal is still crisp. Presentation matters for Halloween, so consider serving them on a black platter with fake cobwebs or plastic spiders around the edges. They pair well with cold milk or a spooky punch like “Witch’s Brew” (green punch with floating gummy worms).
For storage, keep the treats in an airtight container at room temperature for up to 3 days. If you live in a humid climate, they may become sticky faster, so consider adding a layer of parchment paper between layers. You can also freeze them for up to 2 months. To freeze, wrap the entire block tightly in plastic wrap and then in foil. Thaw them in the refrigerator overnight before serving. Reheating is not recommended as it will melt the marshmallow and ruin the texture. However, if you want a warm treat, you can microwave a single square for 10 seconds, but be careful not to overdo it.
Over time, the flavors meld together, and the black coloring may bleed slightly into the white marshmallow, creating a more marbled look. This is normal and adds to the spooky aesthetic. If you want them to look fresh, add the eyeballs just before serving.
Nutritional Information & Benefits
While these treats are definitely a dessert indulgence, they do provide some quick energy thanks to the simple carbohydrates. Each square contains approximately 150-200 calories, depending on the size and the amount of candy used. The main ingredients are rice cereal, sugar, and butter, so they are not particularly high in fiber or protein.
However, they can be a fun, moderate treat for special occasions. If you are looking for a healthier option, you can reduce the amount of butter by half and use a sugar-free marshmallow alternative, though the texture will be different. For those with dietary restrictions, the recipe is naturally nut-free and can be made gluten-free. Be mindful of the candy eyeballs, which often contain artificial colors and high sugar content. Moderation is key, but these are perfect for a Halloween party where the focus is on fun rather than nutrition.
From a wellness perspective, I find that making treats at home allows me to control the quality of ingredients. By using real vanilla and good butter, I feel better about serving them to my family compared to store-bought alternatives loaded with preservatives. It’s about balance and enjoying the moment.
Conclusion
Making these creepy Halloween rice krispie treats with candy eyeballs is a fun, low-stress way to get into the holiday spirit. It’s a recipe that brings people together, whether you are making it with kids or sharing it with neighbors like Mrs. Gable. The combination of spooky visuals and classic comfort food makes it a hit every time. I encourage you to try this recipe and make it your own. Experiment with different food coloring, add your own decorative touches, or share the story with friends.
I love this recipe because it is simple yet impressive, and it reminds me that cooking is about connection and creativity. So, grab your marshmallows and get ready to make some magic. Don’t forget to share your creations in the comments below—I would love to see how you decorated your treats. And if you try this, please tag me on social media; I love seeing your spooky spins on classic recipes. Happy Halloween, and may your treats be ever creepy!
Frequently Asked Questions
Can I make these treats ahead of time?
Yes, you can make these treats up to 3 days in advance. Store them in an airtight container at room temperature. If you want to freeze them, wrap them tightly in plastic wrap and foil. They will last for up to 2 months in the freezer. Thaw in the refrigerator before serving.
Why are my rice krispie treats too hard?
If your treats are too hard, you may have pressed them down too firmly or used too much cereal. Ensure you are using the correct ratio of marshmallows to cereal. Also, avoid over-melting the marshmallows, as this can cause them to become tough when they cool.
Can I use mini marshmallows?
You can use mini marshmallows, but they will take longer to melt and may result in a denser texture. If you use mini marshmallows, you may need to increase the melting time slightly and stir more frequently to ensure they melt evenly.
How do I prevent the black food coloring from turning gray?
To prevent the coloring from turning gray, use gel food coloring instead of liquid. Add the gel coloring in small amounts and fold it gently into the marshmallow mixture. Do not over-stir; you want to maintain swirls of black and white for the best visual effect.
Are these treats suitable for gluten-free diets?
Yes, these treats can be made gluten-free by using certified gluten-free puffed rice cereal. Ensure that all other ingredients, including the butter and candy eyeballs, are also certified gluten-free to avoid cross-contamination.
Pin This Recipe!
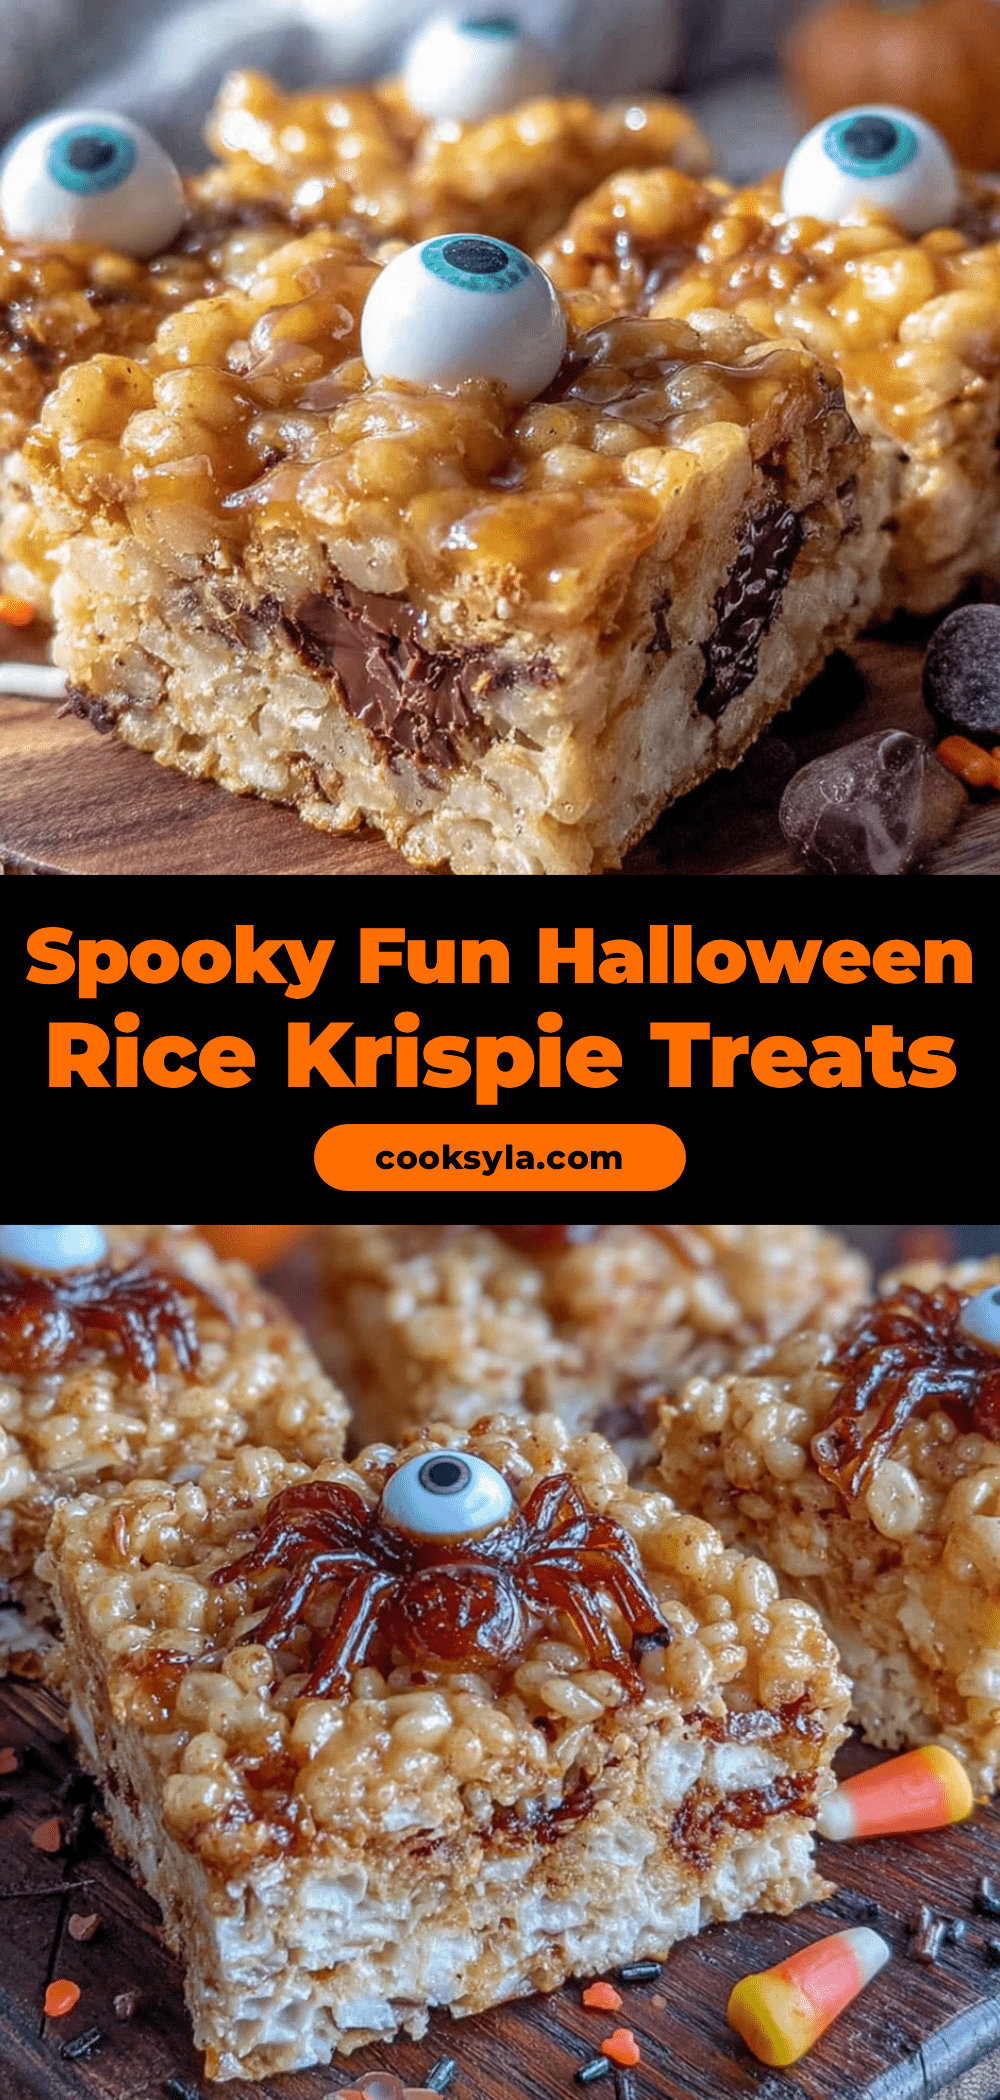
Creepy Halloween Rice Krispie Treats: 5 Easy Spooky Candy Eyeball Recipe
These spooky Halloween Rice Krispie treats feature a swirling black food coloring technique and are topped with gummy candy eyeballs for a fun, creepy, and delicious party snack.
- Prep Time: 15 minutes
- Cook Time: 10 minutes
- Total Time: 25 minutes
- Yield: 12 servings 1x
- Category: Dessert
- Cuisine: American
Ingredients
- 1/2 cup (113g) unsalted butter
- 10 oz (283g) large marshmallows
- 1 teaspoon vanilla extract
- 6 cups (approx. 210g) Rice Krispies cereal
- 1–2 teaspoons black gel food coloring
- 1 bag gummy candy eyeballs
- Optional: White chocolate for drizzling
Instructions
- Lightly grease a 9×13 inch baking pan with butter or cooking spray, optionally lining it with parchment paper for easy removal.
- Place a large saucepan over medium-low heat and melt the unsalted butter completely, swirling occasionally to prevent browning.
- Add the marshmallows to the melted butter and stir constantly with a silicone spatula until smooth and glossy, about 3 minutes.
- Remove the pan from heat and stir in the vanilla extract.
- Add 1 teaspoon of black gel food coloring and gently fold it into the mixture to create swirls; add more if a darker color is desired.
- Immediately add the Rice Krispies cereal and fold until every piece is thoroughly coated.
- Transfer the mixture to the prepared pan and press down firmly but not too tightly using buttered hands or wax paper.
- Let the treats cool for 10-15 minutes until firm enough to handle.
- Press gummy candy eyeballs into the surface of the cooled treats, arranging them randomly for a spooky effect.
- Let the treats cool completely at room temperature for at least 30 minutes before cutting into squares and serving.
Notes
Use gel food coloring instead of liquid to prevent the mixture from becoming sticky and to maintain distinct black swirls. Ensure the cereal is fresh for the best crunch. If the mixture becomes too hard to stir, add a teaspoon of warm water or milk. For a vegan version, use vegan butter and plant-based marshmallows.
Nutrition
- Serving Size: 1 square
- Calories: 175
- Sugar: 18
- Sodium: 120
- Fat: 8
- Saturated Fat: 4
- Carbohydrates: 24
- Protein: 2
Keywords: Halloween, Rice Krispie Treats, Candy Eyeballs, Spooky Dessert, Easy Recipe, Party Snack, Kids Cooking


