Love this? Save it for later!
Share the inspiration with your friends
It was 11:47 PM on a rainy Tuesday, and I had that specific kind of hunger that a sandwich just isn’t going to fix. You know the one—where your body is practically begging for something crispy, something savory, something that feels like a reward for making it through the day. I opened the fridge, hoping for inspiration, and found a pack of bone-in chicken thighs staring back at me. I didn’t have the energy for a complicated marinade or a messy flour dredging station, but I did have some grated Parmesan that was about to expire and a lemon that had rolled to the back of the produce drawer. And then it hit me—what if I just… smashed them together?
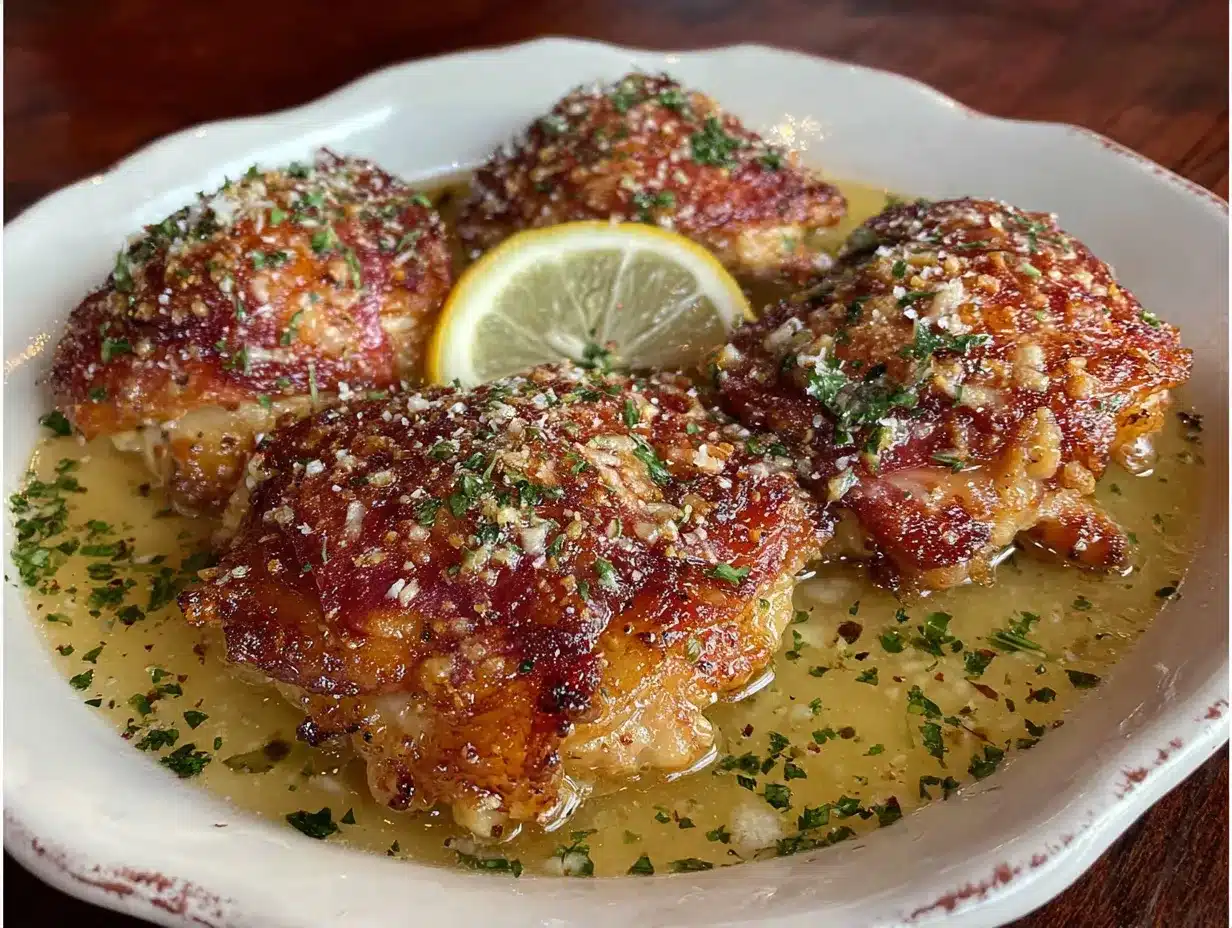
That night, standing in my socks on the cold kitchen floor, I threw together what I now call my emergency chicken dinner. I seasoned the thighs, pressed them into a mixture of panko and Parmesan, and pan-fried them until the kitchen filled with that nutty, browned butter smell that honestly should be bottled as a candle. I deglazed the pan with some chicken broth and lemon juice, not really expecting much, and what came out was this glossy, tangy sauce that made me forget I was eating dinner at midnight. I mean, I ate two pieces standing over the stove. No plate. No shame.
So this recipe for Crispy Garlic Parmesan Chicken Thighs with Lemon Pan Sauce was born from a moment of pure, unfiltered craving and a fridge that was down to its last few ingredients. And honestly? That’s usually when the best food happens. Maybe you’ve been there too—staring into the fridge, wondering if you can make something magical out of almost nothing. This is that recipe. It’s the one I’ve made at least a dozen times since that rainy night, and it never gets old. The crust stays shatteringly crisp, the meat stays juicy, and that lemon pan sauce ties everything together in a way that feels way fancier than the 35 minutes it actually takes to make.
Why You’ll Love This Recipe
Let me tell you why this recipe has earned a permanent spot in my weekly dinner rotation. First off, it’s the kind of meal that makes you look like a rockstar in the kitchen without actually having to work that hard. I’ve tested this method at least eight times to get the crust just right, and I can tell you with confidence—this is the version you want.
- Quick & Easy: From fridge to table in about 35 minutes. Perfect for those nights when you forgot to plan dinner and need something that feels special, fast.
- Simple Ingredients: You probably have most of these in your kitchen right now. No trips to a specialty store required. Just good, honest ingredients that work together beautifully.
- Perfect for Weeknights or Company: This dish is fancy enough to serve to guests but easy enough to make on a random Wednesday. It’s my go-to for both “I need comfort food” and “I need to impress someone” situations.
- Crowd-Pleaser: My picky-eater nephew actually asked for seconds the last time I made these. That’s a win in my book.
- Unbelievably Delicious: That first bite—where the crispy Parmesan crust shatters and gives way to juicy, tender chicken, all coated in that bright, garlicky lemon sauce—is the kind of moment that makes you close your eyes and just… enjoy.
What makes this recipe different from all the other crispy chicken recipes out there is the technique. Instead of a traditional flour-egg-breadcrumb coating, I use a combination of mayonnaise and Dijon mustard as the glue for the panko-Parmesan crust. It sounds weird, I know, but trust me on this one. The mayo keeps the chicken incredibly moist while the mustard adds a subtle tang that plays perfectly with the lemon sauce. Plus, the crust stays crispy even after sitting in the sauce for a few minutes—something that most breaded chicken recipes can’t claim. This isn’t just another version of crispy chicken; it’s the best version I’ve ever made, and I’ve made a lot of chicken in my day.
What Ingredients You Will Need
This recipe uses simple, wholesome ingredients to deliver bold flavor and satisfying texture without the fuss. Most of these are pantry staples, and the ones that aren’t are easy to find at any grocery store.
For the Chicken
- Bone-in, skin-on chicken thighs (about 4-6 thighs, roughly 2 pounds) — The bone keeps the meat juicy during cooking, and the skin adds extra fat for crisping. If you can only find boneless, skinless thighs, reduce cooking time by about 5-7 minutes.
- Panko breadcrumbs (1 cup) — These are flakier than regular breadcrumbs and create a much crispier crust. I’ve tried both, and panko wins every time.
- Grated Parmesan cheese (½ cup, plus more for serving) — Use the real stuff from a block, not the green can. The pre-grated stuff doesn’t melt as well and can make the crust gritty. I prefer Parmigiano-Reggiano for the best flavor.
- Mayonnaise (2 tablespoons) — I know it sounds strange, but mayo is the secret to an ultra-crispy, non-greasy crust. It also keeps the chicken from drying out. Use full-fat for best results.
- Dijon mustard (1 tablespoon) — Adds a subtle tangy depth that cuts through the richness. You won’t taste it directly, but you’ll notice if it’s missing.
- Garlic powder (1 teaspoon) — For that garlic flavor without the risk of burning fresh garlic in the pan.
- Onion powder (½ teaspoon) — A little extra savory punch.
- Salt and black pepper (to taste) — Don’t be shy with the salt; it’s what makes the crust pop.
- Olive oil (2 tablespoons) — For pan-frying. Avocado oil works too if you prefer a higher smoke point.
For the Lemon Pan Sauce
- Chicken broth (½ cup) — Low-sodium is best so you can control the salt level. Vegetable broth works in a pinch.
- Fresh lemon juice (3 tablespoons, from about 1 large lemon) — Please don’t use bottled lemon juice. The fresh stuff makes a world of difference in brightness.
- Minced garlic (3 cloves) — Fresh is non-negotiable here. It adds that aromatic punch that powdered garlic just can’t replicate.
- Unsalted butter (2 tablespoons, cold and cut into small cubes) — This emulsifies the sauce and gives it a silky, glossy finish.
- Fresh parsley (2 tablespoons, chopped) — For color and freshness at the end.
- Lemon zest (from 1 lemon) — Adds an extra layer of citrus aroma that the juice alone can’t provide.
Equipment Needed
You don’t need a fancy kitchen to make these chicken thighs. Here’s what you’ll need, along with some tips from my own experience:
- Large cast-iron skillet or heavy-bottomed skillet (12-inch) — Cast iron is ideal because it holds heat evenly and gives you that beautiful golden crust. I use my trusty Lodge skillet that I’ve had for years. If you don’t have one, a stainless steel pan works fine—just make sure it’s heavy enough to maintain temperature.
- Sharp chef’s knife — For mincing garlic and chopping parsley. A dull knife makes prep frustrating and takes longer.
- Cutting board — Preferably one with a groove to catch juices.
- Mixing bowls (2 small to medium) — One for the panko-Parmesan mixture, one for the mayo-mustard binder.
- Tongs — For flipping the chicken without breaking the crust. Silicone-tipped tongs are gentle on non-stick surfaces if you’re using one.
- Meat thermometer — This is non-negotiable for perfectly cooked chicken. I use a simple instant-read thermometer, and it’s saved me from dry chicken more times than I can count.
- Microplane or fine grater — For zesting the lemon and grating fresh Parmesan. A box grater works too, but a microplane gives you that fluffy zest that melts right into the sauce.
- Paper towels — For patting the chicken dry. This step is crucial for a crispy crust, so don’t skip it.
If you don’t have a cast-iron skillet, don’t worry. A good non-stick pan will work, but you might not get quite as deep of a golden crust. Just be careful not to overcrowd the pan, and you’ll still get great results.
Preparation Method
Alright, let’s get cooking. I’ve broken this down step by step so you can follow along without any confusion. Take your time, and remember—cooking is supposed to be fun, not stressful.
- Prep the chicken (5 minutes): Start by patting the chicken thighs completely dry with paper towels. This is the most important step for a crispy crust—moisture is the enemy of crunch. Season both sides generously with salt, pepper, garlic powder, and onion powder. Set aside while you prepare the coating.
- Make the coating (5 minutes): In a small bowl, mix together the panko breadcrumbs and grated Parmesan cheese. In another small bowl, combine the mayonnaise and Dijon mustard until smooth. The mayo-mustard mixture should be thick but spreadable—if it’s too thick, add a tiny splash of water.
- Coat the chicken (5 minutes): Using a brush or your fingers (I use my hands—it’s easier), spread a thin, even layer of the mayo-mustard mixture all over each chicken thigh, including the underside. Don’t go overboard; you just need enough for the breadcrumbs to stick. Then press each thigh into the panko-Parmesan mixture, making sure every surface is covered. Gently shake off any excess. Place the coated thighs on a plate while you heat the oil.
- Heat the pan (3 minutes): Place your skillet over medium-high heat and add the olive oil. Let it heat until the oil shimmers and a breadcrumb dropped in sizzles immediately—about 2-3 minutes. You want the pan hot enough to sear the crust but not so hot that the breadcrumbs burn before the chicken cooks through.
- Pan-fry the chicken (12-15 minutes): Carefully place the chicken thighs skin-side down in the hot skillet. Don’t overcrowd—if your pan is too small, cook in batches. Let them cook undisturbed for 5-6 minutes, until the bottom is deep golden brown and crispy. Use tongs to flip each thigh gently, being careful not to scrape off the crust. Cook for another 5-6 minutes on the second side. The chicken is done when the internal temperature reaches 165°F (74°C) at the thickest part, and the juices run clear. Transfer the cooked chicken to a plate and tent loosely with foil to keep warm.
- Start the pan sauce (2 minutes): Pour off all but about 1 tablespoon of the fat from the skillet, leaving the browned bits (fond) on the bottom—that’s pure flavor. Reduce the heat to medium and add the minced garlic. Sauté for about 30 seconds until fragrant, stirring constantly so it doesn’t burn.
- Deglaze and build the sauce (3 minutes): Pour in the chicken broth and lemon juice, scraping up all those delicious browned bits from the bottom of the pan with a wooden spoon. Let it simmer for 2-3 minutes, until the liquid has reduced by about half. The sauce should thicken slightly and become more flavorful as it reduces.
- Finish the sauce (1 minute): Remove the pan from the heat and whisk in the cold butter cubes, one at a time, until the sauce is smooth and glossy. Stir in the lemon zest and fresh parsley. Taste and adjust seasoning with salt and pepper if needed. The sauce should be bright, tangy, and rich all at once.
- Serve immediately: Place the crispy chicken thighs on a serving platter or individual plates. Spoon the lemon pan sauce over the top, making sure to get some of those garlicky bits on each piece. Sprinkle with extra Parmesan and a pinch of fresh parsley for color. Serve right away while the crust is still shatteringly crisp.
Cooking Tips & Techniques
After making this recipe more times than I can count, I’ve learned a few things the hard way. Here are my best tips to help you nail it on the first try.
Don’t skip drying the chicken. I know it seems like a small step, but patting the thighs dry with paper towels is what gives you that ultra-crispy crust. If the chicken is even slightly damp, the breadcrumbs will steam instead of fry, and you’ll end up with a soggy coating. Trust me on this—I learned this lesson after one particularly disappointing batch.
Use a meat thermometer. Chicken thighs are forgiving, but they can still dry out if overcooked. I aim for exactly 165°F (74°C) at the thickest part. If you don’t have a thermometer, pierce the thickest thigh with a knife—the juices should run clear, not pink. But honestly, a thermometer is a cheap investment that will make you a better cook.
Don’t move the chicken too soon. When you first place the thighs in the hot pan, resist the urge to poke or move them. Let them cook undisturbed for at least 5 minutes. That’s how you build that deep, golden crust. If you try to flip them too early, the coating will stick to the pan and tear off. You’ll know they’re ready when they release easily from the pan.
Work in batches if needed. Crowding the pan lowers the oil temperature and steams the chicken instead of frying it. If your skillet isn’t big enough to fit all the thighs with room between them, cook them in two batches. Yes, it takes a few extra minutes, but the results are worth it. Keep the first batch warm in a 200°F oven while you cook the second.
Save the fond. Those browned bits stuck to the bottom of the pan after cooking the chicken are packed with flavor. Don’t scrub them off or let them burn. When you add the broth and lemon juice, scrape them up—that’s the foundation of your pan sauce. It’s the difference between a good sauce and a great one.
Variations & Adaptations
One of the best things about this recipe is how adaptable it is. Here are some variations I’ve tried and loved:
Dietary Adaptations
- Gluten-Free: Swap the panko breadcrumbs for gluten-free panko or crushed pork rinds. The pork rinds create an incredibly crispy, low-carb crust that’s surprisingly delicious. I’ve tested this for a friend with celiac disease, and she couldn’t tell the difference.
- Dairy-Free: Use a dairy-free Parmesan alternative (look for one made from cashews or almonds) and substitute the butter in the sauce with a dairy-free butter or a tablespoon of olive oil. The sauce won’t be quite as rich, but it’s still really good.
- Low-Carb/Keto: Replace the panko with almond flour or crushed pork rinds mixed with Parmesan. Skip the mayo-mustard binder and use a thin layer of melted butter instead. The chicken will still be crispy and delicious.
Flavor Twists
- Spicy Version: Add ½ teaspoon of cayenne pepper or red pepper flakes to the panko mixture. You can also stir a teaspoon of hot sauce into the mayo-mustard binder for an extra kick. I made this version for a game day party, and it disappeared in minutes.
- Herb-Crusted: Mix 2 tablespoons of finely chopped fresh herbs (thyme, rosemary, or oregano) into the panko-Parmesan mixture. The herbs add a fragrant, earthy note that pairs beautifully with the lemon sauce.
- Smoky Twist: Add 1 teaspoon of smoked paprika to the panko mixture. The smokiness complements the garlic and Parmesan and adds a subtle barbecue-like flavor. This is my husband’s favorite version.
Cooking Method Variations
- Oven-Baked: If you prefer to bake instead of pan-fry, preheat your oven to 400°F (200°C). Place the coated thighs on a wire rack set over a baking sheet. Bake for 25-30 minutes, flipping halfway through, until golden and cooked through. The crust won’t be quite as crispy as pan-frying, but it’s a great hands-off option.
- Air Fryer: Preheat your air fryer to 375°F (190°C). Place the coated thighs in a single layer in the basket (work in batches if needed). Cook for 12-15 minutes, flipping halfway through, until golden and cooked through. The air fryer gives you a remarkably crispy crust with less oil.
Serving & Storage Suggestions
These crispy garlic Parmesan chicken thighs are best served fresh, but there are a few tricks to make them work for leftovers too.
Serving: I like to serve these chicken thighs on a warm platter with the lemon pan sauce spooned over the top. They pair beautifully with simple sides that let the chicken shine. Try them with creamy mashed potatoes to soak up all that sauce, a crisp green salad with a light vinaigrette, or roasted asparagus or green beans. For a carb-lover’s dream, serve them over buttery egg noodles or alongside crusty bread for dipping. A glass of crisp white wine like Sauvignon Blanc or a light Pinot Grigio is the perfect accompaniment.
Storage: If you have leftovers (which is rare in my house), store the chicken and sauce separately in airtight containers in the refrigerator. The chicken will keep for up to 3 days, and the sauce will keep for 2 days. The crust will soften over time, but the flavor will still be fantastic.
Reheating: The best way to reheat these is in the oven or air fryer. Preheat your oven to 350°F (175°C) and place the chicken on a wire rack over a baking sheet. Reheat for 8-10 minutes until warmed through and the crust crisps up again. For the air fryer, reheat at 350°F (175°C) for 4-5 minutes. Reheat the sauce separately in a small saucepan over low heat, adding a splash of broth or water if it’s too thick. Avoid the microwave—it will make the crust soggy and the chicken rubbery.
Flavor development: Interestingly, the lemon pan sauce actually gets better after a day in the fridge. The flavors meld together and the garlic mellows out. If you’re meal-prepping, consider making the sauce a day ahead and reheating it gently while you cook the chicken fresh.
Nutritional Information & Benefits
While this recipe is definitely a treat, it does offer some nutritional benefits worth noting. Here’s an approximate breakdown per serving (based on 4 servings, using bone-in skin-on thighs):
| Nutrient | Amount per Serving |
|---|---|
| Calories | 485 kcal |
| Protein | 38g |
| Fat | 32g |
| Saturated Fat | 10g |
| Carbohydrates | 12g |
| Fiber | 1g |
| Sugar | 2g |
| Sodium | 720mg |
Health Benefits: Chicken thighs are an excellent source of high-quality protein, which is essential for muscle repair and keeping you full. They also provide B vitamins, particularly B6 and B12, which support energy metabolism. The lemon juice in the sauce adds a healthy dose of vitamin C, a powerful antioxidant that supports immune function. Garlic is known for its anti-inflammatory and heart-health benefits. While this dish is higher in fat than a lean chicken breast recipe, the fats come primarily from olive oil and butter, which can be part of a balanced diet when enjoyed in moderation.
Dietary Considerations: This recipe is naturally low-carb (about 12g per serving) and can be made gluten-free with simple substitutions. It’s not suitable for a vegan or vegetarian diet, but the dairy-free variation works well. If you’re watching your sodium intake, use low-sodium chicken broth and go easy on the added salt.
Conclusion
So there you have it—my go-to recipe for Crispy Garlic Parmesan Chicken Thighs with Lemon Pan Sauce. It’s the kind of meal that feels special enough for a Sunday dinner but comes together quickly enough for a busy Tuesday. The crispy, cheesy crust, the juicy meat, and that bright, tangy sauce all come together in a way that’s honestly greater than the sum of its parts.
I hope you give this recipe a try and make it your own. Maybe you’ll add a little extra garlic, swap in some fresh herbs, or serve it with your favorite side dish. That’s the beauty of cooking—you get to make every recipe your own. And if you do make it, I’d love to hear how it turned out. Drop a comment below and let me know if you tried any variations, or share a photo of your creation. It honestly makes my day when readers tell me they loved a recipe as much as I do.
Until next time, happy cooking, and remember—the best meals often come from the simplest ingredients and a little bit of trust in the process. You’ve got this!
Frequently Asked Questions
Can I use boneless, skinless chicken thighs for this recipe?
Absolutely, but you’ll need to adjust the cooking time. Boneless thighs cook faster—about 4-5 minutes per side instead of 5-6. They also won’t have the same level of juiciness as bone-in thighs, so keep an eye on the internal temperature to avoid drying them out.
Why did my crust fall off when I flipped the chicken?
This usually happens when you try to flip the chicken too early. The crust needs time to form a golden-brown seal against the pan. Wait at least 5 minutes before attempting to flip, and if the chicken resists, give it another minute. Also, make sure your pan is hot enough before adding the chicken.
Can I make the lemon pan sauce ahead of time?
Yes! The sauce actually develops more flavor as it sits. Make it up to 2 days in advance and store it in an airtight container in the refrigerator. Reheat it gently in a small saucepan over low heat, adding a splash of chicken broth or water if it’s too thick. Just don’t add the fresh parsley until right before serving.
What can I use instead of mayonnaise for the binder?
If you’re not a mayo fan, you can use full-fat Greek yogurt or sour cream instead. Both will give you a similar creamy texture and help the breadcrumbs stick. The flavor will be slightly different but still delicious. For a dairy-free option, try using a thin layer of olive oil or melted butter.
How do I keep the chicken crispy if I’m not serving it right away?
The key is to keep the chicken separate from the sauce until you’re ready to serve. Place the cooked chicken on a wire rack set over a baking sheet in a 200°F (93°C) oven to keep warm. The wire rack allows air to circulate around the chicken, preventing the crust from getting soggy. Reheat the sauce separately and spoon it over the chicken just before serving.
Pin This Recipe!
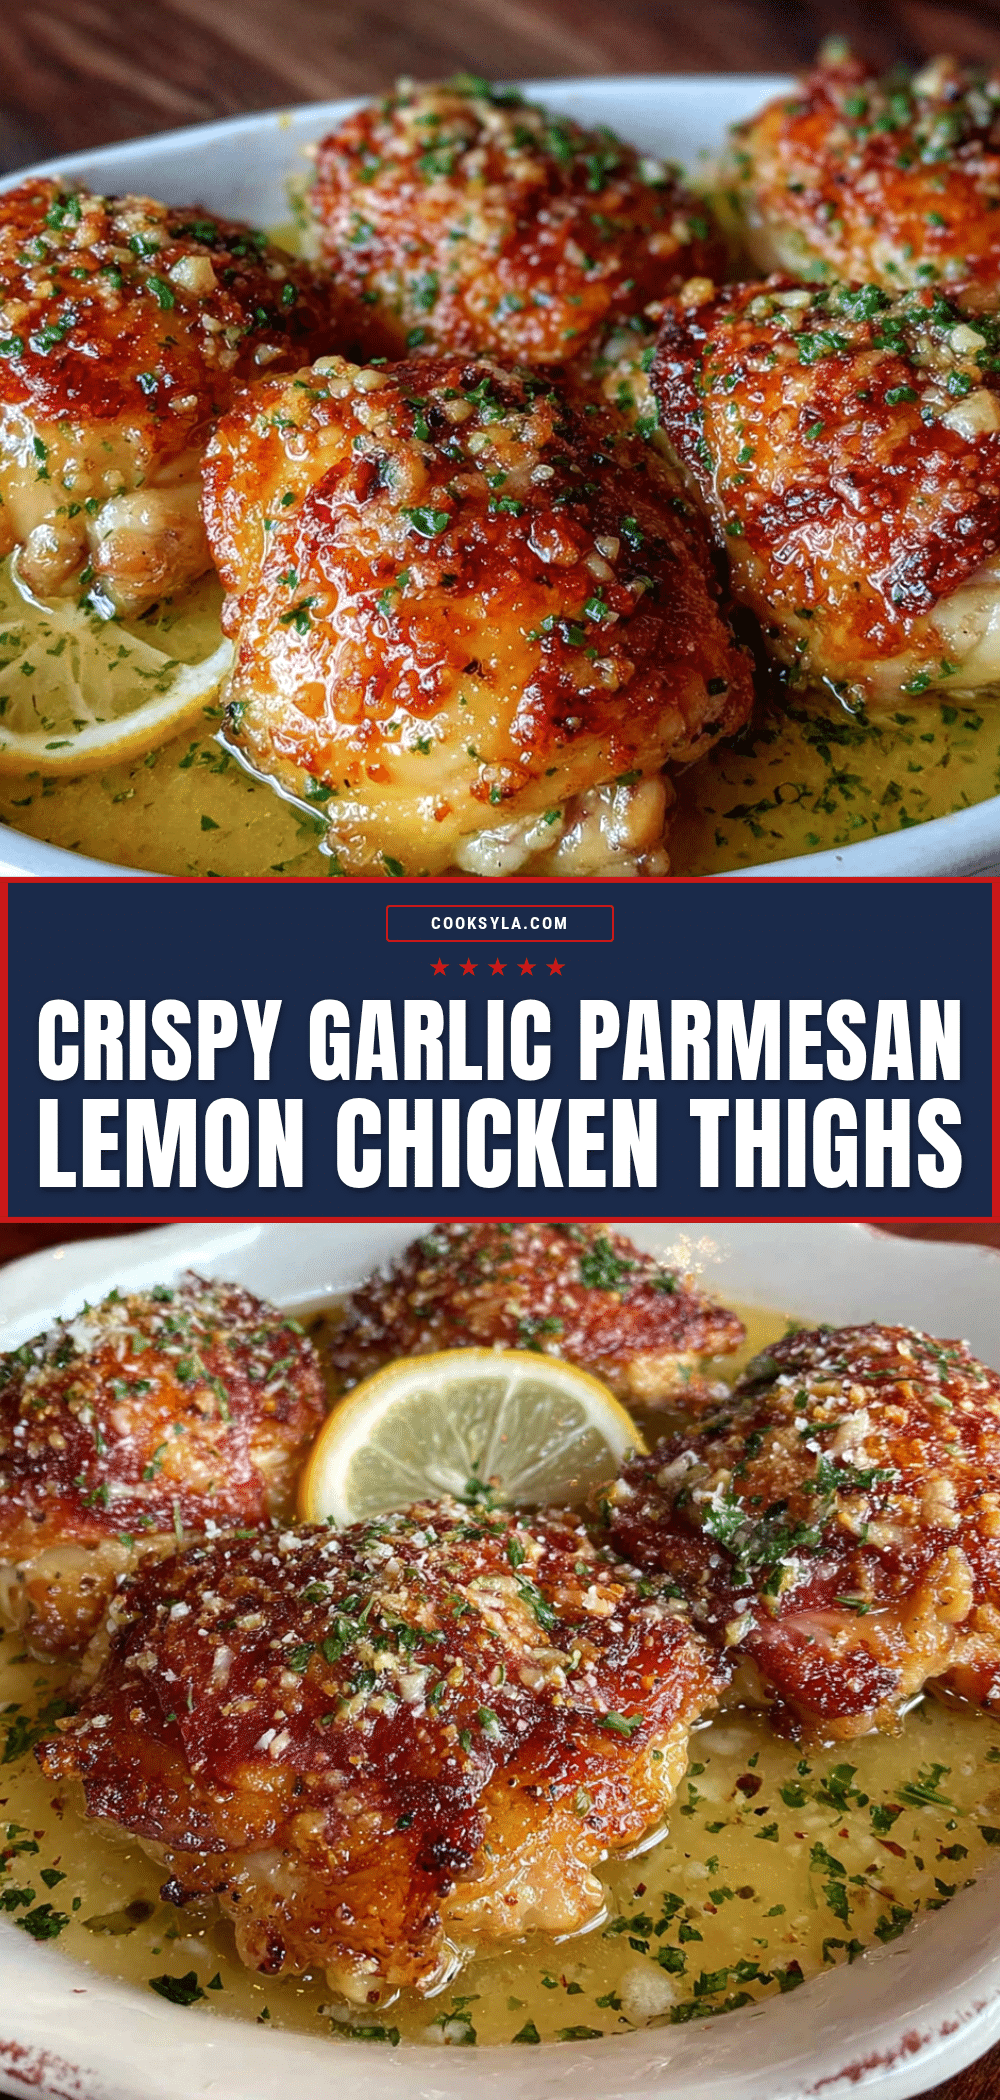
Crispy Garlic Parmesan Chicken Thighs with Lemon Sauce
Crispy, cheesy chicken thighs with a bright lemon pan sauce. This quick and easy recipe uses a secret mayo-mustard binder for an ultra-crispy crust and juicy meat, all ready in about 35 minutes.
- Prep Time: 15 minutes
- Cook Time: 20 minutes
- Total Time: 35 minutes
- Yield: 4 servings 1x
- Category: Main Course
- Cuisine: American
Ingredients
- 4–6 bone-in, skin-on chicken thighs (about 2 pounds)
- 1 cup panko breadcrumbs
- ½ cup grated Parmesan cheese (plus more for serving)
- 2 tablespoons mayonnaise
- 1 tablespoon Dijon mustard
- 1 teaspoon garlic powder
- ½ teaspoon onion powder
- Salt and black pepper to taste
- 2 tablespoons olive oil
- ½ cup low-sodium chicken broth
- 3 tablespoons fresh lemon juice (from about 1 large lemon)
- 3 cloves garlic, minced
- 2 tablespoons unsalted butter, cold and cut into small cubes
- 2 tablespoons fresh parsley, chopped
- Lemon zest from 1 lemon
Instructions
- Pat the chicken thighs completely dry with paper towels. Season both sides generously with salt, pepper, garlic powder, and onion powder.
- In a small bowl, mix together panko breadcrumbs and grated Parmesan cheese. In another small bowl, combine mayonnaise and Dijon mustard until smooth.
- Spread a thin, even layer of the mayo-mustard mixture all over each chicken thigh. Press each thigh into the panko-Parmesan mixture, covering every surface. Shake off excess and place on a plate.
- Heat olive oil in a large cast-iron or heavy-bottomed skillet over medium-high heat until shimmering (about 2-3 minutes).
- Place chicken thighs skin-side down in the hot skillet without overcrowding. Cook undisturbed for 5-6 minutes until deep golden brown. Flip gently and cook for another 5-6 minutes until internal temperature reaches 165°F (74°C). Transfer to a plate and tent with foil.
- Pour off all but 1 tablespoon of fat from the skillet, leaving browned bits. Reduce heat to medium and add minced garlic. Sauté for 30 seconds until fragrant.
- Pour in chicken broth and lemon juice, scraping up browned bits with a wooden spoon. Simmer for 2-3 minutes until reduced by half.
- Remove pan from heat and whisk in cold butter cubes one at a time until smooth and glossy. Stir in lemon zest and fresh parsley. Season with salt and pepper to taste.
- Place chicken on a serving platter, spoon sauce over the top, and sprinkle with extra Parmesan and parsley. Serve immediately.
Notes
Pat chicken completely dry for crispiest crust. Use a meat thermometer to ensure chicken reaches 165°F. Don’t move chicken too soon when pan-frying; let it form a crust. Work in batches if needed to avoid overcrowding. Save the browned bits (fond) for the sauce. For best results, serve immediately while crust is crisp.
Nutrition
- Serving Size: 1 chicken thigh with
- Calories: 485
- Sugar: 2
- Sodium: 720
- Fat: 32
- Saturated Fat: 10
- Carbohydrates: 12
- Fiber: 1
- Protein: 38
Keywords: crispy chicken thighs, garlic parmesan chicken, lemon chicken, easy chicken dinner, weeknight dinner, pan-fried chicken


