Love this? Save it for later!
Share the inspiration with your friends
There used to be a dive bar in Chicago called The Owl’s Nest, tucked between a laundromat and a shuttered shoe repair shop, that made the most unsettlingly perfect deviled eggs. They called them “The Creepy Crawlers” and served them every October on a chipped platter lined with fake spiderwebs. When the place closed in 2019—turned into another overpriced juice spot—I honestly felt a little lost. Those eggs were my Halloween tradition.
After maybe six tries—some where the olives looked more like sad blobs than spiders, others where the paprika turned everything into a dusty mess—I finally cracked it. These Easy Halloween Deviled Eggs with Spider Olive Toppers are my love letter to that weird little bar. They’re creepy, they’re cute, and they come together in about 20 minutes flat. No fancy tools, no stress, just a snack that’ll make your Halloween party guests do a double-take.
Why You’ll Love This Recipe
Let me tell you, I’ve made a lot of deviled eggs in my day. But these? They’re the ones that disappear first at every party. Here’s why you’re going to want them on your table this Halloween:
- Quick & Easy: From start to finish, you’re looking at about 20 minutes of active work. The hardest part is peeling the eggs, and I’ve got a trick for that below.
- Simple Ingredients: Eggs, mayo, mustard, paprika, and olives. That’s it. No hunting down weird specialty items at three different stores.
- Perfect for Halloween Parties: These are the kind of appetizer that gets photographed, shared, and talked about. They’re spooky without being over-the-top.
- Crowd-Pleaser: Even people who “don’t like olives” end up eating these. Something about the spider shape makes them irresistible.
- Unbelievably Delicious: The creamy, tangy filling paired with the briny olive is a combo that just works. Trust me on this one.
What makes this version different from all the other Halloween deviled eggs out there? It’s the ratio. I spent way too much time figuring out the perfect amount of mustard to mayo so the filling stays creamy but doesn’t get runny. And the olive placement—legs at just the right angle—makes them look like real little spiders crawling across the plate. It’s the little details, you know?
This recipe isn’t just good—it’s the kind that makes people say “Wait, you made these?” with genuine surprise. It’s Halloween fun without the stress, and honestly, that’s exactly what we all need during the chaos of October.
What Ingredients You Will Need
This recipe uses simple, everyday ingredients to create something that looks way more complicated than it actually is. Most of these are probably in your kitchen right now.
For the Deviled Eggs
- 6 large eggs (room temperature works best for even cooking)
- 3 tablespoons mayonnaise (I prefer Hellmann’s or Duke’s for the right tang)
- 1 teaspoon yellow mustard (adds that classic deviled egg zing)
- 1/2 teaspoon white vinegar (optional, but brightens the flavor)
- Salt and black pepper to taste
- Paprika for dusting (smoked or sweet both work great)
For the Spider Toppers
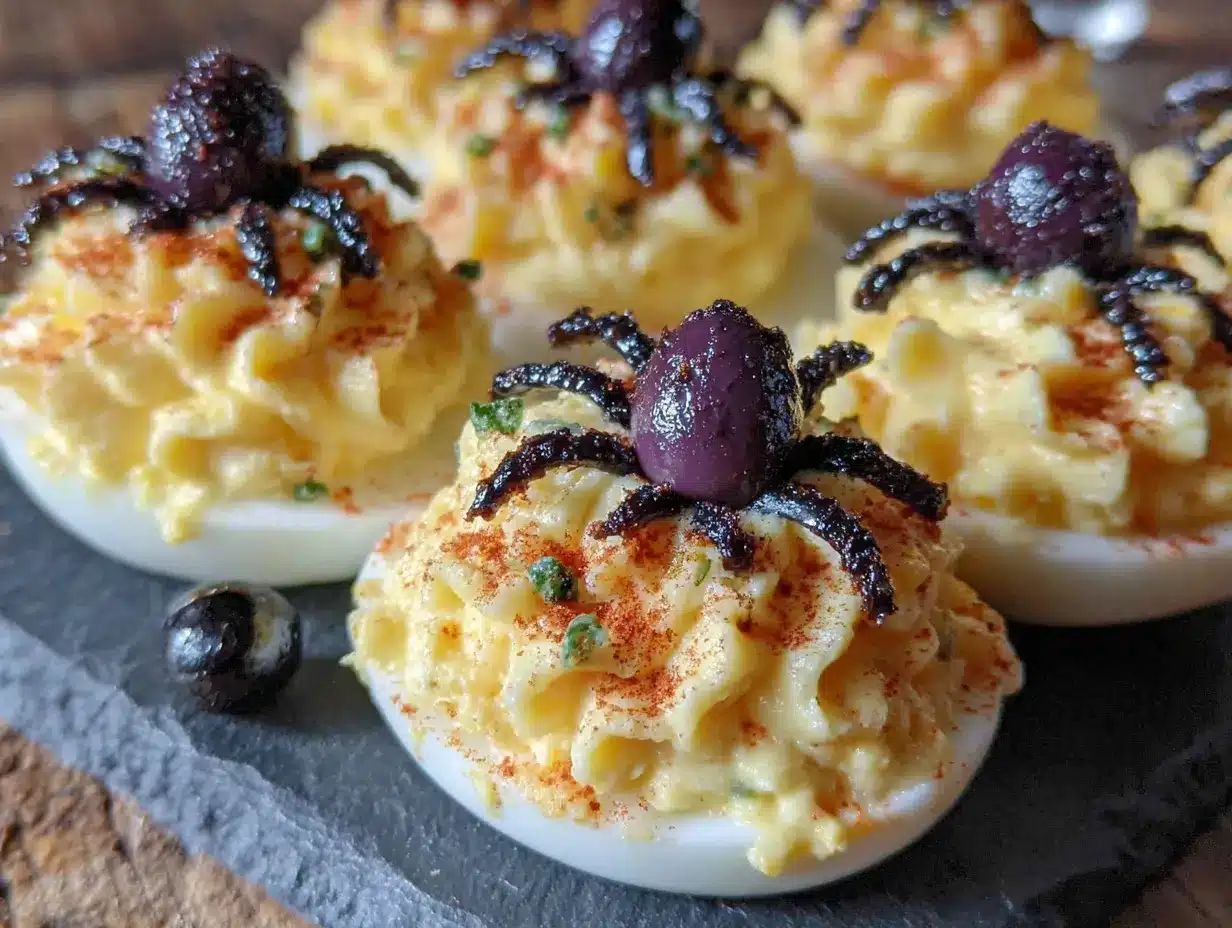
- 6 whole black olives (the big ones, not the tiny canned ones)
- 12 black olive slices (for the legs—you can buy pre-sliced or slice your own)
Ingredient selection tips: Look for eggs that are at least a week old—they peel way easier than fresh ones. I know that sounds backwards, but it’s true. For the olives, grab the large pitted black olives from the olive bar at your grocery store if you can. They’re meatier and easier to cut into legs. The pre-sliced canned ones work in a pinch, but they tend to fall apart more easily.
Substitution guidance: If you’re not a mayo fan, Greek yogurt makes a surprisingly good substitute—just add a little extra mustard for tang. For a dairy-free version, use vegan mayo and skip the yogurt. And if black olives aren’t your thing, you can use sliced bell peppers cut into thin strips for the legs and a grape tomato half for the body. It won’t look exactly the same, but it’ll still be cute.
Equipment Needed
- Medium saucepan for boiling eggs (with a tight-fitting lid)
- Large bowl filled with ice water (for the ice bath)
- Sharp knife for cutting eggs and olives
- Cutting board
- Small mixing bowl for the filling
- Fork or potato masher for mashing yolks
- Spoon or piping bag for filling the eggs (a zip-top bag with the corner snipped off works great)
- Serving platter
Budget-friendly tip: Don’t have a piping bag? Honestly, I use a sandwich bag with the corner cut off half the time. Works like a charm and saves you from buying something you’ll use once a year. If you don’t have a potato masher, a fork does the job—it just takes a little longer.
Preparation Method
- Boil the eggs: Place your eggs in a single layer in a medium saucepan. Cover them with cold water by about an inch. Bring to a rolling boil over high heat, then immediately cover the pot, remove from heat, and let sit for exactly 10 minutes. Set a timer—I’ve ruined too many eggs by forgetting.
- Ice bath time: While the eggs are sitting, fill a large bowl with ice and cold water. When the timer goes off, use a slotted spoon to transfer the eggs to the ice bath. Let them chill for at least 5 minutes. This stops the cooking and makes peeling SO much easier.
- Peel the eggs: Gently tap each egg on the counter to crack the shell all over, then roll it between your palms to loosen the shell. Start peeling from the wider end—there’s usually an air pocket there that makes it easier. Rinse off any tiny shell bits under cool water.
- Cut and separate: Slice each egg in half lengthwise. Carefully pop out the yolks into a small bowl. Arrange the white halves on your serving platter, cut side up.
- Make the filling: Add mayonnaise, mustard, vinegar (if using), salt, and pepper to the yolks. Mash everything together with a fork until it’s smooth and creamy. Taste it—this is important. Adjust the salt, pepper, or mustard until it tastes right to you. I like mine with a little extra mustard bite.
- Fill the eggs: Spoon the yolk mixture into a piping bag or zip-top bag. Snip off a small corner and pipe the filling into each egg white half. You can also just spoon it in if you’re in a hurry—it’ll still taste the same.
- Make the spiders: Take your whole black olives and cut each one in half lengthwise. You’ll use one half per spider body. For the legs, cut each olive slice in half again to create thin strips. You need 8 legs per spider, so plan accordingly.
- Assemble the spiders: Gently press two olive leg strips on each side of the olive body half to create 8 legs. Place one spider on each deviled egg. The legs should stick out slightly from under the body.
- Finish and serve: Lightly dust the eggs with paprika using a fine-mesh sieve. The paprika adds color and a little smoky flavor. Serve immediately or refrigerate until ready.
Sensory cues: When the eggs are done boiling, they should feel firm but not rubbery. The yolk mixture should be smooth and creamy, not lumpy—if it’s too thick, add a tiny splash of mayo. The finished eggs should look glossy and inviting, with the spiders sitting proudly on top.
Cooking Tips & Techniques
I’ve made these eggs probably two dozen times now, and let me tell you, I’ve learned a few things the hard way. Here are my best tips to save you from my mistakes:
The peeling struggle is real. I used to lose half my egg whites to peeling—they’d come off in shreds and look terrible. The game-changer? Using eggs that are at least a week old. Fresh eggs are harder to peel. Also, shocking them in ice water immediately after boiling creates a temperature shock that helps separate the shell from the white.
Don’t overmix the filling. I know it’s tempting to keep mashing until it’s silky smooth, but overmixing can make the texture gummy. Mash just until everything comes together and looks creamy. A few tiny lumps are totally fine and actually add a nice texture.
Pipe, don’t spoon. I used to spoon the filling in and it always looked messy. Using a piping bag (or zip-top bag) gives you those beautiful, professional-looking swirls. Plus, it’s faster and less messy. Just don’t overfill—you want the spider to sit on top, not slide off.
Olive legs are fiddly. The first time I made these, I spent 20 minutes trying to get the legs to stay in place. Here’s the trick: cut the olive slices into thin strips, then gently press them into the filling before placing the spider body. The filling acts like glue. If the legs still won’t cooperate, use a tiny dab of mayo to hold them in place.
Make ahead tip: You can boil and peel the eggs up to 2 days ahead. Store them in the fridge in a covered container. Make the filling up to 1 day ahead and keep it in a piping bag in the fridge. Assemble everything the day of your party for the best presentation.
Variations & Adaptations
One of the best things about this recipe is how easy it is to change up. Here are a few ways I’ve adapted it over the years:
Spicy Halloween Eggs: Add 1/4 teaspoon of cayenne pepper or a few dashes of hot sauce to the yolk mixture. The heat pairs surprisingly well with the briny olives. I tried this on a whim last year and now it’s my preferred version.
Guacamole Deviled Eggs: Swap out half the mayo for mashed avocado. Add a squeeze of lime juice and a pinch of cumin. The green filling looks extra spooky for Halloween, and the avocado makes them a little healthier. Just be warned—they don’t keep as long, so serve them right away.
Bacon Spider Eggs: Because everything is better with bacon, right? Crumble a slice of cooked bacon into the yolk mixture before piping. The smoky, salty crunch is incredible. For the spiders, you can even use small pieces of bacon as extra legs—though it’s a little unconventional.
Gluten-Free and Keto-Friendly: This recipe is naturally gluten-free and low-carb, so it’s perfect for guests with dietary restrictions. Just double-check your mustard and mayo labels to make sure they’re gluten-free (most are, but it’s worth verifying).
Vegan Version: Use silken tofu instead of eggs for the whites (look up a tutorial for this—it’s a bit involved), vegan mayo, and black salt for that eggy flavor. The olive spiders stay the same. It’s not exactly the same, but it’s a fun challenge if you’re cooking for a vegan crowd.
Serving & Storage Suggestions
These deviled eggs are best served chilled or at room temperature—never warm. I like to arrange them on a black platter or a Halloween-themed plate to really make the spiders pop. A few fake spiderwebs draped around the edges of the platter adds a fun touch without any extra work.
What to serve with them: These eggs pair beautifully with other Halloween appetizers like mummy hot dogs, pumpkin-shaped cheese balls, or a bowl of creepy-crawly veggie sticks. For drinks, a crisp white wine or a dark beer complements the creamy filling and briny olives. Or just serve them with a pitcher of apple cider—that’s my go-to.
Storage instructions: Leftover deviled eggs (if you have any!) can be stored in an airtight container in the refrigerator for up to 2 days. The filling might get a little firmer, but they’ll still taste great. I do NOT recommend freezing them—the texture gets weird and watery when thawed.
Reheating: Honestly, you don’t want to reheat deviled eggs. They’re meant to be served cold. If you’ve refrigerated them, just let them sit at room temperature for about 10 minutes before serving to take the chill off.
Flavor development: These actually taste better after sitting in the fridge for an hour or two. The flavors meld together and the filling sets up nicely. So don’t stress about making them at the last minute—they’re actually better if you prep ahead.
Nutritional Information & Benefits
Here’s the approximate nutritional breakdown for one deviled egg (with spider topper):
| Nutrient | Amount per egg |
|---|---|
| Calories | 85 |
| Protein | 6g |
| Fat | 6g |
| Carbohydrates | 1g |
| Fiber | 0g |
| Sugar | 0g |
| Sodium | 180mg |
Health benefits: Eggs are a fantastic source of high-quality protein and contain important nutrients like vitamin D, B12, and choline, which supports brain health. Olives provide healthy monounsaturated fats and antioxidants. This recipe is naturally low-carb and gluten-free, making it suitable for keto and paleo diets. The main consideration is the sodium content from the olives and mayo, so if you’re watching your salt intake, use low-sodium olives and go easy on the salt in the filling.
Dietary considerations: This recipe contains eggs and may contain dairy depending on your mayo choice. It’s naturally nut-free and soy-free (check your mayo label). For a lower-fat version, use half the mayo and substitute Greek yogurt.
Conclusion
These Easy Halloween Deviled Eggs with Spider Olive Toppers are proof that you don’t need to spend hours in the kitchen to create something that looks impressive. They’re quick, they’re fun, and they taste genuinely great—not just “good for a Halloween snack.”
I still think about those deviled eggs from The Owl’s Nest every time I make these. But honestly? My version might be even better. The filling is creamier, the spiders are cuter, and I don’t have to fight through a crowd of hipsters to get them. That’s a win in my book.
I’d love to see how yours turn out! Tag me in your photos or leave a comment below with your own twist on the recipe. Did you add hot sauce? Use bacon? Make them vegan? Tell me all about it. And if you’re looking for more Halloween party ideas, check out my spooky snack board or these mummy pigs in a blanket—they’re both huge hits at my annual Halloween bash.
Happy Halloween, and happy cooking!
Frequently Asked Questions
Can I make these deviled eggs ahead of time?
Absolutely! You can boil and peel the eggs up to 2 days ahead. Store them in the fridge in a covered container. Make the filling up to 1 day ahead and keep it in a piping bag. Assemble everything the day of your party for the best look.
How do I keep the olive spiders from falling off?
Gently press the spider legs into the filling before placing the body. The filling acts like glue. If they still won’t stay, use a tiny dab of mayo to hold everything in place.
Can I use different olives for the spiders?
Yes! Large green olives stuffed with pimentos work great too. They give a slightly different look—more like alien spiders—but they’re just as fun. Avoid small canned olives as they’re harder to cut into legs.
Why are my deviled eggs runny?
Runny filling usually means too much mayo or mustard. Start with less than you think you need and add more gradually. Also, make sure your eggs are fully cooked—undercooked yolks can make the filling too soft.
How long do these deviled eggs last in the fridge?
They’ll keep in an airtight container in the refrigerator for up to 2 days. The texture might change slightly, but they’ll still be delicious. Do not freeze them—the texture gets weird and watery.
Pin This Recipe!
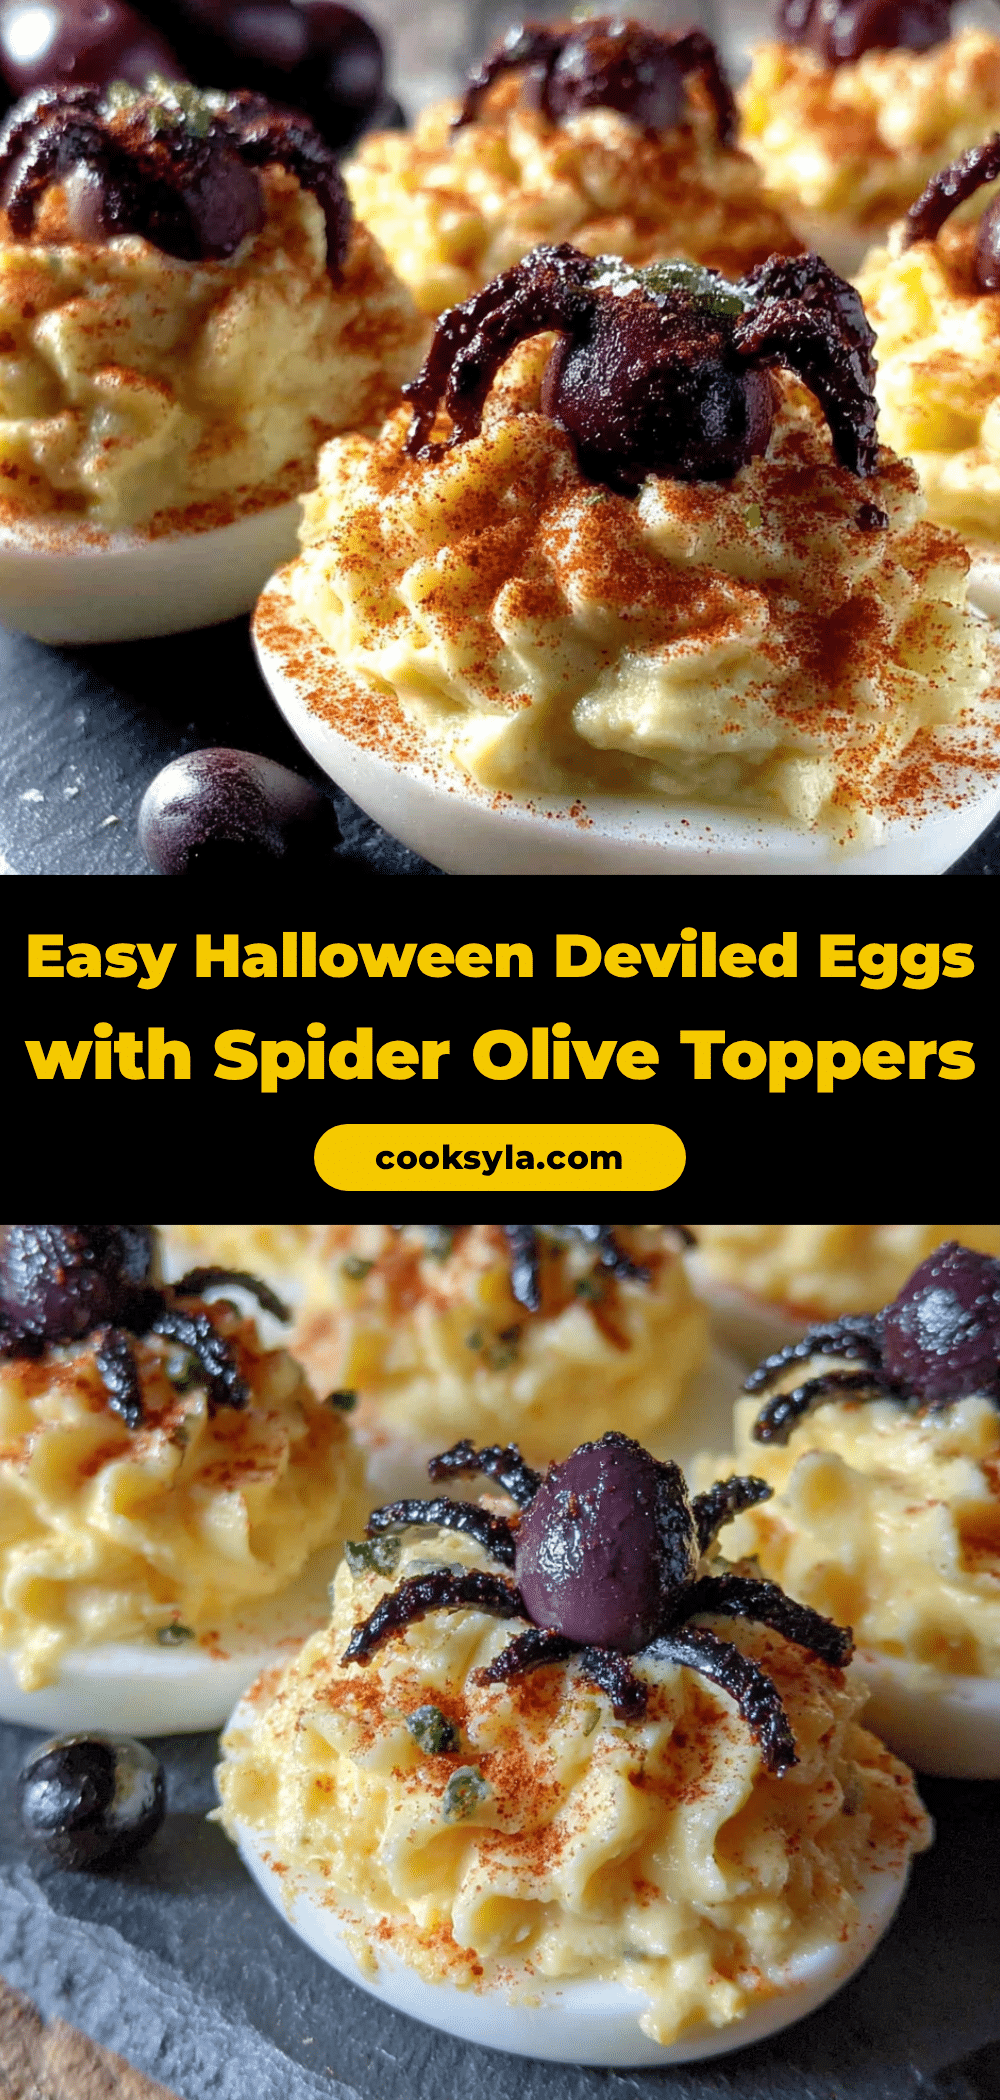
Easy Halloween Deviled Eggs with Spider Olive Toppers
These creepy-cute deviled eggs are topped with olive spiders for a spooky Halloween appetizer. Quick to make with simple ingredients, they’re the perfect party snack that will have guests doing a double-take.
- Prep Time: 20 minutes
- Cook Time: 10 minutes
- Total Time: 30 minutes
- Yield: 12 deviled eggs (6 servings of 2 eggs each) 1x
- Category: Appetizer
- Cuisine: American
Ingredients
- 6 large eggs (room temperature)
- 3 tablespoons mayonnaise (Hellmann’s or Duke’s preferred)
- 1 teaspoon yellow mustard
- 1/2 teaspoon white vinegar (optional)
- Salt and black pepper to taste
- Paprika for dusting (smoked or sweet)
- 6 whole black olives (large, pitted)
- 12 black olive slices (for legs)
Instructions
- Boil the eggs: Place eggs in a single layer in a medium saucepan. Cover with cold water by about an inch. Bring to a rolling boil over high heat, then immediately cover the pot, remove from heat, and let sit for exactly 10 minutes.
- Ice bath: While eggs sit, fill a large bowl with ice and cold water. Transfer eggs to ice bath using a slotted spoon. Let chill for at least 5 minutes to stop cooking and make peeling easier.
- Peel the eggs: Gently tap each egg on the counter to crack the shell all over, then roll between palms to loosen. Start peeling from the wider end. Rinse off any shell bits under cool water.
- Cut and separate: Slice each egg in half lengthwise. Pop out yolks into a small bowl. Arrange white halves on serving platter, cut side up.
- Make the filling: Add mayonnaise, mustard, vinegar (if using), salt, and pepper to the yolks. Mash together with a fork until smooth and creamy. Taste and adjust seasoning as needed.
- Fill the eggs: Spoon yolk mixture into a piping bag or zip-top bag. Snip off a small corner and pipe filling into each egg white half. Alternatively, spoon it in.
- Make the spiders: Cut each whole black olive in half lengthwise. Use one half per spider body. For legs, cut each olive slice in half again to create thin strips. You need 8 legs per spider.
- Assemble the spiders: Gently press two olive leg strips on each side of the olive body half to create 8 legs. Place one spider on each deviled egg, pressing legs into the filling.
- Finish and serve: Lightly dust eggs with paprika using a fine-mesh sieve. Serve immediately or refrigerate until ready.
Notes
Use eggs that are at least a week old for easier peeling. For the olive legs, cut slices into thin strips and press into the filling to help them stay in place. You can boil and peel eggs up to 2 days ahead; make filling up to 1 day ahead. Assemble day of party for best presentation. Do not freeze.
Nutrition
- Serving Size: 2 deviled eggs
- Calories: 170
- Sodium: 360
- Fat: 12
- Saturated Fat: 3
- Carbohydrates: 2
- Protein: 12
Keywords: Halloween deviled eggs, spider deviled eggs, Halloween appetizer, spooky snacks, deviled eggs with olives, easy Halloween recipe


