Love this? Save it for later!
Share the inspiration with your friends
There used to be a tiny sandwich shop tucked behind a laundromat on Grand Avenue that made these incredible spiral sandwiches. When they closed suddenly three summers ago—just a handwritten sign taped to the door saying “Thanks for the memories”—I genuinely felt a little lost. Their ham and cheese pinwheels were my Tuesday lunch ritual for years. After maybe eight attempts—some where the filling slid right out, others where the tortillas cracked like old leather—I finally nailed it. This version actually tastes better than the original, if I’m being honest.
I remember standing in my kitchen that first failed attempt, cream cheese smeared on my favorite apron, wondering why I couldn’t just let a good sandwich memory stay in the past. But that’s the thing about food, you know? Sometimes you just have to chase the taste. The shop used to use this specific blend of seasonings I could never quite identify, and their pinwheels held together perfectly without getting soggy by lunchtime. After testing different cream cheese ratios and wrapping techniques, I figured out their secrets.
What surprises most people about these pinwheels is how the flavors actually get better after sitting in the fridge for a few hours. The first time I made a batch for a picnic, I packed them immediately—big mistake. They were fine, but not amazing. The next time, I let them rest overnight, and something magical happened. The ham infused the cream cheese, the cheese softened just enough, and every bite tasted like it had been carefully planned. Maybe you’ve had that moment where leftovers taste better than the original meal? That’s exactly what’s happening here.
These aren’t just sandwiches—they’re little spirals of nostalgia that actually work for real life. I keep making them because they solve that weird lunch problem where you want something satisfying but don’t want to spend thirty minutes assembling. Plus, they travel better than any regular sandwich I’ve ever made. No sad, soggy bread here.
Why You’ll Love This Recipe
Honestly, these ham and cheese pinwheel sandwiches have saved my lunch routine more times than I can count. They’re the kind of recipe that looks fancy enough for guests but takes almost no real effort—my favorite kind of cooking trick.
- Quick & Easy: Comes together in about 15 minutes of active prep time. Perfect for those mornings when you’re packing lunches at 7 AM and your brain isn’t fully awake yet.
- Simple Ingredients: You probably have most of these in your fridge right now. No special trips to fancy grocery stores needed—just basic deli staples.
- Perfect for Meal Prep: Make them Sunday night, and you’ve got lunches sorted for the next three days. They actually taste better on day two.
- Crowd-Pleaser: Kids devour these, adults sneak extras, and somehow they disappear at every potluck I’ve brought them to.
- Unbelievably Delicious: The cream cheese filling with ranch seasoning creates this tangy, creamy base that perfectly balances the salty ham and melty cheddar. It’s just—really, really good.
What makes this version different from other pinwheel recipes? It’s the resting time and the filling technique. Most recipes tell you to roll and slice immediately, but that’s where things fall apart—literally. Letting the rolled tortillas chill for at least two hours creates clean slices that actually hold their shape. The cream cheese mixture needs to be whipped until completely smooth too; nobody wants lumpy filling in their pinwheels.
This recipe isn’t just good—it’s the kind that makes you close your eyes after the first bite. It’s comfort food reimagined, faster and simpler, but with the same soul-soothing satisfaction. Perfect for impressing lunch guests without stress, or turning a simple weekday lunch into something memorable.
What Ingredients You Will Need
This recipe uses simple, mostly pantry-stable ingredients to deliver bold flavor and satisfying texture without the fuss. Here’s everything you’ll need:
- 4 large flour tortillas (burrito size, about 10 inches—I prefer Mission brand for flexibility, but any brand works)
- 8 ounces cream cheese, softened to room temperature (full-fat works best for texture, but Neufchâtel is fine too)
- 1/2 cup shredded cheddar cheese (sharp cheddar adds more flavor, but mild works in a pinch)
- 8 slices deli ham (honey ham or black forest ham both work great—just avoid super thick slices)
- 1/4 cup finely chopped green onions (about 3-4 stalks, white and light green parts only)
- 1 packet ranch seasoning mix (the 1-ounce packet—Hidden Valley is my go-to)
- 1 tablespoon Dijon mustard (optional but recommended for a little tang)
- 1/4 teaspoon garlic powder (adds depth without being overpowering)
- 1/4 teaspoon black pepper (freshly ground if you have it)
A few notes on ingredients: The cream cheese absolutely needs to be at room temperature. I’ve made the mistake of using cold cream cheese, and it creates this lumpy mess that refuses to spread evenly. Just leave it on the counter for about 30 minutes before you start. For the tortillas, look for ones that are pliable and not too dry around the edges. If your tortillas seem stiff, microwave them for about 10 seconds wrapped in a damp paper towel—they’ll roll much easier.
For the ham, I recommend getting it sliced medium-thin from the deli counter rather than using pre-packaged slices. The pre-packaged stuff tends to be too thin and tears easily when you roll. You want slices that are sturdy enough to hold their shape but thin enough to roll without creating bulges. If you’re feeling fancy, you can substitute turkey or roast beef for the ham—the recipe works beautifully with either.
One substitution tip: If you don’t have ranch seasoning, you can use 1 teaspoon dried dill, 1 teaspoon dried parsley, 1/2 teaspoon onion powder, and 1/2 teaspoon garlic powder mixed together. It’s not exactly the same, but it gets you close. For a dairy-free version, use vegan cream cheese and dairy-free shredded cheese—just note the texture will be slightly different.
Equipment Needed
You don’t need much fancy equipment for these pinwheels, which is part of why I love this recipe so much.
- Large mixing bowl (for the cream cheese mixture)
- Hand mixer or stand mixer (a wooden spoon works too, but the mixture gets much smoother with a mixer)
- Rubber spatula (for scraping every last bit of that delicious filling)
- Sharp knife (a serrated knife works best for clean slices without squishing the pinwheels)
- Cutting board (preferably one with a non-slip bottom)
- Plastic wrap (for wrapping the rolls tightly)
- Baking sheet or large plate (for chilling the rolls in the fridge)
- Toothpicks (optional, but helpful for securing pinwheels if you’re transporting them)
If you don’t have a hand mixer, you can absolutely whip the cream cheese by hand—just make sure it’s really soft first, and be prepared for a little arm workout. I’ve done it both ways, and honestly, the hand-mixed version tastes just as good. The key is making sure there are no lumps, so take your time.
Preparation Method
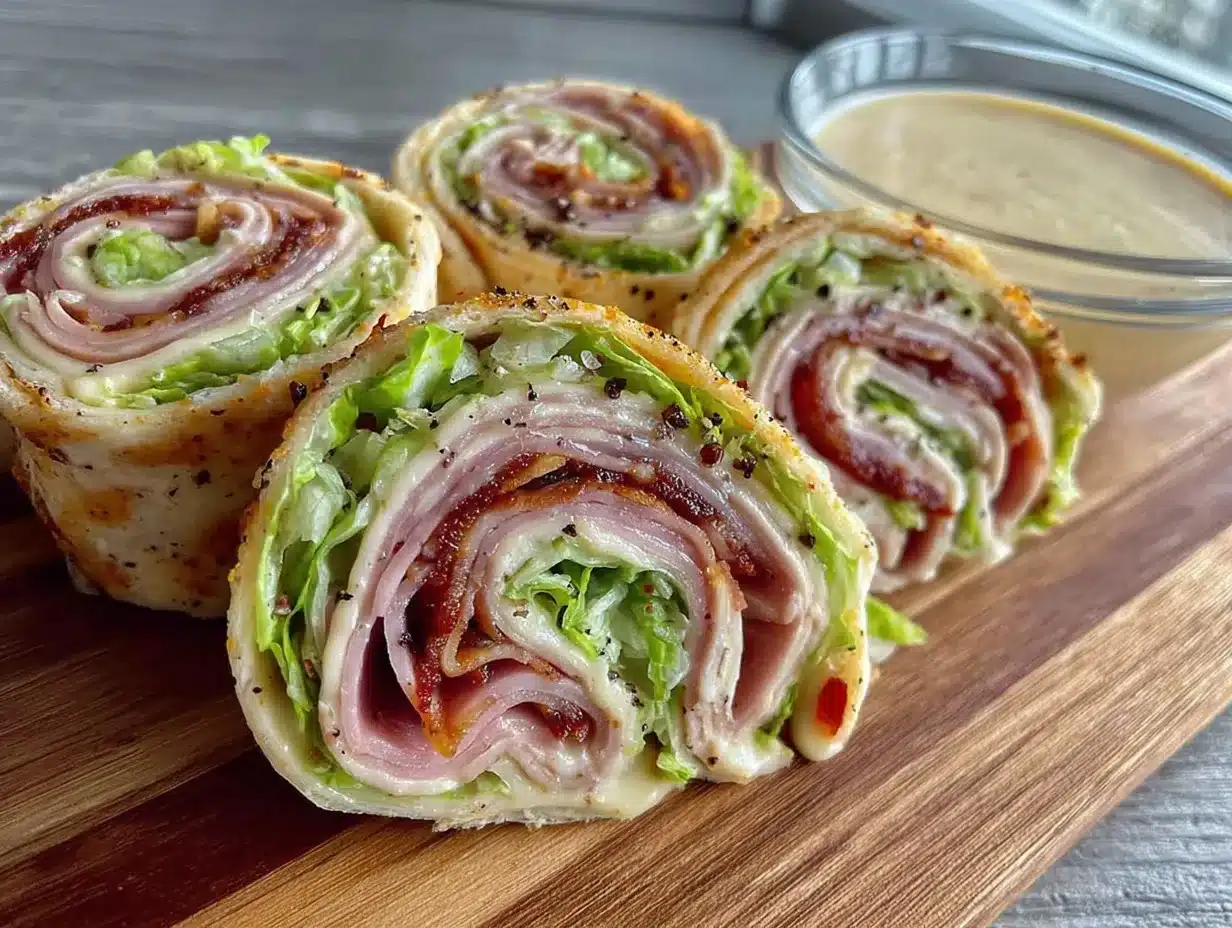
Let me walk you through this step by step. Trust me on the resting time—it makes all the difference.
- Soften the cream cheese. Take your cream cheese out of the fridge about 30 minutes before starting. It should be soft enough that you can easily press a finger into it. If you’re in a hurry, microwave it for 10-15 seconds in a bowl—but watch it carefully. Nobody wants melted cream cheese.
- Make the filling. In your large mixing bowl, combine the softened cream cheese, ranch seasoning, Dijon mustard, garlic powder, and black pepper. Beat with your hand mixer on medium speed until completely smooth and fluffy—about 2 minutes. Scrape down the sides with your spatula halfway through. Fold in the shredded cheddar cheese and chopped green onions by hand.
- Prepare your work surface. Lay your tortillas flat on the cutting board. If they seem stiff, microwave them for 10 seconds between damp paper towels. They should be pliable but not hot.
- Spread the filling. Divide the cream cheese mixture evenly among the four tortillas (about 1/3 cup each). Use your spatula to spread it all the way to the edges—this is important because the edges need filling to seal properly. Don’t leave a border like you would for a regular wrap.
- Layer the ham. Place 2 slices of ham on each tortilla, overlapping them slightly. Try to cover the entire surface area of the tortilla evenly. If your ham slices are small, you might need three per tortilla.
- Roll them tight. Starting at one edge, roll each tortilla as tightly as you can without squeezing the filling out the sides. Think of it like rolling a sleeping bag—firm but gentle. The tighter you roll, the prettier your pinwheels will look.
- Wrap and chill. Wrap each rolled tortilla individually in plastic wrap, twisting the ends like a candy wrapper. Place them on a baking sheet or plate and refrigerate for at least 2 hours. Overnight is even better. This step is non-negotiable—I learned this the hard way after making sad, falling-apart pinwheels for a picnic.
- Slice and serve. When you’re ready to serve, unwrap each roll and place it on your cutting board. Using a sharp serrated knife, slice each roll into 1-inch pieces. A gentle sawing motion works better than pressing straight down. You should get about 6-8 pinwheels per tortilla, depending on size.
- Arrange and enjoy. Place the pinwheels on a serving platter, cut side up so everyone can see those pretty spirals. If you’re packing them for lunch, arrange them in a container with a slightly damp paper towel on top to keep them from drying out.
A quick note about timing: The active prep time is about 15 minutes, but don’t forget to account for the 2-hour chilling time. I usually make these the night before I need them, and it makes morning lunch-packing so much easier.
Cooking Tips & Techniques
After making these pinwheels probably fifty times, I’ve collected some hard-won wisdom. Let me share the stuff I wish someone had told me.
Temperature matters more than you think. Cold tortillas crack. Cold cream cheese doesn’t spread. Room temperature ingredients are your friends here. I learned this after a particularly frustrating batch where the tortillas literally split down the middle as I tried to roll them. Now I let everything sit out for at least 20 minutes before I start.
The filling consistency is everything. Your cream cheese mixture should be spreadable but not runny. If it seems too thick, add a teaspoon of milk or water. If it seems too thin, pop it in the fridge for 10 minutes to firm up. You want it to spread like butter—smooth and even.
Don’t skip the plastic wrap. I know it seems wasteful, but wrapping each roll individually in plastic wrap is what keeps them tight and round. Without it, the rolls loosen up in the fridge and you get oval-shaped pinwheels that don’t look as nice. If you’re eco-conscious, beeswax wraps work too—just make sure they’re tight.
The knife matters. I ruined an entire batch using a dull knife. The soft filling squished out, the ham got all torn up, and I ended up with a plate of sad, messy spirals. A sharp serrated knife gives you clean cuts. If your knife is sticking, wipe it clean between cuts.
My biggest failure was the time I tried to rush the chilling process. I had friends coming over in an hour, so I only chilled the rolls for 30 minutes. Big mistake. The pinwheels fell apart immediately, and I spent the whole party apologizing for the messy appetizers. Now I plan ahead—these are not a last-minute recipe.
Variations & Adaptations
One of the best things about this recipe is how flexible it is. Here are some variations I’ve tried and loved:
Turkey and Swiss Pinwheels: Swap the ham for thinly sliced turkey breast and use Swiss cheese instead of cheddar. Add a tablespoon of honey mustard to the cream cheese mixture for a sweet-tangy twist. This version is a little lighter tasting and perfect for spring lunches.
Veggie Cream Cheese Pinwheels: Skip the ham entirely and double up on the veggies. Add finely chopped bell peppers, shredded carrots, and cucumber slices to the cream cheese mixture. This version is surprisingly satisfying and holds up beautifully in lunch boxes.
Spicy Southwest Pinwheels: Use pepper jack cheese instead of cheddar, add 1/4 cup finely chopped pickled jalapeños to the cream cheese mixture, and swap the ham for sliced roast beef. The heat level is adjustable—start with less jalapeño if you’re sensitive to spice.
Breakfast Pinwheels: This is my personal favorite variation. Use scrambled eggs instead of ham, add crumbled bacon, and use a mild cheddar. Spread the cream cheese mixture thinner and roll carefully. These are amazing for brunch or a grab-and-go breakfast.
For gluten-free adaptations, use large gluten-free tortillas—just be extra gentle when rolling because they tend to be more fragile. For a lower-carb version, use low-carb tortillas or large lettuce leaves. Lettuce wraps work but won’t hold up as long in the fridge.
Serving & Storage Suggestions
These pinwheels are surprisingly versatile when it comes to serving. Here’s what works best.
Serving temperature: I prefer them cold or at room temperature. Straight from the fridge, they’re firm and refreshing. If you let them sit out for about 10 minutes, the cream cheese softens slightly and the flavors open up more. For parties, I arrange them on a platter with some fresh herbs sprinkled on top for color.
What to serve with them: These pinwheels pair beautifully with a simple side salad, some fresh fruit, or a cup of tomato soup. For a lunch spread, I’ll add some pickle spears, baby carrots, and maybe some chips. They’re also great alongside a bowl of chili or vegetable soup.
Storage instructions: Keep your pinwheels in an airtight container in the refrigerator for up to 3 days. Place a slightly damp paper towel on top of the pinwheels before sealing the container—this prevents them from drying out. I don’t recommend freezing these, as the cream cheese texture changes when thawed and can become grainy.
Reheating tips: Honestly, I don’t recommend reheating these. They’re designed to be served cold. If you really want a warm version, you can microwave individual pinwheels for about 10 seconds, but the texture won’t be the same. For a warm appetizer, try making these as sliders instead.
Flavor development: Here’s something interesting—these pinwheels actually taste better on day two. The flavors meld together overnight, and the cream cheese mixture absorbs the ham and seasoning flavors more deeply. If you can plan ahead, making them a day before you need them is the move.
Nutritional Information & Benefits
Here are the approximate nutritional values per pinwheel (based on 8 pinwheels per tortilla, 4 tortillas total, making 32 pinwheels):
| Nutrient | Amount per Pinwheel |
|---|---|
| Calories | 85 |
| Total Fat | 5g |
| Saturated Fat | 3g |
| Cholesterol | 20mg |
| Sodium | 210mg |
| Total Carbohydrates | 6g |
| Dietary Fiber | 0.5g |
| Sugars | 1g |
| Protein | 4g |
These pinwheels offer a good balance of protein and carbohydrates for sustained energy. The cream cheese provides calcium and vitamin A, while the ham offers B vitamins and iron. If you’re watching your sodium intake, look for low-sodium ham or reduce the ranch seasoning slightly. For a lower-fat version, use Neufchâtel cheese and reduced-fat cheddar. This recipe is naturally nut-free and egg-free, making it safe for many common allergies.
Conclusion
These ham and cheese pinwheel sandwiches have become a staple in my kitchen for good reason. They’re simple enough for a busy weekday lunch but pretty enough for company. The recipe is forgiving—you can swap ingredients, adjust seasonings, and experiment with different fillings without worrying about ruining anything.
I love that this recipe solves the eternal lunch problem: something that’s satisfying, portable, and doesn’t require reheating. Whether you’re packing school lunches, preparing for a picnic, or just want something ready in the fridge for when hunger strikes, these pinwheels deliver every time.
I’d love to hear how yours turn out! Drop a comment below and let me know what variations you tried—did you go spicy with jalapeños or keep it classic? Share your photos on Pinterest and tag me so I can see your beautiful spirals. And if you have a favorite filling combination I haven’t mentioned, please share it! Happy rolling, friends!
Frequently Asked Questions
Can I make these pinwheels ahead of time?
Absolutely! In fact, they taste better when made a day in advance. The flavors meld together overnight, and the pinwheels hold their shape better after a long chill. Just keep them wrapped tightly in plastic wrap until you’re ready to slice and serve.
Why are my pinwheels falling apart?
This usually happens for one of three reasons: the cream cheese wasn’t soft enough to spread evenly, you didn’t chill them long enough (minimum 2 hours), or you used a dull knife to slice them. Fix these issues, and your pinwheels will hold together beautifully.
Can I use different types of cheese?
Yes! Cheddar is classic, but Swiss, provolone, pepper jack, or even mozzarella work great. Just make sure whatever cheese you use is shredded finely so it incorporates evenly into the cream cheese mixture.
How long do these pinwheels last in the fridge?
They’ll stay fresh for up to 3 days in an airtight container. After that, the tortillas start to get a little soggy. I don’t recommend freezing them, as the cream cheese texture changes when thawed.
Can I make these gluten-free?
Yes! Just use large gluten-free tortillas. Be aware that gluten-free tortillas are often more fragile, so roll them gently and don’t overfill them. The chilling time is especially important for gluten-free versions to help them hold their shape.
Pin This Recipe!

Easy Ham and Cheese Pinwheel Sandwiches

These ham and cheese pinwheel sandwiches are quick, easy, and perfect for meal prep. With a creamy ranch-seasoned filling, they taste even better after resting in the fridge.
- Prep Time: 15 minutes
- Cook Time: 0 minutes
- Total Time: 2 hours 15 minutes (includes chilling)
- Yield: 32 pinwheels 1x
- Category: Appetizer
- Cuisine: American
Ingredients
- 4 large flour tortillas (burrito size, about 10 inches)
- 8 ounces cream cheese, softened to room temperature
- 1/2 cup shredded cheddar cheese
- 8 slices deli ham (honey ham or black forest ham)
- 1/4 cup finely chopped green onions (about 3–4 stalks, white and light green parts only)
- 1 packet ranch seasoning mix (1-ounce packet)
- 1 tablespoon Dijon mustard (optional)
- 1/4 teaspoon garlic powder
- 1/4 teaspoon black pepper
Instructions
- Soften the cream cheese: Take cream cheese out of fridge 30 minutes before starting, or microwave for 10-15 seconds in a bowl.
- Make the filling: In a large mixing bowl, combine softened cream cheese, ranch seasoning, Dijon mustard, garlic powder, and black pepper. Beat with a hand mixer on medium speed until smooth and fluffy, about 2 minutes. Fold in shredded cheddar cheese and chopped green onions.
- Prepare work surface: Lay tortillas flat on a cutting board. If stiff, microwave for 10 seconds between damp paper towels.
- Spread the filling: Divide cream cheese mixture evenly among tortillas (about 1/3 cup each). Spread to the edges using a spatula.
- Layer the ham: Place 2 slices of ham on each tortilla, overlapping slightly to cover the surface.
- Roll them tight: Starting at one edge, roll each tortilla tightly without squeezing filling out the sides.
- Wrap and chill: Wrap each rolled tortilla individually in plastic wrap, twisting ends. Refrigerate for at least 2 hours, preferably overnight.
- Slice and serve: Unwrap rolls and slice into 1-inch pieces using a sharp serrated knife with a gentle sawing motion. You should get 6-8 pinwheels per tortilla.
- Arrange and enjoy: Place pinwheels on a serving platter cut side up. For lunch, pack in a container with a slightly damp paper towel on top.
Notes
Cream cheese must be at room temperature for smooth spreading. Chilling for at least 2 hours is essential for clean slices. These taste better on day two as flavors meld. For gluten-free, use large gluten-free tortillas and roll gently. For lower-carb, use low-carb tortillas or lettuce leaves (lettuce won’t hold as long).
Nutrition
- Serving Size: 1 pinwheel
- Calories: 85
- Sugar: 1
- Sodium: 210
- Fat: 5
- Saturated Fat: 3
- Carbohydrates: 6
- Fiber: 0.5
- Protein: 4
Keywords: ham and cheese pinwheels, easy appetizer, lunch recipe, meal prep, pinwheel sandwiches, cream cheese pinwheels


