Love this? Save it for later!
Share the inspiration with your friends
My sister-in-law, Claire, had sworn off pumpkin desserts for over a decade. A bad pumpkin pie incident at a Thanksgiving potluck in 2012—something about undercooked custard and a soggy crust—had scarred her for life. Then last October, I found her standing in my kitchen, spoon in hand, scraping the last bit of filling from a mini cheesecake bite. “Don’t say a word,” she mumbled, reaching for another one.
I didn’t say anything. I just smiled and handed her the plate.
That’s the thing about these Easy No-Bake Pumpkin Pie Cheesecake Bites. They sneak up on you. I honestly didn’t think three simple ingredients could pull off such a convincing pumpkin dessert. But the first time I made them—using a bag of pumpkin I had forgotten in the back of my pantry—I was genuinely surprised. The texture was creamy, the flavor was spot-on, and there was zero oven time involved. I mean, come on. That’s practically a miracle during the holiday chaos.
Maybe you’ve been there too. You want a pumpkin dessert that feels special but doesn’t require pulling out the mixer, rolling out dough, or waiting for something to bake. These bites are exactly that. They’re the kind of treat you can whip up while the turkey rests or the kids are coloring at the kitchen table. No stress, no mess, just pure pumpkin satisfaction.
Honestly, this recipe has become my secret weapon for fall gatherings. It’s the one people ask for by name, the one that converts pumpkin skeptics into pumpkin lovers one tiny bite at a time. And I keep making it because it proves that sometimes the simplest things are the ones that stick with you.
Why You’ll Love This Recipe
Let me tell you why these little bites have earned a permanent spot in my fall rotation. After testing this recipe about seven times (someone had to do it), I can confidently say these are the real deal.
- Quick & Easy: These come together in under 15 minutes of active prep. No baking, no water baths, no complicated techniques. Just mix, shape, and chill.
- Simple Ingredients: You only need three main ingredients. Seriously. I’m not exaggerating. Chances are you already have most of them in your pantry or fridge right now.
- Perfect for Fall Gatherings: These bites are ideal for Thanksgiving, Friendsgiving, Halloween parties, or cozy movie nights. They look impressive on a platter but require almost no effort.
- Crowd-Pleaser: I’ve served these to pumpkin lovers and pumpkin haters alike. The haters always come back for seconds. Claire is living proof.
- Unbelievably Delicious: The texture is silky and rich, like a mini cheesecake but lighter. The pumpkin pie spice flavor hits all the right cozy notes without being overpowering.
What makes this recipe different from every other pumpkin dessert out there? It’s the texture. By using the right ratio of cream cheese to pumpkin puree, you get a filling that’s firm enough to hold its shape but still melts in your mouth. No gelatin, no complicated steps. Just a perfectly balanced bite every time.
This isn’t just another pumpkin recipe. It’s the kind of dessert that makes you close your eyes after the first bite. It’s comfort food reimagined—healthier than a full slice of cheesecake, faster than a pie, but with the same soul-soothing satisfaction. Perfect for impressing guests without breaking a sweat, or turning a simple Tuesday night into something memorable.
What Ingredients You Will Need
This recipe uses simple, wholesome ingredients to deliver bold flavor and a satisfying texture without the fuss. Everything is easy to find at your local grocery store, and most items are pantry staples during the fall season.
For the Cheesecake Filling
- 8 ounces cream cheese, softened (Full-fat works best for the creamiest texture. I prefer Philadelphia brand for consistent results. Let it sit on the counter for 30 minutes before starting.)
- 1 cup pumpkin puree (Not pumpkin pie filling! Look for 100% pure pumpkin. Libby’s is my go-to brand. If you’re using fresh pumpkin, make sure it’s well-drained to avoid watery bites.)
- 1/2 cup powdered sugar (Adds sweetness without grittiness. You can adjust this to taste if you prefer less sweet bites. For a lower-sugar option, use a powdered monk fruit sweetener.)
- 1 teaspoon pumpkin pie spice (Store-bought is fine, but I love making my own blend with cinnamon, nutmeg, ginger, and cloves. It smells incredible.)
- 1/2 teaspoon vanilla extract (Pure vanilla extract adds warmth and depth. Imitation vanilla works in a pinch, but the real stuff makes a difference.)
For the Coating
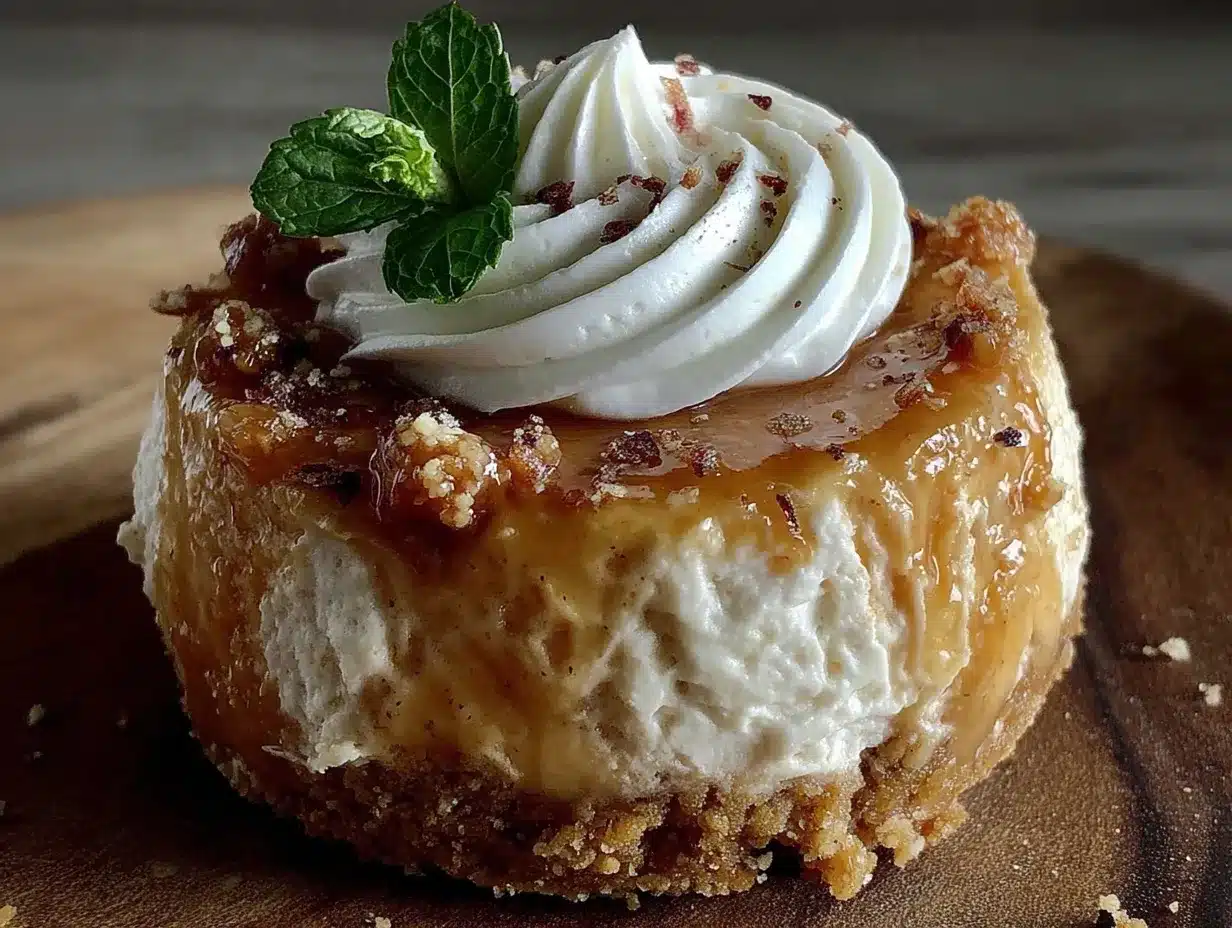
- 1 cup graham cracker crumbs (You can buy pre-crushed crumbs or crush your own. For a gluten-free version, use gluten-free graham crackers or crushed almonds.)
- 2 tablespoons melted butter (Salted or unsalted both work. If using unsalted, add a tiny pinch of salt to the crumbs.)
Optional Toppings
- Whipped cream (For serving. Homemade is lovely, but store-bought is perfectly fine.)
- Extra pumpkin pie spice (For dusting on top. It makes them look extra pretty.)
- Mini chocolate chips (A fun addition if you want a chocolate-pumpkin combo. White chocolate chips work great too.)
Ingredient selection tip: Make sure your cream cheese is truly softened. Cold cream cheese will leave lumps in your filling, and nobody wants a lumpy cheesecake bite. If you forget to take it out ahead of time, microwave it in 10-second bursts until it’s soft but not melted.
Substitution guidance: For a dairy-free version, use vegan cream cheese and a dairy-free butter alternative. The texture will be slightly different, but still delicious. For a lower-carb option, substitute the graham cracker crumbs with crushed pecans or almond flour mixed with a little butter.
Equipment Needed
You don’t need any fancy equipment for these bites, which is one of the reasons I love this recipe so much. Here’s what you’ll need:
- Mixing bowl (Any medium-sized bowl will work. I use a glass one because it’s easy to see when everything is combined.)
- Hand mixer or stand mixer (A hand mixer makes the filling smooth and fluffy. You can also mix by hand with a wooden spoon, but it takes a bit more elbow grease to get rid of lumps.)
- Measuring cups and spoons (For accuracy. Eyeballing it can lead to a filling that’s too wet or too dry.)
- Small cookie scoop or tablespoon (For portioning the bites evenly. A cookie scoop makes them uniform and professional-looking.)
- Baking sheet or plate (To hold the bites while they chill. Line it with parchment paper for easy cleanup.)
- Small bowl (For mixing the graham cracker coating.)
- Plastic wrap (To cover the bites while they set in the fridge.)
If you don’t have a cookie scoop, just use a regular tablespoon. The bites don’t need to be perfectly round—a little rustic charm is part of their appeal. I’ve also used a melon baller in a pinch, and it worked great. For the graham cracker crumbs, a food processor makes quick work of crushing whole crackers, but a zip-top bag and a rolling pin work just as well. Trust me, I’ve done it both ways.
Preparation Method
Follow these steps, and you’ll have perfect no-bake pumpkin cheesecake bites ready to chill in no time. I’ve included all the little details I wish someone had told me the first time I made these.
- Prepare the graham cracker coating. In a small bowl, combine 1 cup of graham cracker crumbs with 2 tablespoons of melted butter. Mix with a fork until the crumbs are evenly moistened. Set this aside. The mixture should look like wet sand. If it’s too dry, add another teaspoon of melted butter. If it’s too wet, add a tablespoon more crumbs.
- Soften the cream cheese. Take your 8 ounces of cream cheese out of the fridge about 30 minutes before you start. Cut it into cubes to speed things up. You want it to be room temperature so it blends smoothly. If you’re in a hurry, microwave it in 10-second intervals until it’s soft to the touch but not hot. Trust me, hot cream cheese will ruin the texture.
- Mix the filling base. Place the softened cream cheese in a medium mixing bowl. Beat it with a hand mixer on medium speed for about 1 minute until it’s smooth and creamy. Scrape down the sides of the bowl with a spatula. This step is important—you don’t want any hidden lumps of cream cheese hiding in there.
- Add the pumpkin and sweetener. Add 1 cup of pumpkin puree, 1/2 cup of powdered sugar, 1 teaspoon of pumpkin pie spice, and 1/2 teaspoon of vanilla extract to the bowl. Beat on low speed until everything is combined, about 30 seconds. Scrape the sides and bottom of the bowl, then beat on medium speed for another 30 seconds until the mixture is smooth and fluffy. It should look like a thick, creamy mousse. If it looks too runny, your pumpkin puree might have been too watery. Don’t worry—it will firm up as it chills.
- Chill the filling briefly. Cover the bowl with plastic wrap and pop it in the fridge for about 15 to 20 minutes. This makes the filling easier to handle and shape. Don’t skip this step, or the bites will be too sticky to roll. I learned this the hard way after my first batch turned into a pumpkin-smeared mess on my hands.
- Portion the filling. Line a baking sheet or large plate with parchment paper. Use a small cookie scoop or a tablespoon to scoop out even portions of the filling. Aim for about 1 to 1.5 tablespoons per bite. You should get around 18 to 20 bites. Place the scoops on the prepared sheet, spacing them about an inch apart.
- Shape the bites. Lightly wet your hands with cold water (this prevents sticking). Roll each portion into a smooth ball between your palms. If the filling starts sticking too much, rinse your hands again. Place the rolled balls back on the parchment-lined sheet. This step goes quickly once you get into a rhythm.
- Coat the bites. Take each rolled ball and gently roll it in the graham cracker mixture until it’s evenly coated. Use your fingers to press the crumbs gently into the surface if needed. Place the coated bites back on the parchment-lined sheet. Don’t worry if some crumbs fall off—they’ll stick better as the bites chill.
- Chill until firm. Cover the baking sheet with plastic wrap and refrigerate for at least 2 hours. For best results, chill them for 4 hours or overnight. The bites will firm up nicely and develop a better texture as they rest. If you’re in a rush, you can pop them in the freezer for 30 minutes, but watch them carefully so they don’t freeze solid.
- Serve and enjoy. Once the bites are firm, transfer them to a serving platter. If you like, top each one with a tiny dollop of whipped cream and a sprinkle of extra pumpkin pie spice. Serve them cold straight from the fridge. They’re best within 3 to 4 days, but honestly, they rarely last that long in my house.
Cooking Tips & Techniques
After making these bites more times than I care to count, I’ve picked up a few tricks that make the process smoother and the results even better. Let me share them with you.
Don’t overmix the filling. Once you add the pumpkin and powdered sugar, mix just until everything is combined. Overmixing can incorporate too much air, which makes the filling slightly grainy instead of silky smooth. I found this out when I got distracted by a phone call and kept mixing. The texture was off, and I had to start over.
Watch your pumpkin puree. Some brands of pumpkin puree are more watery than others. If your puree looks thin or has liquid pooling on top, drain it through a fine-mesh sieve or paper towel before using. Just press gently to remove excess moisture. This prevents the filling from being too soft to shape. I once used a generic brand that was super watery, and the bites never set properly. Lesson learned.
Chill your hands. When rolling the bites, run your hands under cold water every few bites. The cold helps the filling hold its shape and prevents it from sticking to your palms. It’s a small trick, but it makes a huge difference. I keep a small bowl of ice water nearby when I’m making a big batch.
Use a light touch for coating. When rolling the bites in the graham cracker crumbs, be gentle. Pressing too hard can flatten the balls or push the crumbs into the filling unevenly. A light, rolling motion works best. Think of it like you’re handling a delicate truffle.
Plan ahead for the best texture. These bites truly benefit from an overnight chill. The flavors meld together, and the texture becomes perfectly creamy and firm. If you’re serving them for a party, make them the day before. Your future self will thank you.
Common mistake to avoid: Using cold cream cheese straight from the fridge. I know I’ve said this already, but it’s worth repeating. Cold cream cheese creates lumps that are nearly impossible to beat out completely. Take the extra 30 minutes to soften it. Your bites will be smoother, creamier, and so much more enjoyable.
Variations & Adaptations
One of the best things about this recipe is how easy it is to customize. Here are some variations I’ve tried and loved.
Chocolate Pumpkin Bites: Add 2 tablespoons of cocoa powder to the filling mixture. The chocolate and pumpkin combination is surprisingly good. I made these for a Halloween party, and they disappeared faster than the regular ones. You can also roll them in crushed chocolate wafers instead of graham crackers for extra chocolate flavor.
Vegan Version: Use vegan cream cheese and a plant-based butter alternative. I’ve tried this with Kite Hill brand cream cheese, and it worked beautifully. The texture is slightly less firm, but the flavor is still fantastic. Just be sure to chill them for at least 4 hours to help them set properly.
Gluten-Free Option: Swap the graham cracker crumbs for crushed gluten-free graham crackers or finely ground almonds. Toasted almond flour mixed with a little melted butter and cinnamon makes a delicious alternative. I’ve also used crushed gluten-free shortbread cookies with great results.
Keto/Low-Carb Adaptation: Replace the powdered sugar with a powdered erythritol or monk fruit sweetener. For the coating, use crushed pecans or almond flour mixed with butter and a pinch of cinnamon. These are still creamy and satisfying, just with fewer carbs. My neighbor who follows keto absolutely loves these.
Spiced Up Version: Add an extra 1/2 teaspoon of cinnamon and a pinch of cayenne pepper to the filling. The heat from the cayenne pairs beautifully with the sweet pumpkin and spice. I tried this on a whim one chilly November evening, and now it’s my go-to variation when I want something a little different.
Pumpkin Cheesecake Bites with Crust: Instead of rolling the bites in crumbs, press the graham cracker mixture into the bottom of a mini muffin tin lined with paper liners. Spoon the filling on top and chill until set. These look like tiny cheesecakes and are perfect for parties. Just be sure to use a mini muffin tin, not a regular one.
Serving & Storage Suggestions
These bites are best served cold, straight from the fridge. The cool, creamy texture is part of what makes them so addictive. Arrange them on a beautiful platter or cake stand for a stunning presentation. A dusting of extra pumpkin pie spice or a tiny dollop of whipped cream on each bite takes them from simple to special in seconds.
For a dessert board, pair these bites with fresh apple slices, candied pecans, and a warm mug of spiced cider. They also go beautifully with a cup of coffee or a glass of cold milk. If you’re serving them after a big meal, they’re light enough to feel like a treat without weighing anyone down.
Storage instructions: Store leftover bites in an airtight container in the refrigerator. They’ll stay fresh for up to 5 days, though the texture is best within the first 3 days. Layer them between sheets of parchment paper to prevent them from sticking together. I’ve also stored them in a single layer in a shallow container with a tight-fitting lid.
Freezer instructions: These bites freeze beautifully! Place them on a baking sheet in a single layer and freeze until solid, about 1 hour. Then transfer them to a freezer-safe bag or container. They’ll keep for up to 3 months. When you’re ready to enjoy them, let them thaw in the refrigerator for about 30 minutes. Don’t thaw them at room temperature, or they might become too soft.
Reheating tips: These are meant to be served cold, so no reheating is needed. If you’ve frozen them, just let them thaw in the fridge. The flavor actually improves after a day or two in the fridge as the spices meld together. I’ve found that day-old bites are even better than freshly made ones.
Nutritional Information & Benefits
Here’s the estimated nutritional breakdown for one bite (based on 20 bites per batch):
- Calories: Approximately 110-120 calories per bite
- Fat: 7-8g (mostly from cream cheese and butter)
- Carbohydrates: 10-12g
- Protein: 2-3g
- Fiber: 1g (from pumpkin puree)
- Sugar: 7-8g (from powdered sugar and natural pumpkin sugars)
Health benefits of key ingredients: Pumpkin puree is packed with vitamin A, which supports eye health and immune function. It’s also rich in fiber and antioxidants. Cream cheese provides calcium and protein, while the pumpkin pie spice adds anti-inflammatory properties from cinnamon and ginger.
Dietary considerations: This recipe can be adapted for gluten-free, low-carb, and vegan diets (see variations above). It contains dairy and gluten in its standard form. For a nut-free version, ensure your graham crackers are nut-free and avoid almond-based coatings.
From a wellness perspective, these bites are a great way to satisfy a sweet craving without going overboard. They’re portion-controlled and made with real ingredients. I feel good about serving them to my family because I know exactly what’s in them. No preservatives, no artificial flavors, just simple, wholesome goodness.
Conclusion
These Easy No-Bake Pumpkin Pie Cheesecake Bites are proof that you don’t need a long ingredient list or hours in the kitchen to create something truly special. With just three main ingredients and a few pantry staples, you can whip up a dessert that looks impressive, tastes incredible, and makes everyone smile.
I love this recipe because it’s forgiving. You can tweak the spices, swap the coating, or adjust the sweetness to your liking. It’s the kind of recipe that invites experimentation and always delivers. Plus, it’s the perfect make-ahead dessert for busy holiday seasons when oven space is at a premium.
I encourage you to make these your own. Try them with a different coating, add a drizzle of caramel, or experiment with different spice blends. And when you do, I’d love to hear about it. Drop a comment below and let me know how they turned out. Share a photo of your creation on Pinterest or Instagram. Tag me so I can see your beautiful bites.
Thank you for stopping by and spending time with me in my little corner of the kitchen. Now go ahead, grab that can of pumpkin, and make some magic. You’ve got this.
Frequently Asked Questions
Can I use pumpkin pie filling instead of pumpkin puree?
No, I wouldn’t recommend it. Pumpkin pie filling is already sweetened and spiced, which will throw off the flavor balance of these bites. Stick with 100% pure pumpkin puree for the best results. If you only have pumpkin pie filling on hand, reduce the powdered sugar and pumpkin pie spice, but honestly, it’s easier to just grab a can of pure pumpkin.
How long do these bites need to chill?
At least 2 hours in the refrigerator, but overnight is ideal. The longer they chill, the firmer and creamier they become. If you’re in a hurry, you can freeze them for 30 minutes, but watch them carefully so they don’t freeze solid. The texture won’t be quite as smooth, but they’ll still be delicious.
Can I make these bites ahead of time for a party?
Absolutely! In fact, I recommend it. These bites actually taste better after a day in the fridge because the flavors have time to meld together. You can make them up to 3 days in advance and keep them stored in an airtight container in the refrigerator. They’re the perfect make-ahead dessert for Thanksgiving or any fall gathering.
Why is my filling too soft to roll into balls?
This usually happens for two reasons: your pumpkin puree was too watery, or your cream cheese wasn’t cold enough after the initial chill. To fix this, try chilling the filling for another 30 minutes. If it’s still too soft, you can add a tablespoon of powdered sugar or a teaspoon of cornstarch to help firm it up. Next time, drain your pumpkin puree through a paper towel before mixing.
Can I double this recipe?
Yes, this recipe doubles beautifully. Just make sure you have enough room in your refrigerator to chill all the bites. I’ve made a double batch for Thanksgiving before, and it worked perfectly. The only thing to keep in mind is that you’ll need a larger mixing bowl and more space on your baking sheets. Everything else scales up without any issues.
Pin This Recipe!
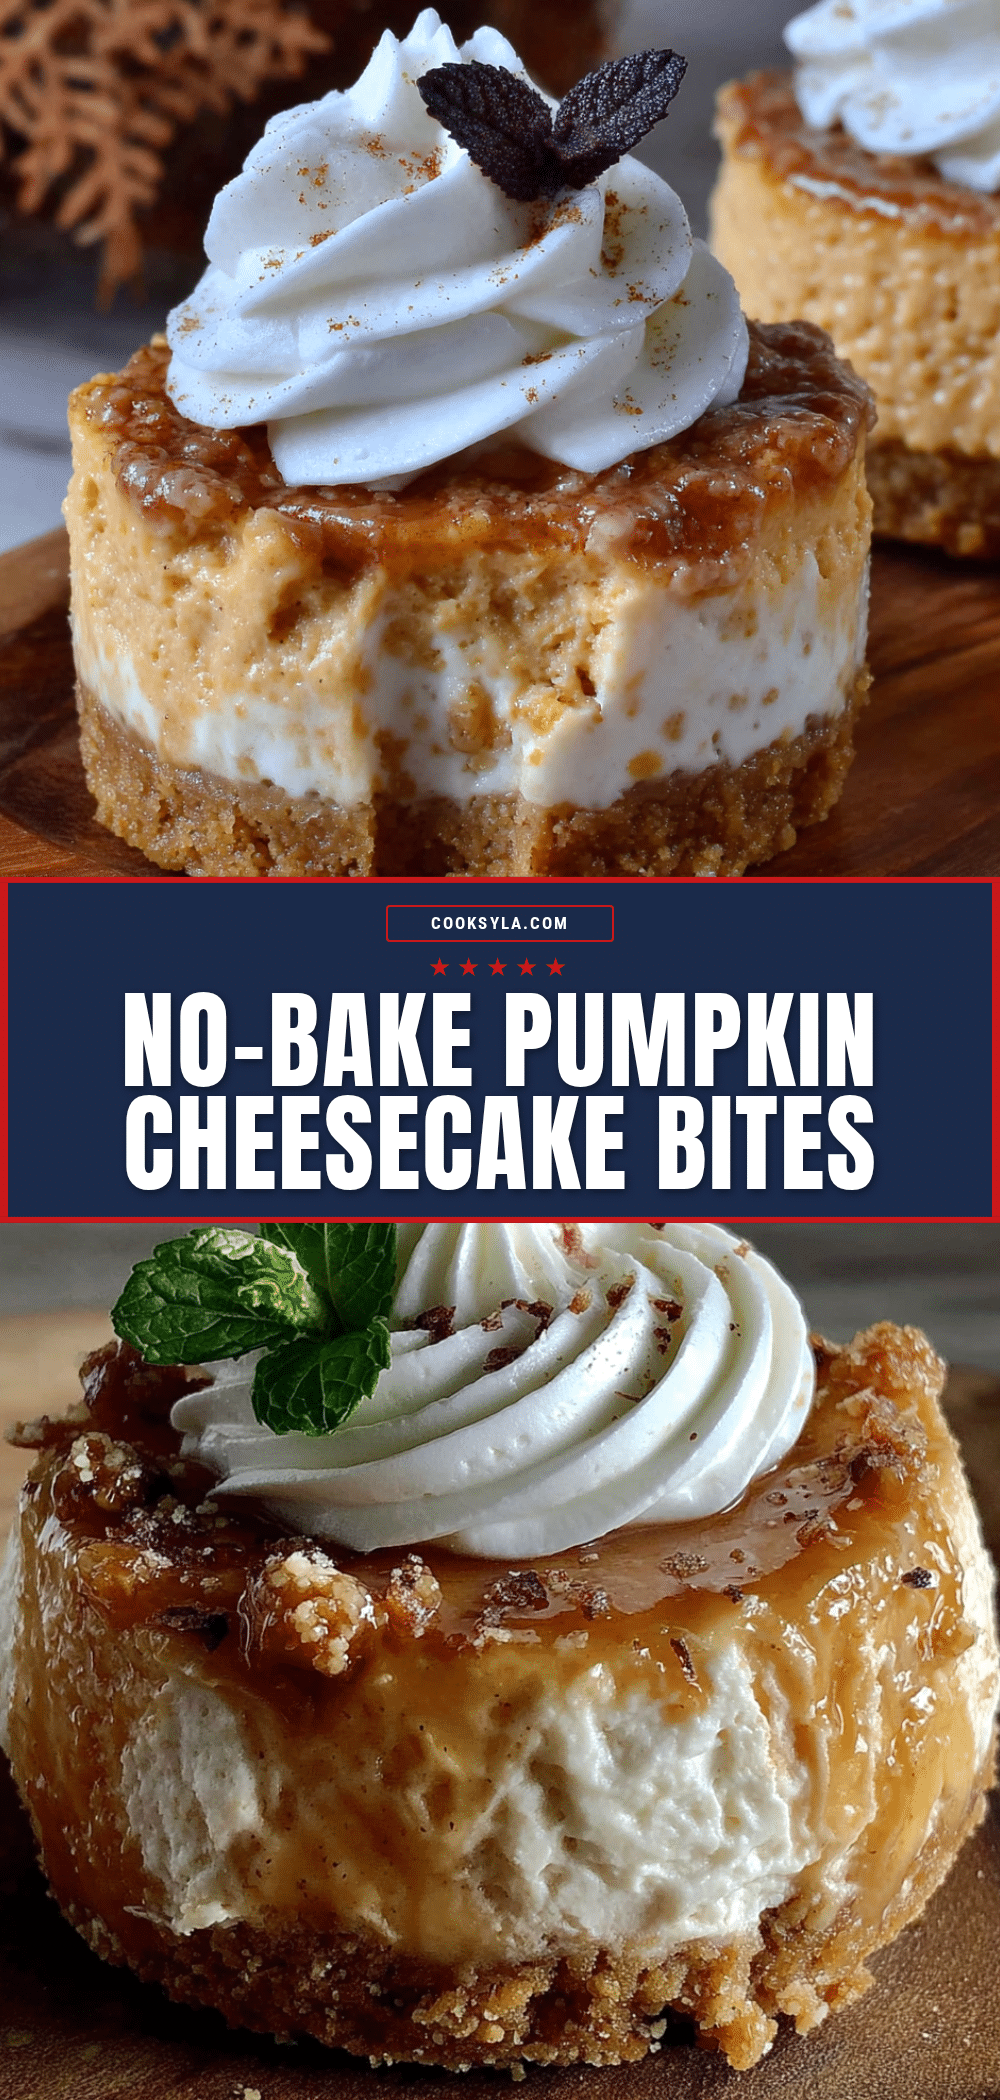
Easy No-Bake Pumpkin Cheesecake Bites (3 Ingredients!)
These no-bake pumpkin cheesecake bites are creamy, rich, and made with just three main ingredients. Perfect for fall gatherings, they come together in under 15 minutes and require no oven time.
- Prep Time: 15 minutes
- Cook Time: 0 minutes
- Total Time: 2 hours 15 minutes (includes chilling)
- Yield: 18-20 bites 1x
- Category: Dessert
- Cuisine: American
Ingredients
- 8 ounces cream cheese, softened
- 1 cup pumpkin puree (not pumpkin pie filling)
- 1/2 cup powdered sugar
- 1 teaspoon pumpkin pie spice
- 1/2 teaspoon vanilla extract
- 1 cup graham cracker crumbs
- 2 tablespoons melted butter
- Whipped cream (optional, for serving)
- Extra pumpkin pie spice (optional, for dusting)
- Mini chocolate chips (optional)
Instructions
- Prepare the graham cracker coating: In a small bowl, combine 1 cup graham cracker crumbs with 2 tablespoons melted butter. Mix with a fork until the crumbs are evenly moistened. Set aside.
- Soften the cream cheese: Take 8 ounces cream cheese out of the fridge about 30 minutes before starting. Cut into cubes to speed up softening.
- Mix the filling base: Place the softened cream cheese in a medium mixing bowl. Beat with a hand mixer on medium speed for about 1 minute until smooth and creamy. Scrape down the sides of the bowl.
- Add the pumpkin and sweetener: Add 1 cup pumpkin puree, 1/2 cup powdered sugar, 1 teaspoon pumpkin pie spice, and 1/2 teaspoon vanilla extract. Beat on low speed until combined, about 30 seconds. Scrape sides and bottom, then beat on medium speed for another 30 seconds until smooth and fluffy.
- Chill the filling briefly: Cover the bowl with plastic wrap and refrigerate for 15 to 20 minutes.
- Portion the filling: Line a baking sheet or large plate with parchment paper. Use a small cookie scoop or tablespoon to scoop out even portions (about 1 to 1.5 tablespoons each). You should get around 18 to 20 bites.
- Shape the bites: Lightly wet your hands with cold water. Roll each portion into a smooth ball between your palms. Place on the parchment-lined sheet.
- Coat the bites: Roll each ball in the graham cracker mixture until evenly coated. Use fingers to gently press crumbs into the surface if needed. Place coated bites back on the parchment-lined sheet.
- Chill until firm: Cover the baking sheet with plastic wrap and refrigerate for at least 2 hours, preferably 4 hours or overnight.
- Serve and enjoy: Transfer to a serving platter. Optionally top with whipped cream and a sprinkle of extra pumpkin pie spice. Serve cold.
Notes
Make sure cream cheese is fully softened to avoid lumps. If pumpkin puree is watery, drain it through a fine-mesh sieve or paper towel before using. For best texture, chill overnight. These bites can be frozen for up to 3 months.
Nutrition
- Serving Size: 1 bite
- Calories: 115
- Sugar: 7.5
- Sodium: 95
- Fat: 7.5
- Saturated Fat: 4
- Carbohydrates: 11
- Fiber: 1
- Protein: 2.5
Keywords: no-bake pumpkin cheesecake bites, easy pumpkin dessert, 3-ingredient pumpkin bites, fall dessert, Thanksgiving dessert, no-bake dessert


