Love this? Save it for later!
Share the inspiration with your friends
“Why can’t you just use a spoon to drag the white chocolate through the dark?” my nephew Leo asked, hovering over the parchment paper with a plastic utensil he’d stolen from the dishwasher. I was in the middle of explaining the delicate art of tempering, or at least pretending to, when he interrupted my lecture with a question that made me pause. I started to explain why that wouldn’t work — then stopped. The logic was simple, and honestly, it was brilliant.
I looked at the messy swirls I had been trying to create with a toothpick, a tool so fine it required steady hands and a steady heart. Leo’s suggestion was chaotic, fast, and completely unconventional. I handed him the spoon. He didn’t care about symmetry or perfect spirals. He just dragged it through the chocolate with the enthusiasm of a child who knows that the mess is part of the fun. When he pulled it away, the result wasn’t a geometric masterpiece. It was a web. A messy, lopsided, beautiful spider web that looked exactly like something out of a Halloween movie set in our kitchen.
I felt a little sheepish admitting that my careful technique had been outdone by a six-year-old’s instinct. But as we tasted the finished bark, crunchy and sweet with a hint of mint, I realized something important. Sometimes the best recipes aren’t about precision. They are about permission to be imperfect. This Easy No-Bake Spider Web Chocolate Bark became our favorite because it allowed us to stop worrying about being perfect and start enjoying the process.
You know that feeling when you spend too much time on a dish only to realize the simplest version is the one everyone fights over? I mean, honestly, that is exactly what happened here. The power went out briefly while I was setting the fridge, and instead of panicking, we just ate the soft chocolate with our fingers. It stuck in my memory. That’s why I keep making it. It’s fast, it’s forgiving, and it brings out the kid in everyone, even the adults who think they’re too old for such silly tricks.
Why You’ll Love This Recipe
This recipe isn’t just another candy bar; it is a test of patience and a celebration of simplicity. After years of developing recipes in professional kitchens, I have learned that the most memorable treats are often the ones that require the least amount of stress. This Easy No-Bake Spider Web Chocolate Bark stands out because it bypasses the tempering headache that usually comes with chocolate work. You do not need a thermometer, and you do not need a double boiler.
- Quick & Easy: From melting to setting, this takes less than thirty minutes of active time. It is perfect for busy weeknights or last-minute Halloween preparations when you realize you forgot to buy decorations.
- Simple Ingredients: You likely already have everything in your pantry. Dark chocolate, white chocolate, and a few drops of food coloring are all you need. No fancy grocery trips required.
- Perfect for Parties: It is an excellent crowd-pleaser for Halloween gatherings, school bake sales, or spooky movie nights. It looks impressive but is incredibly simple to make.
- Crowd-Pleaser: Kids love the spider web design, and adults love the rich chocolate flavor. It gets rave reviews from every age group.
- Unbelievably Delicious: The contrast between the dark and white chocolate creates a visual and flavor experience that is next-level comfort food.
What makes this recipe different is the technique. Most people try to pipe intricate webs, which is difficult and time-consuming. By using the spoon method, you create organic, random patterns that look professional but feel homemade. It is not just another version of chocolate bark; it is your best version because it saves you time while delivering a stunning result. This recipe is the kind that makes you close your eyes after the first bite, savoring the snap of the chocolate and the sweetness of the candy accents.
What Ingredients You Will Need
This recipe uses simple, wholesome ingredients to deliver bold flavor and satisfying texture without the fuss. The beauty of this bark lies in its minimalism. You do not need a dozen exotic spices or rare items. The focus is on the quality of the chocolate and the visual contrast. Here is what you need to get started.
- Dark Chocolate Chips: Use high-quality semi-sweet or dark chocolate chips. I recommend brands like Ghirardelli or Guittard for their smooth melt and rich flavor. You will need about two cups. These form the base of the web.
- White Chocolate Chips: Standard white chocolate chips work well, but almond bark is a good alternative if you want a softer set. You need about one cup. This is used to create the web strands.
- Food Coloring: Gel food coloring in black or dark purple is ideal. Liquid coloring can seize the chocolate, so stick to gel. You only need a few drops. Black gives a true spider web look, while purple adds a spooky hue.
- Candy Eyes: These are essential for the spider theme. Look for large, edible plastic eyes. They add a playful touch that kids adore.
- Mini Marshmallows: Optional, but they add texture and a fluffy contrast to the hard chocolate. White mini marshmallows look like spider eggs or webs.
- Pretzel Sticks: Broken pretzel sticks can be used to add a salty crunch. This balances the sweetness of the chocolate nicely.
If you are looking for substitutions, you can use milk chocolate instead of dark chocolate for a sweeter profile. For a dairy-free option, use vegan chocolate chips. In summer, you might add crushed peppermint candies for a refreshing twist. I personally prefer dark chocolate because the bitterness cuts through the sweetness of the white chocolate, creating a more sophisticated taste. Always store your chocolate in a cool, dry place to prevent blooming, which can ruin the appearance.
Equipment Needed
You do not need fancy gadgets to make this bark. A few basic tools are all that is required. A microwave-safe bowl is essential for melting the chocolate. If you do not have a microwave, a heatproof bowl over a pot of simmering water works just as well. I prefer the microwave because it is faster and less messy, but be careful not to burn the chocolate.
A large baking sheet lined with parchment paper is your main workspace. Parchment paper is crucial because chocolate sticks to everything else. Wax paper can work in a pinch, but parchment is more reliable. A silicone spatula is helpful for stirring the chocolate to ensure even melting. I have ruined several batches by using wooden spoons that were not clean, so make sure your tools are dry.
You will need a small spoon or a toothpick for dragging the chocolate. I use a regular teaspoon for the initial drag and a toothpick for finer details. A small microwave-safe cup is useful for melting the white chocolate separately. Keep it simple. You do not need a candy thermometer or a scale. Just the basics. This makes cleanup easy and the process stress-free.
Preparation Method
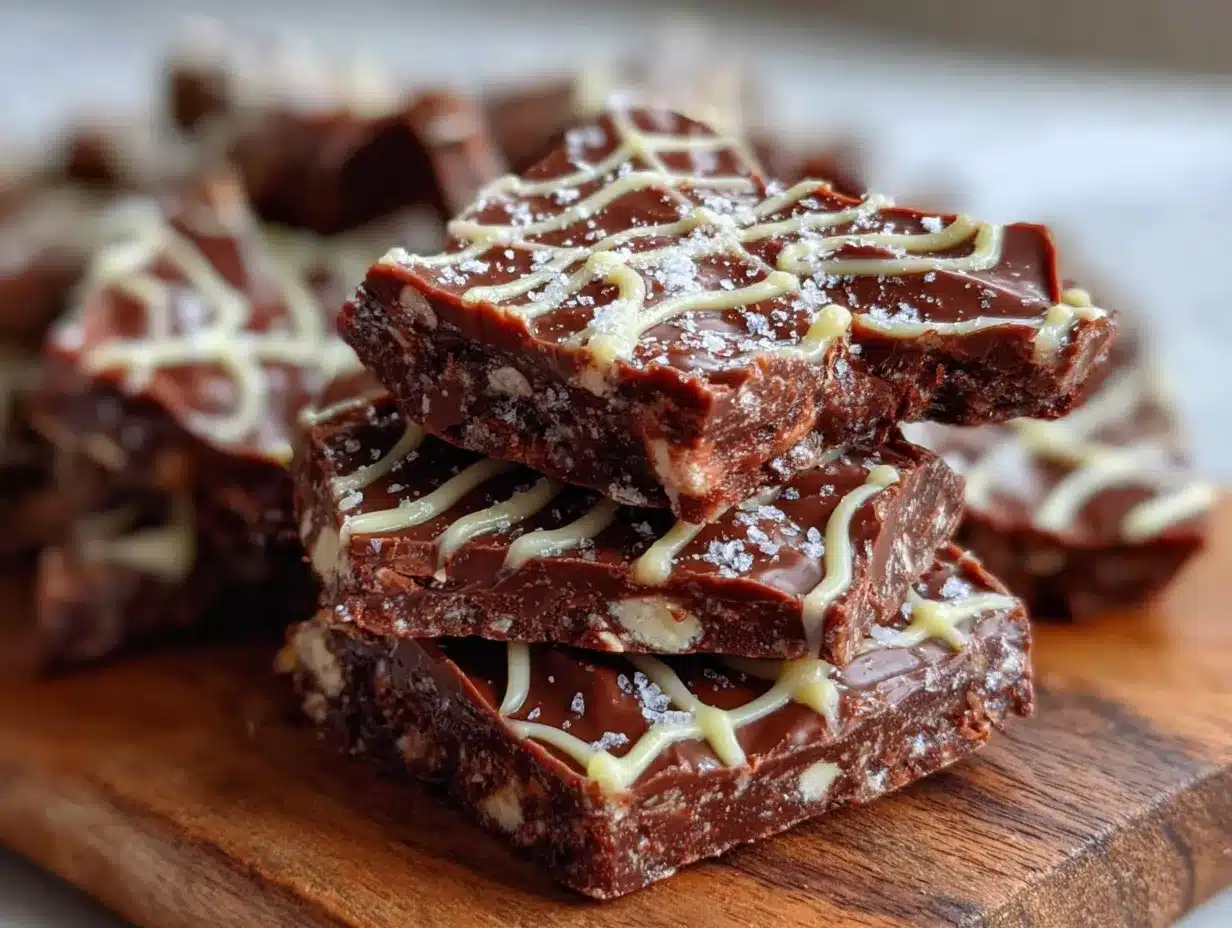
Getting started is the easiest part. First, line a large baking sheet with parchment paper. Set it aside. This step is important because once the chocolate is poured, you do not want to move it around.
- Melt the Dark Chocolate: Place two cups of dark chocolate chips in a microwave-safe bowl. Microwave on high for thirty seconds. Stir well. If there are still chunks, microwave for another fifteen seconds. Stir again. Repeat until the chocolate is smooth. This usually takes about sixty to ninety seconds total. Be careful not to overheat. The chocolate should be glossy and fluid. If it looks grainy, it is too hot. Let it cool for a minute.
- Pour the Base: Pour the melted dark chocolate onto the prepared baking sheet. Use a spatula to spread it into a thin, even layer. Aim for about a quarter-inch thickness. It does not need to be perfect. Irregular edges add to the rustic charm. Spread it out to the edges of the parchment for maximum bark.
- Melt the White Chocolate: In a separate bowl, melt one cup of white chocolate chips. Use the same microwave method. Thirty seconds, stir, fifteen seconds, stir. Once smooth, transfer about half of the white chocolate to a small cup. Leave the rest in the main bowl.
- Add Color: Add two or three drops of black gel food coloring to the small cup of white chocolate. Stir until it is a uniform dark color. This is your “ink” for the web. Do not add too much coloring, or the chocolate will become too thin and runny.
- Create the Web: This is the fun part. Take a spoon and dip it into the dark white chocolate. Drizzle small dots or thin lines randomly across the dark chocolate base. Do not worry about patterns. Just let your hand move freely. Then, take a toothpick or a thin skewer. Drag it through the dots and lines. Pull from the center outward, or drag in zigzag patterns. The white chocolate will stretch and connect, creating a web-like effect. You can create multiple layers by adding more dots and dragging again.
- Add Accents: While the chocolate is still wet, press candy eyes and mini marshmallows into the bark. If you are using pretzel sticks, break them into small pieces and sprinkle them over the top. Press them down gently so they stick.
- Set the Bark: Place the baking sheet in the refrigerator. Let it chill for at least thirty minutes. The chocolate needs to be completely firm before you break it. If you try to break it too soon, it will be messy and sticky.
- Break and Serve: Once firm, lift the parchment paper and break the bark into irregular pieces. Store in an airtight container. Enjoy!
Cooking Tips & Techniques
Chocolate can be temperamental, but with a few tricks, you can master it. One common mistake is overheating the chocolate. Always use short bursts in the microwave. If the chocolate seizes, it means water got into it. Dry bowls are a must. If your chocolate looks thick or lumpy, it is likely too hot. Let it sit for a minute to cool down before stirring.
Another tip is to work quickly. Chocolate sets fast, especially white chocolate. Have your tools ready before you start dragging the patterns. If you wait too long, the lines will not stretch properly. I often find that working in a cool kitchen helps the chocolate set faster, which is good for efficiency but bad if you want to adjust the design.
For the best visual contrast, use a high-quality white chocolate. Some cheaper brands have a yellowish tint that does not show up well against dark chocolate. Look for brands with a pure white color. Also, do not skip the parchment paper. Chocolate will bond to metal and glass, making cleanup a nightmare. Parchment paper ensures easy removal and cleanup.
When dragging the toothpick, vary your pressure. Light pressure creates thin, delicate strands. Heavier pressure creates thicker, bolder lines. Mix both for a dynamic look. You can also use a fork to create a different texture. The key is to experiment. There is no right or wrong way to make a web. Embrace the chaos.
Variations & Adaptations
This recipe is highly adaptable. You can change the colors, flavors, and textures to suit your needs. For a Halloween theme, use orange and purple food coloring instead of black. This creates a vibrant, spooky look. You can also add sprinkles for a festive touch.
For a healthier option, use dark chocolate with 70% cocoa content. This reduces the sugar and adds antioxidants. You can also substitute the white chocolate with white almond bark, which is easier to melt and sets harder. This is good for humid climates.
If you want a nutty flavor, add chopped peanuts or almonds to the dark chocolate before pouring. For a minty twist, add a drop of peppermint extract to the white chocolate. This pairs well with the dark chocolate and adds a refreshing aftertaste. You can also use crushed peppermint candies instead of food coloring for a speckled effect.
For a gluten-free version, ensure your chocolate chips are certified gluten-free. Most are, but some contain wheat starch. Use gluten-free pretzels if you include them. This recipe is naturally dairy-free if you use vegan chocolate chips. Check labels carefully. I once made a batch with coconut oil instead of butter for a vegan friend, and it turned out surprisingly good, though softer.
Serving & Storage Suggestions
Serve this bark at room temperature for the best texture. Cold chocolate can be hard and difficult to bite through. Present it on a platter with other Halloween treats for a party spread. It pairs well with hot cocoa or milk. The salty pretzels complement the sweet chocolate perfectly.
Store the bark in an airtight container at room temperature. It will keep for up to two weeks. If your kitchen is warm, store it in the refrigerator. Bring it to room temperature before serving to avoid condensation. Do not freeze this bark, as the white chocolate can become grainy when thawed.
If you have leftover candy eyes, they can be used for other projects. The bark itself is best eaten within a week for optimal freshness. The flavors meld together over time, making it taste even better after a day or two. Just keep it away from direct sunlight to prevent melting.
Nutritional Information & Benefits
While this is a treat, dark chocolate has some health benefits. It contains antioxidants and can improve heart health. White chocolate is high in sugar and fat, so enjoy in moderation. This recipe is not suitable for those with nut allergies if you use nuts. Always check labels. The candy eyes are generally safe but contain artificial colors. For a natural alternative, use dried fruit or seeds.
Each piece provides about 150 calories. It is a sweet indulgence rather than a health food. But the joy it brings is priceless. I find that making treats with family creates memories that last longer than the sugar rush. This recipe is a way to connect and have fun.
Conclusion
This Easy No-Bake Spider Web Chocolate Bark is more than just a snack. It is a fun activity that brings people together. It is quick, easy, and visually stunning. I love it because it requires no special skills and delivers professional results. Try it for your next party or just because you want a sweet treat. Customize it to your taste and share it with friends. You will be surprised by how much joy a simple bowl of chocolate can bring. Let me know how yours turns out!
FAQs
Can I use milk chocolate instead of dark chocolate?
Yes, you can. Milk chocolate will make the bark sweeter and lighter in color. The contrast with the white chocolate will be less dramatic, but it will still taste delicious.
Why did my chocolate seize?
Chocolate seizes when water gets into it. Make sure your bowls and utensils are completely dry. Also, avoid microwaving for too long, as overheating can cause the chocolate to break.
Can I make this recipe ahead of time?
Yes, you can make it up to two weeks in advance. Store it in an airtight container at room temperature. If it is hot, keep it in the refrigerator.
What can I use instead of candy eyes?
You can use M&Ms, chocolate chips, or crushed nuts. Any small candy or topping will work. The eyes are just for fun and thematic appeal.
How do I fix a broken web pattern?
If the pattern does not look right, you can drag a toothpick through it again. Or, you can simply add more dots and lines. There is no wrong way to do it. Embrace the imperfections.
Pin This Recipe!
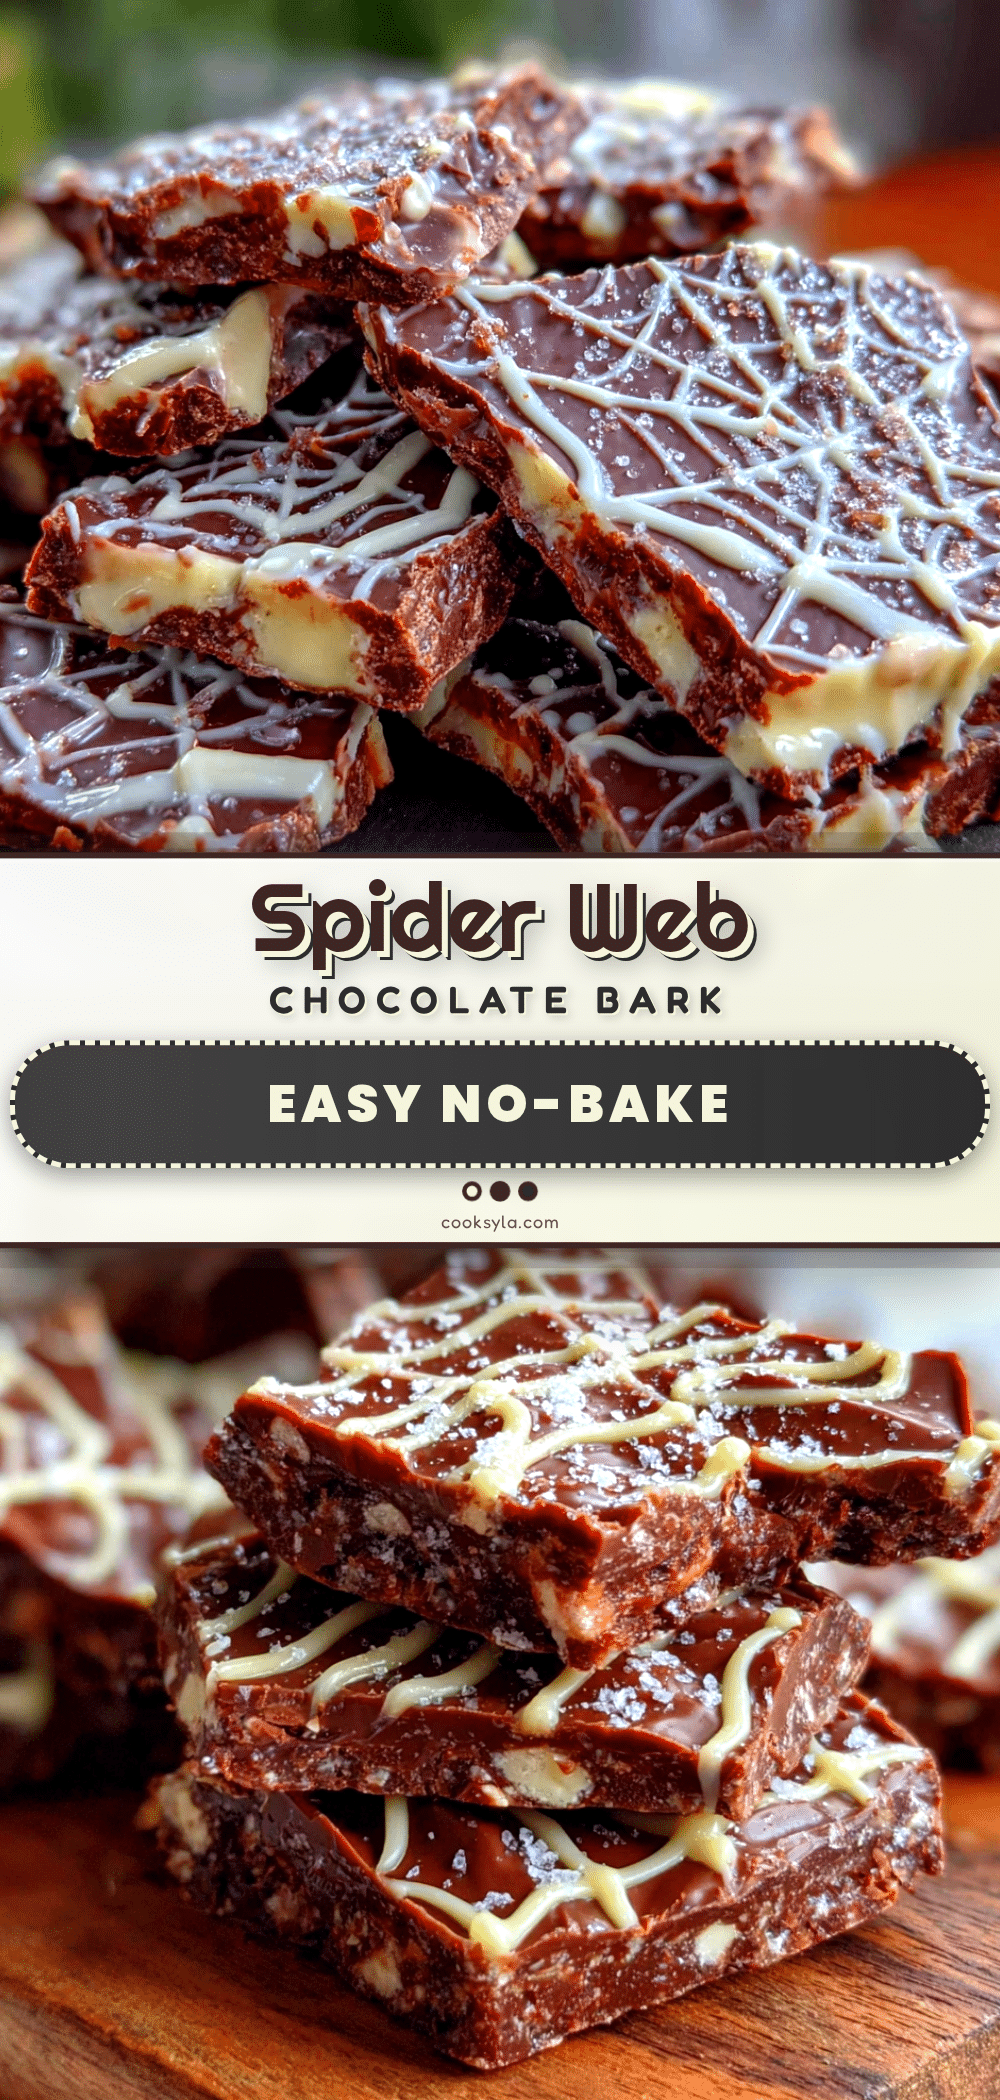
Easy No-Bake Spider Web Chocolate Bark
A quick, no-bake Halloween treat featuring dark and white chocolate swirled into a spider web pattern, decorated with candy eyes and optional crunchy accents.
- Prep Time: 15 minutes
- Cook Time: 0 minutes
- Total Time: 45 minutes
- Yield: Approximately 12 servings 1x
- Category: Dessert
- Cuisine: American
Ingredients
- 2 cups dark chocolate chips (semi-sweet or dark)
- 1 cup white chocolate chips
- 2–3 drops black gel food coloring
- Edible candy eyes
- Mini marshmallows (optional)
- Pretzel sticks, broken into pieces (optional)
Instructions
- Line a large baking sheet with parchment paper and set aside.
- Place dark chocolate chips in a microwave-safe bowl. Microwave on high for 30 seconds, stir, then microwave in 15-second intervals, stirring after each, until smooth. Let cool slightly.
- Pour melted dark chocolate onto the prepared baking sheet and spread into a thin, even layer (about 1/4 inch thick).
- In a separate bowl, melt white chocolate chips using the same microwave method until smooth.
- Transfer about half of the melted white chocolate to a small cup. Add black gel food coloring and stir until uniform.
- Drizzle small dots or thin lines of the colored white chocolate randomly across the dark chocolate base.
- Using a toothpick or thin skewer, drag through the dots and lines from the center outward or in zigzag patterns to create a web effect.
- While the chocolate is still wet, press candy eyes, mini marshmallows, and pretzel pieces into the bark.
- Refrigerate for at least 30 minutes until completely firm.
- Lift the parchment paper and break the bark into irregular pieces. Serve or store.
Notes
Ensure all bowls and utensils are completely dry to prevent chocolate from seizing. Use gel food coloring rather than liquid to avoid thinning the chocolate. Store in an airtight container at room temperature for up to two weeks, or in the refrigerator if the kitchen is warm. Do not freeze as white chocolate may become grainy.
Nutrition
- Serving Size: 1 piece
- Calories: 150
- Sugar: 15
- Sodium: 15
- Fat: 9
- Saturated Fat: 5
- Carbohydrates: 18
- Fiber: 1
- Protein: 2
Keywords: Halloween, chocolate bark, no-bake, spider web, easy dessert, party snack, kids recipe


