Love this? Save it for later!
Share the inspiration with your friends
I’d stopped by my neighbor’s house to borrow a ladder, of all things. It was a sweltering Tuesday afternoon in July, and I was dripping sweat just from walking across the lawn. Before I even knocked on the screen door, this cool, sweet, creamy smell hit me. It was strawberries and cream and something buttery, and it was floating out through the window screen like a secret. She opened the door with flour on her cheek, holding a glass dish that was sweating cold beads of water. “Oh, this?” she said when I asked. “It’s nothing. Just throwing stuff together.” She was so casual about it, like she hadn’t just created the most perfect summer dessert I’d ever seen. I stood there, ladder forgotten, just staring at those layers of golden biscuits and pink cream.
The funny thing is, she wasn’t even trying to impress anyone. She told me her air conditioner had been on the fritz, and she refused to turn on the oven. So she grabbed a box of shortcake biscuits, a carton of heavy cream, and the giant flat of strawberries her son had picked that morning. She layered them in a dish like she was building a little cold lasagna of summer. “My grandmother used to make this,” she shrugged, “but she used those stale ladyfingers. I like the shortcake better.” I mean, honestly. Who just whips up a no-bake masterpiece on a random Tuesday and acts like it’s no big deal? I stood in her kitchen, eating a spoonful right out of the dish, and I knew I was never going to forget that moment. Maybe you’ve been there—you taste something so simple and so perfect that you feel like you’ve discovered a secret. That’s this No-Bake Strawberry Shortcake Icebox Cake.
Why You’ll Love This Recipe
Let me tell you, after testing this recipe about six times (my family didn’t complain), I can honestly say this is the summer dessert you need in your life. It has everything you want and nothing you don’t.
- No Oven Required: When it’s ninety degrees outside, the last thing you want to do is turn on your oven. This entire recipe comes together on your countertop and sets up in the fridge. It’s practically a heat-wave survival tool.
- Simple Ingredients: You don’t need a specialty grocery store or a second mortgage to buy fancy ingredients. We’re talking fresh strawberries, heavy cream, sweetened condensed milk, and store-bought shortcake biscuits. That’s it. No weird stuff.
- Perfect for Summer Gatherings: This is the dish you bring to a BBQ, a potluck, or a 4th of July picnic. It serves a crowd, it looks gorgeous, and everyone will ask you for the recipe. I promise you this.
- Crowd-Pleaser: Kids love the creamy, sweet layers. Adults love the nostalgic flavor. Even my picky uncle, who “doesn’t do desserts,” went back for seconds. It’s a universal win.
- Unbelievably Delicious: The texture here is the real magic. The biscuits soften into a cake-like consistency while the cream sets into a cloud. It’s not soggy, it’s not dry—it’s just perfect. The flavor combo of fresh strawberries and sweet cream is next-level comfort food.
Honestly, what makes this recipe different from the rest is the technique. Most icebox cakes use graham crackers or chocolate wafers, which turn into mush. By using shortcake biscuits, you get a sturdy layer that absorbs the cream just enough to become tender but still holds its shape. It’s the best version of an icebox cake I’ve ever had. This isn’t just good—it’s the kind of dessert that makes you close your eyes after the first bite. It’s comfort food reimagined for summer: cooler, faster, and with the same soul-soothing satisfaction.
What Ingredients You Will Need
This recipe uses simple, wholesome ingredients to deliver that classic strawberry shortcake flavor without any fuss. Everything here is easy to find at your local grocery store, and most of it is probably already in your pantry.
- For the Strawberry Layer:
- 2 pounds fresh strawberries, hulled and sliced (about 6 cups sliced)
- 1/4 cup granulated sugar (helps draw out the natural juices)
- 1 tablespoon fresh lemon juice (brightens the flavor, trust me on this)
For the Cream Layer:
- 2 cups heavy whipping cream, very cold (I recommend using a brand like Organic Valley or Horizon for best texture)
- 1 can (14 ounces) sweetened condensed milk (this is the secret to the perfect sweetness and set)
- 1 teaspoon vanilla extract (pure, not imitation, if you can swing it)
- Pinch of salt (balances the sweetness)
For the Layers:
- 2 packages (about 12 biscuits total) store-bought shortcake biscuits or sponge cake cups (I like the ones from the bakery section, not the dry shelf-stable kind)
For the Topping (optional but recommended):
- 1 cup heavy whipping cream, very cold
- 2 tablespoons powdered sugar
- 1/2 teaspoon vanilla extract
- Fresh strawberry slices and mint leaves for garnish
A few notes on ingredient selection. Look for strawberries that are deep red and fragrant—that’s how you know they’re ripe. If strawberries aren’t in season, you can use frozen strawberries (thawed and drained), but honestly, fresh really makes a difference here. For the cream, make sure it’s heavy cream or heavy whipping cream with at least 36% milk fat. Anything less won’t whip properly. If you need a dairy-free version, you can use full-fat coconut cream from a can, but the texture will be slightly different. I’ve tested it, and it works, but it’s not quite as fluffy.
Equipment Needed
You don’t need a lot of fancy equipment for this recipe, which is part of the beauty of it. Here’s what you’ll need:
- 9×13-inch Baking Dish or Glass Pan: This is the perfect size for layering. A deep dish works best to hold all those gorgeous layers. I use a Pyrex glass dish because it’s heavy and keeps everything cold.
- Large Mixing Bowls: You’ll need one for the strawberries and one for the cream. Stainless steel or glass works best, especially for whipping cream (plastic can retain grease).
- Electric Hand Mixer or Stand Mixer: You can whip cream by hand with a whisk, but honestly, your arm will get tired. A hand mixer makes this so much easier. I’ve done it both ways, and the mixer is worth every penny.
- Sharp Knife and Cutting Board: For hulling and slicing those strawberries.
- Rubber Spatula: For folding the cream and scraping every last bit out of the bowl. Don’t waste a drop.
- Plastic Wrap or Aluminum Foil: For covering the dish while it chills.
If you don’t have a 9×13 dish, you can use a 9×9 square pan or even a large trifle bowl. The layers will just be thicker or thinner depending on the size. If you don’t have a hand mixer, you can use a whisk and some elbow grease—just make sure the cream and bowl are very cold. I keep my bowl and beaters in the freezer for 15 minutes before whipping. It’s a little trick I picked up from a pastry chef friend, and it works like a charm.
Preparation Method
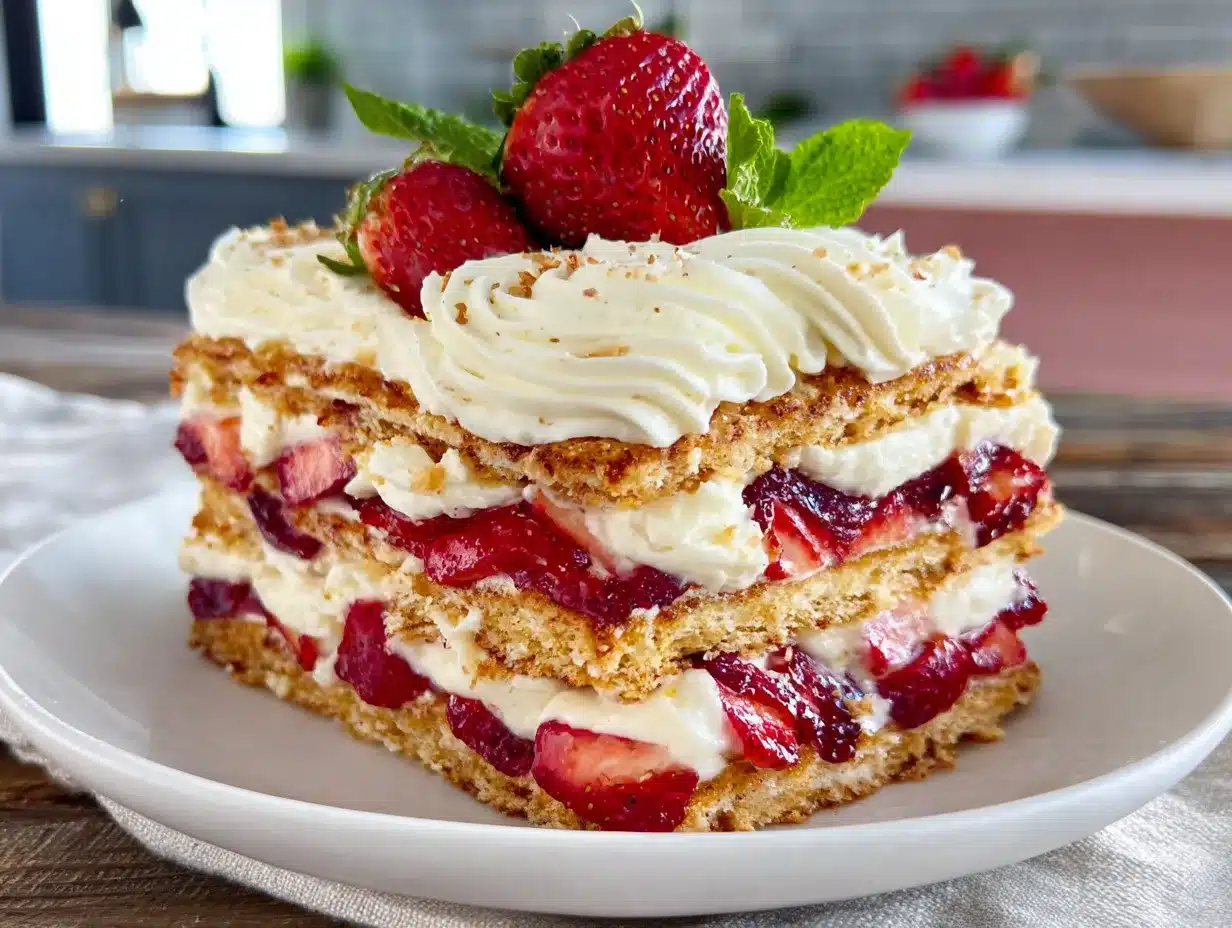
Alright, let’s build this beautiful no-bake cake. Follow these steps, and you’ll have a dessert that looks like you spent hours on it—when really, it’s about 20 minutes of active work.
Step 1: Macerate the Strawberries (15 minutes active, 30 minutes resting)
Start by washing, hulling, and slicing your strawberries. You want them about 1/4-inch thick—not paper thin, but not chunky either. Toss them in a large bowl with the 1/4 cup of granulated sugar and the tablespoon of lemon juice. Stir gently to coat. Let them sit at room temperature for about 30 minutes. This process, called macerating, draws out the natural juices and creates a syrupy liquid that will soak into the biscuits. It’s the secret to that perfect strawberry flavor throughout the cake. While they sit, stir them once or twice to make sure all the berries are coated. You’ll notice the liquid pooling at the bottom of the bowl—that’s gold.
Step 2: Make the Cream Base (10 minutes)
In a large, chilled mixing bowl, pour in the 2 cups of heavy whipping cream. Using your hand mixer on medium speed, whip the cream until soft peaks form—this means when you lift the beaters, the cream forms gentle peaks that flop over. This takes about 3-4 minutes. Be careful not to overwhip. Once you have soft peaks, reduce the mixer speed to low and slowly pour in the sweetened condensed milk and the teaspoon of vanilla extract. Add the pinch of salt. Continue mixing on low until everything is combined and the mixture is thick and luscious, like a cloud. It should hold its shape but still be soft. If it looks curdled or grainy, you’ve overwhiped it—but don’t panic, it will still taste fine.
Step 3: Assemble the First Layer (5 minutes)
Now comes the fun part. Spread a thin layer of the cream mixture on the bottom of your 9×13 dish—just enough to coat it, about 1/4 cup. This prevents the biscuits from sticking. Arrange a single layer of shortcake biscuits on top of the cream. You may need to break some biscuits in half to fill the gaps. Don’t worry about perfection; it’ll all come together. Spoon about half of the macerated strawberries (including all that gorgeous syrup) evenly over the biscuits. Then spread half of the remaining cream mixture over the strawberries. Use your spatula to spread it gently, being careful not to disturb the biscuit layer.
Step 4: Add the Second Layer (5 minutes)
Place another layer of shortcake biscuits on top of the cream. Again, break them to fit if needed. Spoon the remaining strawberries and syrup over the biscuits. Top with the remaining cream mixture, spreading it evenly to the edges. Make sure the top is completely covered—you want to seal in those strawberries so they don’t dry out.
Step 5: Make the Topping (5 minutes)
If you’re making the optional whipped cream topping, clean your mixer bowl and beaters (or grab a fresh bowl). Pour in the 1 cup of heavy cream, the powdered sugar, and the vanilla. Whip on medium-high until stiff peaks form—this means the peaks stand straight up when you lift the beaters. Spread this over the top of the cake in swoops and swirls. It doesn’t have to be perfect; rustic is beautiful.
Step 6: Chill and Set (6 hours minimum, overnight is best)
Cover the dish tightly with plastic wrap or aluminum foil. Refrigerate for at least 6 hours, but overnight is really best. This is the most important step—the biscuits need time to absorb the cream and strawberry juices and soften into that cake-like texture. I know it’s hard to wait, but trust the process. If you cut into it too early, the biscuits will still be firm and the layers won’t hold together properly. Patience, my friend.
Cooking Tips & Techniques
I’ve made this cake more times than I can count, and I’ve learned a few things along the way. Let me save you from my early mistakes.
Don’t Overwhip the Cream: This is probably the most common mistake. Whip the cream until it’s thick and holds soft peaks, but stop the second it looks smooth and billowy. If you keep going, it will turn into butter. I’ve done it. It’s sad. If you accidentally overwhip, add a tablespoon of cold cream and gently fold it in to bring it back.
Use Room Temperature Strawberries: Cold strawberries straight from the fridge don’t release their juices as well. Let them sit at room temp for that 30 minutes, and you’ll get a much better syrup. It’s worth the wait.
Drain the Strawberries Slightly: Here’s a tip I learned the hard way. After macerating, the strawberries release a lot of liquid. You want that syrup in the cake, but too much can make the biscuits soggy. Use a slotted spoon to transfer the strawberries to the layers, and spoon just enough syrup over them to moisten the biscuits—about 2-3 tablespoons per layer. You don’t need to dump all of it in. Save any extra syrup to drizzle over the top when serving.
Chill Your Bowl and Beatres: For the fluffiest whipped cream, put your mixing bowl and beaters in the freezer for 15 minutes before you start. This is a game-changer, especially on a warm day. The cold fat whips up faster and holds its shape better.
Plan Ahead: This is not a last-minute dessert. You need at least 6 hours of chilling time, but 24 hours is even better. The flavors meld, the textures soften, and the whole thing becomes transcendent. Make it the day before you plan to serve it. Your future self will thank you.
Variations & Adaptations
One of the best things about this No-Bake Strawberry Shortcake Icebox Cake is how easy it is to change it up. Here are some ways I’ve played with it over the years.
Berry Medley Version: Swap half the strawberries for fresh blueberries, raspberries, or sliced peaches. The combination of berries is incredible, and it looks so pretty with all those colors peeking through the cream. I made this for a Fourth of July party with strawberries and blueberries, and it was a showstopper.
Chocolate Strawberry Dream: Add a layer of chocolate. After the first layer of cream, sprinkle about 1/2 cup of mini chocolate chips or shaved dark chocolate over the strawberries. The chocolate pairs beautifully with the strawberries and cream. I tried this on a whim one night, and now it’s my husband’s favorite version.
Gluten-Free Option: Use gluten-free shortcake biscuits or even gluten-free vanilla wafers. Most store-bought shortcake biscuits contain wheat, so check the label. I’ve used Schär’s gluten-free sponge cakes with great results. The texture is slightly different, but still delicious.
Lemon Twist: Add the zest of one lemon to the cream mixture along with the vanilla. The bright citrus flavor cuts through the richness and makes everything taste even fresher. You can also add a thin layer of lemon curd between the biscuits for an extra punch. This is my personal favorite summer variation.
Individual Servings: Instead of a big dish, layer everything in individual mason jars or small glass cups. This is perfect for parties or picnics. Just crumble the biscuits instead of using whole ones, and layer the cream and strawberries. They’re portable, adorable, and everyone gets their own.
Serving & Storage Suggestions
This cake is best served cold, straight from the fridge. The texture is perfect when it’s been chilled for at least 6 hours, but I think it’s even better after 24 hours. The flavors have a chance to really get to know each other.
How to Serve: Scoop it out with a large spoon or a spatula, making sure to get all the layers in each serving. It’s a messy, beautiful, glorious slice. Garnish with fresh strawberry slices and a sprig of mint for color. You can also drizzle a little of the reserved strawberry syrup over the top. It’s like a little gift to yourself.
What to Serve With It: This dessert is rich enough to stand on its own, but it pairs beautifully with a cup of hot coffee or iced tea. For a real treat, serve it alongside a scoop of vanilla bean ice cream or a dollop of fresh whipped cream. If you’re feeling fancy, a glass of chilled Prosecco or a crisp Sauvignon Blanc is a lovely pairing.
Storage Instructions: Cover the dish tightly with plastic wrap or foil and store in the refrigerator for up to 3 days. The cake will continue to soften as it sits, which is actually a good thing—it gets more and more tender. After day three, the biscuits start to break down too much, so try to eat it within that window. Good luck having leftovers that long, though.
Can You Freeze It? Yes, you can! This cake freezes surprisingly well. Assemble the cake completely but don’t add the fresh garnish. Wrap it tightly in a layer of plastic wrap, then a layer of foil. Freeze for up to 2 months. To serve, thaw it in the refrigerator overnight. The texture will be slightly softer, but it’s still delicious. I’ve made two at a time and frozen one for later—it’s a lifesaver when you need a last-minute dessert.
Nutritional Information & Benefits
Let’s be real—this is a dessert, and it’s meant to be enjoyed. But there are some redeeming qualities here. Strawberries are packed with vitamin C, antioxidants, and fiber. They’re one of the healthiest fruits you can eat. The heavy cream provides calcium and healthy fats that help you feel satisfied. And hey, there’s no baking, so no trans fats from processed oils.
Here’s an approximate nutritional breakdown per serving (based on 12 servings):
- Calories: 380
- Total Fat: 24g
- Saturated Fat: 15g
- Cholesterol: 85mg
- Sodium: 180mg
- Total Carbohydrates: 38g
- Dietary Fiber: 2g
- Sugars: 28g
- Protein: 5g
Dietary Considerations: This recipe contains dairy and gluten (from the shortcake biscuits). For a dairy-free version, use full-fat coconut cream whipped with powdered sugar and skip the sweetened condensed milk (use a dairy-free sweetened condensed milk alternative). For a gluten-free version, use gluten-free shortcake biscuits. This recipe is not keto or low-carb due to the sugar content, but you can use a sugar substitute in the strawberries and a sugar-free condensed milk alternative if you want to lighten it up.
I personally love that this dessert uses real, whole ingredients. No artificial flavors, no preservatives, no weird gums. Just cream, fruit, and a little bit of sugar. In my book, that’s a win.
Conclusion
This No-Bake Strawberry Shortcake Icebox Cake is the dessert I turn to again and again, and I think you will too. It’s simple enough for a Tuesday night but impressive enough for a party. It requires no oven, no fancy skills, and very little active time. But the result? It’s pure summer magic. The way the biscuits soften into cake, the way the cream melts on your tongue, the way the strawberries burst with flavor—it’s everything I want in a dessert.
I’d love to hear how yours turns out. Did you add a twist? Did your family love it? Did you eat it for breakfast the next day? (No judgment here.) Drop a comment below and let me know. And if you share it on social media, tag me so I can see your beautiful creation. This recipe is meant to be shared, so pass it along to a friend who needs a little summer sweetness in their life.
Go ahead, give it a try. Your taste buds will thank you. And honestly, you deserve something this good.
Frequently Asked Questions
Can I use frozen strawberries instead of fresh?
Yes, you can use frozen strawberries, but they will be much softer and release more liquid when thawed. Thaw them completely in the refrigerator, drain off the excess liquid, and then macerate them with the sugar and lemon juice. The texture won’t be quite as firm as fresh, but the flavor will still be great.
How long does this cake need to set in the fridge?
At least 6 hours, but overnight is best. The biscuits need time to absorb the moisture from the cream and strawberries and soften into a cake-like texture. If you try to cut it too early, the biscuits will still be firm and the layers won’t hold together. Patience is key here.
Can I make this cake ahead of time for a party?
Absolutely! This is actually the perfect make-ahead dessert. You can assemble it up to 24 hours in advance and keep it covered in the fridge. The flavors get even better as they meld together. Just add the fresh strawberry garnish right before serving.
What if I don’t have sweetened condensed milk?
You can substitute with a mixture of 1 cup heavy cream and 1/2 cup powdered sugar, whipped to soft peaks. It won’t be quite as thick or sweet, but it will work. Alternatively, you can use a can of dulce de leche for a deeper, caramel-like flavor.
Can I use a different type of biscuit or cookie?
Yes! While I love shortcake biscuits, you can use sponge cake cups, angel food cake cubes, or even vanilla wafers. Ladyfingers also work well, though they tend to be softer. Avoid graham crackers or chocolate wafers, as they can turn into mush. The key is using a sturdy, somewhat dry biscuit that can absorb moisture without falling apart.
Pin This Recipe!
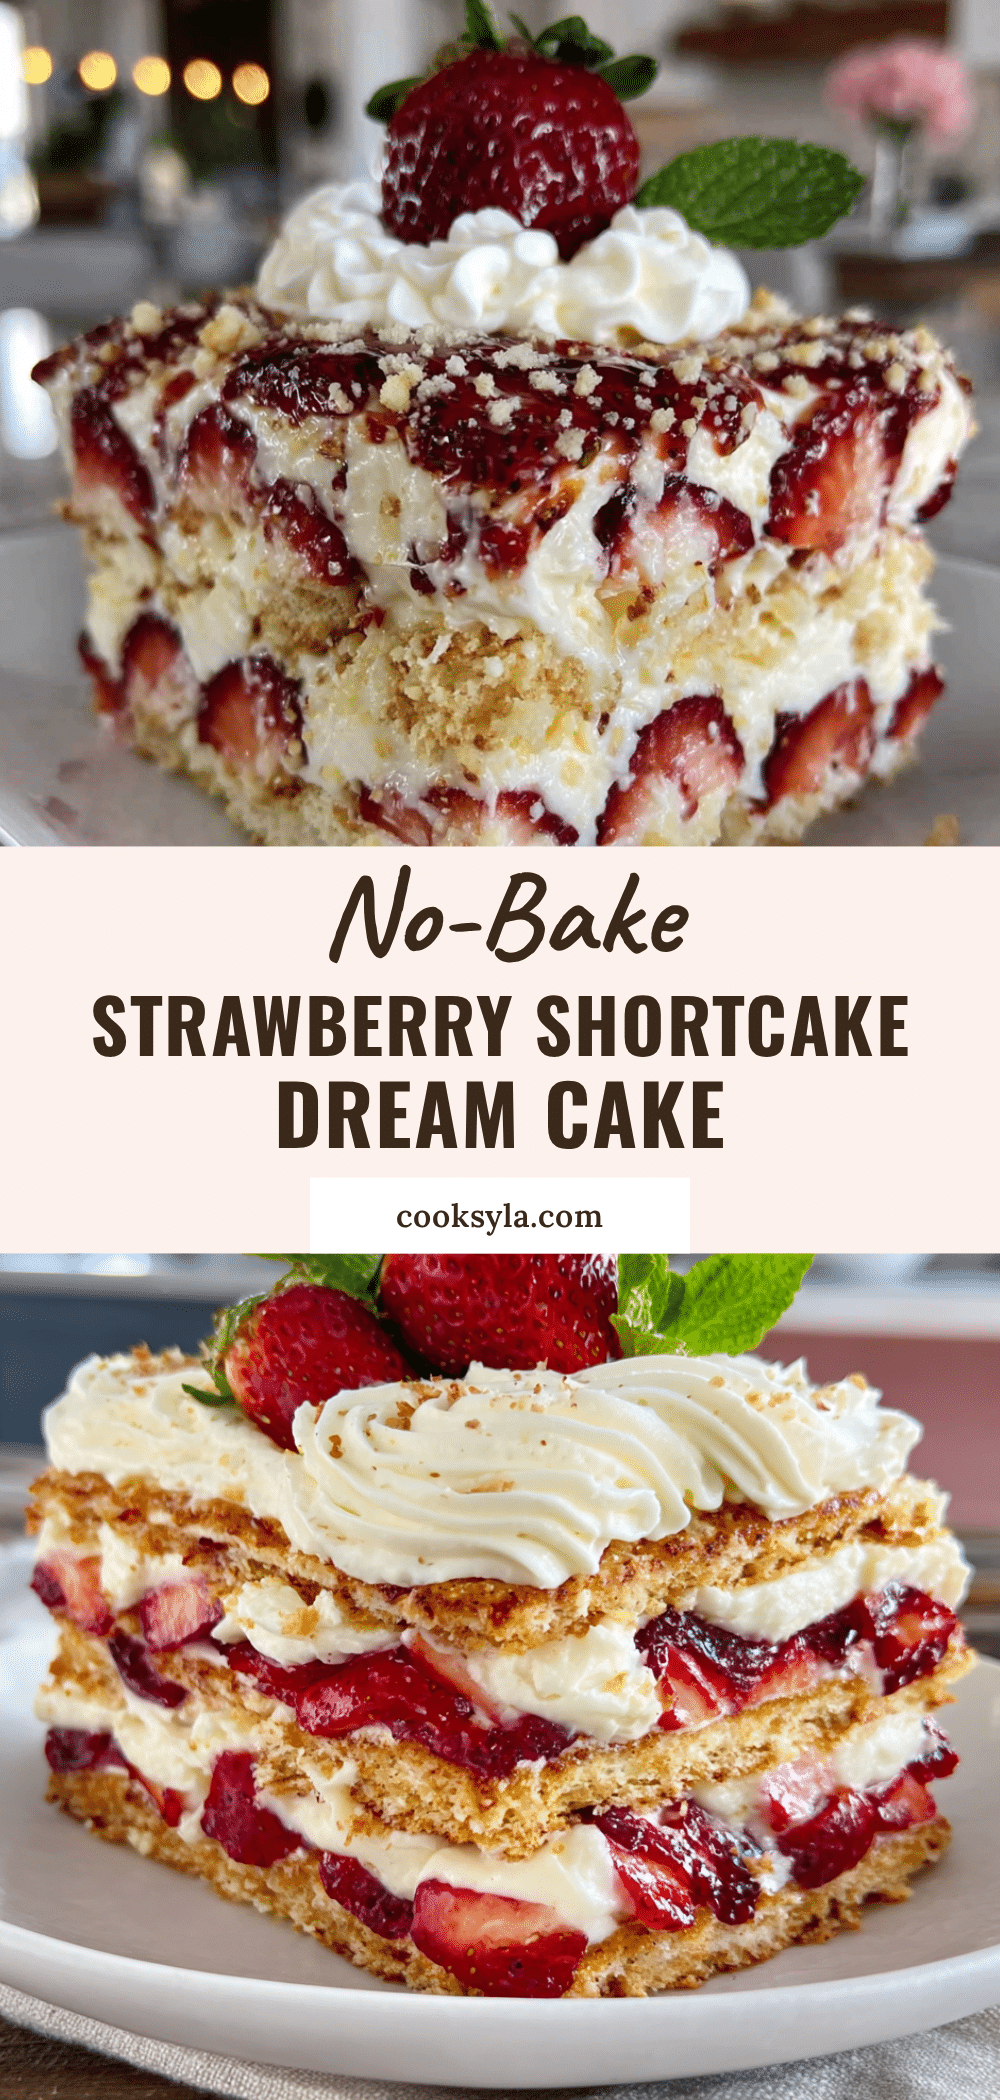
Easy No-Bake Strawberry Shortcake Icebox Cake
A simple, no-bake dessert made with fresh strawberries, sweet cream, and shortcake biscuits. Perfect for summer gatherings, this icebox cake requires no oven and comes together in just 20 minutes of active prep time.
- Prep Time: 20 minutes
- Cook Time: 0 minutes
- Total Time: 6 hours 20 minutes (includes chilling)
- Yield: 12 servings 1x
- Category: Dessert
- Cuisine: American
Ingredients
- 2 pounds fresh strawberries, hulled and sliced (about 6 cups sliced)
- 1/4 cup granulated sugar
- 1 tablespoon fresh lemon juice
- 2 cups heavy whipping cream, very cold
- 1 can (14 ounces) sweetened condensed milk
- 1 teaspoon vanilla extract
- Pinch of salt
- 2 packages (about 12 biscuits total) store-bought shortcake biscuits or sponge cake cups
- 1 cup heavy whipping cream, very cold (for topping)
- 2 tablespoons powdered sugar (for topping)
- 1/2 teaspoon vanilla extract (for topping)
- Fresh strawberry slices and mint leaves for garnish
Instructions
- Macerate the strawberries: Wash, hull, and slice strawberries about 1/4-inch thick. Toss with 1/4 cup granulated sugar and 1 tablespoon lemon juice. Let sit at room temperature for 30 minutes, stirring occasionally.
- Make the cream base: In a large chilled mixing bowl, whip 2 cups heavy cream on medium speed until soft peaks form (3-4 minutes). Reduce speed to low and slowly add sweetened condensed milk, 1 teaspoon vanilla, and a pinch of salt. Mix until combined and thick.
- Assemble the first layer: Spread a thin layer (about 1/4 cup) of cream mixture on the bottom of a 9×13-inch dish. Arrange a single layer of shortcake biscuits on top. Spoon half of the macerated strawberries (with syrup) over the biscuits. Spread half of the remaining cream mixture over the strawberries.
- Add the second layer: Place another layer of shortcake biscuits on top. Spoon remaining strawberries and syrup over biscuits. Top with remaining cream mixture, spreading evenly to the edges.
- Make the topping: In a clean bowl, whip 1 cup heavy cream, 2 tablespoons powdered sugar, and 1/2 teaspoon vanilla on medium-high until stiff peaks form. Spread over the top of the cake.
- Chill and set: Cover tightly with plastic wrap or foil. Refrigerate for at least 6 hours, preferably overnight. The biscuits need time to soften into a cake-like texture.
Notes
For best results, chill the mixing bowl and beaters in the freezer for 15 minutes before whipping cream. Use a slotted spoon to transfer strawberries to layers to avoid too much liquid. The cake can be made up to 24 hours in advance. Leftovers keep covered in the refrigerator for up to 3 days. The cake can also be frozen for up to 2 months.
Nutrition
- Serving Size: 1 slice (1/12 of cak
- Calories: 380
- Sugar: 28
- Sodium: 180
- Fat: 24
- Saturated Fat: 15
- Carbohydrates: 38
- Fiber: 2
- Protein: 5
Keywords: no-bake dessert, strawberry shortcake, icebox cake, summer dessert, easy dessert, no oven dessert


