Love this? Save it for later!
Share the inspiration with your friends
“You know that moment when you grab a snack late at night and suddenly find yourself covered in crumbs, with a smile you didn’t expect?” That was me last summer, standing in my tiny kitchen, clutching a plate of these Flavorful Key Lime Pie Bars with Coconut Crunch. Honestly, I wasn’t planning to make them that night—I was supposed to be prepping for the next day’s work, but the smell of toasted coconut and zesty lime just pulled me in.
The recipe actually came from an old friend I met at a weekend market. She was selling homemade jams and somehow slipped me a handwritten recipe card while we chatted about her travels to the Florida Keys. I tucked it into my bag, forgetting about it until one rainy Tuesday when I found the card again. The rest, well, is a bit of a messy kitchen story involving a cracked mixing bowl and a phone call from a neighbor interrupting the zesting process.
These bars have stuck with me ever since—not just because they’re tangy, sweet, and perfectly crunchy but because they capture that unexpected joy of a simple recipe turning into a favorite. If you’ve ever been on the hunt for a dessert that feels like sunshine and a little tropical breeze all in one bite, I think you’re going to love making these bars as much as I do.
Why You’ll Love This Recipe
After making these key lime pie bars countless times, I’m confident they’ll become your go-to treat for a few good reasons:
- Quick & Easy: Ready in about 45 minutes, including baking and cooling—great for busy afternoons or spontaneous get-togethers.
- Simple Ingredients: No need for exotic items; most are pantry staples or easy to find at any grocery store.
- Perfect for Warm Weather: The bright lime flavor and coconut crunch make it ideal for summer parties or casual picnics.
- Crowd-Pleaser: Kids, adults, skeptics—you name it, everyone tends to ask for seconds.
- Unbelievably Delicious: The creamy, tangy filling balanced by a buttery crust and toasted coconut topping is just next-level comfort food.
What sets this recipe apart isn’t just the combination of flavors but the texture play: the crisp crust, the smooth key lime custard, and that slightly chewy coconut crunch on top. I’ve tested versions with and without the coconut, and honestly, the topping is a game-changer. It adds that unexpected twist that makes you close your eyes after the first bite.
Plus, these bars are versatile—you can make them a week ahead for a party, and the flavors only get better. I always keep a batch in the freezer for those last-minute sweet cravings or when friends drop by unannounced.
What Ingredients You Will Need
This recipe uses simple, wholesome ingredients to deliver bold flavor and satisfying texture without the fuss. Most of these items are pantry staples, with a few fresh touches to brighten the bars up.
- For the Crust:
- 1 ½ cups graham cracker crumbs (about 12 full sheets, finely crushed)
- ⅓ cup granulated sugar
- 7 tablespoons unsalted butter, melted (I recommend Kerrygold for a rich flavor)
- For the Filling:
- 4 large eggs, room temperature
- 1 ¼ cups sweetened condensed milk (Nestlé is my go-to brand)
- ½ cup freshly squeezed key lime juice (or regular lime juice if unavailable)
- 1 tablespoon lime zest (adds fresh brightness)
- For the Coconut Crunch Topping:
- ¾ cup sweetened shredded coconut (toasted until golden brown)
- 2 tablespoons brown sugar (for a caramelized touch)
- 1 tablespoon unsalted butter, melted
Substitution tips: For a gluten-free option, swap the graham cracker crumbs for gluten-free cookies or almond flour. If you prefer dairy-free, use coconut oil instead of butter and a dairy-free condensed milk alternative. In summer, fresh key limes are fantastic, but bottled juice works perfectly well for convenience.
Equipment Needed
- 9×9-inch (23×23 cm) baking pan – I like using a glass pan for even baking, but metal works too.
- Mixing bowls – one medium and one large.
- Electric mixer or whisk – hand whisking works, but a mixer speeds things up.
- Zester or microplane – for that fresh lime zest.
- Measuring cups and spoons – accurate measurements really help with consistency.
- Spatula – for scraping the bowl and smoothing the filling.
- Toaster oven or skillet – optional, for toasting the coconut if you don’t want to use the oven.
If you don’t have a zester, a fine grater can do the job, but be careful to avoid the bitter white pith. For the coconut, you can spread it on a baking sheet or toast it quickly in a dry skillet over medium heat, stirring constantly to avoid burning.
Preparation Method
- Preheat your oven to 350°F (175°C). Lightly grease your 9×9-inch baking pan or line it with parchment paper, leaving some overhang for easy removal later. (Takes about 5 minutes)
- Make the crust: In a medium bowl, combine graham cracker crumbs and sugar. Pour in the melted butter and stir until the mixture resembles wet sand. Press firmly into the bottom of the prepared pan using the back of a spoon or your fingers. (This sets the base for that perfect crunch.) Bake for 8-10 minutes until slightly golden. Remove and let cool while you prepare the filling.
- Prepare the filling: In a large bowl, whisk the eggs until frothy. Add the sweetened condensed milk, key lime juice, and lime zest. Whisk until smooth and fully combined. (The mixture will be fairly thin—that’s exactly right.)
- Pour the filling over the cooled crust and spread it evenly using a spatula. Try not to disturb the crust too much.
- Toast the coconut: Spread the shredded coconut on a baking sheet and bake at 350°F (175°C) for 5-7 minutes, stirring halfway through. Watch closely to avoid burning—it should be a light golden brown. Alternatively, toast in a dry skillet over medium heat, stirring often.
- Mix the coconut topping: In a small bowl, combine the toasted coconut, brown sugar, and melted butter. Stir well to coat all the coconut pieces.
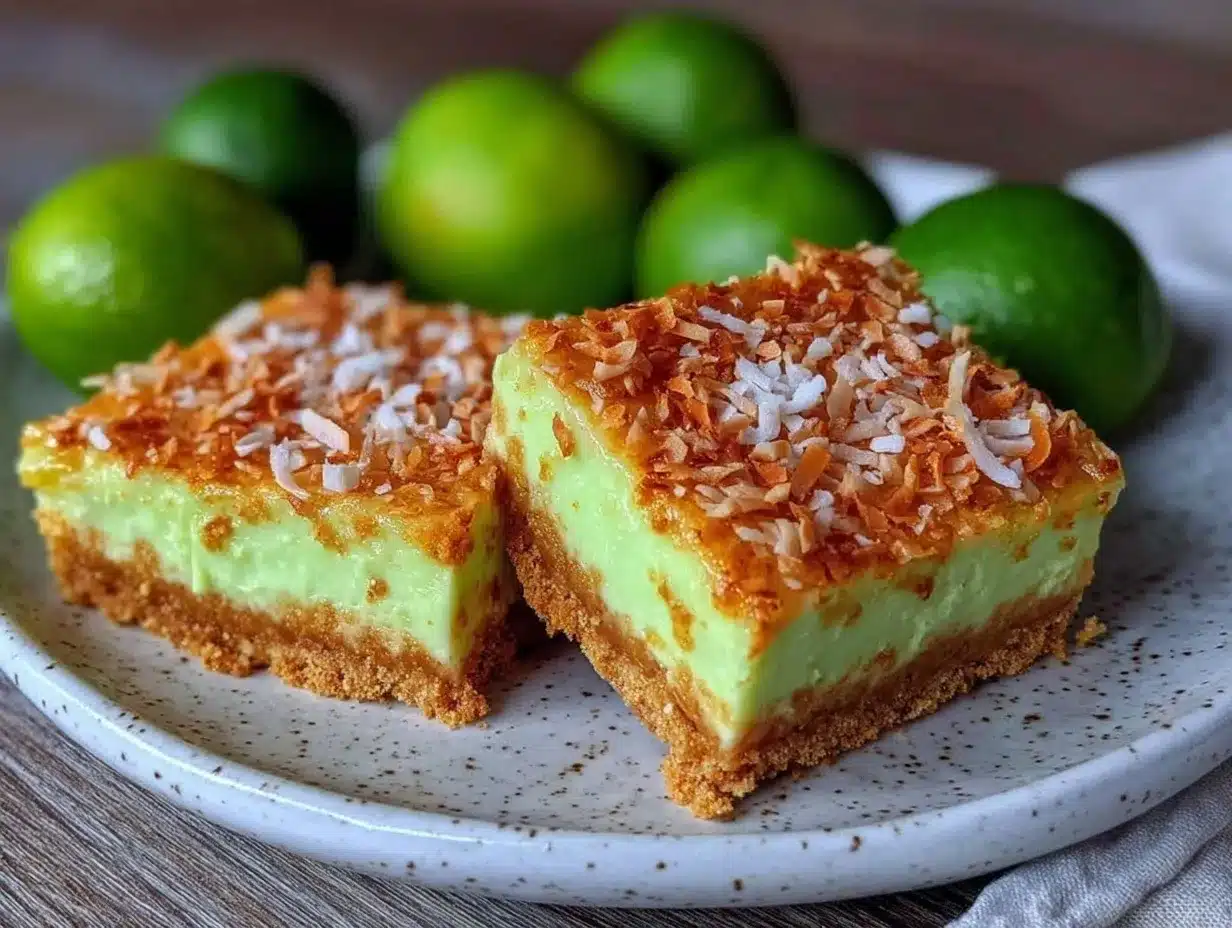
- Sprinkle the coconut topping evenly over the lime filling. Return the pan to the oven and bake for an additional 12-15 minutes. The filling should be set but still slightly jiggly in the center—like a good custard.
- Cool completely: Let the bars cool at room temperature for at least 1 hour, then chill in the refrigerator for 2 hours or more. (This step is key for clean slicing.)
- Slice and serve: Use a sharp knife, wiping it clean between cuts, to slice into 16 bars. These keep well covered in the fridge for up to 5 days.
If your filling cracks or looks uneven, don’t worry—the coconut topping hides a multitude of imperfections! Also, if you find the crust too crumbly, pressing it firmly before baking helps hold it together better.
Cooking Tips & Techniques
One trick I learned is to make sure your eggs are at room temperature before mixing. It helps the filling blend smoothly and bake evenly. Also, when zesting the limes, avoid the white pith underneath—it can taste bitter and throw off the delicate flavor.
When pressing the crust into the pan, don’t be shy about using your fingers—getting it packed tight means less crumble when cutting. I usually reserve a little extra graham cracker crumbs in case I want to sprinkle on the edges for texture.
The coconut topping is best toasted fresh. If you try toasting it ahead and store it, it tends to lose that lovely crunch and aroma. If you’re short on time, a quick 1-2 minute toast in a skillet works wonders.
Timing is everything here. Don’t overbake the filling—it should still jiggle slightly when you take it out. It firms up perfectly as it cools. And when slicing, a warm knife dipped in hot water can help you cut clean bars without sticking.
Personally, I’ve had batches where I forgot the lime zest (rookie move!) and it made a big difference in brightness. So don’t skip that step, even if it seems small. Trust me, the zing is worth it.
Variations & Adaptations
These key lime pie bars are pretty flexible and can be customized in a few fun ways:
- Dietary: Use almond flour or gluten-free cookie crumbs for a gluten-free crust. Coconut oil can replace butter for a dairy-free version.
- Seasonal twists: Swap the lime juice for lemon or even blood orange for a different citrus vibe. In summer, fresh berries make a great garnish on top.
- Flavor boosts: Add a teaspoon of vanilla extract or a pinch of cardamom to the filling for a subtle twist. If you love coconut, stir some shredded coconut into the filling itself.
- Cooking method: I’ve tried these in a mini muffin tin for bite-sized treats—just reduce baking time to 10-12 minutes total and watch closely.
- Personal variation: Once, I sprinkled chopped macadamia nuts along with the coconut topping, adding a lovely crunch and a nod to tropical flavors.
Serving & Storage Suggestions
Serve these bars chilled or just slightly cool. They taste amazing straight from the fridge when the filling is firm but smooth. For a little extra flair, a dollop of whipped cream or a few fresh mint leaves on top is lovely.
These bars pair beautifully with light beverages like iced tea, sparkling water with lime, or even a crisp white wine for grown-up gatherings.
Store leftover bars tightly covered in the refrigerator for up to 5 days. They also freeze well—wrap individual bars in plastic wrap and place them in an airtight container. Thaw overnight in the fridge before serving.
Flavors actually deepen after a day or two, so if you can wait, let them rest in the fridge for some extra zing and creaminess.
Nutritional Information & Benefits
Each bar contains approximately 220 calories, with 12 grams of fat and 25 grams of carbohydrates. The key lime juice is rich in vitamin C, great for immune support and skin health. The coconut topping adds healthy fats and fiber, making these bars a bit more satisfying than your average dessert.
They’re naturally gluten-free if you use gluten-free crumbs, and can be adapted to dairy-free easily. Just be mindful of the sweetened condensed milk if you’re monitoring sugar intake—it’s key to the creamy texture but can be swapped for lower sugar versions in some recipes.
From a wellness perspective, these bars offer a refreshing citrus boost that feels lighter than heavy cream pies, making them a nice choice when you want something indulgent but not overwhelming.
Conclusion
So, whether you’re craving a bright, tangy dessert or need a crowd-pleasing sweet for your next gathering, these Flavorful Key Lime Pie Bars with Coconut Crunch have you covered. They bring together a perfect balance of creamy, crunchy, and zesty that’s hard to resist.
Feel free to tweak the topping, the crust, or the citrus to make it truly your own. Honestly, I love how this recipe invites little experiments while still delivering consistent deliciousness every time.
If you give these bars a try, I’d love to hear how they turned out or what fun variations you come up with—drop a comment below and share your experience. Here’s to sweet moments and happy kitchens!
FAQs
Can I use regular limes instead of key limes?
Absolutely! Regular limes work just fine and are usually easier to find. The flavor is slightly different but still delicious.
How do I prevent the coconut from burning while toasting?
Toast it in a dry skillet over medium heat, stirring constantly, or in the oven at 350°F (175°C) while watching it closely. Remove as soon as it’s golden.
Can I make these bars ahead of time?
Yes! They actually taste better after a day or two in the fridge, allowing the flavors to meld perfectly.
What’s the best way to cut the bars cleanly?
Use a sharp knife wiped clean between cuts. Dipping the knife in hot water before slicing helps prevent sticking.
Is there a way to make these bars less sweet?
You can reduce the sugar slightly in the crust or topping, but the sweetened condensed milk in the filling is key for texture and flavor, so I recommend keeping it as is for best results.
Pin This Recipe!
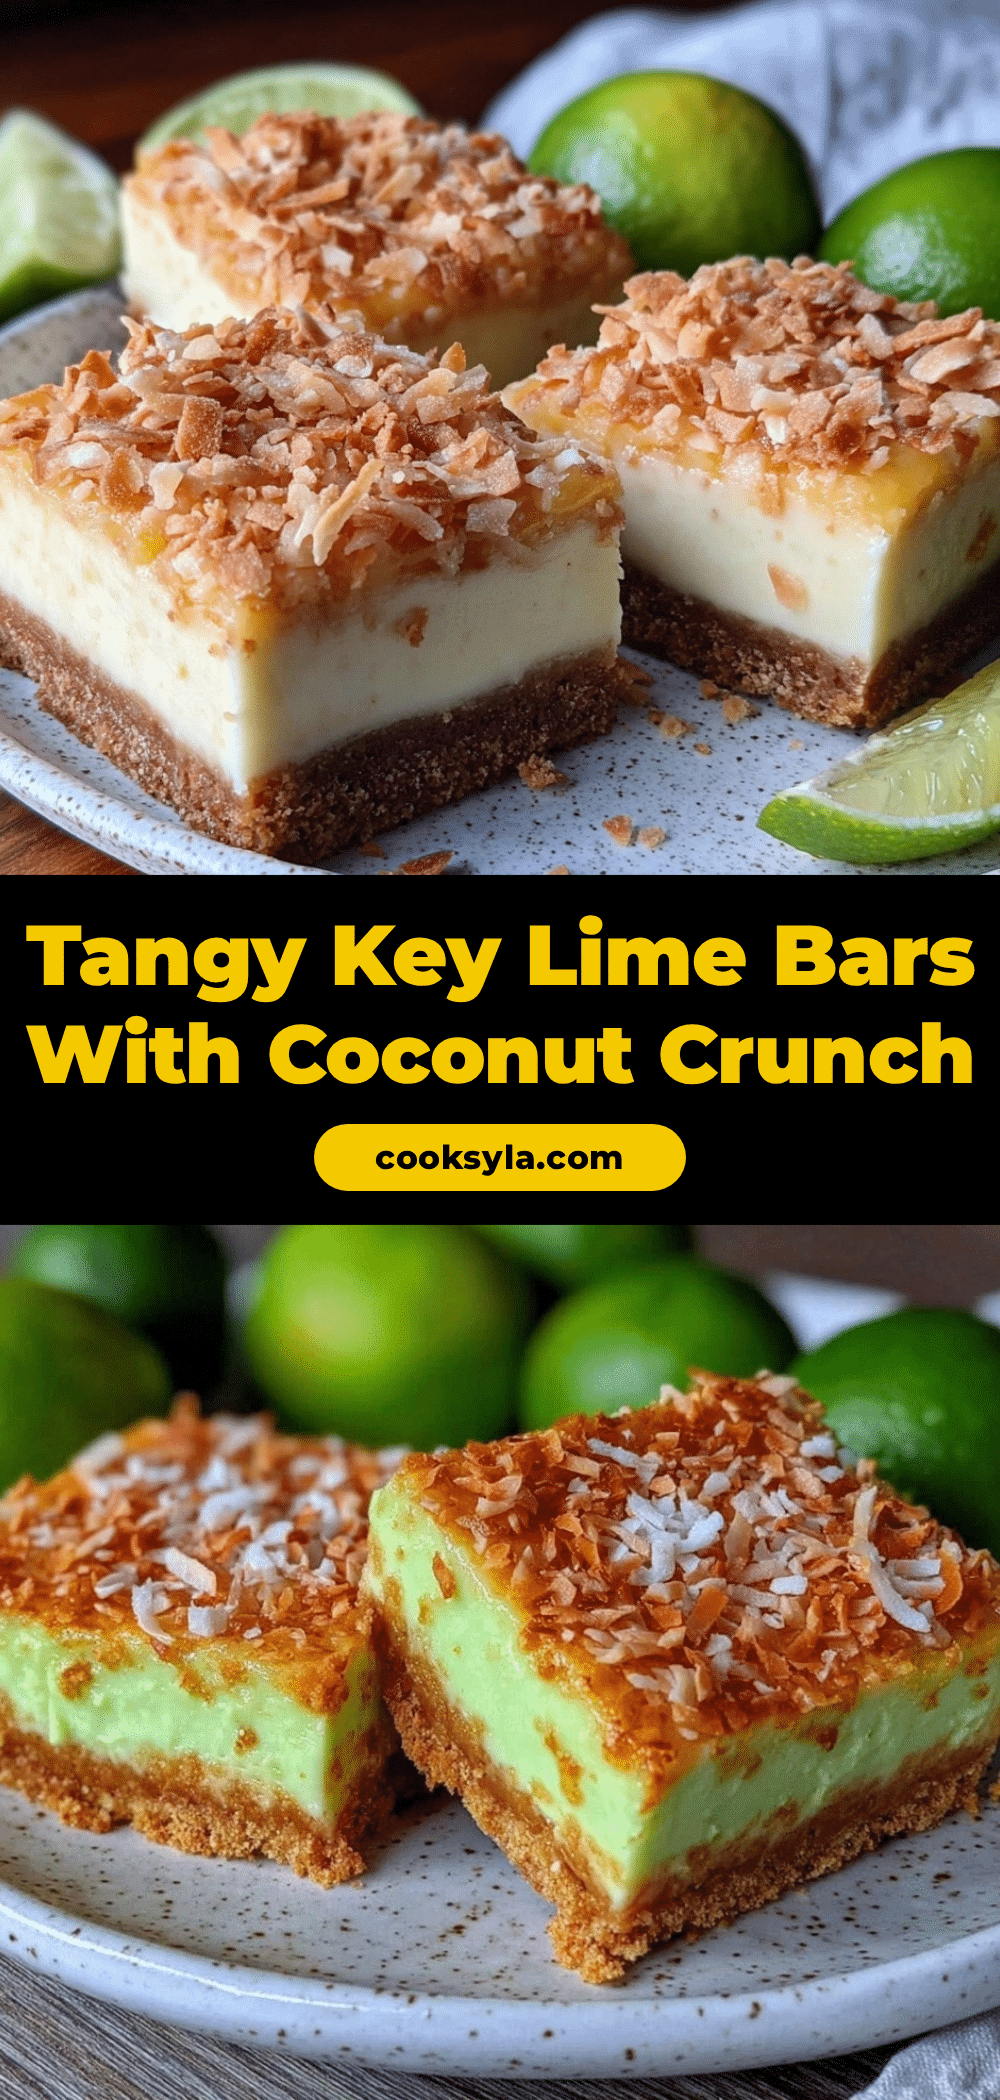
Flavorful Key Lime Pie Bars Recipe with Easy Coconut Crunch Topping
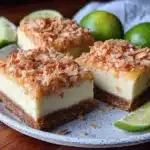
These tangy, sweet key lime pie bars feature a buttery graham cracker crust, creamy lime custard filling, and a crunchy toasted coconut topping. Perfect for summer parties or casual get-togethers, they are quick to make and a crowd-pleaser.
- Prep Time: 15 minutes
- Cook Time: 30 minutes
- Total Time: 45 minutes
- Yield: 16 bars 1x
- Category: Dessert
- Cuisine: American
Ingredients
- 1 ½ cups graham cracker crumbs (about 12 full sheets, finely crushed)
- ⅓ cup granulated sugar
- 7 tablespoons unsalted butter, melted
- 4 large eggs, room temperature
- 1 ¼ cups sweetened condensed milk
- ½ cup freshly squeezed key lime juice (or regular lime juice)
- 1 tablespoon lime zest
- ¾ cup sweetened shredded coconut, toasted until golden brown
- 2 tablespoons brown sugar
- 1 tablespoon unsalted butter, melted
Instructions
- Preheat your oven to 350°F (175°C). Lightly grease a 9×9-inch baking pan or line it with parchment paper, leaving some overhang for easy removal.
- In a medium bowl, combine graham cracker crumbs and sugar. Pour in the melted butter and stir until the mixture resembles wet sand. Press firmly into the bottom of the prepared pan. Bake for 8-10 minutes until slightly golden. Remove and let cool.
- In a large bowl, whisk the eggs until frothy. Add the sweetened condensed milk, key lime juice, and lime zest. Whisk until smooth and fully combined.
- Pour the filling over the cooled crust and spread evenly using a spatula.
- Toast the shredded coconut on a baking sheet at 350°F (175°C) for 5-7 minutes, stirring halfway through, until light golden brown. Alternatively, toast in a dry skillet over medium heat, stirring constantly.
- In a small bowl, combine the toasted coconut, brown sugar, and melted butter. Stir well to coat all the coconut pieces.
- Sprinkle the coconut topping evenly over the lime filling. Return the pan to the oven and bake for an additional 12-15 minutes until the filling is set but slightly jiggly in the center.
- Cool the bars completely at room temperature for at least 1 hour, then chill in the refrigerator for 2 hours or more.
- Slice into 16 bars using a sharp knife wiped clean between cuts. Store covered in the refrigerator for up to 5 days.
Notes
Use room temperature eggs for a smooth filling. Avoid zesting the white pith of the lime to prevent bitterness. Press the crust firmly to reduce crumbling. Toast coconut fresh for best flavor and crunch. Use a warm knife dipped in hot water to slice bars cleanly. Bars taste better after resting in the fridge for a day or two. For gluten-free, substitute graham cracker crumbs with gluten-free cookies or almond flour. For dairy-free, replace butter with coconut oil and use dairy-free condensed milk.
Nutrition
- Serving Size: 1 bar
- Calories: 220
- Sugar: 18
- Sodium: 110
- Fat: 12
- Saturated Fat: 7
- Carbohydrates: 25
- Fiber: 1
- Protein: 3
Keywords: key lime pie bars, coconut crunch topping, easy dessert, summer dessert, lime bars, quick dessert, crowd-pleaser