Love this? Save it for later!
Share the inspiration with your friends
I was elbow-deep in packing tape last October when the smell hit me. Not the cardboard smell of moving boxes, but something else — sweet, buttery, faintly vanilla. My neighbor across the hall was making Rice Krispie treats for her kid’s Halloween class party. And just like that, I was seven years old again, standing on a step stool in my Aunt Carol’s yellow kitchen, watching her stir a pot of marshmallows on the stove. She’d let me pour in the extra sprinkles, even when my hand shook and half of them ended up on the counter. She passed away five years ago, and I still can’t find her recipe box. But that smell? That I remembered. That I could almost hold onto.
So I bought a box of Rice Krispies on my way home that night. And a bag of candy corn, because Halloween was coming and Aunt Carol always added something silly and seasonal to her treats. I’m not gonna pretend my first batch was perfect — I forgot to grease the spatula, and let me tell you, peeling marshmallow cement off a metal spoon is nobody’s idea of a good time. But the second batch? The one where I folded in the candy corn at just the right moment? That one made me close my eyes. Maybe you’ve been there — chasing a taste from your childhood that you can’t quite describe but would know anywhere.
These Halloween Rice Krispie Treats are that taste for me. They’re the recipe I keep coming back to, not just because they’re easy, but because they feel like home. And honestly, when you’re hosting a crowd of hungry ghosts and goblins, you need something that feels like home.
Why You’ll Love This Recipe
Let’s be real for a second. Halloween parties are chaotic. You’ve got costumes to wrangle, decorations to hang, and a playlist that’s probably 60% “Monster Mash.” The last thing you need is a complicated recipe that requires a pastry bag and a steady hand. These Halloween Rice Krispie Treats are the opposite of that. They’re the dish you can throw together between answering the doorbell and untangling fake spiderwebs.
Here’s why these candy corn bites are about to become your go-to party trick:
- 15 Minutes Start to Finish: I timed it. From the moment the butter hits the pan to the moment you press the last marshmallow into place, you’re looking at a quarter of an hour. That’s faster than ordering pizza.
- Simple Ingredients: Butter, marshmallows, Rice Krispies cereal, and candy corn. That’s it. No weird specialty items, no trip to three different stores. You probably have most of this in your pantry right now.
- Perfect for Halloween Gatherings: These treats are made for sharing. They’re portable, they don’t need plates or forks, and kids and adults both go nuts for them. I’ve watched a grown man in a vampire costume eat four in a row without blinking.
- Crowd-Pleaser Guaranteed: Every single time I bring these to a party, someone asks for the recipe. And I’m not even a professional baker — I’m just someone who figured out the right ratio of marshmallow to cereal.
- Unbelievably Delicious: The texture is that perfect balance of chewy and crisp. The candy corn adds a little pop of sweetness and that iconic Halloween look. It’s comfort food with a costume on.
What makes this recipe different from the hundred other versions out there? It’s the timing. I’ve tested this more times than I care to admit, and I’ve learned exactly when to add the candy corn so it doesn’t melt into a sticky mess. You get distinct pieces of candy corn suspended in chewy, buttery marshmallow goodness. It’s not just another Rice Krispie treat — it’s the best version of one.
This is the kind of recipe that makes you look like a hero with almost no effort. Perfect for impressing your Halloween guests without breaking a sweat, or turning a simple snack into something that feels special.
What Ingredients You Will Need
This recipe uses simple, everyday ingredients to deliver that nostalgic flavor and satisfying crunch. Nothing fancy here — just pantry staples that come together in a way that feels almost magical.
- 3 tablespoons unsalted butter — Adds richness and helps prevent the marshmallows from sticking. I use salted butter in a pinch, but unsalted lets you control the salt level. (I recommend Kerrygold for the best flavor, but any brand works fine.)
- 1 package (10 ounces) regular marshmallows — These are the foundation of the treat. Mini marshmallows melt faster, but regular ones work perfectly too. Just stir them a little longer. Jet-Puffed is my go-to brand because they melt evenly without leaving lumps.
- 6 cups Rice Krispies cereal — The classic. Don’t substitute with a generic crispy rice cereal unless you have to — the texture and crunch are noticeably different. I’ve tried, and it’s just not the same.
- 1 cup candy corn — This is where the Halloween magic happens. Look for fresh candy corn — if it’s rock hard, it won’t blend well. Brach’s is the most reliable brand in my experience. You can also use autumn mix or candy pumpkins for variety.
- 1/4 teaspoon vanilla extract (optional) — I add this because Aunt Carol always did. It rounds out the sweetness and adds a warm, cozy note. Completely optional, but highly recommended.
- Pinch of salt (optional) — A tiny pinch of flaky sea salt on top right after pressing balances the sweetness beautifully. Don’t skip this if you like sweet-salty combos.
Ingredient Selection Tips: For the best texture, make sure your marshmallows are fresh and soft. Stale marshmallows won’t melt smoothly and can leave you with lumpy treats. Same goes for the candy corn — if it’s been sitting in your pantry since last Halloween, buy a fresh bag. Trust me on this one.
Substitution Guidance: For a dairy-free version, use vegan butter and vegan marshmallows (Dandies brand works great). The texture will be slightly different, but still delicious. For a gluten-free option, Rice Krispies are naturally gluten-free, but always check the label — some store brands add malt flavoring that contains gluten.
Equipment Needed
You don’t need a professional kitchen for this recipe. In fact, you probably already own everything on this list. But a few specific tools make the process smoother — and less sticky.
- Large pot or Dutch oven: You need something big enough to stir the cereal without it spilling over the sides. A 5- to 6-quart pot is ideal. I use my old Le Creuset, but honestly, any heavy-bottomed pot works.
- Wooden spoon or silicone spatula: A wooden spoon is sturdy enough to stir the thick mixture without bending. Silicone spatulas are great for scraping every last bit out of the pot. Just make sure it’s heat-resistant.
- 9×13-inch baking dish: This is the standard size for a full batch. If you want thicker treats, use a 9×9-inch dish. For thinner, more snackable bites, use a rimmed baking sheet.
- Parchment paper: This is non-negotiable. Line your dish with parchment paper, leaving some overhang on the sides. It makes lifting the whole block out so much easier — and cleanup is a breeze.
- Measuring cups and spoons: For accurate measurements. Eyeballing it works for some recipes, but this one needs precision for the right texture.
- Sharp knife: For cutting clean squares. A chef’s knife or a long serrated knife works best. Spray it with cooking spray between cuts to prevent sticking.
Budget-Friendly Alternatives: No parchment paper? Grease the dish generously with butter or cooking spray. No 9×13 dish? Use a disposable aluminum pan — they’re perfect for parties and you don’t have to worry about washing it afterward.
Preparation Method
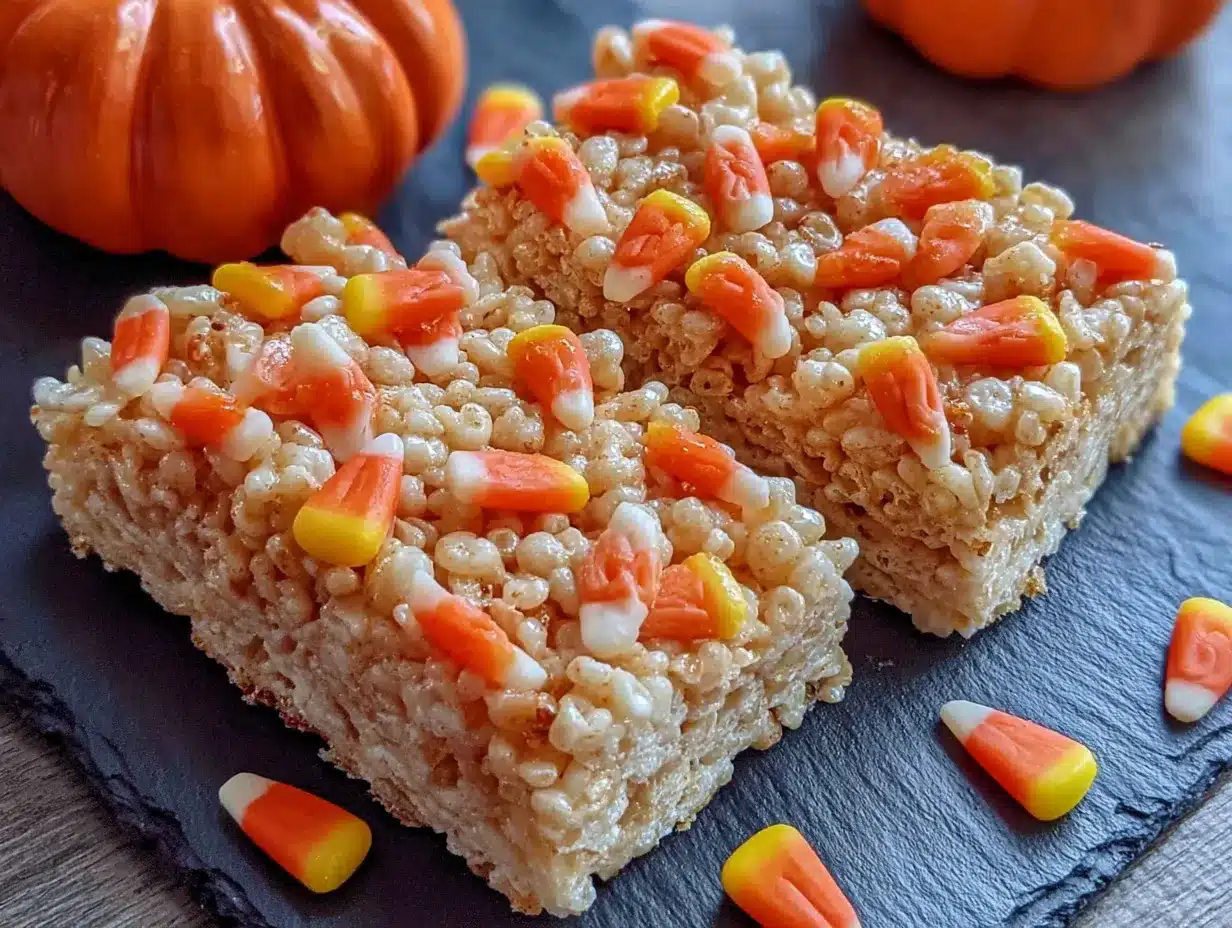
Alright, let’s get to the fun part. This is where the kitchen gets warm and sticky and smells incredible. Follow these steps, and you’ll have a pan of perfect Halloween Rice Krispie Treats in no time.
- Prep your dish. Line a 9×13-inch baking dish with parchment paper, leaving about 2 inches of overhang on two opposite sides. Lightly grease the parchment with butter or cooking spray. This step saves you from the heartbreak of stuck-on treats.
- Melt the butter. Place your large pot over medium-low heat. Add the 3 tablespoons of unsalted butter and let it melt slowly. Don’t rush this — high heat can burn the butter and ruin the flavor. Swirl the pot occasionally to help it melt evenly.
- Add the marshmallows. Once the butter is fully melted, pour in the entire 10-ounce bag of marshmallows. Stir constantly with your wooden spoon or silicone spatula. The marshmallows will start to puff up and then collapse into a smooth, gooey pool. This takes about 3-4 minutes on medium-low heat.
- Stir in vanilla and salt. If you’re using the vanilla extract and pinch of salt, add them now. Stir until fully incorporated. The mixture should be smooth, glossy, and uniform in color. If you see any lumps, keep stirring — they’ll melt.
- Remove from heat. Take the pot off the burner. This is important — if you leave it on the heat while adding the cereal, the mixture can get too hot and make the treats hard and brittle.
- Add the Rice Krispies. Pour in the 6 cups of cereal all at once. Fold gently with your spoon or spatula, using a cutting motion rather than stirring. You want to coat every piece of cereal without crushing it. The mixture will be thick and sticky — that’s normal.
- Fold in the candy corn. This is the moment that matters. Add 1 cup of candy corn and fold it in gently. Don’t overmix, or the candy corn will start to melt from the residual heat. You want distinct pieces of candy corn visible throughout the mixture. Work quickly but gently.
- Press into the dish. Transfer the mixture to your prepared baking dish. Using a greased spatula or greased hands (butter works best), press the mixture into an even layer. Don’t press too hard — you want them chewy, not compressed. An even, gentle pressure is all you need.
- Cool completely. Let the treats cool at room temperature for at least 30 minutes. Don’t rush this by putting them in the fridge — condensation can make them soggy. Patience pays off here.
- Cut and serve. Once completely cool, lift the block out using the parchment overhang. Place on a cutting board. Use a sharp knife (sprayed with cooking spray) to cut into squares. I usually go for 12 large squares or 24 smaller bites, depending on the crowd.
Pro Tip: If the mixture starts to get too stiff while you’re pressing it, it’s cooling too fast. Pop it back on the stove over low heat for 30 seconds to soften it up. I learned this the hard way after trying to press a cold, stubborn block into the dish.
Cooking Tips & Techniques
I’ve made these Halloween Rice Krispie Treats more times than I can count, and I’ve made every mistake in the book. Here’s what I’ve learned so you don’t have to repeat my failures.
Low and slow is the way to go. The biggest mistake people make is cranking up the heat to melt the marshmallows faster. Don’t do it. High heat makes the sugar in the marshmallows seize up, leaving you with a grainy, hard texture. Keep it on medium-low and be patient. Your treats will be chewy and soft, not tough.
Grease everything. I cannot stress this enough. Grease your spatula, your hands, your knife, your dish — everything that touches the marshmallow mixture. I once forgot to grease my spatula and spent 20 minutes scraping marshmallow goo off a metal spoon. It was not a good time. A light coating of butter or cooking spray makes all the difference.
Add candy corn at the right moment. If you add it too early, it melts into the marshmallow and you lose those beautiful orange and yellow pieces. If you add it too late, the mixture is already cooling and the candy corn won’t stick. The sweet spot is right after you fold in the cereal, while the mixture is still warm but not hot.
Don’t overmix. I know it’s tempting to keep stirring until everything looks perfectly uniform, but overmixing crushes the cereal and makes the treats dense and hard. Fold just until the cereal is coated, then stop. Imperfect is better here.
Timing is everything for parties. These treats are best the day they’re made, but you can make them a day ahead. Just store them in an airtight container at room temperature. If you’re bringing them to a party, cut them and arrange them on a platter — they look impressive with minimal effort.
My biggest failure: I once tried to double the recipe in a pot that was too small. The mixture overflowed, got all over my stovetop, and I ended up with half the batch stuck to the burner. Use a big pot. Trust me.
Variations & Adaptations
One of the best things about this recipe is how easy it is to customize. Here are a few variations I’ve tried and loved:
Chocolate Drizzle: After the treats cool, melt 1/2 cup of semi-sweet chocolate chips with 1 teaspoon of coconut oil in the microwave (30-second intervals, stirring between). Drizzle over the top with a fork. The chocolate and candy corn combo is amazing. I did this for a Halloween party last year and they disappeared in 10 minutes.
Spooky Sprinkles: Before the mixture sets, sprinkle Halloween-themed sprinkles on top — orange and black jimmies, edible eyeballs, or bat-shaped sprinkles. Press them in gently with your spatula. Kids go crazy for these.
Peanut Butter Twist: Add 1/4 cup of creamy peanut butter to the marshmallow mixture right after it melts. Stir until smooth, then proceed with the recipe. The peanut butter adds a savory note that balances the sweetness of the candy corn. Just make sure none of your guests have peanut allergies.
Vegan Version: Use vegan butter (Earth Balance works well) and vegan marshmallows (Dandies are my favorite). The texture is slightly different — a bit more dense — but still delicious. I’ve served these to a mixed crowd and nobody noticed the difference.
Gluten-Free Option: Rice Krispies are naturally gluten-free, but some generic brands use malt flavoring that contains gluten. Look for the “Gluten-Free” label on the box. Fruity Pebbles are also gluten-free and make a fun, colorful variation.
My personal favorite variation: I add 1/2 cup of mini chocolate chips along with the candy corn. The chocolate melts slightly from the warmth, creating little pockets of gooey goodness throughout the treat. It’s like a s’more and a Rice Krispie treat had a Halloween baby.
Serving & Storage Suggestions
These Halloween Rice Krispie Treats are best served at room temperature. The texture is perfectly chewy, and the candy corn stays firm but not hard. If you’re serving them at a party, arrange them on a large platter or cake stand for a festive display.
What to serve alongside: These treats pair beautifully with a warm apple cider or a pumpkin spice latte for the adults. For kids, cold milk is the classic choice. If you’re building a Halloween dessert table, add some caramel apples, popcorn balls, and pumpkin-shaped cookies for variety.
Storage instructions: Store leftover treats in an airtight container at room temperature for up to 3 days. Do not refrigerate — the cold air makes them hard and stale. If you’re making them ahead for a party, prepare them the day before and keep them sealed until serving.
Freezer tips: These treats freeze surprisingly well. Wrap individual squares tightly in plastic wrap, then place them in a freezer-safe bag. They’ll keep for up to 3 months. To thaw, leave them at room temperature for about 30 minutes. Don’t microwave them to thaw — the texture gets weird.
How flavors develop: These treats are actually better the next day. The marshmallow sets up perfectly, and the flavors meld together. I’ve found that the candy corn softens slightly overnight, which makes it even more enjoyable. So don’t stress about making them fresh — day-old treats are still fantastic.
Nutritional Information & Benefits
Let’s be honest — these are a treat, not a health food. But here’s the estimated nutritional breakdown for one large square (assuming 12 servings per batch):
| Nutrient | Amount per Serving |
|---|---|
| Calories | 210 |
| Total Fat | 6g |
| Saturated Fat | 3.5g |
| Carbohydrates | 38g |
| Sugar | 24g |
| Protein | 2g |
| Sodium | 180mg |
Health benefits of key ingredients: Rice Krispies are made from rice, which is naturally gluten-free and provides a quick source of energy. Butter contains fat-soluble vitamins A, D, E, and K. And while candy corn is mostly sugar, it does bring a little joy — and that counts for something, especially during the holidays.
Dietary considerations: This recipe contains dairy (butter) and is not suitable for vegans unless substitutions are made. It can be made gluten-free by checking the cereal label. The main allergen to watch for is dairy, but the candy corn is typically dairy-free.
My wellness perspective: I believe in balance. These treats are for celebrations, not everyday snacks. Enjoy them at your Halloween party, savor every bite, and don’t feel guilty about it. Life is too short to skip the candy corn.
Conclusion
These Halloween Rice Krispie Treats with Candy Corn are more than just a quick dessert — they’re a little piece of nostalgia you can share with the people you love. They’re the recipe that brings back memories of Aunt Carol’s yellow kitchen, of Halloween parties past, of the simple joy of biting into something sweet and chewy.
I hope you make these for your next gathering. I hope you customize them with your own favorite add-ins — chocolate chips, sprinkles, peanut butter, whatever makes you happy. And I hope they bring a smile to your face like they do to mine.
If you try this recipe, I’d love to hear about it. Leave a comment below and tell me how they turned out, or share a photo of your creation. Did you add your own twist? Did the kids love them? Did you forget to grease the spatula like I did? Share it all — I read every comment.
Now go make some memories. And don’t forget to save a piece for yourself before the crowd gets to them!
Frequently Asked Questions
Can I use mini marshmallows instead of regular ones?
Yes, absolutely. Mini marshmallows melt faster and more evenly, which can actually make the process quicker. Use the same weight — 10 ounces — and reduce the melting time by about a minute. Keep stirring until they’re completely smooth.
Why did my Rice Krispie treats turn out hard?
This usually happens when the marshmallow mixture gets too hot. Keep the heat on medium-low and remove the pot from the burner as soon as the marshmallows are melted. Overheating causes the sugar to crystallize, resulting in hard, brittle treats. Also, pressing too firmly when shaping can make them dense.
Can I use stale candy corn?
I wouldn’t recommend it. Stale candy corn is hard and dry, and it won’t blend well with the marshmallow mixture. It can also have an off flavor. For the best results, use fresh, soft candy corn from a new bag. Your treats will thank you.
How do I keep the treats from sticking to the knife when cutting?
Spray your knife with cooking spray between each cut. You can also run the knife under hot water and wipe it dry before cutting — the heat helps the blade glide through the marshmallow. A long serrated knife works better than a straight blade for clean cuts.
Can I freeze these treats for later?
Yes, they freeze well for up to 3 months. Wrap each square individually in plastic wrap, then place them in a freezer-safe bag. Thaw at room temperature for about 30 minutes before serving. Don’t microwave them to thaw — it messes up the texture. They’re great to have on hand for last-minute Halloween cravings!
Pin This Recipe!
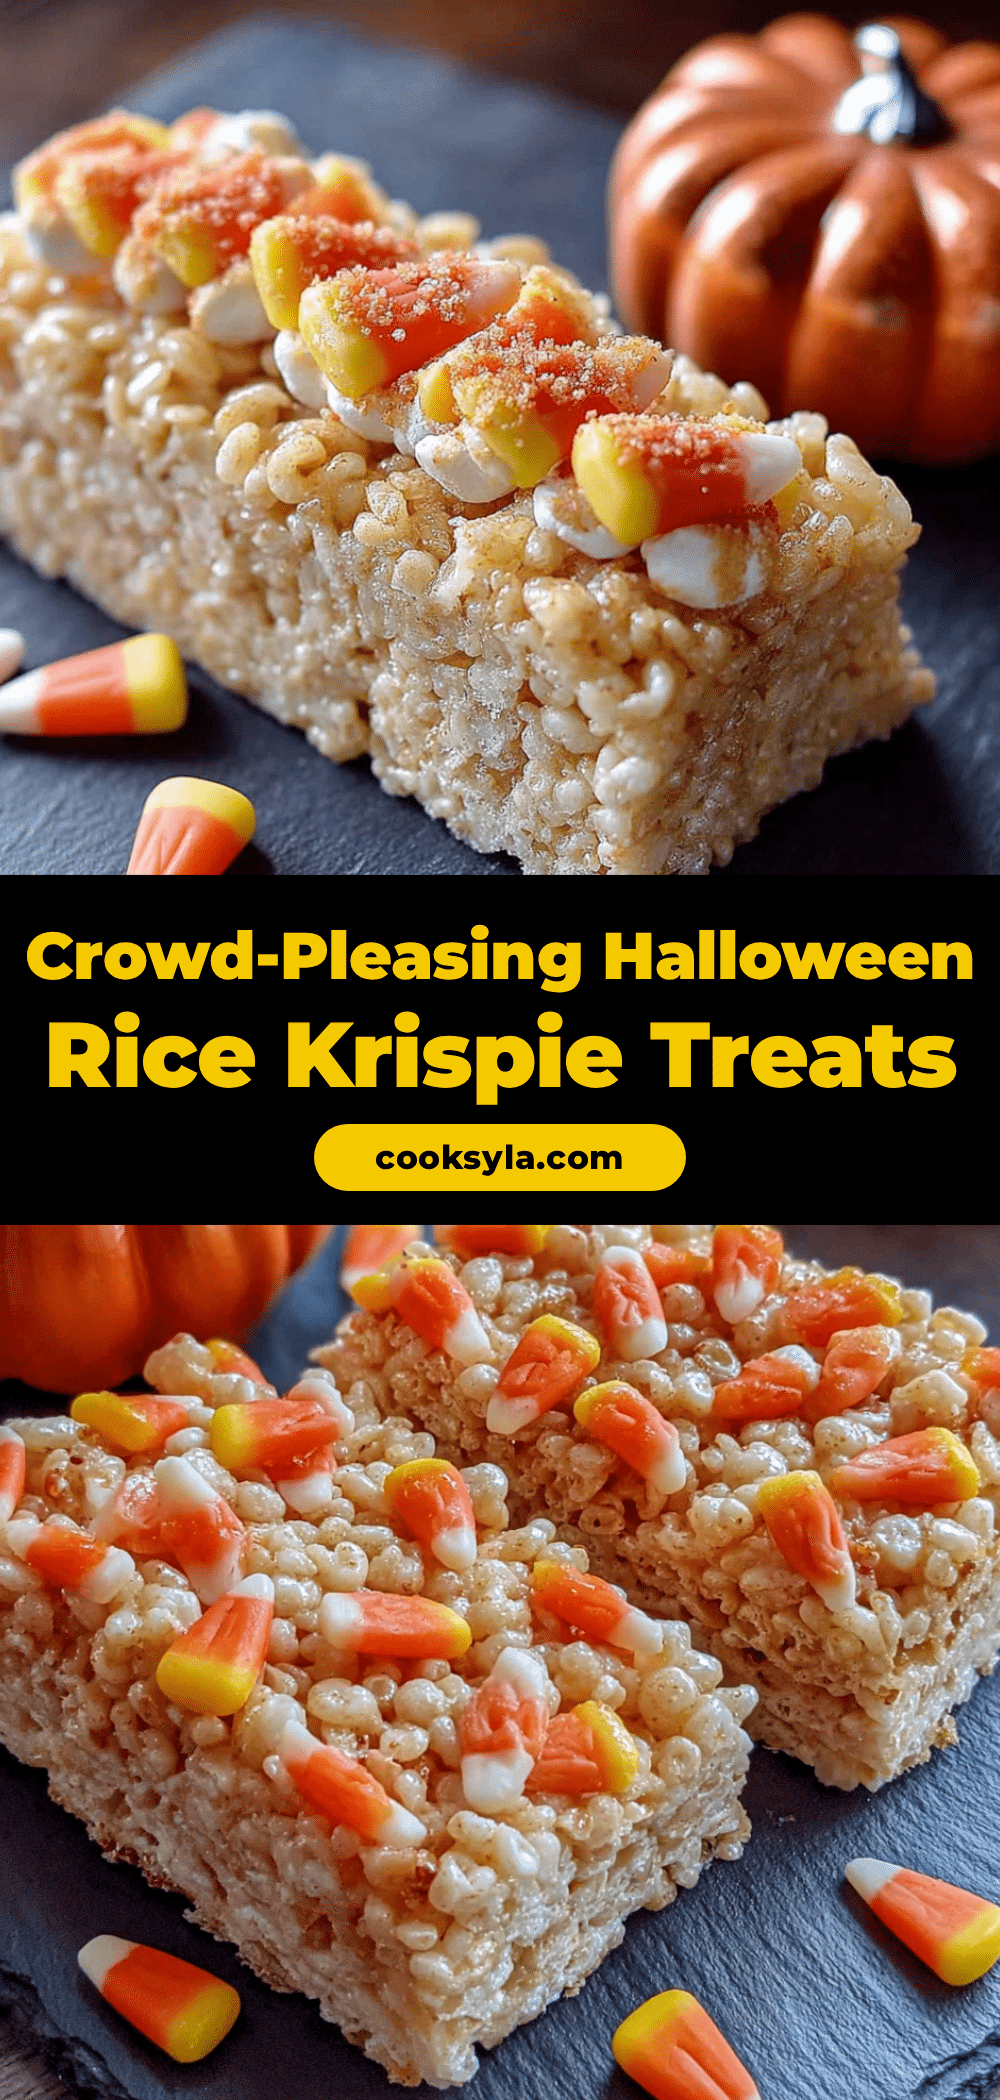
Halloween Rice Krispie Treats – Easy 15-Minute Candy Corn Bites
These Halloween Rice Krispie Treats are a quick and easy 15-minute recipe featuring buttery marshmallow treats studded with candy corn. Perfect for Halloween parties, they’re a nostalgic crowd-pleaser that kids and adults love.
- Prep Time: 5 minutes
- Cook Time: 10 minutes
- Total Time: 15 minutes
- Yield: 12 servings 1x
- Category: Dessert
- Cuisine: American
Ingredients
- 3 tablespoons unsalted butter
- 1 package (10 ounces) regular marshmallows
- 6 cups Rice Krispies cereal
- 1 cup candy corn
- 1/4 teaspoon vanilla extract (optional)
- Pinch of salt (optional)
Instructions
- Line a 9×13-inch baking dish with parchment paper, leaving about 2 inches of overhang on two opposite sides. Lightly grease the parchment with butter or cooking spray.
- Place a large pot over medium-low heat. Add the 3 tablespoons of unsalted butter and let it melt slowly.
- Once the butter is fully melted, pour in the entire 10-ounce bag of marshmallows. Stir constantly until the marshmallows are completely melted and smooth, about 3-4 minutes.
- If using, stir in the vanilla extract and pinch of salt until fully incorporated.
- Remove the pot from the heat.
- Pour in the 6 cups of Rice Krispies cereal all at once. Fold gently with a wooden spoon or silicone spatula until every piece of cereal is coated.
- Add the 1 cup of candy corn and fold it in gently. Do not overmix; you want distinct pieces of candy corn visible.
- Transfer the mixture to the prepared baking dish. Using a greased spatula or greased hands, press the mixture into an even layer. Do not press too hard.
- Let the treats cool at room temperature for at least 30 minutes.
- Once completely cool, lift the block out using the parchment overhang. Place on a cutting board. Use a sharp knife (sprayed with cooking spray) to cut into squares.
Notes
For best results, use fresh marshmallows and candy corn. Grease your spatula, hands, and knife to prevent sticking. If the mixture gets too stiff while pressing, return the pot to low heat for 30 seconds to soften. Store in an airtight container at room temperature for up to 3 days. Freeze individual squares wrapped in plastic wrap for up to 3 months.
Nutrition
- Serving Size: 1 large square
- Calories: 210
- Sugar: 24
- Sodium: 180
- Fat: 6
- Saturated Fat: 3.5
- Carbohydrates: 38
- Protein: 2
Keywords: Halloween Rice Krispie treats, candy corn treats, easy Halloween dessert, no-bake dessert, 15-minute recipe


