Love this? Save it for later!
Share the inspiration with your friends
Introduction
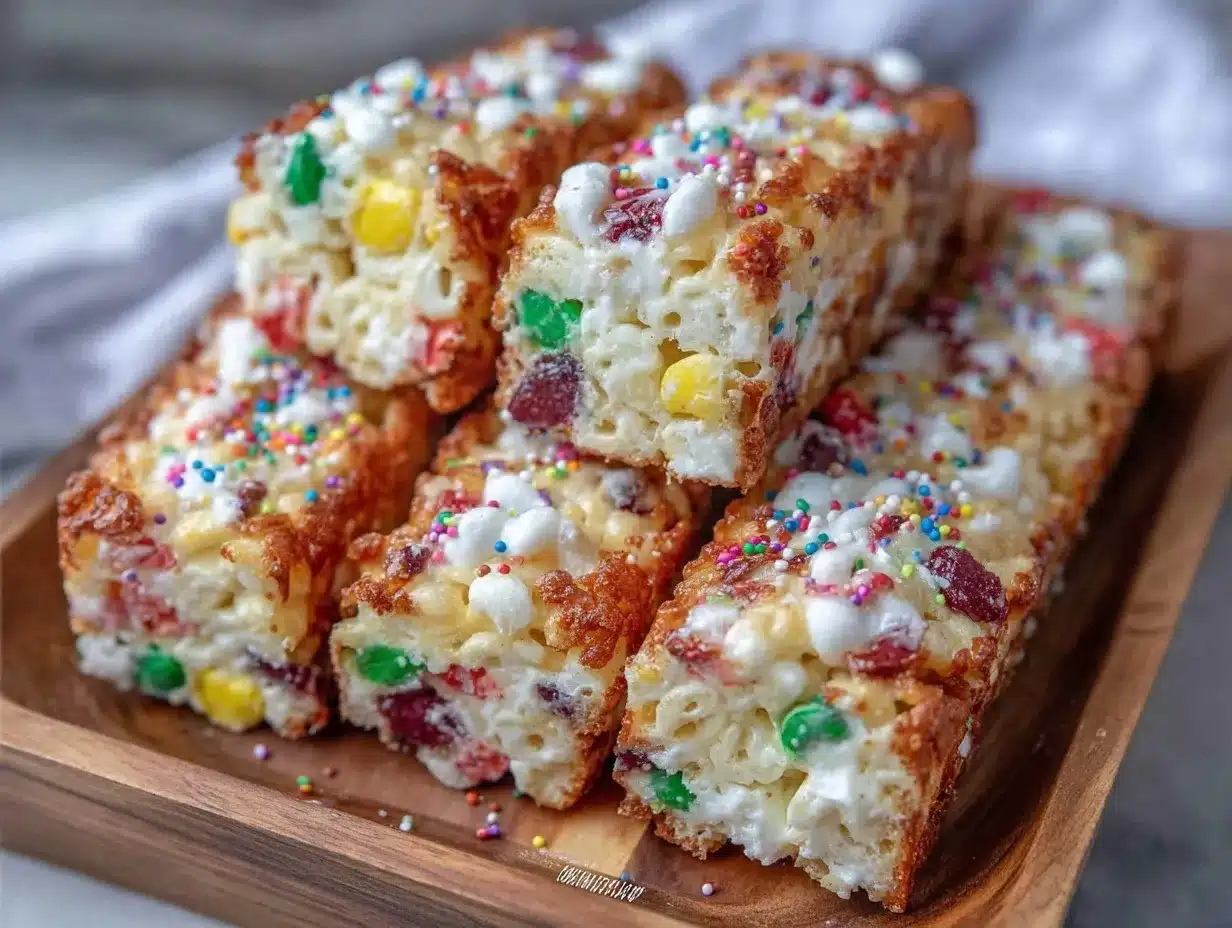
It was exactly 10:37 PM on a sleepy Wednesday, and the weirdest craving hit me — something sweet, nostalgic, but with a twist that could wow the kids at the upcoming school party. I didn’t have any fancy molds or the usual cookie cutters, but I did have a box of Rice Krispies, marshmallows, and a wild idea that struck me like a late-night lightning bolt: pencil-shaped Rice Krispie treats. Sounds odd? Maybe. But honestly, the kitchen mess I made in the process told me this was going to be a hit.
Let me tell you, I wasn’t planning on getting this creative after a long day. My mixing bowl was cracked from an earlier mishap, and the neighbor’s dog kept howling outside, but there I was, sculpting these quirky little treats shaped like pencils — bright yellow, with pink erasers and a chocolate tip. Maybe you’ve been there: a craving that makes you invent on the fly and, somehow, the results are better than the usual.
This recipe stuck with me because it’s not just about sugar and cereal mashed together. It’s about turning the simple into the unexpected, and honestly, these pencil-shaped Rice Krispie treats have become my go-to for kids’ parties and quick after-school snacks. If you’re looking for something fun and easy that brings a smile (and maybe a few “how did you do that?”), this recipe is your new best friend.
Why You’ll Love This Recipe
After testing this recipe more times than I can count, I’m confident it’s a winner in every sense. Here’s why you’ll want to keep this pencil-shaped Rice Krispie treats recipe in your back pocket:
- Quick & Easy: Comes together in under 30 minutes — perfect for busy weeknights or last-minute party prep.
- Simple Ingredients: No need for specialty stores; you probably have everything right in your pantry already.
- Perfect for Kids’ Parties: These treats add a playful, colorful touch that kids adore, making them a hit at birthdays or classroom celebrations.
- Crowd-Pleaser: The classic Rice Krispie treat flavor with a fun twist that both kids and adults rave about.
- Unbelievably Delicious: The marshmallow’s sweetness balanced with crispy cereal texture and a hint of chocolate is just irresistible.
What makes this recipe stand out isn’t just the shape — although that’s a crowd-stopper — but the way the marshmallow mixture is gently folded with the cereal for perfect fluffiness. Plus, the coloring technique for the “pencil” parts is simple but so effective. Honestly, this isn’t just another Rice Krispie treat recipe; it’s the one that gets you compliments and repeat requests.
And if you’re wondering why I keep coming back to this recipe, it’s because it’s fun to make and makes everyone smile — from the littlest guests to the grown-ups who secretly love a nostalgic snack.
What Ingredients You Will Need
This recipe uses simple, wholesome ingredients to deliver bold flavor and a satisfying texture without any fuss. Most of these are pantry staples, and if you have kids around, the chances are you already have everything on hand.
- Rice Krispies cereal (6 cups / 180 g) – The classic crispiness that holds everything together.
- Marshmallows (4 cups / about 240 g) – Use regular or mini marshmallows; they melt down perfectly.
- Unsalted butter (3 tablespoons / 42 g) – Adds richness and helps the marshmallows melt smoothly.
- Yellow food coloring – For that iconic pencil body color (gel food coloring works best).
- Pink frosting or colored candy melts – To create the eraser tip (store-bought or homemade works fine).
- Chocolate chips or melted chocolate (about ½ cup / 90 g) – For the pencil tip, giving it that authentic look.
- Optional: edible gold shimmer or sprinkles – For a little extra sparkle if you’re feeling fancy.
Pro tip: I like using Jet-Puffed marshmallows for the fluffiest texture, and Wilton gel food coloring for vibrant, consistent color without watering down the mix. If you’re looking for a gluten-free option, Rice Krispies are naturally gluten-free in some regions, but always check your packaging.
Substitution ideas: Swap butter with coconut oil for a dairy-free twist, or try dairy-free marshmallows if needed. For the eraser, you can also use pink fondant shaped with your hands if you want a no-fuss candy alternative.
Equipment Needed
- Large saucepan or pot for melting butter and marshmallows
- Large mixing bowl
- Rubber spatula or wooden spoon for stirring
- Baking sheet lined with parchment paper or a silicone mat
- Sharp knife or kitchen scissors for shaping the treats
- Measuring cups and spoons
- Optional: piping bag or small brush for applying frosting or melted chocolate details
If you don’t have a silicone mat, parchment paper works just as well and helps keep the treats from sticking. For shaping the pencil tips, a serrated knife works better than a smooth one — it gives you more control and cleaner edges. I once tried shaping these with just my hands in the dark, and let me tell you, it was a sticky mess — so get yourself a good knife!
Preparation Method
- Prepare your workspace. Line a baking sheet with parchment paper or a silicone mat and set aside. Gather all your ingredients to keep the process smooth.
- Melt the butter. In a large saucepan over low heat, melt 3 tablespoons (42 g) of unsalted butter. This should take about 2 minutes — don’t rush it or the butter might brown.
- Add marshmallows. Once the butter is melted, add 4 cups (about 240 g) of marshmallows to the pot. Stir constantly with a rubber spatula until melted and smooth, about 4-5 minutes. Watch closely to avoid burning.
- Add yellow food coloring. Remove the pot from heat and stir in your yellow food coloring a drop at a time until you reach a vibrant pencil-yellow hue. (Gel coloring is best here to avoid thinning the mixture.)
- Combine with Rice Krispies. Immediately pour the melted marshmallow mixture over 6 cups (180 g) of Rice Krispies cereal in your large bowl. Fold gently but thoroughly to coat every piece without squishing the cereal too much.
- Shape the treats. Press the mixture firmly but gently onto the prepared baking sheet into a rectangular slab, about 1-inch (2.5 cm) thick. Let it cool for 5 minutes—don’t skip this or the next steps get messy.
- Cut into rectangles. Using a sharp knife, cut the slab into pencil-sized rectangles, about 1 inch (2.5 cm) wide and 5 inches (12.7 cm) long. Don’t panic if the edges aren’t perfect; the charm is in the handmade look.
- Create the eraser. On one end of each rectangle, spread a thin layer of pink frosting or carefully apply pink candy melts; this forms the “eraser” part. Let it set for a few minutes.
- Make the pencil tip. Melt your chocolate chips (about ½ cup / 90 g) in short bursts in the microwave or over a double boiler. Dip the opposite ends of your treats into the melted chocolate or use a small spoon to shape a pointed “tip.” Place the treats back on the parchment to set.
- Optional finishing touches. Add edible gold shimmer or sprinkles near the eraser for a little sparkle and let everything cool completely before serving.
Tips: If the mixture gets too sticky while shaping, wet your hands lightly to avoid sticking. If the marshmallow mixture cools and hardens too fast, warm it gently over low heat again before shaping.
Cooking Tips & Techniques
Honestly, Rice Krispie treats are straightforward, but shaping them into pencils adds a little twist that’s worth some insider tips.
- Use low heat when melting marshmallows. High heat can scorch the marshmallows and make the mixture grainy. Stir constantly to keep the texture smooth.
- Don’t over-stir the cereal mixture. Folding gently preserves the crispy texture and prevents mushiness.
- Work quickly but carefully when shaping. The mixture sets fast, especially in cooler kitchens, so have your tools ready and your hands lightly greased with butter or water.
- For clean cuts, use a serrated knife warmed in hot water and wiped dry. This reduces sticking and crumbling.
- When applying frosting or chocolate, let each layer set before moving to the next. It helps keep the pencil shape crisp and prevents colors from blending.
- Don’t skip chilling the chocolate tips. Proper setting of the chocolate gives that authentic pencil point and avoids smudging.
One time, I tried piping the chocolate tips directly onto the treats without melting it first — rookie mistake. The tips never hardened properly and looked sloppy. So, melting and dipping or spooning works best. Also, multitasking by melting chocolate while the marshmallow mixture cools saves time.
Variations & Adaptations
Here are some ways to switch up this pencil-shaped Rice Krispie treats recipe to suit different tastes and occasions:
- Dietary swaps: Use vegan marshmallows and coconut oil instead of butter for a dairy-free version.
- Flavor twists: Add a teaspoon of vanilla or almond extract to the melted marshmallow for extra depth. You can also fold in mini chocolate chips with the cereal for a double treat.
- Color variations: Change the pencil body color to blue, green, or red for themed parties or school colors.
- Cooking method: Instead of shaping on a baking sheet, press the mixture into silicone pencil-shaped molds for perfect uniformity.
- Personal twist: I once tried adding a sprinkle of edible glitter to the eraser frosting—kids loved the extra sparkle!
Allergy-friendly tip: Omit the chocolate tip or substitute with sunflower seed butter for nut allergies. For gluten sensitivity, confirm your Rice Krispies brand is gluten-free or substitute with a gluten-free crispy cereal.
Serving & Storage Suggestions
Serving these pencil-shaped Rice Krispie treats at room temperature is best to enjoy their crisp texture and sweet marshmallow flavor. They make a perfect centerpiece on a colorful platter for kids’ parties, paired with fresh fruit or simple juice boxes.
For a fun presentation, arrange them in a pencil cup or wrap each treat in clear cellophane tied with a ribbon matching your party theme.
To store, keep them airtight at room temperature for up to 3 days. If you want to keep them longer, wrap individually and freeze for up to 2 weeks. Thaw at room temperature before serving.
Reheating isn’t necessary, but if you prefer a softer treat, zap for 10-15 seconds in the microwave. Just don’t overdo it or they’ll get too gooey.
Over time, the flavors meld a bit and the treats soften slightly, which some kids actually prefer. Either way, they’re always a hit.
Nutritional Information & Benefits
Here’s a rough estimate per pencil-shaped treat (based on 12 servings):
| Calories | 150-180 kcal |
|---|---|
| Fat | 5-7 g |
| Sugar | 15-20 g |
| Carbohydrates | 28-32 g |
| Protein | 1-2 g |
While these treats are definitely a sweet indulgence, the marshmallows provide quick energy, and the cereal offers some crunch and light fiber. Using unsalted butter helps control sodium levels.
If you’re mindful of allergens, note that the recipe contains dairy (butter) and gluten depending on your cereal brand. Substitutions can be made for dairy-free or gluten-free diets.
I personally appreciate that this recipe is straightforward and kid-friendly, making it easier to whip up a fun snack without complicated ingredients or techniques — perfect for keeping the little ones happy and energized.
Conclusion
So, whether you’re gearing up for a school party, a fun afternoon snack, or just craving a playful twist on a childhood favorite, these pencil-shaped Rice Krispie treats are a fantastic go-to. They’re simple, sweet, and silly enough to bring out smiles all around.
Feel free to customize the colors, flavors, and decorations to suit your occasion — honestly, that’s part of the fun. I keep coming back to this recipe because it’s a little messy, a little creative, and totally satisfying every single time.
Give it a try, tweak it your way, and let me know how your pencil treats turn out. Share your stories, photos, or any creative spins you add — I’d love to hear from you!
After all, isn’t cooking about making memories one messy, sweet moment at a time?
Frequently Asked Questions
Can I make pencil-shaped Rice Krispie treats ahead of time?
Yes! These treats keep well at room temperature for 2-3 days or can be frozen for up to 2 weeks. Just wrap them tightly to prevent drying out.
What if I don’t have food coloring?
You can skip the yellow color and keep the treats classic, or use natural coloring options like turmeric for yellow, but use sparingly to avoid altering flavor.
Can I use a different cereal instead of Rice Krispies?
Sure! Crisped rice cereals from different brands work well. Just avoid cereals that are too dense or sugary as they may affect texture.
How do I prevent the marshmallow mixture from sticking to my hands?
Lightly butter or wet your hands before handling the mixture. This simple trick keeps everything manageable without sticking.
Can I make these treats gluten-free?
Yes, provided you use a gluten-free crispy rice cereal. Double-check labels to be safe, as some Rice Krispies brands contain malt flavoring with gluten.
Pin This Recipe!
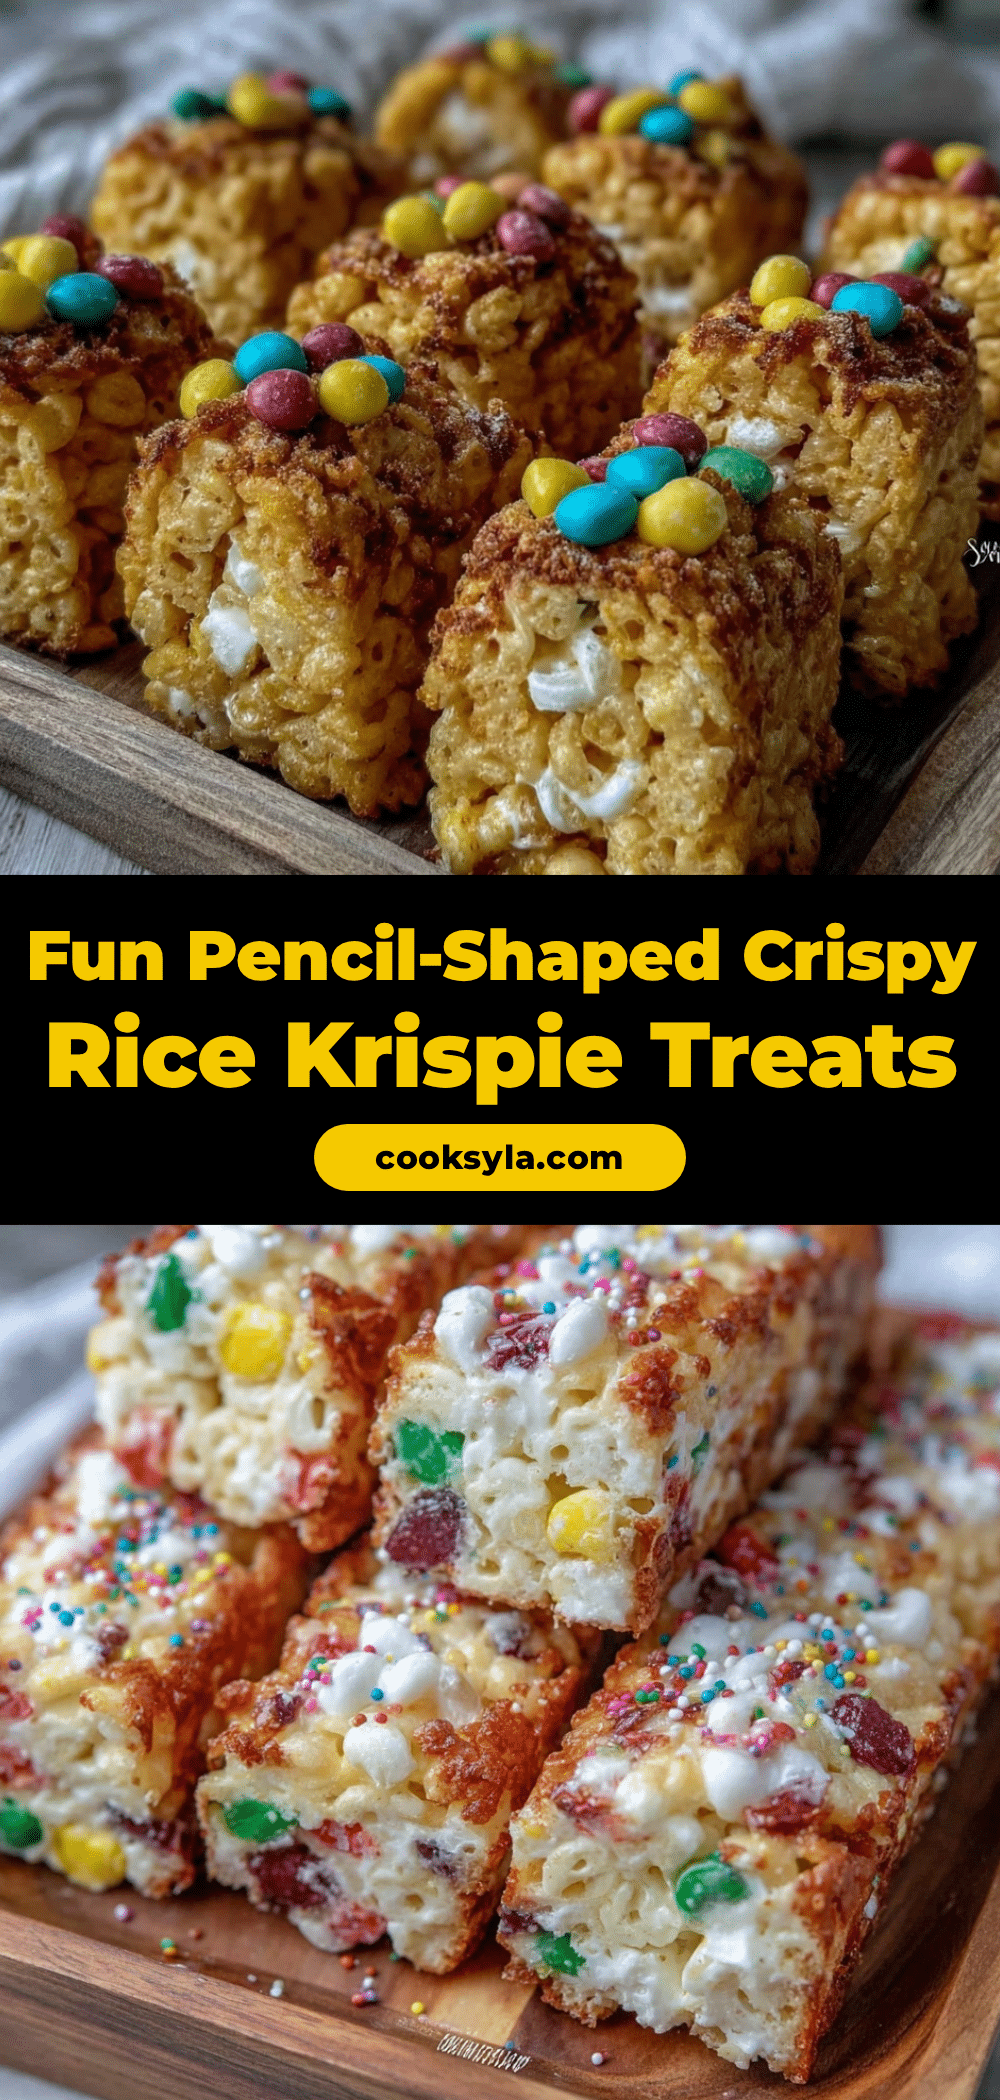
Pencil-Shaped Rice Krispie Treats Easy Recipe for Kids Parties

Fun and easy pencil-shaped Rice Krispie treats perfect for kids’ parties and quick snacks, featuring a colorful twist with yellow pencil bodies, pink erasers, and chocolate tips.
- Prep Time: 10 minutes
- Cook Time: 10 minutes
- Total Time: 20 minutes
- Yield: 12 servings 1x
- Category: Dessert
- Cuisine: American
Ingredients
- 6 cups (180 g) Rice Krispies cereal
- 4 cups (about 240 g) marshmallows (regular or mini)
- 3 tablespoons (42 g) unsalted butter
- Yellow food coloring (gel recommended)
- Pink frosting or colored candy melts
- ½ cup (90 g) chocolate chips or melted chocolate
- Optional: edible gold shimmer or sprinkles
Instructions
- Prepare your workspace by lining a baking sheet with parchment paper or a silicone mat and gather all ingredients.
- Melt 3 tablespoons (42 g) of unsalted butter in a large saucepan over low heat for about 2 minutes.
- Add 4 cups (about 240 g) of marshmallows to the melted butter and stir constantly with a rubber spatula until melted and smooth, about 4-5 minutes.
- Remove from heat and stir in yellow food coloring a drop at a time until vibrant pencil-yellow color is achieved.
- Pour the melted marshmallow mixture over 6 cups (180 g) of Rice Krispies cereal in a large bowl and fold gently to coat evenly.
- Press the mixture firmly but gently onto the prepared baking sheet into a 1-inch (2.5 cm) thick rectangular slab and let cool for 5 minutes.
- Cut the slab into pencil-sized rectangles about 1 inch (2.5 cm) wide and 5 inches (12.7 cm) long using a sharp knife.
- Spread a thin layer of pink frosting or apply pink candy melts on one end of each rectangle to create the eraser and let set for a few minutes.
- Melt chocolate chips (about ½ cup / 90 g) and dip or spoon the opposite ends of the treats to form the pencil tips. Place back on parchment to set.
- Optionally, add edible gold shimmer or sprinkles near the eraser for extra sparkle and let everything cool completely before serving.
Notes
Use low heat to melt marshmallows to avoid scorching. Fold cereal gently to keep crispiness. Wet hands lightly to prevent sticking when shaping. Use a serrated knife warmed in hot water for clean cuts. Let frosting and chocolate layers set before proceeding. Store airtight at room temperature for up to 3 days or freeze for up to 2 weeks.
Nutrition
- Serving Size: One pencil-shaped tr
- Calories: 165
- Sugar: 18
- Sodium: 90
- Fat: 6
- Saturated Fat: 3.5
- Carbohydrates: 30
- Fiber: 1
- Protein: 1.5
Keywords: Rice Krispie treats, pencil-shaped treats, kids party snacks, marshmallow treats, easy dessert, fun snacks for kids