Love this? Save it for later!
Share the inspiration with your friends
The lady at the craft store counter watched me loading up on black gel food coloring and royal icing mix, and didn’t say anything at first. Then she just pointed at the tiny bottle in my hand and said, “You’re going to need three of those, honey. And a steady hand.” She was a retiree who decorated cookies for her grandkids every Halloween, and she ended up spending twenty minutes showing me how to thin royal icing to the perfect consistency on a paper towel. I never caught her name, but I think about her every time I pull out my piping bags. That conversation changed how I approach decorated cookies entirely—and honestly, it’s why these Perfect Black Velvet Halloween Sugar Cookies with Royal Icing turned out so good the first time I tried them at home.
I mean, let me tell you, the first batch I made on my own was a disaster. The cookies spread into weird black blobs that looked more like burnt pancakes than velvet anything. But that’s the thing about sugar cookies—they teach you patience. You mess up, you adjust, you try again. And somewhere between the third batch and a very messy kitchen counter, I figured out the trick to getting that deep, velvety black color without the cookies tasting like a chemistry experiment.
These cookies have this beautiful dark color that feels perfect for Halloween, but the texture is what really gets people. They’re soft with this slight tenderness that melts on your tongue, and the royal icing sets up with a glossy, smooth finish that makes them look professionally done. Maybe you’ve been there—staring at pictures of perfect black cookies online, wondering how anyone gets them that dark without burning them. I promise, it’s totally doable, and I’m going to show you exactly how.
This recipe stayed with me because it’s the one that finally made me feel like a real cookie decorator. Not just someone who bakes, but someone who creates. And honestly, that feeling never gets old.
Why You’ll Love This Recipe
I’ve tested this recipe about seven times now—yes, seven—and each batch taught me something new. The first batch was too dry. The second was too sweet. The third? Well, the third batch was when I finally understood what “velvet” texture actually means in a sugar cookie. So trust me when I say this version is the one you want.
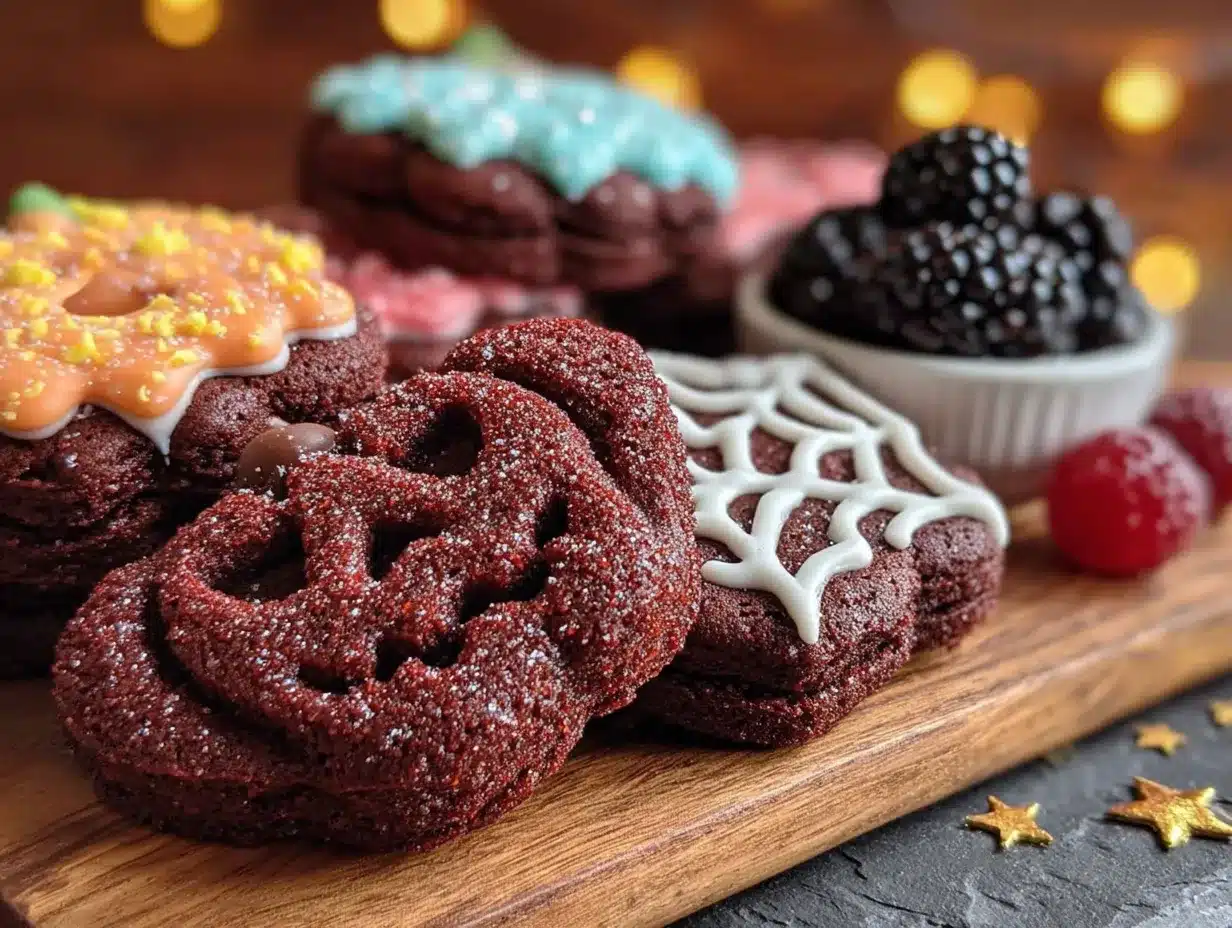
- Stunning Visual Impact: The deep black color with glossy royal icing creates cookies that look like edible art. Perfect for Halloween parties, trick-or-treat gatherings, or just making your Instagram feed look amazing.
- Soft Velvet Texture: Unlike those rock-hard sugar cookies that snap when you bite them, these have a tender, melt-in-your-mouth crumb. The secret is in the cream cheese and the careful mixing technique.
- No Bitter Aftertaste: Black cookies can taste awful if you use too much coloring. This recipe uses the right combination of cocoa powder and gel coloring to get that dark shade without the chemical flavor.
- Royal Icing That Actually Works: I’ll share the exact consistency you need—not too runny, not too stiff—so your icing flows smoothly and sets with a perfect shine.
- Make-Ahead Friendly: The dough freezes beautifully, and the decorated cookies stay fresh for over a week. You can prep everything ahead and decorate at your own pace.
What makes this recipe different from all those other black sugar cookie recipes out there? It’s the balance. The cream cheese adds tenderness, the black cocoa powder deepens the color naturally, and the vanilla rounds out any harshness. This isn’t just another version—it’s the one I’d serve to my pickiest friends without hesitation. The kind of cookie that makes people close their eyes after the first bite and say, “Okay, I get it now.”
Perfect for Halloween parties where you want to impress without spending three days in the kitchen. Or honestly, perfect for a random Tuesday when you just feel like making something beautiful.
Ingredients Needed
This recipe uses simple ingredients that work together to create that signature velvet texture and deep black color. Most of these are pantry staples, though you might need to grab the black cocoa powder and gel coloring from a specialty store or online.
For the Sugar Cookie Dough
- 2 ½ cups all-purpose flour (spooned and leveled—don’t scoop directly from the bag)
- ½ cup black cocoa powder (I prefer the brand from King Arthur Flour; it’s darker and smoother)
- ½ teaspoon baking powder
- ¼ teaspoon salt
- 1 cup unsalted butter, softened to room temperature (adds richness and tenderness)
- 1 cup granulated sugar
- 1 large egg, room temperature
- 2 teaspoons vanilla extract (use real vanilla, not imitation, for the best flavor)
- 2 tablespoons cream cheese, softened (this is the secret to the velvet texture)
- 1 ½ teaspoons black gel food coloring (Americolor Super Black works best—liquid coloring won’t get dark enough)
For the Royal Icing
- 3 tablespoons meringue powder (I’ve tried several brands; Wilton is reliable, but Genie’s is my top pick)
- 4 cups powdered sugar, sifted (sifting prevents lumps that clog piping tips)
- 5-6 tablespoons warm water (you’ll adjust this for consistency)
- ½ teaspoon vanilla extract (optional, for flavor)
- Black gel food coloring (to tint the icing, if desired)
- Edible glitter or luster dust (optional, for decorating)
Ingredient Tips: For the black cocoa powder, look for “black cocoa” specifically—it’s different from Dutch-processed cocoa and gives that Oreo-like color and flavor. If you can’t find it, you can use Dutch-processed cocoa, but the color won’t be as dark. The cream cheese is non-negotiable though; it makes the cookies soft without making them cakey. For a dairy-free version, use vegan cream cheese and plant-based butter, though the texture will be slightly different.
Equipment Needed
- Stand mixer or hand mixer (a stand mixer makes creaming butter easier, but a hand mixer works fine)
- Large mixing bowls
- Whisk and rubber spatula
- Rolling pin (preferably with thickness rings for even cookies)
- Halloween cookie cutters (ghosts, bats, pumpkins, or whatever shapes you like)
- Baking sheets lined with parchment paper or silicone mats
- Cooling rack
- Piping bags or squeeze bottles (for the royal icing)
- Small round piping tips (size 2 or 3 for outlining, size 1 for details)
- Toothpicks (for popping air bubbles and spreading icing)
- Food scale (optional but helpful for consistent dough portions)
I’ve used cheap baking sheets that warped in the oven, and let me tell you—investing in good ones makes a difference. Nordic Ware is my go-to brand. Also, don’t skip the parchment paper. It prevents spreading and makes cleanup so much easier.
Preparation Method
- Cream the butter and sugar. In a large bowl, beat the softened butter and granulated sugar together on medium speed for about 3 minutes, until light and fluffy. Scrape down the sides of the bowl halfway through. The mixture should look pale and airy—this is where the tenderness starts.
- Add the wet ingredients. Beat in the egg, vanilla extract, and cream cheese until fully combined. The mixture might look slightly curdled at this point, but that’s normal. Add the black gel food coloring and mix until the color is uniform. Don’t worry if it’s not super dark yet—the cocoa powder will deepen it.
- Mix the dry ingredients. In a separate bowl, whisk together the flour, black cocoa powder, baking powder, and salt. This ensures the leavening is evenly distributed.
- Combine wet and dry. Gradually add the dry ingredients to the wet mixture, mixing on low speed until just combined. Stop when you no longer see streaks of flour—overmixing will make the cookies tough. The dough will be soft and slightly sticky, but it should hold together when pressed.
- Chill the dough. Divide the dough into two discs, wrap each tightly in plastic wrap, and refrigerate for at least 2 hours (overnight is better). Chilling is crucial—it prevents spreading and makes the dough easier to roll. I’ve skipped this step before, and my cookies turned into black puddles.
- Preheat and prepare. When ready to bake, preheat your oven to 350°F (175°C). Line your baking sheets with parchment paper. Remove one disc of dough from the fridge and let it sit at room temperature for 5-10 minutes—it should be firm but not rock hard.
- Roll and cut. On a lightly floured surface, roll the dough to about ¼-inch thickness. Use your cookie cutters to cut out shapes, and transfer them to the prepared baking sheets, spacing them about 2 inches apart. Gather the scraps, re-roll, and cut again. For best results, chill the cut-out cookies on the baking sheet for 10 minutes before baking.
- Bake. Bake for 8-10 minutes, rotating the pan halfway through. The cookies are done when the edges look set and the centers are just slightly puffed. They won’t look browned—remember, they’re black—so watch the edges carefully. Overbaking makes them dry.
- Cool completely. Let the cookies cool on the baking sheet for 5 minutes, then transfer them to a wire rack to cool completely. Do not ice warm cookies, or the royal icing will slide right off.
- Make the royal icing. In a large bowl, combine the meringue powder and sifted powdered sugar. Add 5 tablespoons of warm water and the vanilla extract. Beat on low speed for 1 minute, then increase to medium-high and beat for 4-5 minutes, until the icing is thick, glossy, and forms stiff peaks. Add more water, one teaspoon at a time, if needed.
- Adjust icing consistency. For outlining, leave the icing thick (stiff peaks). For flooding (filling in), thin the icing by adding water a few drops at a time until it flows like honey and a ribbon sinks back into the bowl within 10 seconds. This consistency is key for smooth, even coverage.
- Decorate the cookies. Fit a piping bag with a small round tip and fill it with the outlining icing. Outline each cookie, then let it dry for 5 minutes. Switch to the flooding consistency icing, fill the outlined areas, and use a toothpick to spread the icing into corners and pop any air bubbles. Let the cookies dry completely, uncovered, for 6-8 hours or overnight.
Sensory cues: The dough should feel smooth and slightly cool when you roll it. When you cut shapes, the edges should be clean, not ragged. The baked cookies should feel firm on the edges but slightly soft in the center when you touch them. The royal icing should hold its shape when piped but spread easily when nudged with a toothpick.
Cooking Tips & Techniques
I learned most of these tips the hard way—by making mistakes and eating my failures. Here’s what I wish someone had told me from the start.
Get the color right without the taste. The biggest mistake people make with black cookies is using too much liquid food coloring, which ruins the texture and adds a bitter aftertaste. Use gel coloring instead of liquid—it’s more concentrated and won’t throw off your dough’s moisture balance. And always pair it with black cocoa powder for a natural dark base. I once used only liquid coloring and ended up with cookies that tasted like a marker smells. Not good.
Chill, chill, chill. I cannot stress this enough. Chilling the dough before rolling, after cutting, and even between batches prevents spreading. If your kitchen is warm, pop the baking sheet with cut-out cookies in the fridge for 15 minutes before baking. This step alone will give you perfectly shaped cookies every time.
Master the royal icing consistency. The perfect flooding consistency is often called “10-second icing”—when you drag a spoon through it, the line should disappear in about 10 seconds. Too thick, and it won’t smooth out. Too thin, and it will run off the edges. Test a small amount on a practice cookie before you start decorating. I’ve wasted entire batches of icing getting this wrong, so learn from my pain.
Work in batches. Don’t try to decorate all your cookies at once. Outline a few, flood them, and let them set before moving on. Rushing leads to smudged designs and frustrated tears. Trust me, I’ve been there.
Use a light touch with flour. When rolling out the dough, use just enough flour to prevent sticking. Too much flour makes the cookies dry and tough. I sprinkle a little flour on my rolling pin and surface, then add more only if needed.
Variations & Adaptations
One of the best things about this recipe is how flexible it is. Here are some ways I’ve adapted it over the years.
Flavor variations. Swap the vanilla extract for peppermint or almond extract for a different flavor profile. Peppermint black cookies with white royal icing look incredibly striking—like little ghosts. Or add a teaspoon of cinnamon and a pinch of cayenne for a spicy Mexican hot chocolate vibe.
Dietary adaptations. For a gluten-free version, use a 1:1 gluten-free flour blend that contains xanthan gum. I’ve tried this with Bob’s Red Mill, and the texture was surprisingly good—just a bit more delicate. For an egg-free royal icing, use aquafaba (the liquid from canned chickpeas) instead of meringue powder. It works, but the icing takes longer to dry.
Different decorating styles. Instead of flooding the entire cookie, try a “wet-on-wet” technique where you pipe dots of white icing on top of the black flooding and drag a toothpick through them to create spiderwebs. Or use stencils and edible spray for a quick, modern look. I once made a batch with just a simple white outline and silver luster dust—they looked elegant and took half the time.
Color alternatives. Don’t want black? Use the same recipe with regular cocoa powder and decorate with orange, purple, or green icing for a different Halloween vibe. The velvet texture works with any color theme.
Mini cookies. Use small cookie cutters to make bite-sized versions. These are perfect for party platters and take less time to decorate. Just reduce the baking time by 2-3 minutes.
Serving & Storage Suggestions
These cookies are best served at room temperature, which lets the royal icing set properly and the cookie texture shine. Arrange them on a platter with other Halloween treats—I love pairing them with spiced pumpkin bread and caramel apples for a full fall spread. They also look amazing on a dessert table with black and white decorations.
Storage: Store undecorated cookies in an airtight container at room temperature for up to 1 week. Decorated cookies need to be stored in a single layer (or separated by parchment paper) to prevent the icing from smudging. They’ll stay fresh for up to 2 weeks, though the icing might soften slightly over time.
Freezing: You can freeze the unbaked dough discs for up to 3 months. Wrap them tightly in plastic wrap and then foil. Thaw overnight in the fridge before rolling and baking. Baked, undecorated cookies also freeze well for up to 3 months—just thaw at room temperature before icing. I always keep a batch of dough in the freezer for last-minute Halloween cravings.
Reheating: These cookies don’t need reheating, but if you want that just-baked warmth, pop them in a 300°F oven for 3-4 minutes. Let them cool completely before adding any icing.
Flavor development: The cookies actually taste better the day after baking. The flavors meld together, and the texture softens slightly. So don’t stress about making them all in one day—bake one day, decorate the next.
Nutritional Information & Benefits
Let’s be honest—these are decorated sugar cookies, so they’re a treat, not a health food. But here’s the breakdown for one cookie (based on a 2-inch ghost shape, with icing): approximately 150-180 calories, 7g fat, 22g carbohydrates, 2g protein, and 12g sugar. The exact numbers vary based on size and how much icing you use.
Health highlights: The black cocoa powder contains antioxidants (flavonoids) that are good for heart health. The cream cheese adds a small amount of calcium and protein. And hey, there’s something to be said for the mental health benefits of spending a relaxing afternoon decorating cookies. It’s meditative, creative, and honestly pretty satisfying.
Dietary considerations: This recipe contains dairy, eggs, and gluten. For a vegan version, use plant-based butter and cream cheese, and replace the egg with a flax egg (1 tablespoon ground flaxseed mixed with 3 tablespoons water). The royal icing can be made with aquafaba instead of meringue powder.
Allergen note: The royal icing contains meringue powder, which is made from dried egg whites. If you have an egg allergy, use the aquafaba version or buy a commercial egg-free royal icing mix.
My personal take? I don’t make these every day, but when I do, I savor every bite. Life’s too short to skip the good stuff.
Conclusion
These Perfect Black Velvet Halloween Sugar Cookies with Royal Icing are the kind of recipe that makes you feel like a baking superstar. They look dramatic and professional, but the process is totally doable for any home baker. The velvet texture, the deep black color, the glossy icing—it all comes together in a way that’s genuinely impressive.
I hope you make these your own. Try different shapes, experiment with colors, add sprinkles or edible glitter. The best part about cookie decorating is that there’s no wrong way to do it. Well, except maybe burning them. Don’t do that.
If you make these, I’d love to hear how they turned out. Drop a comment below and tell me about your decorating adventures—or your disasters. Those are my favorite stories. And if you’re looking for more Halloween baking ideas, you might enjoy my chewy chocolate cookies or this easy caramel apple recipe.
Happy baking, and may your cookies always be perfectly black.
Frequently Asked Questions
Can I use regular cocoa powder instead of black cocoa powder?
You can, but the cookies won’t be as dark. Regular cocoa powder will give you a dark brown color, not true black. If you want that deep black shade, stick with black cocoa powder or use a combination of regular cocoa and extra gel food coloring.
Why did my cookies spread into weird shapes?
This usually happens when the dough isn’t chilled enough. Make sure you chill the dough for at least 2 hours, and chill the cut-out cookies on the baking sheet for 10 minutes before baking. Also, check that your butter wasn’t too soft when you mixed the dough.
How do I get the royal icing perfectly smooth?
The key is getting the consistency right. Your flooding icing should be thin enough that it settles into a smooth surface on its own, but thick enough that it doesn’t run off the edges. Use a toothpick to spread the icing into corners and pop any air bubbles. And be patient—let each layer dry completely before adding details.
Can I make these cookies ahead of time?
Absolutely. You can make the dough up to 3 days ahead and keep it in the fridge, or freeze it for up to 3 months. Baked, undecorated cookies stay fresh for a week in an airtight container. Decorated cookies last up to 2 weeks, so you can definitely work ahead.
My royal icing is too thick/thin—how do I fix it?
If it’s too thick, add water one drop at a time and stir gently. If it’s too thin, add more sifted powdered sugar, a tablespoon at a time. Always test the consistency on a practice surface before using it on your cookies. And remember, it’s easier to thin thick icing than to thicken thin icing, so add water slowly.
Pin This Recipe!
Perfect Black Velvet Sugar Cookies: Easy Halloween Royal Icing Recipe

These deep black velvet sugar cookies are soft, tender, and decorated with glossy royal icing. Perfect for Halloween parties or any spooky celebration, they have a stunning visual impact without any bitter aftertaste.
- Prep Time: 30 minutes
- Cook Time: 10 minutes
- Total Time: 2 hours 40 minutes (includes chilling)
- Yield: 24 servings 1x
- Category: Dessert
- Cuisine: American
Ingredients
- 2 ½ cups all-purpose flour (spooned and leveled)
- ½ cup black cocoa powder
- ½ teaspoon baking powder
- ¼ teaspoon salt
- 1 cup unsalted butter, softened to room temperature
- 1 cup granulated sugar
- 1 large egg, room temperature
- 2 teaspoons vanilla extract
- 2 tablespoons cream cheese, softened
- 1 ½ teaspoons black gel food coloring
- 3 tablespoons meringue powder
- 4 cups powdered sugar, sifted
- 5–6 tablespoons warm water
- ½ teaspoon vanilla extract (optional, for royal icing)
- Black gel food coloring (for royal icing, if desired)
- Edible glitter or luster dust (optional, for decorating)
Instructions
- Cream the butter and sugar. In a large bowl, beat the softened butter and granulated sugar together on medium speed for about 3 minutes, until light and fluffy. Scrape down the sides of the bowl halfway through.
- Add the wet ingredients. Beat in the egg, vanilla extract, and cream cheese until fully combined. Add the black gel food coloring and mix until the color is uniform.
- Mix the dry ingredients. In a separate bowl, whisk together the flour, black cocoa powder, baking powder, and salt.
- Combine wet and dry. Gradually add the dry ingredients to the wet mixture, mixing on low speed until just combined. The dough will be soft and slightly sticky.
- Chill the dough. Divide the dough into two discs, wrap each tightly in plastic wrap, and refrigerate for at least 2 hours (overnight is better).
- Preheat and prepare. When ready to bake, preheat your oven to 350°F (175°C). Line your baking sheets with parchment paper. Remove one disc of dough from the fridge and let it sit at room temperature for 5-10 minutes.
- Roll and cut. On a lightly floured surface, roll the dough to about ¼-inch thickness. Use cookie cutters to cut out shapes, and transfer them to the prepared baking sheets, spacing them about 2 inches apart. Chill the cut-out cookies on the baking sheet for 10 minutes before baking.
- Bake. Bake for 8-10 minutes, rotating the pan halfway through. The cookies are done when the edges look set and the centers are just slightly puffed.
- Cool completely. Let the cookies cool on the baking sheet for 5 minutes, then transfer them to a wire rack to cool completely.
- Make the royal icing. In a large bowl, combine the meringue powder and sifted powdered sugar. Add 5 tablespoons of warm water and the vanilla extract. Beat on low speed for 1 minute, then increase to medium-high and beat for 4-5 minutes, until the icing is thick, glossy, and forms stiff peaks. Add more water, one teaspoon at a time, if needed.
- Adjust icing consistency. For outlining, leave the icing thick (stiff peaks). For flooding, thin the icing by adding water a few drops at a time until it flows like honey and a ribbon sinks back into the bowl within 10 seconds.
- Decorate the cookies. Fit a piping bag with a small round tip and fill it with the outlining icing. Outline each cookie, then let it dry for 5 minutes. Switch to the flooding consistency icing, fill the outlined areas, and use a toothpick to spread the icing into corners and pop any air bubbles. Let the cookies dry completely, uncovered, for 6-8 hours or overnight.
Notes
Chill the dough thoroughly to prevent spreading. Use gel food coloring instead of liquid to avoid a bitter taste. The royal icing should have a 10-second consistency for flooding. Cookies taste better the day after baking.
Nutrition
- Serving Size: 1 cookie (2-inch gho
- Calories: 165
- Sugar: 12
- Sodium: 85
- Fat: 7
- Saturated Fat: 4
- Carbohydrates: 22
- Fiber: 1
- Protein: 2
Keywords: black velvet sugar cookies, Halloween cookies, royal icing, black cocoa cookies, decorated sugar cookies


