Love this? Save it for later!
Share the inspiration with your friends
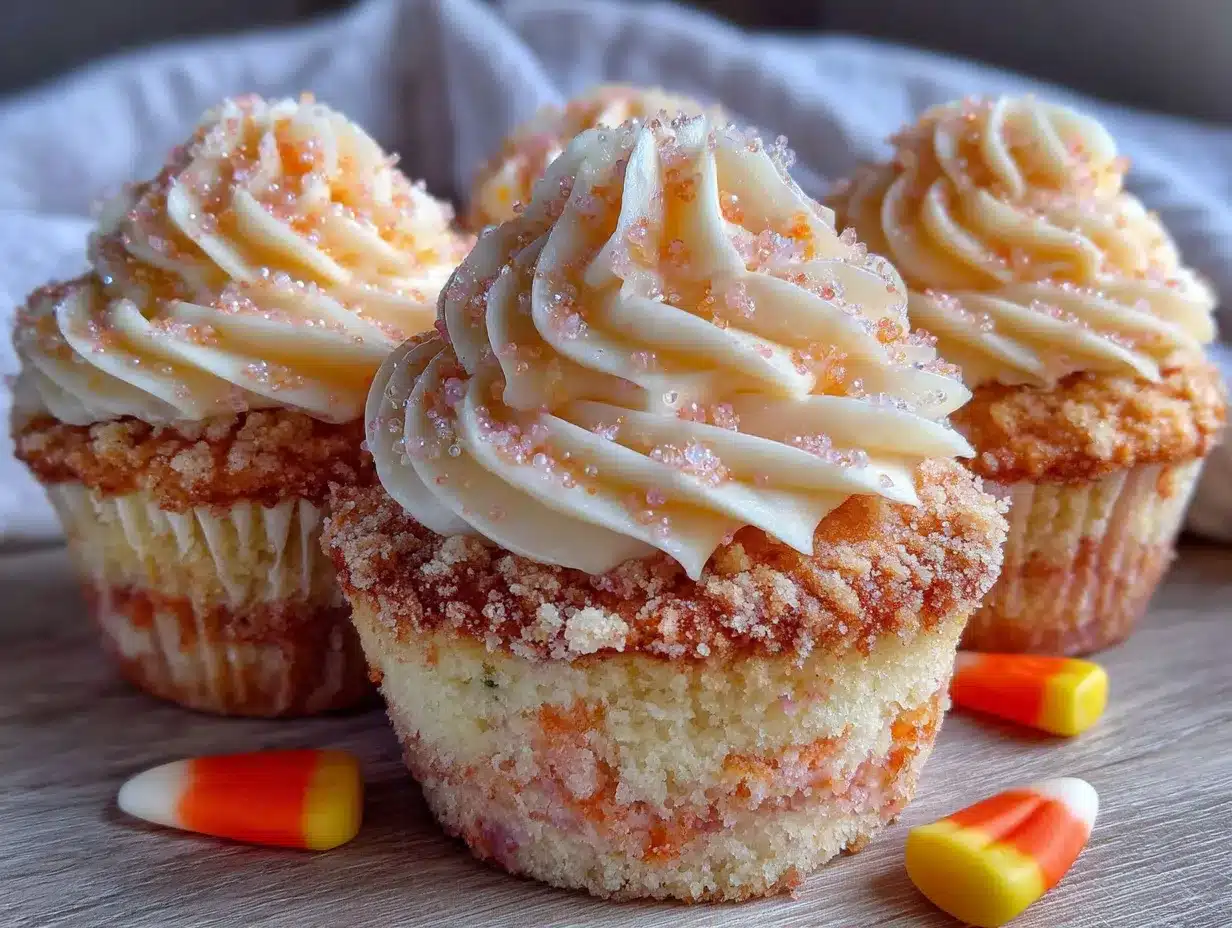
I wasn’t trying to impress anyone. I’d stopped by my neighbor Jen’s house to borrow a whisk—mine had mysteriously vanished into the abyss of my kitchen drawers—and the smell of vanilla and sugar hit me before I even got through the door. It was late September, and the air had that crisp fall feeling, but inside her kitchen, it was pure Halloween. She was standing at the counter, piping frosting onto these little cupcakes that looked like they were wearing tiny striped sweaters. “Oh, these?” she said when I asked, barely looking up. “Just messing around with some candy corn colors.” Just messing around. Honestly, I stood there for a solid minute, holding her whisk, watching her work. The layers were so clean, so perfect—bright yellow melting into orange, then white. She made it look like she was doing absolutely nothing special. Maybe you’ve been there, where someone does something so casually that it makes you question your own baking abilities. I left with the whisk and a mental note to figure out how she did it. Turns out, it’s easier than it looks, and once you get the hang of it, these candy corn cupcakes become a fall tradition you’ll actually look forward to. Let me tell you, I’ve made them every October since, and they never get old.
Why You’ll Love This Recipe
These aren’t just pretty cupcakes, they’re the kind that make people stop and ask, “Wait, did you make those?” The layered effect mimics candy corn perfectly, and it’s way simpler than it looks. I’ve tested this recipe about six times to get the buttercream just right—not too sweet, but sweet enough to feel like a treat.
- Quick & Easy: From start to finish, you’re looking at about an hour. That includes baking and decorating, which is pretty fast for something this impressive.
- Simple Ingredients: You probably already have flour, sugar, eggs, and butter in your kitchen. The only special thing is food coloring, and that’s easy to find.
- Perfect for Fall Parties: Halloween, Thanksgiving, or just a random Tuesday in October—these cupcakes fit right in.
- Crowd-Pleaser: Kids love the colors, adults love the taste, and everyone loves the nostalgia factor. Candy corn is divisive, but these cupcakes? Universally adored.
- Unbelievably Delicious: The vanilla cake is moist and tender, and the buttercream is silky smooth. The combination is pure comfort food.
What makes this recipe different from the rest is the technique. Instead of trying to layer batter in a pan (which can be messy), we’re using a simple piping method that gives you perfect stripes every time. No special equipment needed, just a steady hand and a little patience. Honestly, it’s the kind of recipe that makes you look like a pro without the stress.
What Ingredients You Will Need
This recipe uses simple, wholesome ingredients to deliver bold flavor and satisfying texture without the fuss. Most of these are pantry staples, so you might not even need a grocery run.
For the Cupcakes
- All-purpose flour, 1 ½ cups (190g) – gives structure without being too dense. I prefer Gold Medal for consistent results.
- Granulated sugar, 1 cup (200g) – adds sweetness and helps with browning.
- Unsalted butter, ½ cup (113g), softened – use room temperature for better creaming.
- Large eggs, 2, room temperature – cold eggs can seize the batter.
- Whole milk, ½ cup (120ml) – adds moisture. You can use 2% if that’s what you have.
- Vanilla extract, 2 teaspoons – pure vanilla makes a difference. Imitation works, but it’s not the same.
- Baking powder, 1 ½ teaspoons – for lift.
- Salt, ¼ teaspoon – balances sweetness.
- Yellow and orange gel food coloring – gel is better than liquid because it doesn’t thin the batter. I use Wilton brand.
For the Buttercream Frosting
- Unsalted butter, 1 cup (226g), softened – the base of any good buttercream.
- Powdered sugar, 3-4 cups (360-480g) – adjust for desired sweetness and consistency.
- Heavy cream, 2-3 tablespoons (30-45ml) – adds richness. Milk works in a pinch.
- Vanilla extract, 1 teaspoon – for flavor.
- Salt, a pinch – cuts the sweetness.
- Yellow and orange gel food coloring – same as above, for the layers.
For Decoration
- Candy corn, about 24 pieces – for topping each cupcake.
- Orange and yellow sprinkles (optional) – adds a fun crunch.
If you’re looking for a gluten-free option, swap the all-purpose flour with a 1:1 gluten-free baking blend. For a dairy-free version, use plant-based butter and milk. I’ve tried both, and they work surprisingly well.
Equipment Needed
You don’t need a lot of fancy tools for this recipe, which is part of why I love it. Here’s what you’ll need:
- Muffin tin – standard 12-cup size. Non-stick is nice, but any works.
- Paper liners – I like white ones so the colors pop. You can also use Halloween-themed liners.
- Mixing bowls – at least two, one for dry ingredients and one for wet.
- Electric mixer – hand or stand mixer both work. A whisk is possible, but your arm will thank you for using a mixer.
- Piping bags – three disposable ones, or one reusable with multiple tips. I’ve used Ziploc bags in a pinch, and they work fine.
- Piping tips – a round tip for the batter and a star tip for the frosting. Wilton 1M is my go-to for buttercream.
- Spatula – rubber or silicone for scraping bowls.
- Cooling rack – lets cupcakes cool evenly.
If you don’t have piping bags, you can use a spoon to layer the batter, but it’s harder to get clean stripes. Trust me, I’ve tried. The bags are worth the few dollars.
Preparation Method
Let’s get to the fun part. I’ll walk you through every step, including the little tricks I’ve learned from making these about a dozen times.
Step 1: Prep Your Oven and Pan
Preheat your oven to 350°F (175°C). Line your muffin tin with 12 paper liners. This seems obvious, but I’ve forgotten to line the pan before and ended up scraping batter out of the tin. Don’t be me.
Step 2: Make the Cupcake Batter
In a medium bowl, whisk together the flour, baking powder, and salt. Set aside. In a larger bowl, beat the softened butter and sugar together until light and fluffy, about 3 minutes. Scrape down the sides. Add the eggs one at a time, beating well after each. Stir in the vanilla. Add the dry ingredients in three additions, alternating with the milk. Start and end with the dry ingredients. Mix until just combined—overmixing makes tough cupcakes.
Step 3: Color the Batter
Divide the batter evenly into three bowls. You’ll have about ¾ cup of batter per bowl. Leave one bowl plain (white), color one bowl yellow, and color one bowl orange. Use gel food coloring—it’s more concentrated and won’t mess with the consistency. Start with a tiny dab and add more until you’re happy. I usually use about ¼ teaspoon for vibrant colors.
Step 4: Layer the Batter in the Liners
This is the trickiest part, but it’s easier than it sounds. Spoon the orange batter into a piping bag (or a Ziploc with the corner snipped). Pipe a thin layer of orange into the bottom of each liner, about ⅓ of the way up. Tap the pan gently to level it. Next, pipe a layer of yellow batter on top of the orange, filling another ⅓. Finally, pipe the white batter on top. The liners should be about ¾ full. Don’t worry if the layers look messy—they’ll bake up smooth.
Step 5: Bake
Bake for 18-22 minutes, or until a toothpick inserted into the center comes out clean. The tops should be lightly golden. Let them cool in the pan for 5 minutes, then transfer to a cooling rack. Cool completely before frosting. I know it’s tempting, but warm frosting is a disaster.
Step 6: Make the Buttercream
While the cupcakes cool, beat the softened butter on medium speed until creamy, about 2 minutes. Gradually add the powdered sugar, one cup at a time, beating on low. Add the heavy cream and vanilla, then beat on high for 3-4 minutes until light and fluffy. Add a pinch of salt. If it’s too thick, add more cream; too thin, add more sugar.
Step 7: Color the Frosting
Divide the frosting into three bowls. Leave one white, color one yellow, and color one orange. Use gel food coloring again. Spoon each color into a separate piping bag fitted with a star tip. I use Wilton 1M for that classic swirl.
Step 8: Pipe the Frosting
This is where the magic happens. Hold a piping bag in each hand—orange in one, yellow in the other, white in the third. Starting from the outside edge, pipe a ring of orange frosting. Then a ring of yellow inside that, then white in the center. Continue layering until you’ve used all the frosting. The stripes will show when you cut into the cupcake. Top each with a piece of candy corn. It looks like a professional bakery did it.
Cooking Tips & Techniques
I’ve made my share of mistakes with these cupcakes, so let me save you some trouble. First, don’t skip the gel food coloring. Liquid coloring will thin your batter and frosting, making layers run together. I learned this the hard way when my “stripes” turned into a muddy mess.
Second, when piping the batter, go slow. If you dump it all in at once, the layers will mix. A steady hand gives you clean lines. Also, tap the pan gently after each layer to level the batter—this helps the stripes stay straight.
Third, let the cupcakes cool completely. I once frosted a warm cupcake and watched the buttercream slide right off. It was heartbreaking. Give them at least 30 minutes on the rack.
For the frosting, make sure your butter is truly softened. Cold butter won’t cream properly, and you’ll end up with lumps. Leave it out for an hour before starting. If you forget, cut it into small cubes and microwave for 5-second bursts until soft but not melted.
Finally, if you’re short on time, you can bake the cupcakes a day ahead. Store them in an airtight container at room temperature, then frost the next day. The flavors actually develop overnight.
Variations & Adaptations
These cupcakes are super versatile. Here are some ways to switch them up:
Flavor Variations
Try adding a teaspoon of almond extract to the batter for a nutty twist. Or swap the vanilla for lemon extract and use lemon zest in the frosting. The citrus pairs beautifully with the sweetness.
Dietary Adaptations
For a gluten-free version, use a 1:1 gluten-free flour blend. I’ve tried Bob’s Red Mill, and it works great. For dairy-free, use plant-based butter and milk. The texture is slightly denser but still delicious. For a lower-sugar option, reduce the sugar in the batter to ¾ cup and use a sugar-free powdered sugar substitute in the frosting.
Seasonal Twists
For Christmas, use red and green food coloring. For Easter, pastel pink and purple. The technique stays the same, just change the colors. I’ve also made these for a baby shower with blue and pink layers—they were a hit.
Different Frosting Options
If you’re not a buttercream fan, try cream cheese frosting or a simple glaze. The glaze won’t show the stripes as well, but it tastes amazing. For a chocolate version, add cocoa powder to the frosting and use chocolate cake instead of vanilla.
Serving & Storage Suggestions
These cupcakes are best served at room temperature. The buttercream softens slightly, and the cake stays tender. If you’ve refrigerated them, let them sit out for 20 minutes before serving.
For presentation, arrange them on a tiered stand or a simple platter. The colors pop against a white plate. Add some candy corn around the base for extra flair. They’re perfect for Halloween parties, fall bake sales, or just a fun weekend treat.
To store, place them in an airtight container in the refrigerator for up to 5 days. The frosting will firm up, but it softens again at room temperature. You can also freeze them—unfrosted—for up to 3 months. Wrap each cupcake in plastic wrap, then place in a freezer bag. Thaw at room temperature, then frost.
For reheating, pop one in the microwave for 10 seconds. It won’t be hot, just slightly warm, which brings out the vanilla flavor. I actually prefer them cold straight from the fridge—the frosting gets a little fudge-like.
Nutritional Information & Benefits
Let’s be honest—these are a treat, not a health food. But I believe in balance. One cupcake (with frosting) has about 380 calories, 18g of fat, 52g of carbs, and 3g of protein. The butter provides vitamin A, and the eggs add a little protein. If you use the dairy-free version, you’ll reduce the saturated fat slightly.
For those with dietary restrictions, this recipe can be adapted to be gluten-free or dairy-free as mentioned. It does contain dairy and gluten in the original form, so keep that in mind for allergies. The candy corn on top is mostly sugar, so feel free to skip it if you’re watching your intake.
I personally love that these cupcakes are portion-controlled—one is enough to satisfy a sweet tooth without going overboard. Plus, the joy they bring is worth every calorie. Life’s too short to skip dessert.
Conclusion
These candy corn layered cupcakes are more than just a pretty face. They’re easy enough for a beginner, impressive enough for a party, and delicious enough to become a fall staple. I’ve made them for Halloween parties, Thanksgiving dinners, and even just because it was October. Every time, people ask for the recipe.
I encourage you to make them your own. Play with the colors, try different frostings, or add your favorite sprinkles. Baking is supposed to be fun, and this recipe is a great canvas for creativity. Honestly, the first time I made them, I was nervous about the layers. But after one batch, I felt like a pro. You will too.
If you make these, I’d love to hear about it. Drop a comment below and let me know how they turned out. Did you try a different color combo? Did your kids help pipe the batter? Share your stories—I read every one. And if you’re looking for more fall baking ideas, check out our pumpkin spice cupcakes or apple cider donuts. Happy baking, friend!
Frequently Asked Questions
Can I use liquid food coloring instead of gel?
You can, but it will thin your batter and frosting. Gel gives vibrant colors without changing the consistency. If you only have liquid, use half the amount and add a little extra flour to compensate.
How do I get clean stripes in the frosting?
The trick is piping in concentric rings. Start with orange on the outside, yellow inside that, and white in the center. Use a steady hand and go slow. If the colors blend, don’t worry—it still looks beautiful.
Can I make these cupcakes ahead of time?
Absolutely. Bake the cupcakes a day ahead and store them in an airtight container. Frost them the day you plan to serve. The buttercream can also be made ahead and refrigerated—just let it soften and re-whip before using.
Why did my layers mix together?
This usually happens when the batter is too thin or you pipe too quickly. Make sure you’re using gel food coloring and pipe each layer gently. Tap the pan to level, but don’t shake it. Also, chill the batter for 10 minutes between layers to help them set.
Can I freeze these cupcakes?
Yes, freeze them unfrosted for up to 3 months. Wrap each in plastic wrap, then place in a freezer bag. Thaw at room temperature, then frost. Frosted cupcakes can also be frozen, but the texture of the buttercream may change slightly.
Pin This Recipe!
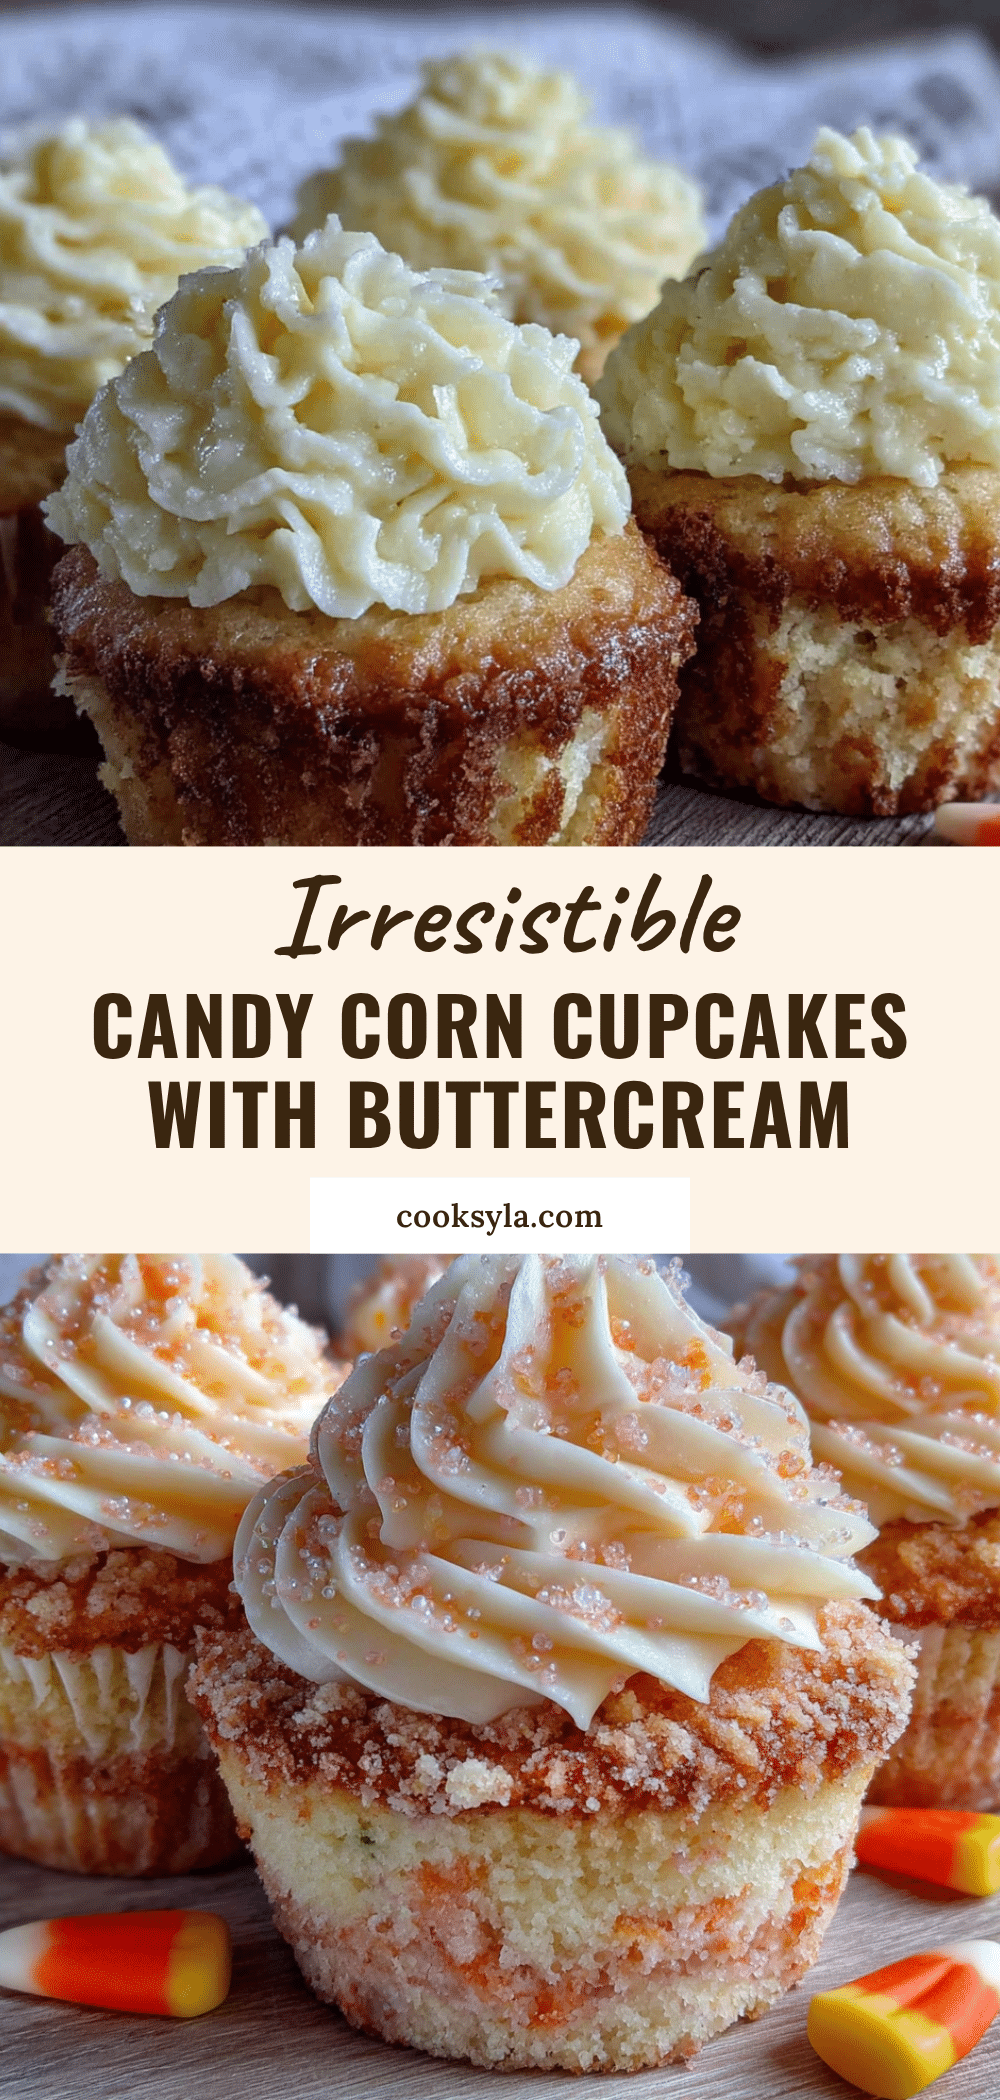
Perfect Candy Corn Cupcakes: Easy Layered Buttercream Recipe
These candy corn layered cupcakes are easy enough for a beginner, impressive enough for a party, and delicious enough to become a fall staple. The layered effect mimics candy corn perfectly, and it’s way simpler than it looks.
- Prep Time: 30 minutes
- Cook Time: 20 minutes
- Total Time: 50 minutes
- Yield: 12 cupcakes 1x
- Category: Dessert
- Cuisine: American
Ingredients
- 1 ½ cups (190g) all-purpose flour
- 1 cup (200g) granulated sugar
- ½ cup (113g) unsalted butter, softened
- 2 large eggs, room temperature
- ½ cup (120ml) whole milk
- 2 teaspoons vanilla extract
- 1 ½ teaspoons baking powder
- ¼ teaspoon salt
- Yellow and orange gel food coloring
- 1 cup (226g) unsalted butter, softened (for frosting)
- 3–4 cups (360-480g) powdered sugar (for frosting)
- 2–3 tablespoons (30-45ml) heavy cream (for frosting)
- 1 teaspoon vanilla extract (for frosting)
- A pinch of salt (for frosting)
- Yellow and orange gel food coloring (for frosting)
- About 24 pieces candy corn (for decoration)
- Orange and yellow sprinkles (optional, for decoration)
Instructions
- Preheat oven to 350°F (175°C). Line a muffin tin with 12 paper liners.
- In a medium bowl, whisk together flour, baking powder, and salt. Set aside.
- In a larger bowl, beat softened butter and sugar together until light and fluffy, about 3 minutes. Scrape down sides.
- Add eggs one at a time, beating well after each. Stir in vanilla.
- Add dry ingredients in three additions, alternating with milk. Start and end with dry ingredients. Mix until just combined.
- Divide batter evenly into three bowls. Leave one plain, color one yellow, and one orange using gel food coloring.
- Spoon orange batter into a piping bag. Pipe a thin layer into the bottom of each liner, about ⅓ full. Tap pan gently to level.
- Pipe yellow batter on top of orange, filling another ⅓. Then pipe white batter on top. Liners should be about ¾ full.
- Bake for 18-22 minutes, or until a toothpick inserted into center comes out clean. Cool in pan for 5 minutes, then transfer to a cooling rack. Cool completely.
- For buttercream: Beat softened butter on medium speed until creamy, about 2 minutes. Gradually add powdered sugar, one cup at a time, beating on low.
- Add heavy cream and vanilla, then beat on high for 3-4 minutes until light and fluffy. Add a pinch of salt. Adjust consistency with more cream or sugar as needed.
- Divide frosting into three bowls. Leave one white, color one yellow, and one orange using gel food coloring.
- Spoon each color into a separate piping bag fitted with a star tip (Wilton 1M recommended).
- Pipe frosting in concentric rings: orange on outside, yellow inside, white in center. Top each cupcake with a piece of candy corn.
Notes
Use gel food coloring for vibrant colors without thinning batter or frosting. Pipe batter slowly for clean layers. Cool cupcakes completely before frosting. Butter can be made ahead and refrigerated; let soften and re-whip before using. Cupcakes can be baked a day ahead and stored in an airtight container at room temperature.
Nutrition
- Serving Size: 1 cupcake
- Calories: 380
- Sugar: 38
- Sodium: 180
- Fat: 18
- Saturated Fat: 11
- Carbohydrates: 52
- Protein: 3
Keywords: candy corn cupcakes, layered cupcakes, Halloween cupcakes, fall cupcakes, buttercream frosting, easy cupcake recipe


