Love this? Save it for later!
Share the inspiration with your friends
My older brother swore he hated chocolate cake. For years. His entire adult life, actually. Then last spring, I showed up at his door with this chocolate espresso birthday cake for his 40th, and I found him standing at the kitchen counter at 11 PM, eating a slice with his fingers straight from the tupperware. He didn’t even bother with a plate. I just stood there in the doorway, and he froze mid-bite, frosting on his nose. “This is different,” he mumbled, and honestly, I didn’t even say “I told you so.” I just poured us both a glass of milk.
That moment stuck with me because it proved what I’d suspected for years — the right chocolate cake has the power to change minds. This isn’t just any chocolate cake, though. The espresso in this recipe doesn’t make it taste like coffee. It makes the chocolate taste more like itself, if that makes sense. It deepens everything, rounds out the sweetness, and gives the whole thing this grown-up complexity that somehow still feels like pure celebration. I mean, it’s still birthday cake. It’s still supposed to be fun.
I developed this recipe after a string of disappointing birthday cakes — dry layers, cloying frosting, that artificial chocolate flavor that tastes more like a chemistry experiment than actual cocoa. Maybe you’ve been there, staring at a slice of cake that cost forty dollars but tastes like nothing. This version fixes all of that. The crumb is tender but sturdy enough to hold up to stacking, the frosting is silky without being greasy, and that espresso note lingers just enough to make people ask, “Wait, what’s in this?” It’s the cake I now make for every birthday in my life, including my own. And honestly? It’s the first cake I’ve ever made that actually gets better on day two.
Why You’ll Love This Recipe
I tested this chocolate espresso birthday cake seven times before I got it right. Seven. The first version was too dry. The second one collapsed in the middle. The third had a frosting that slid right off the layers like a bad toupee. But by version four, I started to understand what this cake wanted to be, and by version seven, I knew I had something special. Here is why this recipe works:
- Deep, Complex Flavor : The espresso doesn’t make this taste like coffee — it makes the chocolate taste richer, darker, and more sophisticated. People will ask what your secret ingredient is.
- Perfectly Moist Crumb : A combination of buttermilk and hot coffee creates a tender, velvety texture that stays moist for days. No dry birthday cake here.
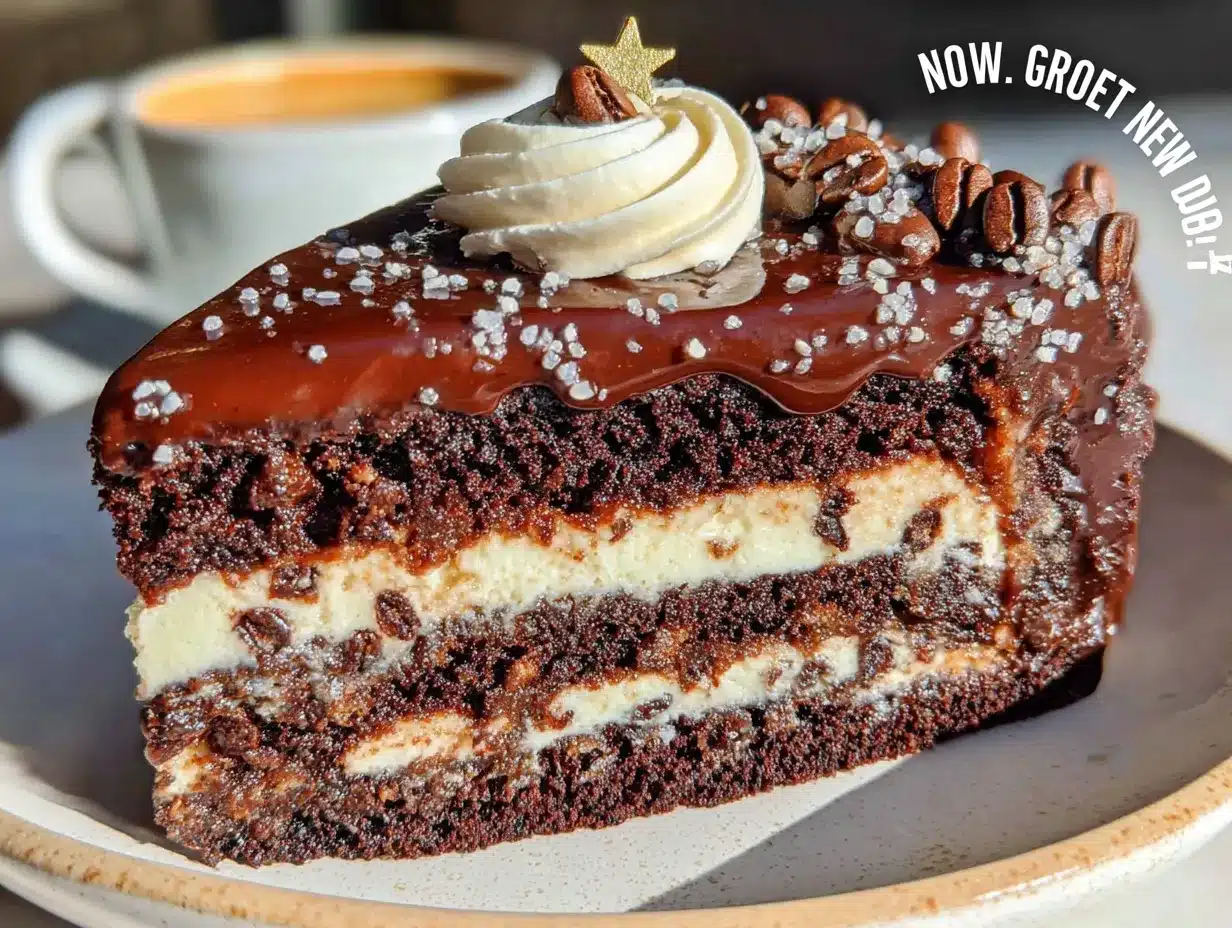
- Foolproof Swiss Meringue Buttercream : This frosting is silky, stable, and not overly sweet. It pipes beautifully and holds its shape at room temperature.
- Simple Pantry Ingredients : Nothing weird or hard to find. Cocoa powder, flour, sugar, eggs, butter — the usual suspects plus some strong brewed coffee.
- Crowd-Pleaser Guaranteed : I’ve made this for picky eaters, chocolate skeptics, and actual pastry chefs. Every single person has asked for the recipe.
What makes this different from every other chocolate cake recipe out there? It’s the balance. Most chocolate cakes are either too sweet or too bitter. This one hits that perfect middle ground where the chocolate shines, the espresso supports, and the frosting ties it all together without making your teeth hurt. It’s the kind of cake that makes people close their eyes after the first bite. I’ve seen it happen at least a dozen times now, and it never gets old.
What Ingredients You Will Need
This chocolate espresso birthday cake relies on simple, quality ingredients that work together to create something truly special. Most of these are standard baking staples, but a few deserve a little extra attention.
For the Cake Layers
- 2 cups all-purpose flour (I use King Arthur for consistent results)
- 2 cups granulated sugar (adds sweetness and helps with structure)
- 3/4 cup unsweetened cocoa powder (use high-quality Dutch-process for the deepest flavor — I prefer Guittard or Valrhona)
- 2 teaspoons baking soda (helps the cake rise properly)
- 1 teaspoon baking powder (adds extra lift for a tender crumb)
- 1 teaspoon fine sea salt (balances sweetness and enhances chocolate flavor)
- 1 cup buttermilk, room temperature (adds moisture and tenderness; you can substitute 1 cup milk mixed with 1 tablespoon lemon juice)
- 1/2 cup vegetable oil (keeps the cake moist; use a neutral oil like canola or grapeseed)
- 2 large eggs, room temperature (binds everything together)
- 2 teaspoons vanilla extract (pure, not imitation — it makes a difference)
- 1 cup hot brewed espresso or strong coffee (this is the magic ingredient — it blooms the cocoa and deepens the chocolate flavor without making the cake taste like coffee)
For the Espresso Swiss Meringue Buttercream
- 5 large egg whites (save the yolks for something else, or just accept the sacrifice)
- 1 1/2 cups granulated sugar
- 2 cups unsalted butter, softened but still cool (I use Plugrà or Kerrygold for the best flavor)
- 2 tablespoons instant espresso powder dissolved in 1 tablespoon hot water (adds that subtle coffee kick)
- 1 teaspoon vanilla extract
- 1/4 teaspoon fine sea salt
For Assembly & Decoration
- Chocolate shavings or curls (optional but pretty)
- Fresh berries or edible flowers (for a pop of color)
- Cocoa powder for dusting (use a fine-mesh sieve for even coverage)
A quick note on ingredient selection: don’t skimp on the cocoa powder. I learned this the hard way after making a batch with generic supermarket cocoa that tasted flat and dusty. Splurge on a good Dutch-process cocoa — it’s worth every penny. And if you don’t have espresso powder for the frosting, you can use 2 tablespoons of strongly brewed coffee instead, just reduce the liquid elsewhere to keep the consistency right.
Equipment Needed
You don’t need a professional bakery setup to make this chocolate espresso birthday cake, but having the right tools makes the process smoother. Here is what you will need:
- Three 8-inch round cake pans (I prefer light-colored metal pans for even baking; dark pans can cause over-browning)
- Stand mixer or hand mixer (a stand mixer makes the frosting easier, but a hand mixer works fine too)
- Parchment paper (for lining the cake pans — this prevents sticking and makes cleanup easier)
- Cooling racks (essential for letting the cake layers cool completely before frosting)
- Offset spatula (for smoothing frosting; a butter knife works in a pinch)
- Cake turntable (optional but helpful for getting those smooth sides)
- Fine-mesh sieve (for sifting dry ingredients and dusting cocoa powder)
- Kitchen scale (I recommend this for consistent results, especially with flour)
If you don’t have three cake pans, you can bake the layers in batches. Just let the batter sit at room temperature while the first batch bakes — it will be fine. And if you’re using a hand mixer for the Swiss meringue buttercream, be prepared for a bit of an arm workout. It’s doable, but your biceps will thank you later.
Preparation Method
Step 1: Preheat and Prep
Preheat your oven to 350°F (175°C). Grease three 8-inch round cake pans with butter or non-stick spray, then line the bottoms with parchment paper circles. Lightly dust the sides with cocoa powder instead of flour — this prevents white streaks on your finished cake. Set the pans aside.
Step 2: Mix the Dry Ingredients
In a large bowl, sift together 2 cups all-purpose flour, 2 cups sugar, 3/4 cup cocoa powder, 2 teaspoons baking soda, 1 teaspoon baking powder, and 1 teaspoon salt. Sifting is important here — it removes lumps and aerates the mixture for a lighter crumb. I once skipped this step out of laziness, and my cake had little pockets of unmixed cocoa. Don’t be me.
Step 3: Combine the Wet Ingredients
In a separate bowl or a large liquid measuring cup, whisk together 1 cup buttermilk, 1/2 cup vegetable oil, 2 eggs, and 2 teaspoons vanilla extract. Make sure your eggs and buttermilk are at room temperature — cold ingredients can cause the batter to seize up and result in a dense cake.
Step 4: Bring It All Together
Pour the wet ingredients into the dry ingredients and mix on low speed until just combined. The batter will be thick at this point. Scrape down the sides and bottom of the bowl with a spatula to make sure everything is incorporated. Now, slowly pour in 1 cup of hot brewed espresso while mixing on low speed. The batter will thin out and become silky — this is exactly what you want. Mix until smooth, about 30 seconds. Do not overmix, or your cake will be tough.
Step 5: Bake the Layers
Divide the batter evenly among the three prepared pans. I use a kitchen scale for this — about 450 grams per pan — but you can also use a measuring cup. Bake for 25 to 30 minutes, rotating the pans halfway through. The cakes are done when a toothpick inserted into the center comes out with a few moist crumbs, not wet batter. Let the cakes cool in the pans for 10 minutes, then turn them out onto cooling racks to cool completely. This is crucial — if you try to frost warm cake, you will have a disaster on your hands.
Step 6: Make the Frosting
While the cakes cool, make the Swiss meringue buttercream. Combine 5 egg whites and 1 1/2 cups sugar in the bowl of a stand mixer. Place the bowl over a pot of simmering water (make sure the water doesn’t touch the bottom of the bowl) and whisk constantly until the sugar dissolves and the mixture reaches 160°F (71°C) on an instant-read thermometer. This takes about 5 to 7 minutes. Transfer the bowl to the stand mixer fitted with the whisk attachment and whip on medium-high speed until stiff peaks form and the bowl feels cool to the touch, about 10 minutes. Switch to the paddle attachment and add the softened butter, one tablespoon at a time, mixing on medium speed. The mixture will look curdled at some point — this is normal. Keep mixing. It will come together into a silky, luscious buttercream. Add the dissolved espresso, vanilla, and salt, and mix until combined.
Step 7: Assemble the Cake
Once the cake layers are completely cool, level them with a serrated knife if needed. Place one layer on your cake board or serving plate and spread about 1 cup of frosting evenly on top. Repeat with the second and third layers. Apply a thin crumb coat — a thin layer of frosting that traps any loose crumbs — and refrigerate for 20 minutes. Then apply the final coat of frosting, smoothing the sides and top with your offset spatula. Decorate with chocolate shavings, berries, or whatever makes you happy.
Cooking Tips & Techniques
I’ve made this chocolate espresso birthday cake more times than I can count, and I’ve made every mistake in the book so you don’t have to. Here are the things I wish someone had told me:
Use room temperature ingredients. This is not a suggestion — it’s a requirement. Cold eggs and buttermilk will make your batter lumpy and your cake dense. Leave everything on the counter for at least an hour before you start. I once tried to speed things up by microwaving my buttermilk, and it curdled. Don’t do that.
Don’t skip the parchment paper. I know it’s annoying to cut those circles, but it’s the difference between a clean release and a broken cake layer. Trace your pan on parchment, cut it out, and move on with your life. Your future self will thank you.
The frosting will look like a disaster before it comes together. Swiss meringue buttercream always goes through a curdled, soupy phase. This is normal. Keep mixing. It will eventually emulsify into smooth, silky buttercream. If it’s still not coming together after 10 minutes, your butter might be too cold. Wrap a warm towel around the bowl and mix for another minute.
Level your cake layers. Even if you think they look flat, use a serrated knife to level them. A domed cake will wobble and slide, and your frosting will end up thicker on one side. A level cake is a happy cake.
Chill between coats. That 20-minute fridge time after the crumb coat is non-negotiable. It sets the frosting and makes the final coat so much easier to apply. I learned this after spending an hour trying to smooth frosting over a cake that kept shedding crumbs everywhere.
Variations & Adaptations
One of the best things about this chocolate espresso birthday cake is how adaptable it is. Here are some variations I’ve tested and loved:
- Gluten-Free Version : Substitute the all-purpose flour with a high-quality gluten-free baking blend that contains xanthan gum. I’ve had great results with King Arthur’s Measure for Measure flour. The texture is slightly more delicate, so handle with care.
- Dairy-Free Version : Use full-fat oat milk mixed with 1 tablespoon apple cider vinegar in place of buttermilk, and substitute the butter in the frosting with a high-quality vegan butter stick (not the spreadable kind in a tub). The flavor is slightly different but still delicious.
- Mocha Mascarpone Filling : For a grown-up twist, add a layer of mascarpone mixed with a little powdered sugar and extra espresso between the cake layers. It adds a creamy tang that pairs beautifully with the chocolate.
- Peppermint Chocolate Version : Add 1/2 teaspoon peppermint extract to the frosting and top with crushed candy canes. This is my go-to for holiday birthdays.
- Single-Layer Sheet Cake : Pour the batter into a greased 9×13-inch pan and bake for 35 to 40 minutes. Halve the frosting recipe and spread it right on top. Less fancy, just as delicious.
I once made a version with orange zest in the batter and a dark chocolate ganache drip on top. It was ridiculous in the best way. Don’t be afraid to experiment — this cake is forgiving enough to handle a little creativity.
Serving & Storage Suggestions
This chocolate espresso birthday cake is best served at room temperature. If you’ve refrigerated it, let it sit out for at least 30 minutes before slicing. The flavors are more pronounced and the texture is softer when it’s not straight from the fridge.
For serving, I like to pair it with a glass of cold milk or a hot cup of coffee. The contrast between the rich cake and the cold milk is honestly one of life’s simple pleasures. If you’re feeling fancy, a dollop of lightly sweetened whipped cream on the side never hurts.
Storage: The cake will keep in an airtight container at room temperature for up to 3 days. In the refrigerator, it will last up to 5 days, but let it come to room temperature before serving. The frosting firms up quite a bit when chilled.
Freezing: This cake freezes beautifully. Wrap individual slices or the entire frosted cake in a double layer of plastic wrap, then a layer of foil. Freeze for up to 3 months. Thaw in the refrigerator overnight, then bring to room temperature before serving. I always keep a few slices in my freezer for emergency cake cravings. No judgment.
One thing I love about this cake is that the flavors actually improve after a day. The espresso and chocolate have time to meld together, and the crumb becomes even more moist. So if you can, make this cake a day ahead. Your future self will thank you.
Nutritional Information & Benefits
Let’s be honest — this is a birthday cake, not a health food. But knowing what’s in it can help you enjoy it mindfully. Here’s the approximate nutritional breakdown per slice (based on 12 servings):
| Nutrient | Amount per Serving |
|---|---|
| Calories | 485 |
| Total Fat | 28g |
| Saturated Fat | 16g |
| Carbohydrates | 55g |
| Sugar | 40g |
| Protein | 6g |
| Fiber | 3g |
| Sodium | 320mg |
On the bright side, this cake does contain some beneficial ingredients. Cocoa powder is rich in antioxidants called flavonoids, which are linked to heart health. The espresso provides a small amount of caffeine and its own antioxidants. And hey, there’s protein from the eggs and butter. Is it a superfood? Absolutely not. But is it worth every single calorie? One hundred percent yes.
If you’re watching your sugar intake, you can reduce the sugar in the cake by 1/4 cup without affecting the texture too much. The frosting is harder to adjust, but you can use a dark chocolate ganache instead for a less sweet option.
Conclusion
This chocolate espresso birthday cake is the recipe I turn to when I want to impress someone, comfort someone, or celebrate something worth remembering. It’s the cake that made my chocolate-hating brother eat frosting off his fingers at midnight. It’s the cake I’ve made for friends going through hard times and friends getting married. It’s the cake that never, ever lets me down.
I hope you make this cake for someone you love. Or better yet, I hope you make it for yourself. Because you deserve a perfect slice of chocolate cake on your birthday, or on a random Tuesday, or whenever the mood strikes. Customize it however you want — add more espresso, swap the frosting, throw in some raspberries. Make it yours.
When you do make it, come back and tell me how it went. Leave a comment below, share a photo, or tag me on social media. I love hearing about your kitchen victories (and your happy accidents too). Now go preheat that oven. Your cake is waiting.
Frequently Asked Questions
Can I make this cake without espresso?
Yes, you can substitute the hot espresso with hot water or hot milk. The cake will still be chocolatey, but it won’t have that same depth of flavor. The espresso doesn’t make it taste like coffee — it just makes the chocolate taste more like itself.
Why did my cake layers dome in the middle?
Domed layers usually mean your oven temperature is too high or your batter was overmixed. Try reducing the oven temperature by 25 degrees and mixing just until combined. You can also use cake strips — wet fabric strips that wrap around your pans — to promote even baking.
Can I use a different frosting?
Absolutely. This cake works well with chocolate ganache, cream cheese frosting, or even a simple dusting of powdered sugar. The Swiss meringue buttercream is my favorite because it’s less sweet, but feel free to use whatever you love.
How do I get clean slices?
Use a long, sharp serrated knife and run it under hot water before each cut. Wipe the blade clean between slices. This gives you those beautiful, bakery-style slices that look like they belong on a magazine cover.
Can I bake this as a cupcake instead?
Yes! This recipe makes about 24 cupcakes. Fill cupcake liners about 2/3 full and bake at 350°F for 18 to 22 minutes. The frosting recipe will generously cover all 24 cupcakes with a little left over for snacking.
Pin This Recipe!
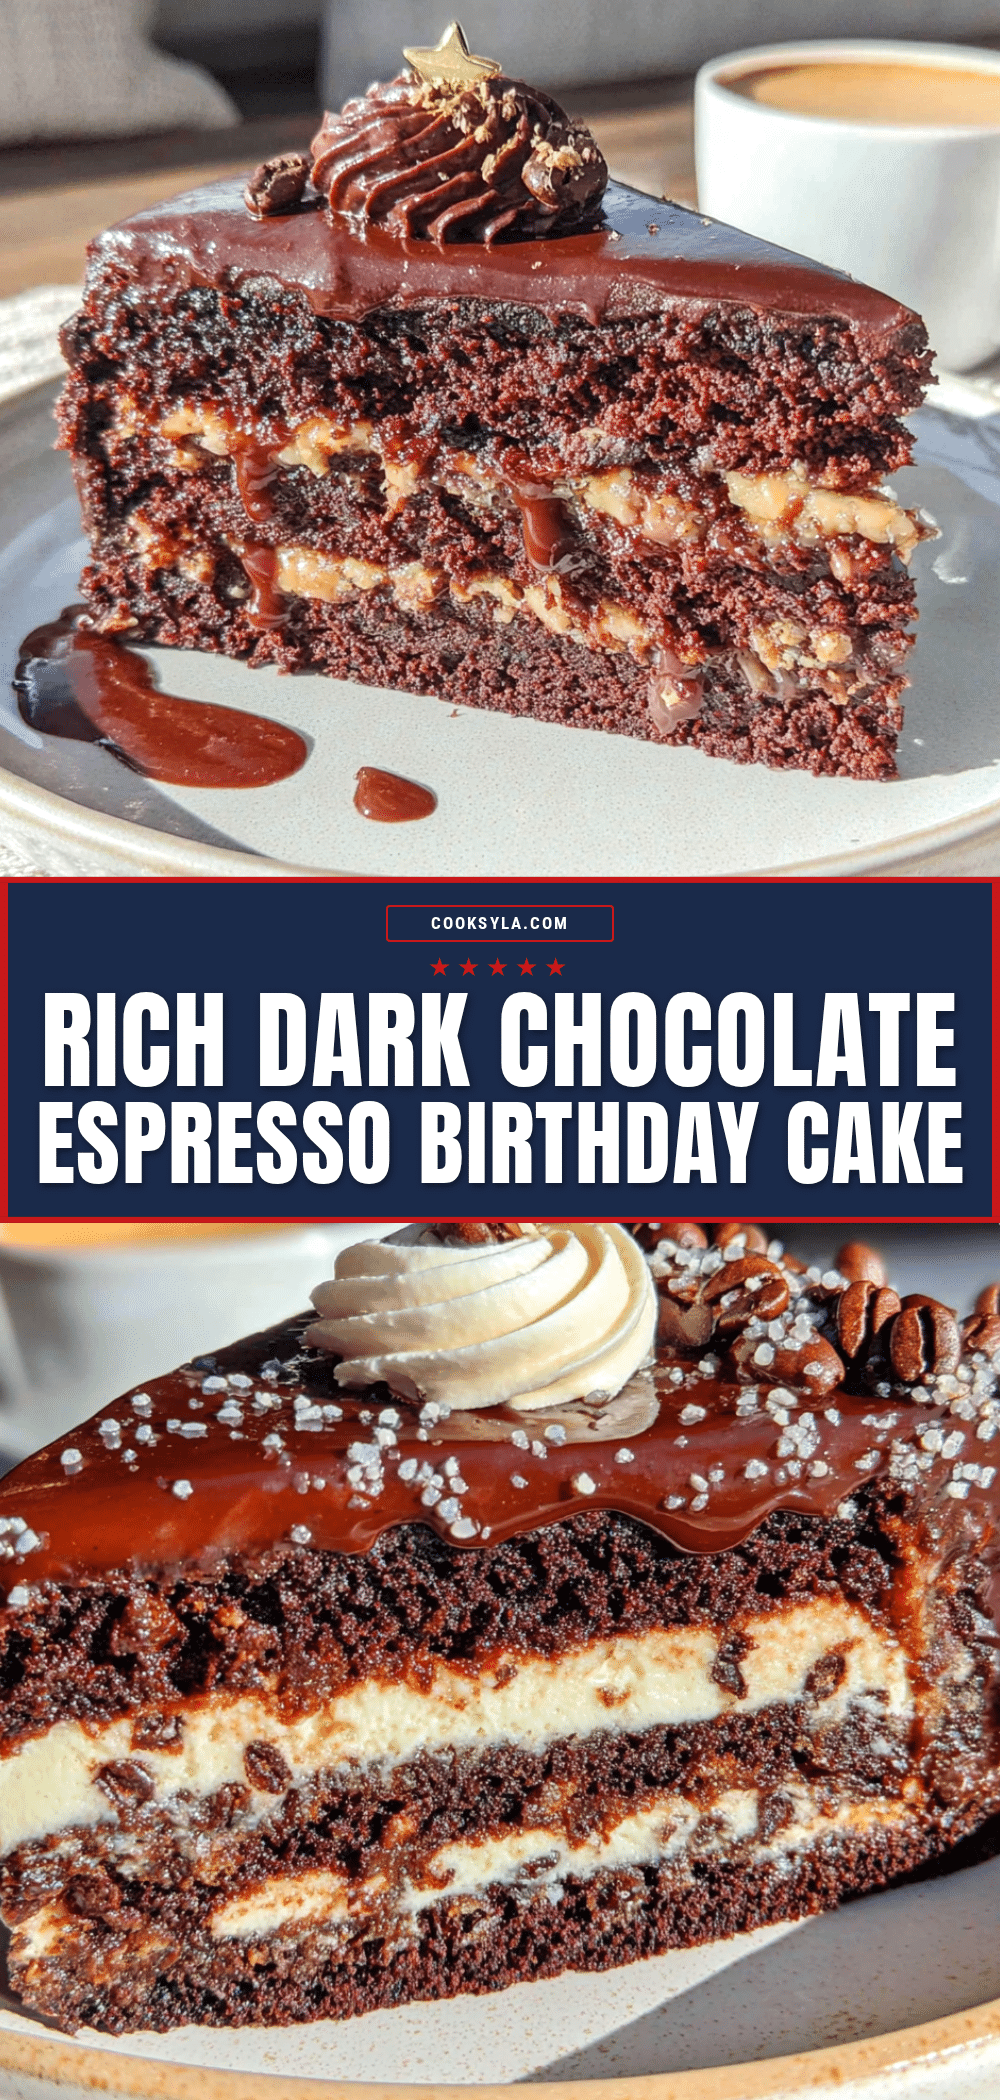
Perfect Chocolate Espresso Birthday Cake: Best Homemade Recipe
This chocolate espresso birthday cake features deep, complex flavor from espresso that enhances the chocolate without tasting like coffee. With a perfectly moist crumb and silky Swiss meringue buttercream, it’s a crowd-pleaser that gets even better on day two.
- Prep Time: 30 minutes
- Cook Time: 30 minutes
- Total Time: 1 hour 30 minutes
- Yield: 12 servings 1x
- Category: Dessert
- Cuisine: American
Ingredients
- 2 cups all-purpose flour
- 2 cups granulated sugar
- 3/4 cup unsweetened cocoa powder (Dutch-process preferred)
- 2 teaspoons baking soda
- 1 teaspoon baking powder
- 1 teaspoon fine sea salt
- 1 cup buttermilk, room temperature
- 1/2 cup vegetable oil
- 2 large eggs, room temperature
- 2 teaspoons vanilla extract
- 1 cup hot brewed espresso or strong coffee
- 5 large egg whites
- 1 1/2 cups granulated sugar
- 2 cups unsalted butter, softened but still cool
- 2 tablespoons instant espresso powder dissolved in 1 tablespoon hot water
- 1 teaspoon vanilla extract
- 1/4 teaspoon fine sea salt
- Chocolate shavings or curls (optional)
- Fresh berries or edible flowers (optional)
- Cocoa powder for dusting (optional)
Instructions
- Preheat oven to 350°F (175°C). Grease three 8-inch round cake pans, line bottoms with parchment paper, and dust sides with cocoa powder.
- In a large bowl, sift together flour, sugar, cocoa powder, baking soda, baking powder, and salt.
- In a separate bowl, whisk together buttermilk, vegetable oil, eggs, and vanilla extract.
- Pour wet ingredients into dry ingredients and mix on low speed until just combined. Slowly add hot espresso while mixing on low until smooth, about 30 seconds. Do not overmix.
- Divide batter evenly among prepared pans (about 450 grams each). Bake for 25-30 minutes, rotating halfway. Cool in pans for 10 minutes, then turn out onto cooling racks to cool completely.
- For frosting: Combine egg whites and sugar in a stand mixer bowl. Place over simmering water, whisking until sugar dissolves and mixture reaches 160°F (71°C). Transfer to mixer with whisk attachment and whip on medium-high until stiff peaks form and bowl is cool, about 10 minutes. Switch to paddle attachment, add butter one tablespoon at a time, mixing on medium. Add dissolved espresso, vanilla, and salt; mix until combined.
- Level cooled cake layers with a serrated knife. Place one layer on serving plate, spread about 1 cup frosting on top. Repeat with remaining layers. Apply a thin crumb coat and refrigerate for 20 minutes. Apply final coat of frosting and decorate as desired.
Notes
Use room temperature ingredients for best results. Don’t skip the parchment paper. The frosting will look curdled before it comes together—keep mixing. Level cake layers for even stacking. Chill between coats for easier frosting. The cake improves after a day; make it ahead if possible.
Nutrition
- Serving Size: 1 slice
- Calories: 485
- Sugar: 40
- Sodium: 320
- Fat: 28
- Saturated Fat: 16
- Carbohydrates: 55
- Fiber: 3
- Protein: 6
Keywords: chocolate cake, espresso cake, birthday cake, chocolate espresso cake, Swiss meringue buttercream, homemade cake


