Love this? Save it for later!
Share the inspiration with your friends
Okay, let’s be honest—the PTA Halloween bake sale was in 24 hours and I had completely forgotten. I mean, completely. I was staring into my pantry like it held the secrets to the universe, while visions of elaborate, Pinterest-perfect haunted gingerbread houses and fondant-covered monster cupcakes danced in my head. Everyone else would be bringing those showstoppers. I had a half-empty bag of dark chocolate chips, a stick of butter, and a vague, panicked memory of a sugar cookie recipe my aunt used to make. There was no time for a grocery run, no time for a trial batch. It was just me, my rolling pin, and a rapidly sinking feeling that I was about to be the person who brought store-bought cookies to a bake sale.
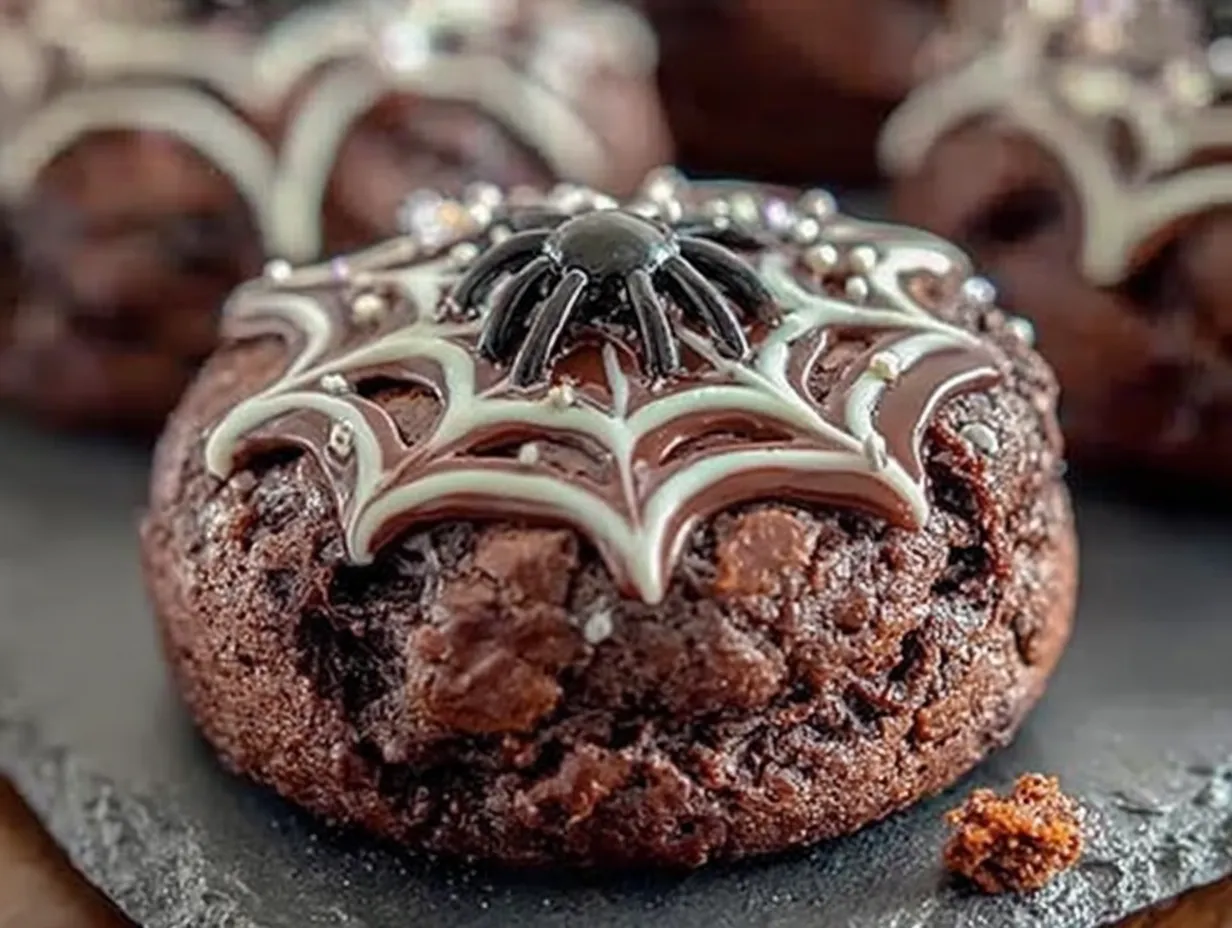
I remembered this spider web technique I’d seen in a magazine once—a simple swirl of icing on a dark chocolate base. It looked fancy, like it took hours. Honestly, I figured it was my only shot at looking like I had my life together. I whipped up a batch of my go-to chocolate sugar cookie dough, rolled it out a little thinner than I should have because I was rushing, and baked them until they were just set. Then came the terrifying part: the royal icing spider webs. My hands were shaking, my kitchen looked like a flour bomb had gone off, and I was pretty sure my first few attempts looked more like a toddler’s art project than a spider’s masterpiece. But I kept going, and something clicked. By the time I was scraping the last bit of icing out of the bowl, I had a whole sheet of these dark, glossy cookies with delicate, white webs stretching across them. They looked, for lack of a better word, cool.
The next morning, I dropped them off, mumbled an apology for being late, and braced for the inevitable comparison to the other, more elaborate treats. I was back home, scrubbing chocolate off my counter, when my phone started buzzing. Texts from other parents: “Those spider web cookies were incredible!” “My kid wouldn’t stop talking about them.” “Can I get the recipe?” The simple, slightly panicked cookies had won. And honestly? That’s why I still make them today. They’re the perfect reminder that you don’t need a week of prep or a pastry degree to create something that makes people stop and smile. It’s just you, a little chocolate, and a whole lot of cozy, spooky fun.
Why You’ll Love These Chocolate Spider Web Sugar Cookies
These aren’t just another Halloween cookie. They are a perfect storm of delicious flavor, stunning visuals, and stress-free baking. I’ve tested this recipe more times than I can count, tweaking the chocolate-to-sugar ratio and the icing consistency until it was absolutely foolproof. This is the version I’m proud to share.
- Quick & Easy: From start to finish, these cookies come together in under an hour. The dough needs minimal chilling, and the icing sets in about 20 minutes. Perfect for a last-minute Halloween party or a cozy afternoon baking session with the kids.
- Simple Ingredients: You likely have everything you need in your pantry right now. No fancy extracts, no specialty flours—just baking staples that turn into something magical. I’ve tested this with both all-purpose and gluten-free 1-to-1 flour blends, and it works beautifully with both.
- Perfect for Halloween: These are the ultimate crowd-pleaser for any spooky gathering. They’re impressive enough for a bake sale, a classroom party, or a Halloween dinner, yet simple enough for a quiet night in with a scary movie.
- Crowd-Pleaser: I’ve brought these to everything from office parties to family gatherings. Kids love the web design, and adults can’t get over the rich, not-too-sweet chocolate flavor. They disappear fast.
- Unbelievably Delicious: This isn’t a dry, crumbly sugar cookie. The cocoa powder gives them a deep, fudgy richness, while the butter keeps them tender and soft. The delicate royal icing web adds the perfect touch of sweetness. It’s the kind of cookie that makes you close your eyes after the first bite.
What makes this recipe different from all the others? It’s the balance. The cookie itself is sturdy enough to hold the icing but soft enough to melt in your mouth. The icing is thick enough to pipe a clean web but thin enough to spread into those beautiful, organic lines. It’s a recipe that was born from a moment of panic and perfected through years of happy baking. It’s comfort food reimagined for the spookiest season—faster, easier, but with the same soul-soothing satisfaction of a homemade treat.
What Ingredients You Will Need
This recipe uses simple, wholesome ingredients to deliver a bold, chocolatey cookie that’s perfect for decorating. You don’t need anything fancy—just your baking basics and a little bit of love. Here’s what you’ll need to gather:
For the Chocolate Sugar Cookies
- 1 cup (2 sticks / 226g) unsalted butter, softened – I always use unsalted butter so I can control the salt level. Let it sit out for about 30 minutes to soften properly. (Adds richness and tenderness)
- 1 cup (200g) granulated sugar – Regular white sugar is perfect. It gives the cookies a nice, crisp edge while keeping the center soft.
- 1 large egg, room temperature – A room-temperature egg emulsifies better into the butter-sugar mixture, creating a smoother dough. (Take it out of the fridge with the butter.)
- 1 teaspoon vanilla extract – Pure vanilla extract adds a warm, aromatic depth that complements the chocolate. I prefer Nielsen-Massey, but any good brand works.
- 1 ½ cups (190g) all-purpose flour – Spoon and level your flour for the most accurate measurement. Scooping directly from the bag can pack in too much flour, making the cookies dry.
- ½ cup (40g) unsweetened cocoa powder – Use a high-quality Dutch-process cocoa powder like Rodelle or Ghirardelli for the richest, darkest color and a smoother flavor. (Adds deep chocolate flavor)
- ½ teaspoon baking powder – This helps the cookies spread just a little and gives them a tender crumb.
- ¼ teaspoon salt – A little salt balances the sweetness and enhances the chocolate flavor. (Use fine sea salt for even distribution.)
For the Royal Icing Spider Webs
- 1 cup (120g) powdered sugar – Sift it if it’s lumpy. This is the base of your icing.
- 1-2 tablespoons milk or water – Start with 1 tablespoon and add more, a teaspoon at a time, until you reach the right consistency. You want it thick enough to hold its shape but thin enough to pipe smoothly.
- ¼ teaspoon vanilla extract or clear almond extract – Vanilla is classic, but a tiny bit of almond extract gives the icing a lovely, subtle flavor. (I use vanilla for this recipe.)
- Optional: Black gel food coloring – If you want to pipe a black spider on top of the white web, a tiny dot of black gel coloring is all you need. (I love the AmeriColor brand.)
Ingredient Selection Tips: For the best texture, make sure your butter is truly softened—it should give slightly when you press it, but not be greasy or melted. For the cocoa powder, Dutch-process is my go-to for these cookies because it gives them that dark, almost black color that makes the white spider webs pop. If you only have natural cocoa powder, it will still work, but the color will be lighter and the flavor slightly more acidic.
Substitution Guidance: Need a dairy-free option? Use vegan butter sticks (like Earth Balance) and a plant-based milk for the icing. The texture will be slightly different, but still delicious. For a gluten-free version, swap the all-purpose flour with a 1-to-1 gluten-free baking flour blend that contains xanthan gum. I’ve tested this with King Arthur Measure for Measure, and the cookies held their shape perfectly.
Equipment Needed
You don’t need a professional bakery setup to make these cookies. Here’s what you’ll need to get the job done:
- Mixing Bowls: One large bowl for the cookie dough and one small bowl for the icing.
- Electric Hand Mixer or Stand Mixer: A hand mixer works perfectly for creaming the butter and sugar. A stand mixer with the paddle attachment is even easier.
- Rolling Pin: A standard rolling pin is fine. If you have a French rolling pin (without handles), it gives you better control over thickness.
- Round Cookie Cutter: A 2.5-inch or 3-inch round cutter is ideal. You can use a fluted or straight edge—both look great.
- Baking Sheets: Two or three standard half-sheet pans work best. I recommend lining them with parchment paper or a silicone baking mat.
- Piping Bags or Zip-Top Bags: For the icing, you can use a small piping bag with a #2 or #3 round tip, or simply snip a tiny corner off a zip-top sandwich bag. I usually use the zip-top bag method for less cleanup—just be careful not to snip too big of a hole!
- Cooling Rack: Essential for cooling the cookies completely before icing them. A wire rack allows air to circulate, preventing soggy bottoms.
- Toothpick or Small Skewer: This is your secret weapon for dragging the icing from the center of the web outward. A toothpick is perfect.
Budget-Friendly Tip: Don’t have a piping tip? No problem. A clean, empty squeeze bottle with a narrow tip works incredibly well for the icing. I’ve used an old honey bottle in a pinch, and it worked like a charm.
Preparation Method
Let’s get baking! Follow these steps carefully, and you’ll have a batch of stunning spider web cookies in no time. I’ve included all the little tips and tricks I’ve learned along the way to make sure your cookies turn out perfectly.
- Preheat and Prep: Preheat your oven to 350°F (175°C). Line two baking sheets with parchment paper or silicone baking mats. This ensures your cookies won’t stick and makes cleanup a breeze.
- Cream the Butter and Sugar: In a large mixing bowl, beat the softened butter and granulated sugar together with an electric mixer on medium speed until light, fluffy, and pale in color. This should take about 2-3 minutes. Don’t rush this step—creaming incorporates air into the dough, which gives the cookies a tender texture. Scrape down the sides of the bowl with a rubber spatula halfway through.
- Add the Egg and Vanilla: Beat in the room-temperature egg and the vanilla extract until just combined. The mixture might look a little curdled at this point—that’s totally normal, especially if your egg was slightly cold. Don’t worry, it will come together once you add the dry ingredients.
- Whisk the Dry Ingredients: In a separate, medium bowl, whisk together the all-purpose flour, cocoa powder, baking powder, and salt. Whisking ensures the baking powder and salt are evenly distributed throughout the flour, so you don’t get a pocket of salt in one cookie.
- Combine Wet and Dry: Gradually add the dry ingredients to the wet ingredients, mixing on low speed. Mix until just combined—you don’t want to overwork the dough. It should be soft, slightly sticky, and smell incredibly chocolatey. If it feels too sticky to handle, you can wrap it in plastic wrap and refrigerate for 15 minutes, but I usually find it’s fine to roll out immediately.
- Roll Out the Dough: Lightly flour your work surface and your rolling pin. Place the dough on the floured surface and roll it out to about ¼-inch (6mm) thickness. Try to keep it even as you roll. If the dough starts to stick, lightly dust the top with a bit more flour. I like to roll it out between two sheets of parchment paper to avoid adding too much extra flour, which can make the cookies tough.
- Cut Out the Cookies: Use your round cookie cutter to cut out as many cookies as possible. Press straight down—don’t twist the cutter, as that can seal the edges and prevent the cookies from spreading evenly. Transfer the cut cookies to your prepared baking sheets, leaving about 1 inch (2.5 cm) of space between each one. Gather the dough scraps, gently re-roll them, and cut out more cookies. You should get about 24-30 cookies, depending on the size of your cutter.
- Bake the Cookies: Bake for 8-10 minutes. The cookies are done when the edges look set and the centers are still slightly soft to the touch. They will continue to firm up as they cool. Do not overbake! Overbaked cookies will be dry and crumbly. I usually start checking at the 8-minute mark.
- Cool Completely: Let the cookies cool on the baking sheet for 5 minutes. This allows them to firm up enough to be moved without breaking. Then, transfer them to a wire cooling rack to cool completely. This is crucial—if the cookies are even slightly warm when you try to ice them, the icing will melt and run right off. Be patient! It usually takes about 20-30 minutes for them to cool completely.
Make the Royal Icing & Create the Webs:
- Make the Icing: In a small bowl, whisk together the powdered sugar, 1 tablespoon of milk or water, and the vanilla extract. The icing should be thick but pipeable—think the consistency of toothpaste. If it’s too thick, add another teaspoon of liquid. If it’s too thin, add a little more powdered sugar.
- Pipe the Base Circle: Spoon the icing into your piping bag or zip-top bag. Snip a very small tip off the corner. On a completely cooled cookie, pipe a solid circle of icing in the center. This will be the “hub” of your spider web.
- Pipe the Spokes: From that center circle, pipe thin lines of icing radiating outward to the edge of the cookie, like the spokes of a wheel. You can do 4, 6, or 8 spokes—the more you do, the more intricate the web will look. Don’t worry if they aren’t perfectly straight; a little imperfection makes it look more organic and spooky.
- Create the Web: This is the fun part! While the icing is still wet, take a toothpick or a small skewer. Starting from the center, gently drag the toothpick in a curved line from one spoke to the next, creating a “U” or “V” shape. Continue moving outward, connecting each spoke to the next, until you reach the edge of the cookie. You should see the web pattern magically appear! Work quickly, as the icing will start to set. I usually do one cookie at a time—pipe the spokes, then immediately drag the web.
- Add a Spider (Optional): If you want to take it to the next level, you can add a tiny spider. Take a small amount of the remaining white icing and tint it black with a tiny dab of black gel food coloring. Pipe a small, round body on the edge of the web, then add 8 tiny legs (4 on each side) using the same icing. It’s a super cute, spooky touch.
- Let the Icing Set: Allow the iced cookies to sit at room temperature for about 20-30 minutes, or until the icing is completely hard and dry to the touch. This is important for stacking or storing them.
Cooking Tips & Techniques
Over the years, I’ve made every mistake in the book with these cookies. Here are my hard-won tips to help you skip the learning curve:
- Chill the Dough (If You Have Time): While I said you can skip the chilling, if you have an extra 30 minutes, wrapping the dough in plastic wrap and popping it in the fridge makes it much easier to handle. It prevents the cookies from spreading too much and gives them a cleaner edge. I’ve made them both ways, and chilling always yields a slightly prettier cookie.
- The Toothpick is Your Best Friend: Don’t use a knife or a fork to drag the icing—a toothpick or a small skewer is the perfect tool. It’s thin enough to create a clean line without disturbing the icing too much. I once tried using the tip of a butter knife, and it was a disaster. The lines were too thick and the whole thing looked like a mess.
- Work in Batches: Don’t try to ice all the cookies at once. I like to set up a little assembly line: pipe the center circle on 4-5 cookies, then pipe the spokes on those same cookies, then drag the webs. This way, the icing is still wet enough to create the web pattern. If you try to do too many at once, the icing will start to set, and the toothpick won’t drag cleanly.
- Consistency is Key: The most common mistake with royal icing is getting the consistency wrong. If it’s too thick, it will be hard to pipe and will clump up. If it’s too thin, it will run off the cookie and your web will disappear. Aim for that toothpaste-like consistency. If you’re unsure, test it on a piece of parchment paper first.
- Don’t Overbake for Softness: The number one tip for soft sugar cookies is to take them out of the oven when they still look slightly underdone in the center. They will continue to bake on the hot baking sheet. I’ve pulled many a perfectly soft cookie out of the oven just in the nick of time. Trust the 8-minute mark and check them.
Variations & Adaptations
This recipe is incredibly versatile. Here are a few ways you can change it up to suit your taste or the occasion:
- Spice It Up: For a warmer, more autumnal flavor, add 1 teaspoon of ground cinnamon and ½ teaspoon of ground nutmeg to the dry ingredients. It turns these into cozy chocolate spice cookies that are perfect for Thanksgiving or a crisp fall day.
- Make It Minty: Swap the vanilla extract in the cookie dough for ½ teaspoon of peppermint extract. Then, use peppermint extract in the royal icing instead of vanilla. The combination of dark chocolate and mint is a classic for a reason. It’s like a thin mint cookie in spider web form!
- Gluten-Free and Dairy-Free: As I mentioned, this recipe adapts beautifully. Use a 1-to-1 gluten-free flour blend for the flour and vegan butter sticks for the butter. For the icing, use a dairy-free milk like oat or almond milk. I’ve served these to friends with dietary restrictions, and they couldn’t tell the difference.
- Different Web Colors: Don’t limit yourself to white webs! You can tint the royal icing any color you like. Try orange for a Halloween twist, green for a monster vibe, or even purple for a magical feel. Just add a drop or two of gel food coloring to the icing before you pipe it. I made a batch with bright green webs last year, and they were a huge hit.
- Spider-Free Version: If you’re not a fan of spiders (I get it!), you can skip the spider entirely. The web pattern on its own is beautiful and elegant. You could also pipe a small ghost or a pumpkin in the center instead.
Serving & Storage Suggestions
These cookies are best enjoyed at room temperature, where the cookie is soft and the icing is perfectly set. Here’s how to serve and store them for maximum enjoyment:
- Serving Temperature: Serve them at room temperature. The cookie will be soft and chewy, and the icing will have a nice, crisp snap. They’re perfect on a Halloween dessert table, alongside a warm mug of apple cider or a glass of cold milk.
- Presentation: Arrange them on a platter in a spiral pattern, with the spider webs facing up. You can sprinkle a few edible glitter stars or some black sanding sugar around the platter for an extra spooky touch. I love serving them on a dark slate or black platter to make the white webs really pop.
- Storage: Store the cookies in an airtight container at room temperature. Layer them between sheets of parchment paper to prevent the icing from sticking together. They will stay fresh and delicious for up to 5 days. The flavor actually gets better after a day or two as the cookie and icing meld together.
- Freezing: You can freeze the baked, un-iced cookies for up to 3 months. Place them in a single layer in a freezer-safe bag or container. When you’re ready to decorate, let them thaw completely at room temperature, then make the icing and create your webs. The cookies taste just as fresh as the day you baked them.
- Reheating: Honestly, I don’t recommend reheating these cookies. They are meant to be enjoyed at room temperature. If you want a warm, gooey chocolate experience, try eating one fresh from the oven before you ice it—it’s a whole different, but equally delicious, treat.
Nutritional Information & Benefits
While these are a treat, they’re made with real, simple ingredients. Here’s a quick look at what you’re getting in one cookie (based on a 2.5-inch cookie with the icing):
Estimated per cookie: Calories: 120 | Fat: 6g | Carbs: 16g | Protein: 1g | Sugar: 10g
- Dark Chocolate Benefits: Cocoa powder is rich in antioxidants called flavonoids, which are known to support heart health and improve blood flow. Using high-quality cocoa powder means you’re getting a little bit of a health boost with every bite.
- Portion Control: These cookies are naturally portion-controlled. They’re satisfying and rich, so one or two is usually enough to curb a sweet craving. They’re the perfect size for a lunchbox treat or an after-dinner dessert.
- Dietary Considerations: This recipe is easily adaptable. As mentioned, you can make it gluten-free and dairy-free with simple substitutions. It is also nut-free (as written), making it a safe choice for school parties and gatherings.
- Potential Allergens: This recipe contains dairy (butter, milk) and gluten (flour). It may contain traces of nuts if your chocolate or baking powder is processed in a facility that handles nuts. Always check your labels if you have severe allergies.
I believe in balance. These cookies are a celebration, a fun activity, and a delicious indulgence. Enjoy them for what they are—a little piece of homemade happiness.
Conclusion
So there you have it—my panicked, last-minute bake sale recipe that turned into a Halloween favorite. These Chocolate Spider Web Sugar Cookies are proof that you don’t need hours of prep or a professional pastry kit to create something truly special. They’re simple enough for a beginner baker, yet impressive enough to steal the show at any spooky gathering. The rich, fudgy chocolate cookie paired with the delicate, sweet royal icing web is a combination that’s hard to beat.
I love this recipe because it’s more than just a cookie. It’s a memory of a frantic evening, a messy kitchen, and the surprising joy of creating something beautiful under pressure. It’s a reminder that sometimes the best things in life come from a little bit of chaos. I hope you’ll make these cookies your own. Maybe you’ll add a pinch of cinnamon, or tint the webs bright orange, or pipe a tiny ghost in the center instead of a spider. Whatever you do, I promise you’ll love the process and the result.
Now, I’d love to hear from you! Have you tried making these? Did you come up with your own fun variation? Drop a comment below and tell me all about it. And if you loved this recipe, please share it with a friend who needs a little spooky sweetness in their life. Happy baking, and may your webs always be perfectly imperfect!
Frequently Asked Questions
Can I use a different type of icing for the webs?
Absolutely! While royal icing is my go-to because it dries hard and creates a clean web, you can use a simple glaze made from powdered sugar and milk. Just keep in mind that a glaze will be thinner and won’t hold the web pattern as sharply. It will spread more, creating a softer, more organic look, which is still very pretty!
My cookie dough is too sticky to roll out. What should I do?
This is a common issue, especially if your butter was a little too soft or your kitchen is warm. The easiest fix is to wrap the dough in plastic wrap and refrigerate it for 20-30 minutes. This will firm up the butter, making the dough much easier to handle. You can also lightly dust your work surface and rolling pin with a bit more flour.
How do I prevent my cookies from spreading too much during baking?
Spreading is usually caused by the dough being too warm. Make sure your butter is softened, not melted. Chilling the rolled-out cut cookies on the baking sheet for 10-15 minutes before baking can also help them hold their shape. Also, make sure you’re not over-creaming the butter and sugar, as too much air can cause spreading.
Can I make the dough ahead of time?
Yes, this dough is perfect for making ahead. You can wrap it tightly in plastic wrap and store it in the refrigerator for up to 3 days. When you’re ready to bake, let it sit at room temperature for about 10-15 minutes to soften slightly, then roll it out and cut your cookies. You can also freeze the dough for up to 3 months.
The icing on my cookies is cracking. What went wrong?
Cracking usually happens if the icing is too thick or if the cookie itself is very dry. Make sure your royal icing is smooth and pipeable, not stiff. Also, ensure your cookies are completely cooled before you ice them. If the cookie is too dry, the icing can crack as it dries. Adding a tiny bit more liquid to your icing can help prevent this.
Pin This Recipe!
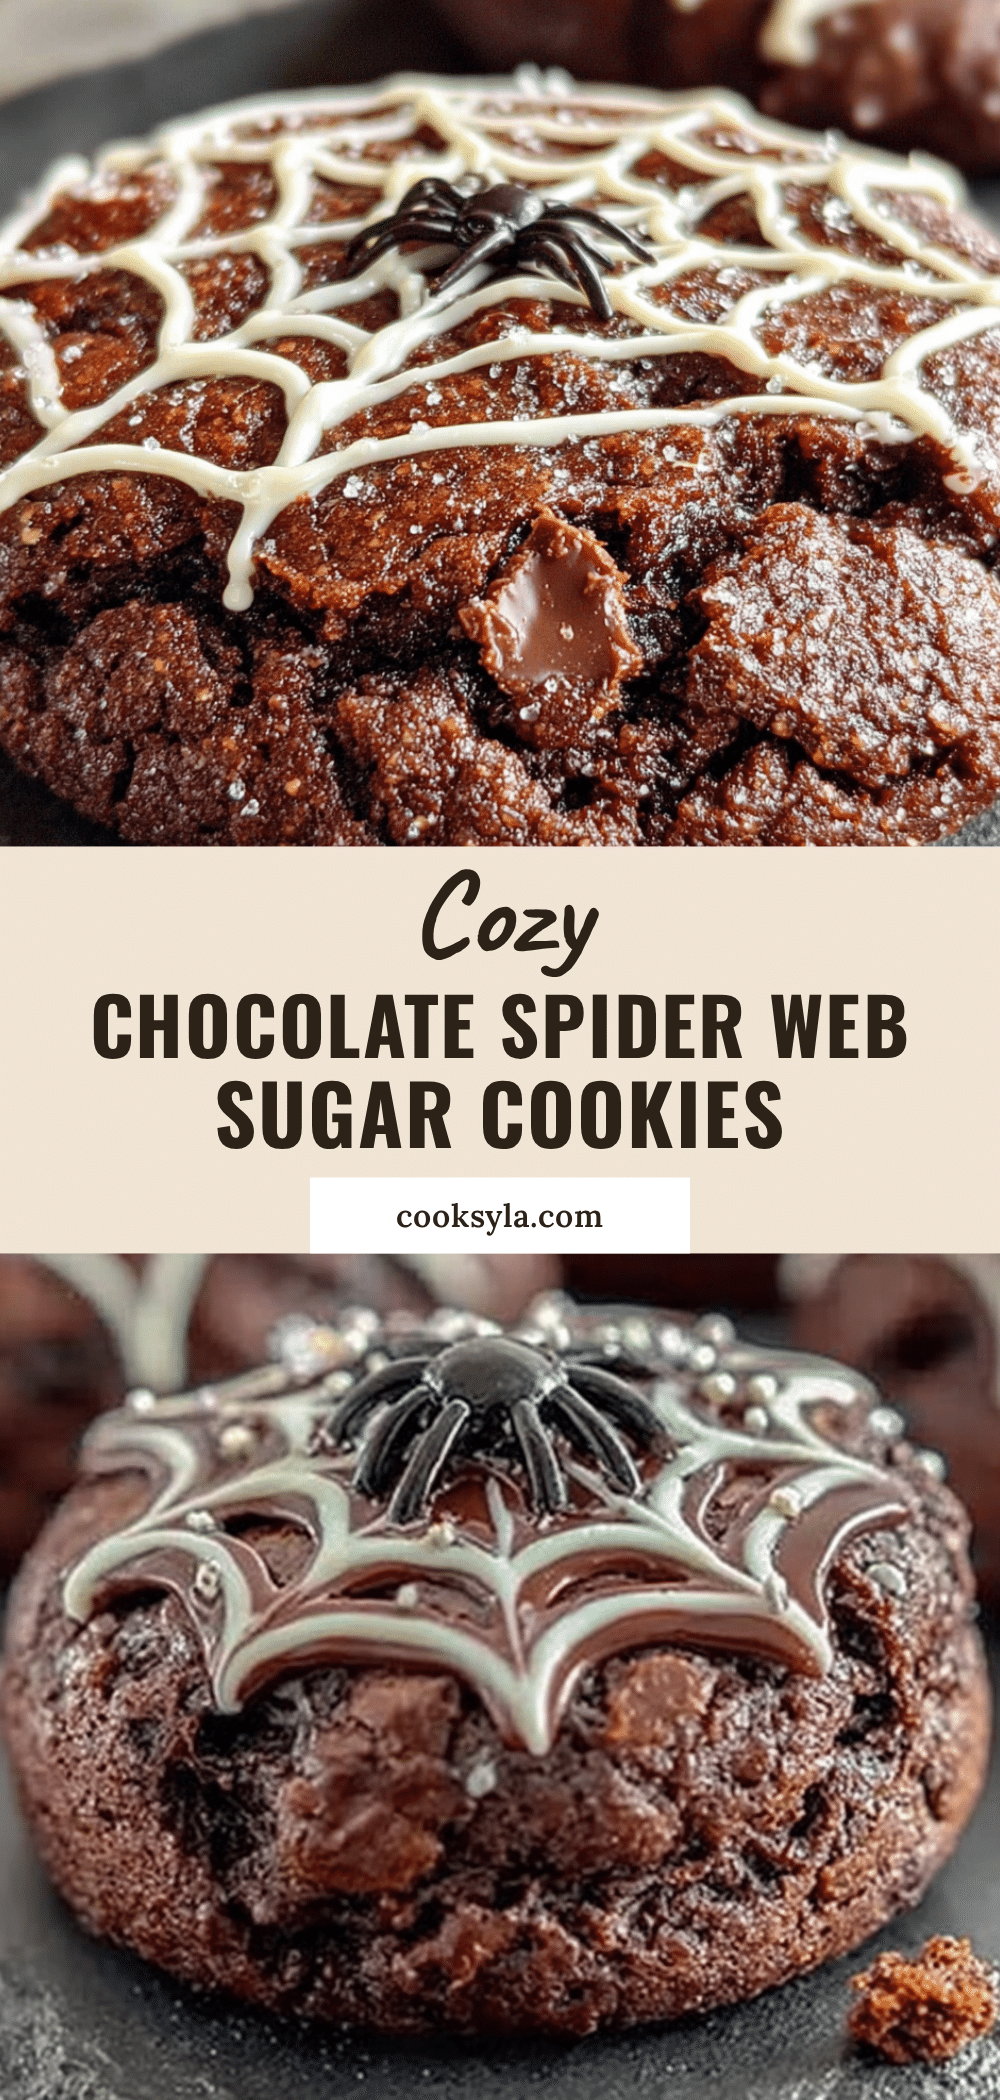
Perfect Chocolate Spider Web Sugar Cookies – Easy Halloween Treats
These rich, fudgy chocolate sugar cookies are topped with a delicate royal icing spider web, making them the perfect last-minute Halloween treat. Quick to make and impressive to serve, they’re a crowd-pleaser for any spooky gathering.
- Prep Time: 15 minutes
- Cook Time: 10 minutes
- Total Time: 45 minutes
- Yield: 24-30 cookies 1x
- Category: Dessert
- Cuisine: American
Ingredients
- 1 cup (2 sticks / 226g) unsalted butter, softened
- 1 cup (200g) granulated sugar
- 1 large egg, room temperature
- 1 teaspoon vanilla extract
- 1 ½ cups (190g) all-purpose flour
- ½ cup (40g) unsweetened cocoa powder (Dutch-process preferred)
- ½ teaspoon baking powder
- ¼ teaspoon salt
- 1 cup (120g) powdered sugar
- 1–2 tablespoons milk or water
- ¼ teaspoon vanilla extract or clear almond extract
- Optional: Black gel food coloring
Instructions
- Preheat oven to 350°F (175°C). Line two baking sheets with parchment paper or silicone baking mats.
- In a large bowl, beat softened butter and granulated sugar with an electric mixer on medium speed until light, fluffy, and pale (2-3 minutes).
- Beat in room-temperature egg and vanilla extract until just combined.
- In a separate bowl, whisk together flour, cocoa powder, baking powder, and salt.
- Gradually add dry ingredients to wet ingredients, mixing on low speed until just combined. Dough should be soft and slightly sticky.
- Lightly flour a work surface and rolling pin. Roll dough to about ¼-inch (6mm) thickness.
- Use a round cookie cutter (2.5-3 inches) to cut out cookies. Transfer to prepared baking sheets, spacing 1 inch apart. Re-roll scraps and repeat.
- Bake for 8-10 minutes, until edges are set and centers are slightly soft. Cool on baking sheet for 5 minutes, then transfer to a wire rack to cool completely.
- For the icing: In a small bowl, whisk together powdered sugar, 1 tablespoon milk or water, and vanilla extract until thick but pipeable (toothpaste consistency). Add more liquid if needed.
- Spoon icing into a piping bag or zip-top bag with a tiny corner snipped off. On a cooled cookie, pipe a solid circle of icing in the center.
- From the center circle, pipe thin lines of icing radiating outward to the edge (4-8 spokes).
- While icing is still wet, use a toothpick to gently drag from one spoke to the next in a curved line, creating a web pattern. Work quickly.
- Optional: Tint a small amount of remaining icing black with gel food coloring. Pipe a small spider body on the edge of the web, then add 8 tiny legs.
- Let iced cookies sit at room temperature for 20-30 minutes until icing is completely hard and dry.
Notes
For best results, chill the dough for 30 minutes if time allows. Work in batches when icing to keep the icing wet for the web pattern. Do not overbake; cookies should be slightly soft in the center when removed from the oven.
Nutrition
- Serving Size: 1 cookie
- Calories: 120
- Sugar: 10
- Sodium: 60
- Fat: 6
- Saturated Fat: 3.5
- Carbohydrates: 16
- Fiber: 1
- Protein: 1
Keywords: chocolate spider web cookies, Halloween cookies, sugar cookies, easy Halloween treats, chocolate sugar cookies, royal icing cookies


