Love this? Save it for later!
Share the inspiration with your friends
This was supposed to be a sleek, modern appetizer spread for my sister’s engagement party. I had planned it for weeks. I had color-coded the napkins. I had even bought those tiny, expensive cheese knives that look like they belong in a museum. But then, my partner walked into the kitchen holding a bag of pumpkins he bought at a roadside stand, and the entire plan collapsed.
I grabbed the wrong platter. It was a rustic, wooden board that had seen better days, with a crack near the handle I kept meaning to fix. The oven was still on from baking bread, making the kitchen humid and chaotic. I was already running late, sweating through my blouse, and feeling that familiar panic rising in my chest. What came out was nothing like the plan — and better.
Instead of sterile, geometric arrangements, I ended up with a chaotic, beautiful explosion of autumn colors. There were walnuts scattered like confetti, figs cut open to reveal their ruby centers, and sharp cheddar wedges that looked like they were stolen from a mountain cave. It wasn’t polished. It was alive.
My sister looked at it and said, “This is the best thing I’ve ever seen.” She was right. The Perfect Fall Harvest Charcuterie Board isn’t about perfection. It’s about abundance. It’s about taking the gifts of the season — the crisp apples, the salty cured meats, the sweet honeycomb — and letting them speak for themselves.
Let me tell you, I used to stress over every millimeter of space. I’d move a grape three times because it looked “off.” But this board? It invited people in. It felt like a hug. You know that feeling when you walk into a cabin in October? The smell of woodsmoke and cinnamon? That’s what this board smells like. That’s what it tastes like.
I haven’t tried to recreate that “perfect” geometric look since. Honestly, who needs it? This recipe stayed with me because it taught me that the best moments in hosting aren’t the ones you control. They’re the ones where you let go, grab the wrong platter, and realize that messy is actually magical. And honestly, that’s the only way I know how to celebrate.
Why You’ll Love This Recipe
There is a specific kind of joy in assembling a charcuterie board that you can’t get from any other cooking method. It’s tactile. It’s creative. And with this Perfect Fall Harvest Charcuterie Board, it’s deeply comforting. I’ve spent years testing different combinations, from overly complicated cheese pairings to simple, pantry-based spreads. This one hits the sweet spot every single time.
Here is why this board is your new go-to for autumn gatherings:
- Quick & Easy: You don’t need to cook a single thing. This comes together in under 20 minutes. It’s perfect for busy weeknights or last-minute dinner parties when you realize you haven’t prepped anything.
- Simple Ingredients: No fancy grocery trips needed. You likely already have most of this in your kitchen. Think crackers, cheese, fruit, and nuts. If you have a farmer’s market nearby, even better.
- Perfect for Autumn: This is the ultimate seasonal starter. It captures the essence of October and November without feeling heavy or overly complicated. It’s great for Halloween parties, Thanksgiving appetizers, or just a cozy Friday night.
- Crowd-Pleaser: Kids love the fruit. Adults love the wine. Everyone loves the cheese. It’s one of those dishes that gets rave reviews from every demographic, which is a chef’s dream.
- Unbelievably Delicious: The texture and flavor combo is next-level comfort food. The crunch of a spiced nut against the creaminess of a brie, followed by the snap of a crisp apple? It’s sensory heaven.
What makes this recipe different from the rest? It’s the balance. Most people just throw cheese and meat on a plate. This is curated. It’s about the interplay of sweet, salty, crunchy, and creamy. I’ve tested this with everything from goat cheese to aged gouda, and the principles remain the same: variety is key, but contrast is king. This isn’t just another version—it’s your best version because it’s foolproof.
It’s the kind of board that makes you close your eyes after the first bite. It’s comfort food reimagined—less stress, more soul-soothing satisfaction. Perfect for impressing guests without stress, or turning a simple meal into something memorable.
What Ingredients You Will Need
This recipe uses simple, wholesome ingredients to deliver bold flavor and satisfying texture without the fuss. The beauty of a fall harvest board is that it relies on what is already ripe and ready. You don’t need to fight the season; you just need to celebrate it.
For the Cheeses (The Stars of the Show)
- Sharp Cheddar: Aged, block-style cheddar. Look for a firm texture. (Adds a sharp, savory punch)
- Brie or Camembert: Soft-ripened cheese. Let it come to room temperature before serving. (Adds creamy richness)
- Gouda: Smoked Gouda works beautifully in the fall. (Adds a smoky, sweet note)
For the Cured Meats (The Salty Element)
- Prosciutto: Thinly sliced Italian ham. Fold it into rosettes. (Adds delicate saltiness)
- Salami: Hard salami, sliced thin. (Adds chewy texture and spice)
For the Fruits and Veggies (The Fresh Contrast)
- Figs: Fresh figs are ideal, but dried figs work too. (Adds natural sweetness)
- Apples: Honeycrisp or Fuji slices. (Adds crunch and tartness)
- Grapes: Red or green grapes, left on the vine if possible. (Adds juicy bursts)
- Pears: Bosc pears, sliced thin. (Adds elegant texture)
For the Crunch and Sweetness
- Walnuts: Toasted lightly for extra flavor. (Adds earthy crunch)
- Pecans: Maple glazed if you’re feeling fancy. (Adds sweetness)
- Crackers: Water crackers, almond flour crackers, or seeded crisps. (The vessel for all the goodness)
- Honey: Local honey, preferably in a comb if you can find it. (Adds liquid gold sweetness)
- Jam: Fig jam or cranberry sauce. (Adds tartness to cut the fat)
I recommend using a local honey for the best texture and flavor profile. If you can’t find fresh figs, don’t stress. Dried apricots or dates work just as well. For the crackers, I always gravitate toward brands like Mary’s Gone Crackers for a gluten-free option that actually tastes good. Swap Greek yogurt with dairy-free coconut yogurt if needed, though that’s less common on a charcuterie board—stick to the cheeses for now.
Which Crackers Work Best?
Don’t just grab any cracker. You want something sturdy enough to hold the cheese but delicate enough not to overpower it. Seeded crackers add a nice nutty flavor that complements the walnuts. Plain water crackers are the classic choice because they let the cheese shine. Avoid overly salty crackers, as the prosciutto and salami already provide plenty of salt.
How to Choose the Right Cheese
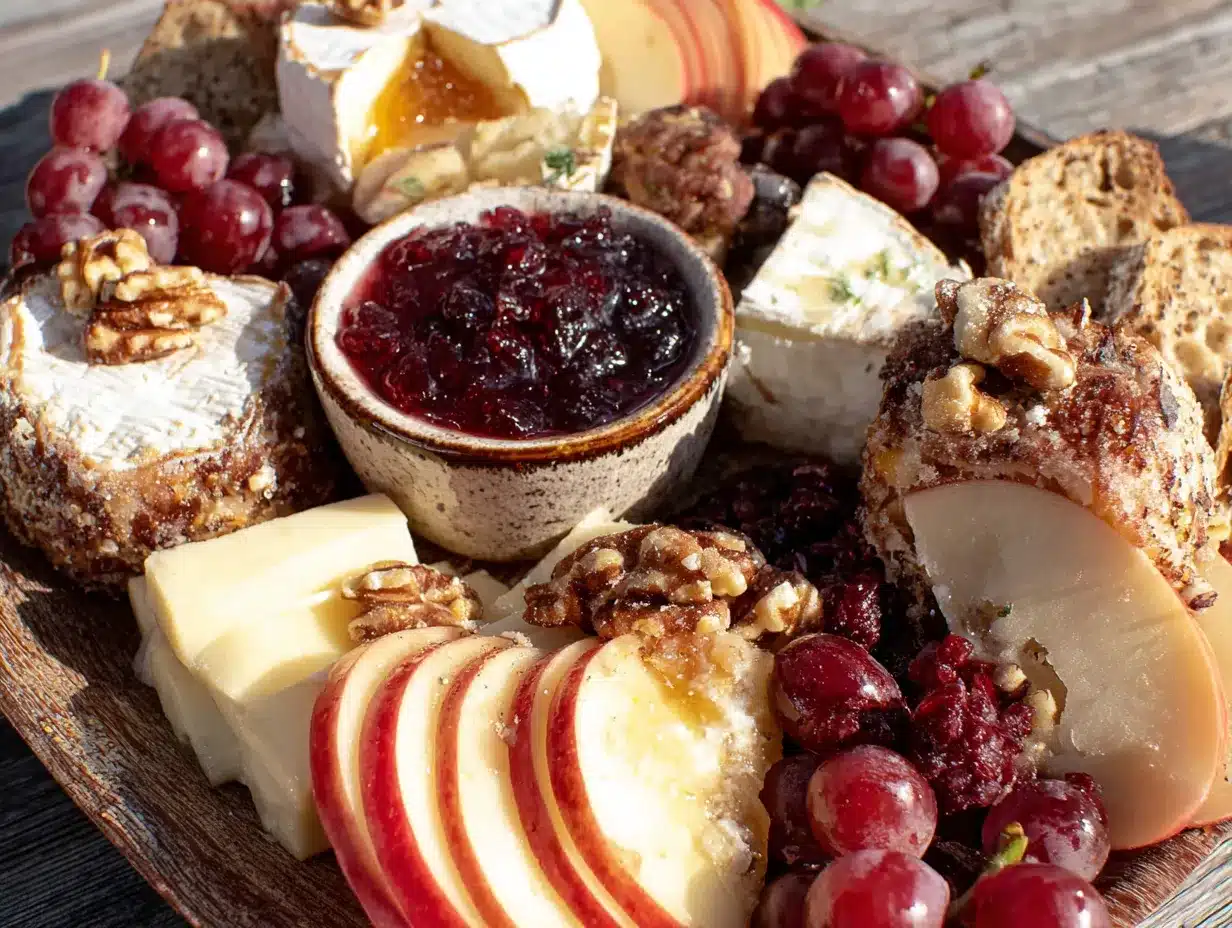
Look for firm, small-curd cottage cheese for best texture? No, that’s for pancakes. For charcuterie, look for cheeses that offer contrast. You want one hard cheese (cheddar), one soft cheese (brie), and one semi-hard cheese (gouda). This variety ensures there’s something for everyone. If you’re buying from a cheese shop, ask for samples. Taste before you buy. It’s the only way to be sure.
Equipment Needed
You don’t need a lot of fancy gear to pull off this board, but having the right tools makes the process much smoother. The most important piece of equipment is your serving surface. A large wooden board is traditional and adds warmth. If you don’t have one, a large ceramic platter or even a clean slate works well. Avoid glass if you can; it can look a bit cold for a fall theme.
You’ll also need a set of cheese knives. A wire cheese cutter is essential for soft cheeses like brie, while a standard knife works for cheddar. If you don’t have specialized knives, a small paring knife and a butter knife will suffice. Just make sure they are clean and sharp.
Small bowls are helpful for holding loose items like olives, nuts, or jams. This keeps the board from looking too crowded and messy. You can use ramekins, small glass jars, or even ceramic spoons placed directly on the board.
Budget-Friendly Tip: If you’re on a budget, you don’t need to buy a new board. Use a large, clean cutting board you already have. Or, use a white tablecloth and arrange the food directly on it. It creates a rustic, farmhouse look that fits the fall theme perfectly.
Maintenance Tip: Wooden boards require care. Hand wash them immediately after use with warm water and mild soap. Do not put them in the dishwasher. Dry them thoroughly and occasionally treat them with mineral oil to prevent cracking. This extends the life of your board and keeps it looking beautiful.
Preparation Method
Assembling the board is easier than it looks, but there is a method to the madness. Follow these steps to create a balanced and visually appealing spread.
- Prep Your Ingredients (10 minutes): Wash and dry all fruits. Slice the apples and pears into thin wedges. Toss them in a little lemon juice to prevent browning, though this is optional if serving immediately. Cube or slice the cheddar. Leave the brie whole or cut it into large wedges. Slice the salami and fold the prosciutto. Toast the walnuts and pecans in a dry pan for 2-3 minutes until fragrant. Let them cool.
- Place the Cheese (2 minutes): Start by placing your cheeses on the board. Space them out evenly. If using a large board, place one cheese in each quadrant. If using a smaller board, cluster them in the center. This anchors the board.
- Add the Meats (3 minutes): Arrange the meats next to the cheeses. Don’t just lay them flat. Fold the prosciutto into loose nests. Roll the salami into cigars. This adds height and visual interest. It also makes it easier for guests to grab a piece.
- Fill in the Gaps with Fruits (5 minutes): Place the grapes, figs, and apple slices in the empty spaces. Use the grapes to fill small holes. Fan out the apple slices for a more elegant look. Remember, variety in color is key here. Mix reds, greens, and purples.
- Add the Crunch (3 minutes): Scatter the nuts and crackers around the board. You can place crackers in a stack or fan them out. Sprinkle nuts loosely, allowing them to spill into gaps. This creates a natural, organic look.
- Finish with Sweet and Savory Accents (2 minutes): Place small bowls of jam and honey on the board. Drizzle honey over the cheese or figs for a glossy finish. Add olives or pickles if you like a briny kick. Step back and assess. Does it look balanced? Add more nuts or fruit if needed.
Troubleshooting Tip: If the cheese looks too dry, add a few grapes or apple slices next to it to moisten the air around it. If the board looks too empty, add more crackers or a small bowl of nuts. It’s better to have too much than too little.
Sensory Cue: The board should look like a painting. You should see a mix of textures—smooth cheese, rough nuts, juicy fruit, and crisp crackers. The colors should pop against the wood or ceramic background.
Cooking Tips & Techniques
There are a few professional tricks that can take your charcuterie board from good to great. First, temperature matters. Cheese tastes best at room temperature. Take your cheeses out of the fridge at least 30 minutes before serving. Cold cheese loses its flavor and aroma. If you serve it too cold, it will taste waxy and bland.
Second, cut your cheese into bite-sized pieces. While some people prefer to cut their own cheese, pre-cutting it makes it easier for guests to eat without making a mess. For hard cheeses, cut into cubes or slices. For soft cheeses, cut into wedges. Leave the rind on brie and camembert; it adds flavor and looks rustic.
Third, create height. A flat board can look boring. Use small bowls, stacked crackers, or folded meats to add vertical elements. This makes the board more visually appealing and easier to navigate.
Common Mistake: Overcrowding the board. It’s tempting to fill every inch, but leave some negative space. This allows the eye to rest and makes the food look more abundant. It also prevents the board from looking cluttered and messy.
Timing Tip: Assemble the board about 30 minutes before your guests arrive. This gives the cheese time to come to room temperature and allows you to make last-minute adjustments. If you assemble it too early, the fruit may brown or the crackers may go stale.
Personal Failure: I once put all the nuts in one corner. It looked like a bird feeder. Next time, scatter them. Distribute the elements evenly so that every bite has a bit of everything. This ensures a balanced flavor profile in every mouthful.
Variations & Adaptations
This board is highly adaptable. Here are a few variations to suit different tastes and dietary needs.
Vegetarian Option: Skip the meats and add more cheese and vegetable sticks. Cucumber, carrot, and bell pepper sticks add crunch and color. Add hummus or baba ganoush for a savory dip.
Gluten-Free Option: Use gluten-free crackers or rice cakes. Most cheeses and meats are naturally gluten-free, but check labels for additives. Almonds and walnuts are safe bets for nuts.
Dairy-Free Option: Use dairy-free cheeses made from nuts or soy. Add more fruit and nuts to compensate for the lost creaminess. Hummus and guacamole can also serve as creamy alternatives.
Seasonal Twist: In the spring, swap the figs and apples for strawberries and kiwi. Add prosciutto-wrapped melon for a classic spring appetizer. In the winter, add roasted root vegetables like beets and carrots for a hearty twist.
My Personal Variation: I love adding a sprinkle of everything bagel seasoning on top of the cream cheese or brie. It adds a salty, crunchy element that pairs surprisingly well with the sweetness of the fruit. It’s a small detail that makes a big difference.
Serving & Storage Suggestions
Serve this board at room temperature. It’s best enjoyed within an hour of assembly. If you need to store leftovers, keep the cheeses in an airtight container in the fridge. Wrap them in wax paper or cheese paper to prevent them from drying out. Store the fruits in a separate container to prevent them from getting mushy. The crackers should be kept in a sealed bag to maintain their crunch.
Reheating: Charcuterie boards are not meant to be reheated. The cheeses will separate, and the meats will become tough. Enjoy it fresh.
Flavor Development: The flavors of the board actually improve slightly after a few hours as the cheeses soften and the fruits release their juices. However, the presentation may suffer. If you’re hosting a large party, consider assembling a second board later in the evening.
Complementary Dishes: This board pairs well with a light main course like roasted chicken or a quinoa salad. It also goes great with a glass of red wine, like Pinot Noir or Merlot, or a crisp cider.
Nutritional Information & Benefits
While charcuterie boards are indulgent, they can be part of a balanced diet. Cheese provides protein and calcium. Nuts offer healthy fats and fiber. Fruits add vitamins and antioxidants. Meats provide protein and iron. However, portion control is key. Enjoy in moderation.
Dietary Considerations: This board contains dairy, nuts, and gluten (depending on crackers). Be sure to label items for guests with allergies. Use gluten-free crackers and dairy-free cheeses if needed.
Health Benefits: The antioxidants in the red grapes and figs support heart health. The omega-3 fatty acids in walnuts support brain health. The probiotics in aged cheeses support gut health. It’s a delicious way to nourish your body.
Personal Wellness Perspective: I love that this board allows me to eat a variety of foods in small portions. It satisfies my sweet tooth, my salty cravings, and my need for crunch, all in one go. It’s a mindful way to snack.
Conclusion
The Perfect Fall Harvest Charcuterie Board is more than just a plate of food. It’s an experience. It’s a celebration of the season’s bounty. It’s a way to bring people together and share in the simple joy of good food. I hope you try this recipe and find your own happy accidents along the way.
Don’t be afraid to experiment. Swap ingredients. Add your own twists. Make it your own. And remember, the best boards are the ones made with love and a little bit of chaos.
Share your creations with me! I’d love to see your boards. Tag me on social media or leave a comment below. Let’s inspire each other.
Happy hosting!
FAQs
How far in advance can I make the charcuterie board?
You can assemble the board up to 30 minutes before serving. This allows the cheese to come to room temperature. For longer prep, keep the ingredients separate and assemble just before serving to maintain freshness.
Can I use pre-sliced cheese?
Yes, but pre-sliced cheese can look flat and unappealing. For a more professional look, buy block cheese and slice it yourself. It also tastes fresher.
What wine pairs best with this board?
A Pinot Noir or Merlot pairs beautifully with the cheeses and meats. For a non-alcoholic option, try a spiced apple cider or a dry sparkling water with lemon.
How do I prevent the crackers from getting soggy?
Place the crackers in a separate bowl or stack them away from juicy fruits. Add them to the board just before serving if possible.
Can I make this board for a large party?
Absolutely. Scale up the ingredients proportionally. Use multiple boards or a large table arrangement. Ensure you have enough serving utensils for each type of cheese and meat.
Pin This Recipe!
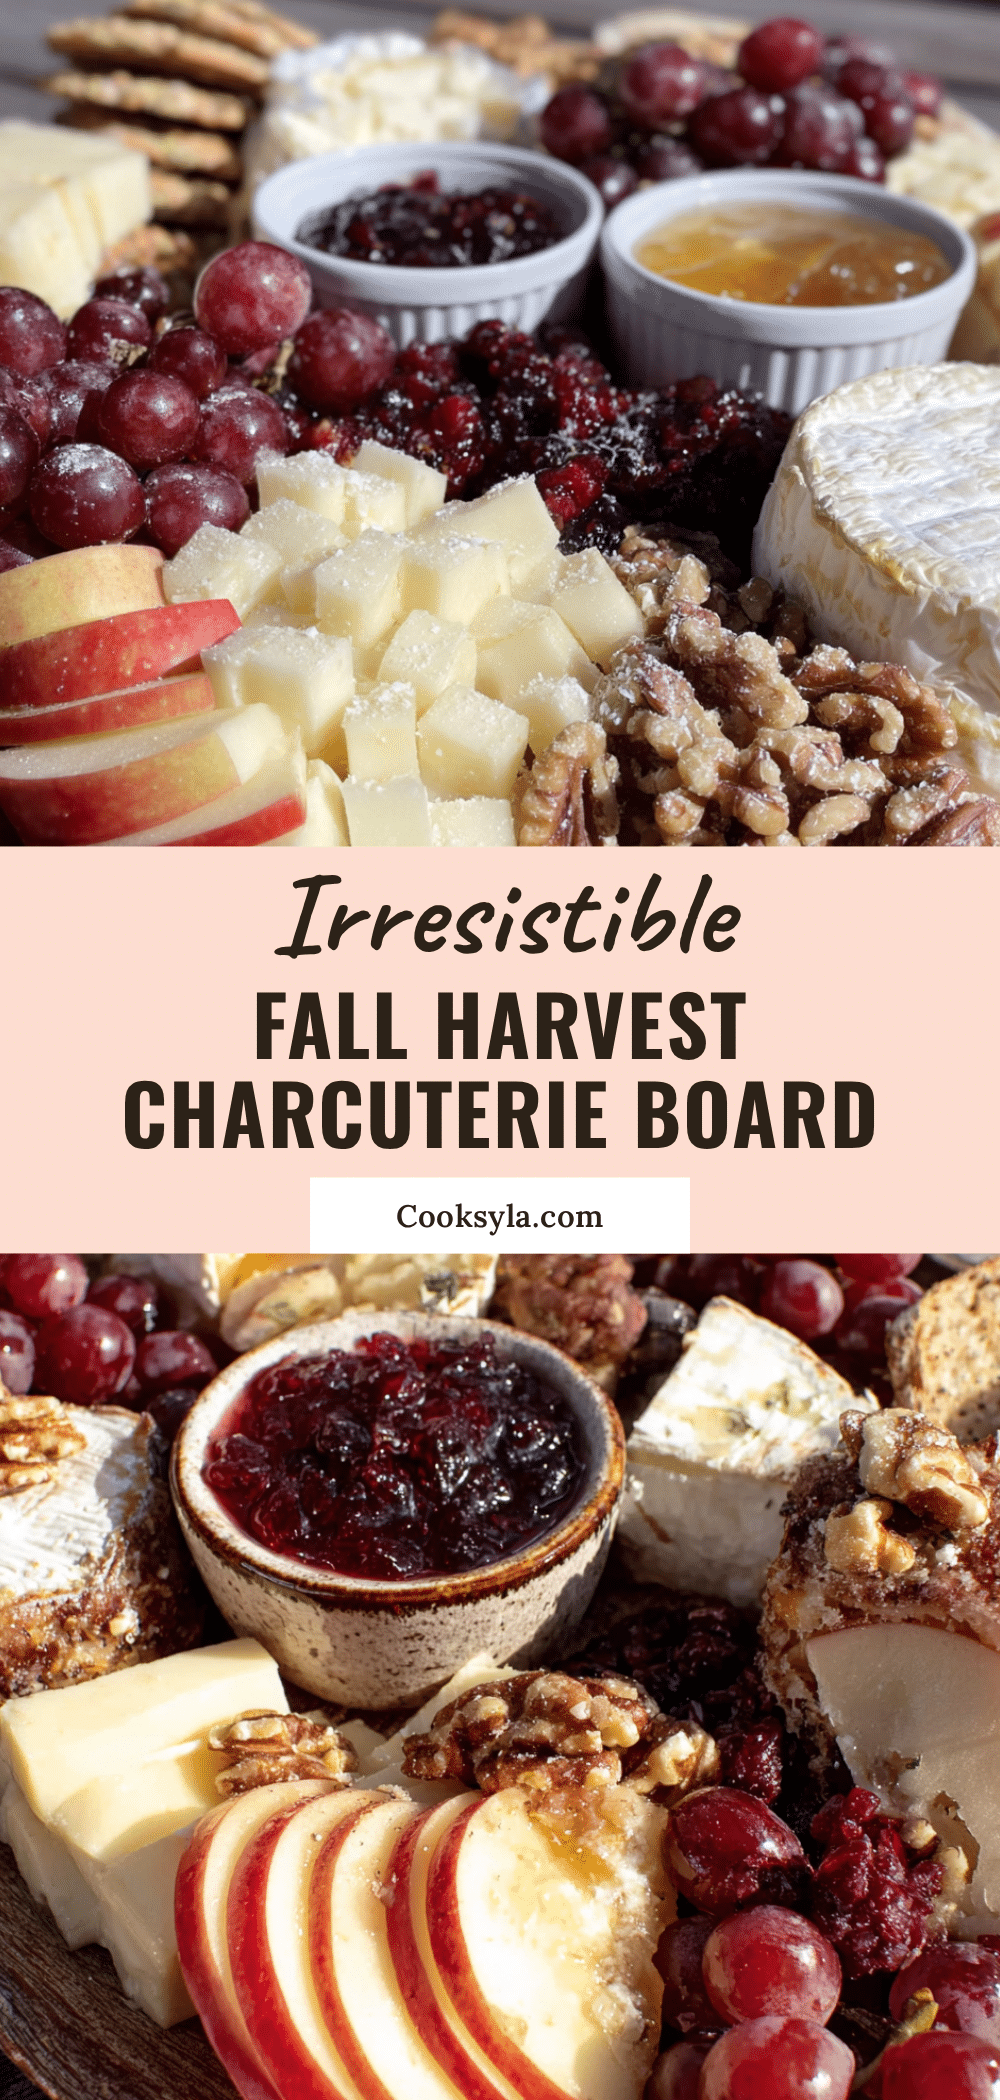
Perfect Fall Harvest Charcuterie Board: Easy Autumn Party Ideas
A rustic, chaotic, and beautiful autumn-themed charcuterie board featuring sharp cheddar, brie, smoked gouda, cured meats, fresh figs, apples, and toasted nuts. This no-cook recipe comes together in under 20 minutes and is perfect for fall gatherings.
- Prep Time: 20 minutes
- Cook Time: 0 minutes
- Total Time: 20 minutes
- Yield: 8-10 servings
- Category: Appetizer
- Cuisine: American
Ingredients
- Sharp Cheddar (aged, block-style)
- Brie or Camembert (soft-ripened)
- Smoked Gouda
- Prosciutto (thinly sliced)
- Salami (hard, sliced thin)
- Fresh Figs (or dried)
- Apples (Honeycrisp or Fuji, sliced)
- Grapes (red or green)
- Pears (Bosc, sliced thin)
- Walnuts (toasted)
- Pecans (maple glazed, optional)
- Crackers (water crackers, almond flour, or seeded crisps)
- Local Honey (preferably honeycomb)
- Fig jam or cranberry sauce
Instructions
- Prep ingredients: Wash and dry fruits. Slice apples and pears, tossing with lemon juice if not serving immediately. Cube or slice cheddar. Leave brie whole or cut into wedges. Slice salami and fold prosciutto. Toast walnuts and pecans in a dry pan for 2-3 minutes until fragrant, then cool.
- Place cheeses on the board, spacing them out evenly or clustering them in the center to anchor the spread.
- Arrange meats next to the cheeses. Fold prosciutto into loose nests and roll salami into cigars to add height and visual interest.
- Fill gaps with fruits. Place grapes, figs, and apple slices in empty spaces, fanning out apple slices and using grapes to fill small holes for color contrast.
- Scatter nuts and crackers around the board. Stack or fan crackers and sprinkle nuts loosely to create a natural, organic look.
- Finish with sweet and savory accents by placing small bowls of jam and honey on the board. Drizzle honey over cheese or figs for a glossy finish.
- Let cheeses come to room temperature for at least 30 minutes before serving for best flavor.
Notes
Serve at room temperature for best flavor. Assemble about 30 minutes before guests arrive to allow cheese to warm up. Avoid overcrowding the board; leave negative space. Store leftovers separately: cheeses in wax paper in the fridge, fruits in separate containers, and crackers in sealed bags. Do not reheat.
Nutrition
- Serving Size: Varied bites from th
- Calories: 350
- Sugar: 12
- Sodium: 600
- Fat: 22
- Saturated Fat: 10
- Carbohydrates: 20
- Fiber: 3
- Protein: 12
Keywords: fall harvest, charcuterie board, autumn party ideas, no-cook appetizer, cheese board, easy entertaining, seasonal recipes


