Love this? Save it for later!
Share the inspiration with your friends
I was standing in line at the DMV—a truly soul-crushing Tuesday afternoon—when the woman behind me started talking about pie crust. Not just any pie crust, mind you. She was describing the flakiest, most buttery crust I’d ever heard of, and she was telling the clerk, of all people, exactly how to make it. Her name was Margaret, she was probably seventy-five, and she was there to renew her license after letting it expire for three months. “I was busy baking,” she said with a shrug, as if that explained everything.
Margaret didn’t look like a pie legend. She looked like someone’s grandma who wore sensible shoes and couponed at the grocery store. But let me tell you, when she started talking about ice water and butter temperature, I forgot all about my number being called. She explained how she’d been making this Perfect Homemade Pumpkin Pie with Flaky Crust for forty-seven years, ever since her mother-in-law taught her the week before her wedding. “I was terrified of her,” Margaret laughed. “But that pie crust? It saved my marriage.”
Honestly, I nearly cried right there in the fluorescent lighting. Here I was, stressing about a recipe I’d been trying to perfect for years, and the answer was standing behind me in the DMV line. I mean, you just never know where you’ll find cooking wisdom, right? Maybe you’ve been there—stuck somewhere boring, overhearing someone describe the exact dish you’ve been dreaming about. That day, I learned more about pastry in ten minutes than I had from three cookbooks.
I scribbled her instructions on the back of an expired registration form. And you know what? I’ve been making this Perfect Homemade Pumpkin Pie with Flaky Crust ever since. It’s the one that makes people close their eyes after the first bite. The one that disappears before the coffee is even poured. And now, I’m passing it along to you—with a few tweaks I’ve picked up over the years, because honestly, even Margaret’s recipe needed a little modern love.
Why You’ll Love This Recipe
Let’s be real for a second—there are about a million pumpkin pie recipes out there. So why should this one earn a spot on your Thanksgiving table or your next dinner party spread? Because I’ve tested this thing into the ground, and it comes out perfect every single time. I’m talking a filling that’s silky, spiced just right, and set without being rubbery. And that crust? It’s the stuff of legend—so flaky it shatters when you cut into it.
- Foolproof Crust: No shrinking, no soggy bottoms, no drama. Just butter, ice water, and a little patience.
- Perfectly Spiced Filling: Not too sweet, not too heavy—just warm, aromatic, and deeply comforting.
- Make-Ahead Friendly: You can prep the crust days in advance and the filling a day ahead. Your future self will thank you.
- Impressive Without Stress: This pie looks like you spent hours in a professional pastry kitchen. But between us? It’s surprisingly simple.
- The Ultimate Crowd-Pleaser: I’ve served this at potlucks, holiday dinners, and casual get-togethers. It gets devoured every time.
I’ve been developing recipes for over a decade, and I can tell you this—the secret isn’t a fancy technique or a hard-to-find ingredient. It’s about understanding how butter and water work together, and how to let the flavors of pumpkin and spice really shine. This isn’t just another version of pumpkin pie. It’s the one I’d serve to my toughest critics (my in-laws, if we’re being honest).
There’s something magical about pulling a golden, fragrant pumpkin pie out of the oven. The way the kitchen smells—like cinnamon, ginger, and cloves—it’s pure comfort. And when you slice into that flaky crust and see the smooth, velvety filling? That’s the moment everyone at the table stops talking and reaches for a plate. This recipe delivers that moment, every single time.
What Ingredients You Will Need
This Perfect Homemade Pumpkin Pie with Flaky Crust uses simple, honest ingredients. Nothing weird, nothing processed—just good, real food that works together beautifully. Most of these are probably already in your pantry, which is exactly how a holiday pie should be.
For the Flaky Pie Crust
- All-purpose flour, 2 ½ cups (315g) – I prefer King Arthur Flour for consistent results, but any unbleached all-purpose flour works great.
- Unsalted butter, 1 cup (226g), very cold, cut into small cubes – This is non-negotiable. The butter needs to be straight from the fridge, almost rock-hard. European-style butter like Plugrà has a higher fat content, which makes for an even flakier crust.
- Ice water, 6 to 8 tablespoons (90-120ml) – Not cold water. Ice water. I keep a bowl of ice cubes and water in the fridge while I work.
- Salt, 1 teaspoon (6g) – Fine sea salt works best. It dissolves evenly and seasons the crust without leaving salty pockets.
- Sugar, 1 tablespoon (12g) – Just a touch to balance the savory notes and help with browning.
For the Pumpkin Filling
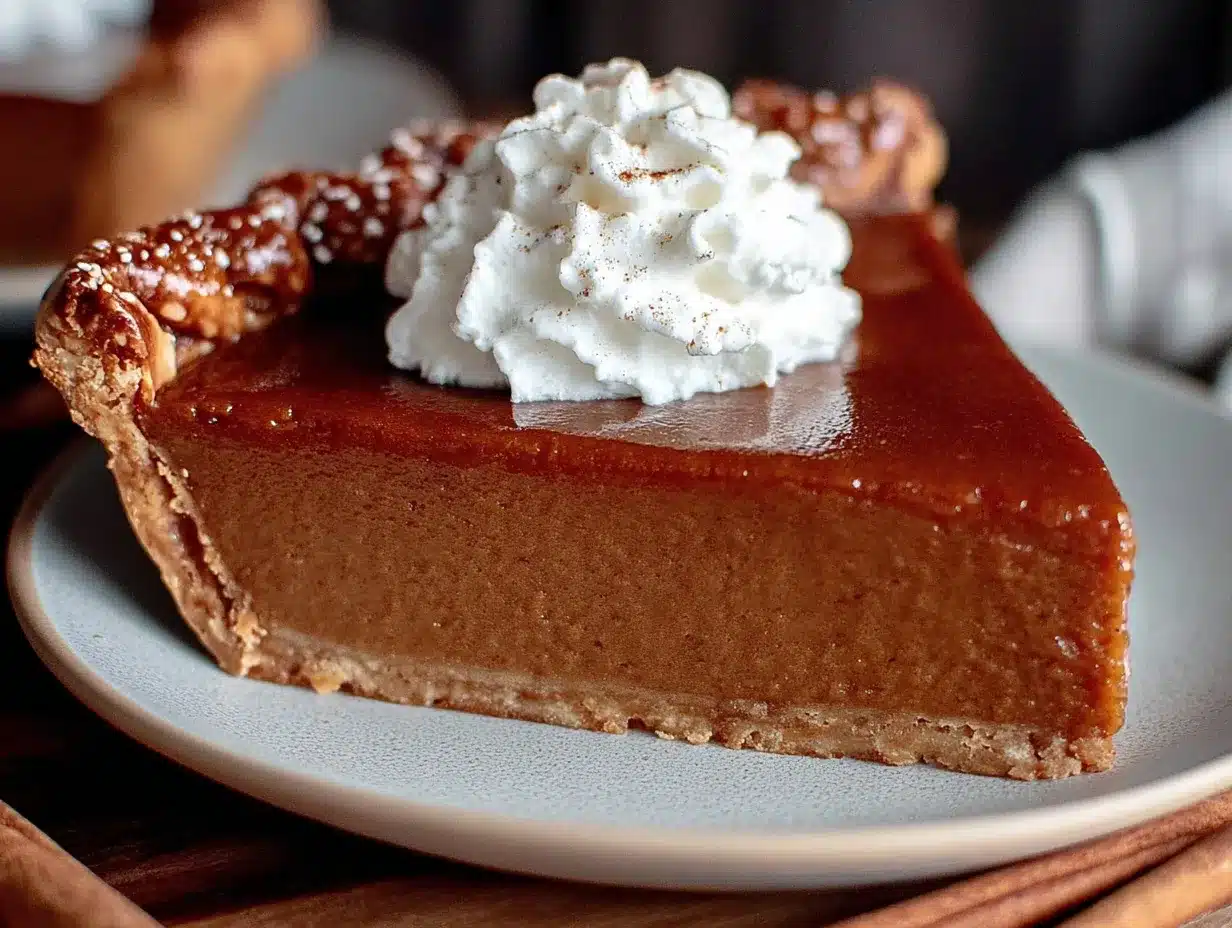
- Pumpkin purée, 1 can (15 oz or 425g) – Make sure you’re buying 100% pumpkin purée, not pumpkin pie filling. Libby’s is my go-to—it’s consistently thick and not watery. Avoid fresh pumpkin here; canned is actually more reliable for texture.
- Heavy cream, 1 cup (240ml) – This gives the filling that luxurious, velvety texture. You can substitute half-and-half in a pinch, but the pie won’t be quite as rich.
- Large eggs, 2 – Room temperature is best. If you forget to take them out ahead of time, place them in a bowl of warm water for 5 minutes.
- Brown sugar, ¾ cup (150g), packed – Light or dark brown sugar both work. Dark brown sugar adds a deeper, molasses-like flavor that I personally love.
- Granulated sugar, ¼ cup (50g) – Just enough to round out the sweetness without making it cloying.
- Vanilla extract, 1 teaspoon (5ml) – Pure vanilla extract, not imitation. It makes a subtle but noticeable difference.
The Spice Blend
- Ground cinnamon, 1 ½ teaspoons (4g) – The backbone of the flavor.
- Ground ginger, ½ teaspoon (1g) – Adds warmth without heat.
- Ground nutmeg, ½ teaspoon (1g) – Freshly grated is incredible if you have it.
- Ground cloves, ¼ teaspoon (0.5g) – A little goes a long way. Be careful not to overdo it.
- Salt, ½ teaspoon (3g) – Essential for balancing sweetness and bringing out the pumpkin flavor.
I always recommend tasting your spice blend before adding it to the wet ingredients. Just mix the spices in a small bowl and take a tiny pinch—you want a balanced, aromatic profile, not one note screaming louder than the others. Also, if you’re feeling adventurous, a pinch of black pepper or cardamom can add an unexpected layer of complexity. I’ve been known to sneak in a tiny bit of both when I’m feeling fancy.
Equipment Needed
You don’t need a professional pastry kitchen to make this Perfect Homemade Pumpkin Pie with Flaky Crust. Here’s what you’ll actually use:
- 9-inch pie dish – Glass or ceramic is ideal. Metal heats up too fast and can lead to over-browning. I use a standard Pyrex dish and it works perfectly.
- Rolling pin – A simple wooden one is fine. If you don’t have one, a clean wine bottle works in a pinch. I’ve done it. No judgment.
- Pastry cutter or food processor – For cutting butter into flour. A pastry cutter gives you more control, but a food processor is faster. I use a pastry cutter because I like the texture it creates.
- Mixing bowls – You’ll need a few different sizes. Nothing fancy.
- Whisk – For the filling. A fork works too, but a whisk gets it smoother.
- Plastic wrap – For chilling the dough. Reusable beeswax wrap is great if you have it.
- Parchment paper and pie weights – For blind baking the crust. Dried beans or rice work perfectly as pie weights if you don’t have the real thing.
- Cooling rack – Essential for letting the pie cool evenly. Setting a hot pie on the counter can lead to a soggy bottom.
I’ve made this pie in a friend’s tiny apartment kitchen with a warped baking sheet and a butter knife for a rolling pin. It still turned out amazing. So don’t stress if you don’t have the perfect tools—this recipe is forgiving.
Preparation Method
Step 1: Make the Dough
In a large bowl, whisk together the flour, salt, and sugar. Add the cold butter cubes. Using a pastry cutter or your fingertips, work the butter into the flour until the mixture looks like coarse meal with some pea-sized butter pieces remaining. This is crucial—those little butter chunks are what create the flaky layers. Drizzle in 6 tablespoons of ice water and stir with a fork until the dough just comes together. If it seems dry, add more water one tablespoon at a time. The dough should hold together when squeezed but not be sticky.
Step 2: Chill the Dough
Turn the dough out onto a lightly floured surface. Shape it into a disc about 1 inch thick. Wrap it tightly in plastic wrap and refrigerate for at least 1 hour, or up to 3 days. This rest is essential—it relaxes the gluten and lets the butter firm up again. If you skip this, your crust will shrink and toughen. I learned this the hard way after making a pie that looked like a deflated frisbee.
Step 3: Roll Out the Crust
On a floured surface, roll the dough out to a 12-inch circle, about ⅛-inch thick. Don’t overwork it—if it starts to stick, dust with a little more flour. Carefully transfer the dough to your pie dish. Gently press it into the bottom and up the sides. Trim the excess dough, leaving about a ½-inch overhang. Fold the overhang under itself and crimp the edges however you like. I do a simple fluted edge with my fingers—nothing fancy, but it looks lovely.
Step 4: Blind Bake the Crust
Preheat your oven to 375°F (190°C). Line the crust with parchment paper and fill it with pie weights or dried beans. Bake for 15 minutes. Remove the paper and weights, then bake for another 8-10 minutes until the bottom looks dry and just barely golden. This step prevents the dreaded soggy bottom. Let the crust cool slightly while you make the filling.
Step 5: Make the Filling
In a large bowl, whisk together the pumpkin purée, heavy cream, and eggs until smooth. Add both sugars, vanilla, and all the spices. Whisk until everything is well combined and silky. Don’t overmix—you don’t want to incorporate too much air, which can cause cracks. The filling should be smooth and slightly thick, like a milkshake.
Step 6: Bake the Pie
Reduce the oven temperature to 350°F (175°C). Pour the filling into the pre-baked crust. Carefully transfer the pie to the oven. Bake for 50-60 minutes, until the edges are set but the center still jiggles slightly when you gently shake the pie. It will continue to set as it cools. If the crust edges start browning too quickly, cover them with a pie shield or strips of foil.
Step 7: Cool Completely
Place the pie on a cooling rack and let it cool to room temperature, about 2 hours. Then refrigerate for at least 4 hours, or overnight. This is the hardest part, I know. But trust me—chilling the pie allows the filling to fully set and the flavors to meld together. A warm pumpkin pie is good. A fully chilled one is transcendent.
Cooking Tips & Techniques
I’ve made this Perfect Homemade Pumpkin Pie with Flaky Crust probably thirty times by now, and I’ve made every mistake you can imagine. Here’s what I’ve learned so you don’t have to repeat my failures.
Keep everything cold. Seriously. If your butter starts to soften while you’re making the crust, pop the bowl in the fridge for ten minutes. Warm butter means a tough, greasy crust. I once tried to rush this step on a hot summer day and ended up with a crust that tasted more like shortbread than flaky pastry. Not the vibe.
Don’t overwork the dough. When you’re bringing the dough together, stop as soon as it holds. Overmixing develops gluten, which makes the crust tough. You want tender, not chewy. If you see streaks of butter in the dough, that’s a good thing.
Blind baking is not optional. I know it adds time, but it’s the difference between a crisp, flaky crust and a sad, soggy one. The pumpkin filling is wet, and if you pour it into an unbaked crust, the bottom will never cook through properly. I learned this after serving a pie that collapsed into a soupy mess. Never again.
Watch the edges. The filling takes a while to set, and sometimes the crust edges brown too fast. I always check at the 30-minute mark. If the edges look golden, I cover them with foil for the remaining bake time.
The jiggle test is your friend. You want the center to wobble slightly when you shake the pie. If it’s completely firm, it’s overbaked and will crack as it cools. If it’s sloshy, it needs more time. That gentle jiggle in the center is the sweet spot.
Patience pays off. I know you want to slice into that pie the second it comes out of the oven. But a warm pumpkin pie is loose and messy. Let it cool to room temperature, then chill it. The texture becomes silky, the flavors deepen, and the crust stays perfectly flaky. It’s worth the wait, I promise.
Variations & Adaptations
One of the best things about this Perfect Homemade Pumpkin Pie with Flaky Crust is how adaptable it is. Here are some ways I’ve changed it up depending on the occasion or who’s coming to dinner.
Dairy-Free Version: Substitute the heavy cream with full-fat coconut cream. It adds a subtle coconut flavor that actually pairs beautifully with the pumpkin and spices. Use vegan butter in the crust—I like Miyoko’s or Earth Balance. The texture is slightly different, but still delicious.
Gluten-Free Crust: Swap the all-purpose flour with a 1:1 gluten-free baking flour blend. I’ve had good luck with Bob’s Red Mill. The dough will be more fragile, so handle it gently and press it into the dish rather than rolling it out. Blind baking is even more important here.
Spice It Up: Add ¼ teaspoon of cayenne pepper or chipotle powder for a subtle heat that cuts through the sweetness. I did this for a Friendsgiving once and it was a huge hit. The warmth sneaks up on you in the best way.
Bourbon Pumpkin Pie: Replace the vanilla extract with 2 tablespoons of bourbon. The alcohol burns off during baking, leaving behind a warm, smoky depth. This is my go-to for adult gatherings. It feels a little fancy without being fussy.
Mini Pie Version: Use a muffin tin to make individual pies. Press the dough into greased muffin cups, blind bake for 10 minutes, then fill and bake for 20-25 minutes. These are perfect for potlucks or when you want to give everyone their own little pie.
Maple Sweetened: Replace the brown and granulated sugar with ¾ cup of pure maple syrup. Reduce the heavy cream to ¾ cup to compensate for the extra liquid. The maple flavor is lovely with the pumpkin, and it’s a hit with anyone who prefers less refined sugar.
Serving & Storage Suggestions
This Perfect Homemade Pumpkin Pie with Flaky Crust is best served chilled, straight from the fridge. I know some people like it warm, but honestly, the texture is so much better when it’s cold—the filling firms up perfectly and the crust stays crisp. Let it sit at room temperature for about 15 minutes before slicing if you want to take the chill off.
What to serve alongside: A generous dollop of lightly sweetened whipped cream is classic for a reason. The creaminess balances the spiced filling beautifully. For something a little different, try a scoop of vanilla bean ice cream or a drizzle of caramel sauce. If you’re hosting, set out a bowl of whipped cream and let guests help themselves.
Storage: Cover the pie loosely with plastic wrap or foil and store it in the refrigerator for up to 4 days. The crust will soften slightly over time, but it’s still delicious. Do not leave it at room temperature for more than 2 hours—the filling contains eggs and dairy, so it needs to stay cold.
Freezing: You can freeze the fully baked and cooled pie for up to 3 months. Wrap it tightly in plastic wrap, then a layer of foil. To serve, thaw it in the refrigerator overnight. The texture will be just as good as fresh. I often make two pies and freeze one for a last-minute gathering.
Reheating: If you prefer warm pie, place individual slices in a 300°F (150°C) oven for 10-15 minutes. The microwave works in a pinch, but it can make the crust soggy. Honestly, I think this pie is best cold—the flavors are more pronounced and the texture is perfect.
One thing I love about this pie is that it actually tastes better the next day. The spices have time to meld, and the filling sets into a silky, sliceable perfection. So if you’re planning a big meal, make this a day or two ahead. Your future self will be so grateful.
Nutritional Information & Benefits
Let’s be honest—pumpkin pie is a treat, not a health food. But it does have some redeeming qualities. Here’s a rough breakdown per slice (based on 8 servings):
| Nutrient | Amount Per Slice |
|---|---|
| Calories | 380 |
| Total Fat | 22g |
| Saturated Fat | 13g |
| Cholesterol | 105mg |
| Sodium | 320mg |
| Total Carbohydrates | 42g |
| Dietary Fiber | 3g |
| Sugars | 24g |
| Protein | 6g |
| Vitamin A | 180% DV |
Pumpkin is packed with vitamin A, which is great for eye health and immune function. It also provides fiber and antioxidants. The eggs add protein, and the heavy cream gives you a dose of calcium. Is it a superfood? No. But it’s a dessert that brings people together, and that counts for something.
If you’re watching your sugar intake, you can reduce the granulated sugar to 2 tablespoons without sacrificing too much sweetness. The brown sugar adds enough flavor on its own. And if you’re dairy-sensitive, the substitutions I mentioned earlier work beautifully.
I personally believe that food should nourish both body and soul. And this pie? It feeds the soul. There’s something about sharing a homemade dessert with people you love that just feels right. So go ahead, have a slice. Enjoy every bite.
Conclusion
This Perfect Homemade Pumpkin Pie with Flaky Crust has become my signature dessert, and I’m so excited to share it with you. It’s the pie I bring to every holiday gathering, the one people ask for by name, the one that makes me look like I know what I’m doing in the kitchen (even on days when I definitely don’t).
What I love most about this recipe is how it brings people together. There’s a reason pumpkin pie is a Thanksgiving classic—it’s comforting, familiar, and undeniably delicious. And when you make it from scratch, with a crust that actually flakes and a filling that’s perfectly spiced, it becomes something special. Something worth sharing.
I’d love to hear how yours turns out! Did you try any of the variations? Did your family fight over the last slice? Drop a comment below and let me know. And if you’re looking for more holiday inspiration, check out my classic pecan pie recipe or my easy sweet potato casserole. Happy baking, friends!
Frequently Asked Questions
Can I use fresh pumpkin instead of canned?
You can, but I don’t recommend it for this recipe. Fresh pumpkin has a higher water content, which can make the filling watery and affect the texture. Canned pumpkin purée is consistent, reliable, and perfectly thick. If you really want to use fresh, roast the pumpkin, purée it, then strain it through a cheesecloth-lined sieve for several hours to remove excess moisture.
Why did my pie crust shrink?
Pie crust shrinks for a few reasons. The most common is that the dough wasn’t chilled enough before baking. Make sure you refrigerate it for at least an hour. Another culprit is overworking the dough, which develops too much gluten. Handle the dough gently and stop mixing as soon as it comes together. Finally, make sure you’re not stretching the dough when you transfer it to the pie dish—ease it in gently.
Can I make this pie ahead of time?
Absolutely! In fact, I recommend it. You can make the dough up to 3 days ahead and keep it in the fridge. You can blind bake the crust a day ahead. And the fully baked pie can be made 2 days ahead and stored in the refrigerator. The flavors actually improve after a day or two.
How do I know when the pie is done?
The edges should be set and slightly puffed, while the center should jiggle gently when you shake the pie. If the center is completely firm, it’s overbaked. If it’s sloshy, it needs more time. A digital thermometer inserted into the center should read around 175°F (80°C).
Can I freeze pumpkin pie?
Yes! Bake and cool the pie completely. Wrap it tightly in plastic wrap, then a layer of foil. Freeze for up to 3 months. Thaw in the refrigerator overnight before serving. The texture will be just as good as fresh. I do not recommend freezing an unbaked pie—the filling can separate and the crust won’t bake properly.
Pin This Recipe!
Perfect Homemade Pumpkin Pie with Flaky Crust
A silky, perfectly spiced pumpkin pie with a legendary flaky crust that shatters when you cut into it. This foolproof recipe delivers a stunning dessert that’s surprisingly simple to make and perfect for holidays or any gathering.
- Prep Time: 30 minutes
- Cook Time: 1 hour 10 minutes
- Total Time: 5 hours 40 minutes (includes chilling and cooling)
- Yield: 8 servings 1x
- Category: Dessert
- Cuisine: American
Ingredients
- 2 ½ cups (315g) all-purpose flour
- 1 cup (226g) unsalted butter, very cold, cut into small cubes
- 6 to 8 tablespoons (90-120ml) ice water
- 1 teaspoon (6g) fine sea salt
- 1 tablespoon (12g) sugar
- 1 can (15 oz or 425g) pumpkin purée (100% pumpkin, not pie filling)
- 1 cup (240ml) heavy cream
- 2 large eggs, room temperature
- ¾ cup (150g) packed brown sugar (light or dark)
- ¼ cup (50g) granulated sugar
- 1 teaspoon (5ml) pure vanilla extract
- 1 ½ teaspoons (4g) ground cinnamon
- ½ teaspoon (1g) ground ginger
- ½ teaspoon (1g) ground nutmeg
- ¼ teaspoon (0.5g) ground cloves
- ½ teaspoon (3g) salt
Instructions
- Make the dough: In a large bowl, whisk together flour, salt, and sugar. Add cold butter cubes. Using a pastry cutter or fingertips, work butter into flour until mixture resembles coarse meal with some pea-sized butter pieces remaining. Drizzle in 6 tablespoons ice water and stir with a fork until dough just comes together. Add more water 1 tablespoon at a time if needed. Dough should hold together when squeezed but not be sticky.
- Chill the dough: Turn dough onto a lightly floured surface. Shape into a 1-inch thick disc. Wrap tightly in plastic wrap and refrigerate for at least 1 hour, or up to 3 days.
- Roll out the crust: On a floured surface, roll dough to a 12-inch circle, about ⅛-inch thick. Transfer to a 9-inch pie dish. Gently press into bottom and up sides. Trim excess dough, leaving ½-inch overhang. Fold overhang under and crimp edges as desired.
- Blind bake the crust: Preheat oven to 375°F (190°C). Line crust with parchment paper and fill with pie weights or dried beans. Bake for 15 minutes. Remove paper and weights, then bake for another 8-10 minutes until bottom looks dry and just barely golden. Let cool slightly.
- Make the filling: In a large bowl, whisk together pumpkin purée, heavy cream, and eggs until smooth. Add both sugars, vanilla, and all spices. Whisk until well combined and silky. Do not overmix.
- Bake the pie: Reduce oven temperature to 350°F (175°C). Pour filling into pre-baked crust. Bake for 50-60 minutes, until edges are set but center still jiggles slightly when gently shaken. If crust edges brown too quickly, cover with a pie shield or foil strips.
- Cool completely: Place pie on a cooling rack and cool to room temperature, about 2 hours. Then refrigerate for at least 4 hours, or overnight, before serving.
Notes
Keep all ingredients cold for the flakiest crust. Blind baking is essential to prevent a soggy bottom. The pie is best served chilled; flavors deepen overnight. For dairy-free, substitute heavy cream with full-fat coconut cream and use vegan butter. For gluten-free, use a 1:1 gluten-free flour blend. The jiggle test is key: center should wobble slightly when done. Do not overmix filling to avoid cracks.
Nutrition
- Serving Size: 1 slice (1/8 of pie)
- Calories: 380
- Sugar: 24
- Sodium: 320
- Fat: 22
- Saturated Fat: 13
- Carbohydrates: 42
- Fiber: 3
- Protein: 6
Keywords: pumpkin pie, homemade pumpkin pie, flaky crust, Thanksgiving dessert, holiday pie, pumpkin dessert, from scratch


