Love this? Save it for later!
Share the inspiration with your friends
I didn’t have the good stuff. You know the kind—the sharp, aged cheddar that costs more per ounce than my hourly wage, or the perfectly ripe avocados that are actually firm enough to slice. All I had was a sad bag of tortilla chips that had gone slightly limp, a block of American cheese that felt more like plastic, and a can of green chiles that had been sitting in the back of the pantry since the last election cycle. Honestly, I should have just gone to bed.
But my brain wouldn’t let me. It was that specific, hollow feeling in your stomach that only happens when you’re alone, the house is quiet, and the only sound is the rain hitting the window. I mean, let’s face it, late-night cooking is just impulsive decision-making with better lighting. I grabbed a skillet because the microwave is for people who don’t understand texture. I threw in the American cheese, some milk, and a handful of shredded mozzarella I found in the freezer. I added the chiles, obviously, because that’s the soul of the thing.
As it melted, the smell changed the whole room. It wasn’t gourmet. It wasn’t even really “healthy.” But when I dipped a soggy chip into that gooey, spicy, golden pool, I felt vindicated. I knew that feeling, you know? That moment when you stop trying to be perfect and just eat. This Ultimate Loaded Nacho Bar with Queso isn’t about fancy plating. It’s about that late-night magic where bad ingredients become a memory you actually want to keep repeating. It’s the kind of recipe that saves your sanity when the world feels too loud.
Why You’ll Love This Recipe
Let’s be real for a second. Most nacho recipes online are just lists of ingredients that assume you have a professional kitchen and three hours to spare. This one? It’s different. I’ve tested this Ultimate Loaded Nacho Bar with Queso version over a dozen times, tweaking the cheese ratio until it hit that sweet spot between creamy and structural integrity. It’s not just another dip; it’s a game-changer for your next gathering, or just for you, staring into the fridge at midnight.
- Quick & Easy: The whole setup takes about 20 minutes. That’s it. Perfect for those busy weeknights when you want something indulgent but don’t have the energy to cook a “real” meal.
- Simple Ingredients: No fancy grocery trips needed. You likely already have the base ingredients in your pantry and fridge. It’s pantry-friendly comfort food at its finest.
- Perfect for Any Occasion: Whether it’s a Super Bowl party, a cozy movie night, or a last-minute dinner for friends who drop by, this fits the bill. It’s versatile enough to be a side or the main event.
- Crowd-Pleaser: I’ve served this to picky eaters and foodies alike, and the reaction is always the same. Eyes widen, hands reach for chips. It’s universally loved.
- Unbelievably Delicious: The texture is next-level. The queso is smooth and velvety, not grainy or oily, and the loaded toppings add crunch and freshness that balances the richness.
What makes this recipe stand out is the balance. Too many queso recipes are just melted cheese soup. This one has depth. I use a mix of cheeses to create a flavor profile that’s sharp but mellow, with a kick from the chiles. It’s the kind of dip that makes you close your eyes after the first bite. It’s comfort food reimagined—fast, satisfying, and with that soul-soothing warmth that only cheese can provide. It’s perfect for impressing guests without stressing over a complicated menu, or just turning a simple Tuesday into something memorable.
What Ingredients You Will Need
This recipe uses simple, wholesome ingredients to deliver bold flavor and satisfying texture without the fuss. The magic here isn’t in exotic spices, but in the quality and combination of the basics. We’re building a foundation that’s sturdy enough to hold all the toppings but creamy enough to coat every chip evenly. You want ingredients that play well together, creating a harmony of salty, spicy, and fresh notes.
For the Queso Base
- Sharp Cheddar Cheese, shredded (8 oz) – I recommend using a block and shredding it yourself. Pre-shredded cheese has anti-caking agents that can make your sauce grainy. Sharp cheddar gives it that necessary bite.
- Mild Cheddar Cheese, shredded (4 oz) – This adds creaminess without overpowering the sharpness. It helps create that smooth, melt-in-your-mouth texture we’re after.
- Monterey Jack Cheese, shredded (4 oz) – The secret weapon. Monterey Jack melts beautifully and adds a mild, buttery flavor that balances the heat.
- Heavy Cream (1/2 cup) – Don’t skip this. Milk can separate, but heavy cream keeps the queso luxurious and stable. It’s what makes it pourable yet thick.
- Green Chiles, diced (1 can, 4 oz) – Mild or medium, depending on your heat tolerance. These add that classic tangy spice. I use the drained kind to control moisture.
- Garlic Powder (1 tsp) – For a consistent garlic flavor without bits of raw garlic burning in the pan.
- Cumin (1/2 tsp) – Just a pinch. It adds warmth and depth, grounding the cheese in savory territory.
- Salt (to taste) – Cheese is salty, so start with a little and adjust. You’ll know when it’s right because it will make your taste buds sing.
For the Loaded Toppings
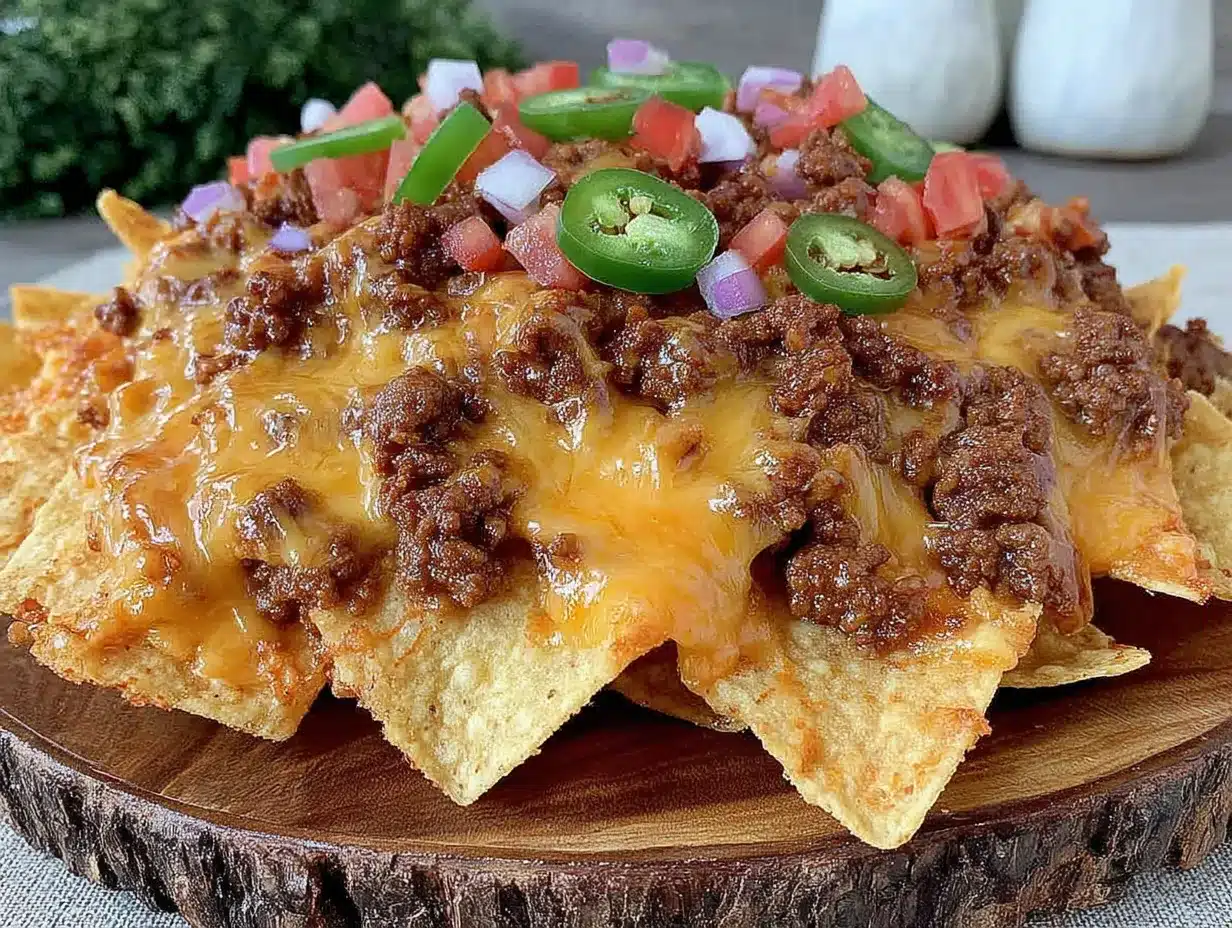
- Tortilla Chips (1 large bag) – Look for sturdy, thick-cut chips. Thin chips will break under the weight of the toppings. Brand doesn’t matter as much as thickness.
- Ground Beef (1 lb, cooked and seasoned) – Or turkey if you prefer. Season it with taco seasoning for that authentic flavor. Drain the grease well, or it’ll make your chips soggy.
- Black Beans, rinsed and drained (1 can) – Adds protein and a nice earthy contrast. Rinsing them removes the excess sodium and slime.
- Jalapeños, sliced (1/2 cup) – Fresh or pickled. Fresh gives a crisp bite; pickled adds vinegar tang. I usually do a mix.
- Green Onions, chopped (1/4 cup) – For that fresh, oniony crunch that cuts through the richness of the cheese.
- Tomatoes, diced (1 medium) – Roma tomatoes work best because they’re less watery. Add them just before serving to keep them fresh.
- Sour Cream (for dolloping) – Adds a cool, creamy contrast to the hot queso. Essential for balance.
- Cilantro, chopped (1/4 cup) – Fresh herbs brighten up the whole dish. Don’t use dried cilantro here; it just doesn’t work.
Equipment Needed
You don’t need a lot of fancy gear for this, but having the right tools makes a huge difference. First, you’ll need a good medium-sized saucepan or a heavy-bottomed skillet. I prefer a saucepan with a wide base because it allows for even melting without scorching. Non-stick is your friend here, as cheese loves to stick and burn if you’re not careful.
A box grater is essential. I cannot stress this enough—do not buy pre-shredded cheese if you want the best result. The coating on pre-shredded cheese prevents it from melting smoothly, leading to a lumpy queso. Grating your own cheese takes five minutes and makes all the difference.
You’ll also need a large baking sheet or a dedicated nacho platter for assembly. If you’re serving a crowd, a large rimmed baking sheet is perfect because it provides a flat surface for spreading chips and toppings. For smaller groups, a wooden board or a large ceramic platter works well.
Finally, a slotted spoon is helpful for draining the ground beef and beans. It keeps everything from getting too greasy. If you don’t have one, a fine-mesh strainer works too. Keep your tools clean and ready; this recipe moves fast, and you don’t want to be washing a bowl while the cheese is melting.
Preparation Method
Let’s get this party started. The process is straightforward, but attention to detail ensures your queso is silky, not separated.
- Prep Your Cheese (5 minutes): Shred your cheddar and Monterey Jack cheeses. If you’re using blocks, this is the best part. Get them all ready in a bowl. Having everything prepped before you start heating the pan is crucial because cheese melts fast.
- Cook the Meat (10 minutes): In a separate skillet, brown the ground beef over medium-high heat. Break it up into small crumbles as it cooks. Once browned, drain the excess grease. Stir in your taco seasoning and a splash of water if needed. Set aside. You want this savory, salty base ready to go.
- Start the Queso Base (5 minutes): In your saucepan, melt the butter over low heat. Add the garlic powder and cumin, stirring constantly for about 30 seconds to bloom the spices. This releases their flavor without burning them.
- Add Liquids and Cheese (10 minutes): Pour in the heavy cream and diced green chiles. Stir gently. Once the cream is warm (don’t let it boil), add the shredded cheese a handful at a time. Stir continuously. This is the most important step. Patience pays off. Let each handful melt completely before adding the next. This prevents clumping.
- Season and Adjust (2 minutes): Once all cheese is melted and the mixture is smooth, taste it. Add salt if needed. If it’s too thick, add a splash more cream. If it’s too thin, let it simmer for another minute. It should coat the back of a spoon.
- Assemble the Bar (5 minutes): Spread a layer of tortilla chips on your baking sheet or platter. Spoon a generous layer of queso over the chips. Repeat with a second layer of chips and more queso. This double-layer method ensures every chip gets covered.
- Add Toppings: Scatter the seasoned beef, black beans, jalapeños, tomatoes, and green onions over the queso. Dollop with sour cream and sprinkle with fresh cilantro. Serve immediately while the queso is still warm and gooey.
Cooking Tips & Techniques
I’ve made my fair share of queso disasters over the years. Here’s what I’ve learned to help you avoid them.
Low and Slow is Key: High heat is the enemy of smooth queso. If you rush it, the cheese proteins tighten up and squeeze out the fats, resulting in a greasy, grainy mess. Keep your heat low and stir often. If it looks like it’s starting to separate, take it off the heat and whisk in a little cold cream. It often saves the day.
Grate Your Own Cheese: I know it’s a pain, but pre-shredded cheese contains cellulose, which is an anti-caking agent. This agent stops the cheese from melting smoothly. Freshly shredded cheese has no additives and melts into a velvety sauce. Trust me, your taste buds will thank you.
Drain Your Wet Ingredients: Tomatoes, jalapeños, and beans all release water. If you add them directly to the hot queso without draining, the extra moisture can break the emulsion. Always rinse beans and drain tomatoes well. For jalapeños, pat them dry with a paper towel.
Keep it Warm: Queso cools down fast and thickens up. If you’re serving a large group, keep the queso in a small slow cooker or a heat-proof bowl set over a pot of simmering water. This keeps it pourable and inviting throughout the party.
Don’t Overload the Chips: It’s tempting to pile on every topping, but if the chips are too heavy, they’ll break. Layer the queso between the chips for better structural support. This ensures you get a chip, a bit of queso, and a bit of topping in every bite.
Variations & Adaptations
This recipe is a canvas. Here are a few ways to make it your own.
Vegan Option: Swap the dairy cheese for a high-quality vegan cheddar and Monterey Jack blend. Use coconut cream instead of heavy cream, and skip the beef for seasoned lentils or crumbled tofu. The texture might be slightly different, but the flavor profile remains satisfying.
Spicy Kick: If you like heat, add a diced habanero or a spoonful of chipotle peppers in adobo sauce to the queso base. You can also use spicy chorizo instead of ground beef for a smoky, fiery twist.
Vegetarian Delight: Skip the meat and add roasted vegetables like bell peppers, zucchini, and corn. Roasting them first brings out their natural sweetness and adds a nice char. Black beans and pinto beans work great as the protein source here.
Seafood Twist: For a coastal vibe, add cooked shrimp or crab meat to the toppings. Pair the queso with a lime-cilantro slaw on the side. This variation feels more elegant but keeps the comfort factor high.
Gluten-Free: Simply swap regular tortilla chips for certified gluten-free corn chips. Most corn chips are naturally gluten-free, but always check the label to ensure they were made in a safe facility. The rest of the recipe is inherently gluten-free.
Serving & Storage Suggestions
Serve this Ultimate Loaded Nacho Bar with Queso hot, straight from the oven or the slow cooker. It’s best enjoyed immediately while the chips are crisp and the cheese is flowing. Pair it with cold beverages like margaritas, beer, or even a crisp white wine if you’re feeling fancy.
For storage, any leftovers can be kept in an airtight container in the refrigerator for up to 3 days. The queso will thicken significantly when cold, so you’ll need to reheat it gently. Add a splash of milk or cream and warm it over low heat, stirring constantly, until it’s smooth again. Do not microwave it on high, or it will separate.
The toppings should be stored separately if possible. The meat and beans can be refrigerated and reheated. The fresh toppings like tomatoes and cilantro are best added fresh to avoid sogginess. If you’re meal prepping, keep the queso and chips separate until you’re ready to eat.
Flavors develop over time, so the leftover queso actually tastes even better on day two, especially if you let it meld in the fridge. Just remember to reheat it properly. Don’t let it sit out for more than two hours for food safety reasons.
Nutritional Information & Benefits
While this dish is definitely a treat, it’s not without its benefits. The cheese provides a good source of calcium and protein, which are essential for bone health and muscle repair. The ground beef adds iron and B vitamins, especially if you use leaner cuts. Black beans are a great source of fiber and plant-based protein, helping to keep you full and satisfied.
However, it’s important to note that this recipe is high in saturated fat and sodium due to the cheese, meat, and processed chips. Enjoy it in moderation as part of a balanced diet. If you’re watching your calorie intake, consider using lighter cheese options or increasing the proportion of vegetables and beans to reduce the overall fat content.
From a wellness perspective, I view this as a “mindful indulgence.” It’s not a daily staple, but a special occasion food. The joy it brings to social gatherings or late-night moments contributes to mental well-being, which is just as important as physical nutrition. Balance is key.
Conclusion
There’s something magical about an Ultimate Loaded Nacho Bar with Queso. It’s more than just food; it’s an experience. It brings people together, whether it’s a big party or a quiet night in. The combination of creamy, spicy queso with crunchy chips and fresh toppings is unbeatable. I hope this recipe becomes a staple in your kitchen, just like it has in mine.
Feel free to customize it to your liking. Add more heat, swap the meat, or go all out with the toppings. The beauty of this recipe is its flexibility. Don’t be afraid to experiment and make it your own.
If you try this recipe, I’d love to hear how it turned out. Leave a comment below with your favorite variations or tips. Share your photos on social media and tag me—I love seeing your creations. And if you have friends who need some comfort food in their lives, share this recipe with them. Let’s spread the queso love.
Happy cooking, and remember: life is too short for bad queso. Make it creamy, make it spicy, and make it yours.
Frequently Asked Questions
Can I make the queso ahead of time?
Yes, you can make the queso base a few hours ahead. Store it in the refrigerator and reheat it gently on the stove, adding a little cream if needed to restore the smooth consistency. However, it’s best to assemble and serve the nachos fresh for the best texture.
Why is my queso grainy?
Grainy queso usually happens if the cheese is heated too quickly or if pre-shredded cheese is used. Always shred your own cheese and melt it over low heat, stirring constantly. If it does get grainy, whisk in a splash of cold cream to help smooth it out.
What kind of chips work best?
Thick-cut, sturdy tortilla chips are best. They can hold up to the heavy toppings without breaking. Avoid thin, delicate chips as they will become soggy and disintegrate under the weight of the queso and meat.
Can I use a slow cooker for the queso?
Absolutely. A slow cooker is great for keeping the queso warm during a party. Melt the cheese in a saucepan first, then transfer it to the slow cooker on the “warm” setting. Add a little extra cream to help it stay fluid over time.
How do I store leftover nachos?
Leftover assembled nachos will become soggy quickly. It’s better to store the queso and toppings separately. Reheat the queso gently and use fresh chips when serving leftovers. The meat and beans can be stored and reheated normally.
Pin This Recipe!
Ultimate Loaded Nacho Bar with Qeso

A quick and easy party dip featuring a creamy, velvety queso base made from a blend of cheddar and Monterey Jack cheeses, served with a variety of loaded toppings like seasoned ground beef, black beans, and fresh vegetables.
- Prep Time: 15 minutes
- Cook Time: 20 minutes
- Total Time: 35 minutes
- Yield: 8 servings 1x
- Category: Appetizer
- Cuisine: Mexican
Ingredients
- 8 oz Sharp Cheddar Cheese, shredded
- 4 oz Mild Cheddar Cheese, shredded
- 4 oz Monterey Jack Cheese, shredded
- 1/2 cup Heavy Cream
- 1 can (4 oz) Green Chiles, diced and drained
- 1 tsp Garlic Powder
- 1/2 tsp Cumin
- Salt to taste
- 1 large bag Tortilla Chips (thick-cut)
- 1 lb Ground Beef, cooked and seasoned with taco seasoning
- 1 can Black Beans, rinsed and drained
- 1/2 cup Jalapeños, sliced
- 1/4 cup Green Onions, chopped
- 1 medium Tomato, diced
- Sour Cream for dolloping
- 1/4 cup Cilantro, chopped
Instructions
- Shred the cheddar and Monterey Jack cheeses and set aside.
- In a separate skillet, brown the ground beef over medium-high heat, breaking it into crumbles. Drain excess grease, stir in taco seasoning, and set aside.
- In a medium saucepan, melt butter over low heat. Add garlic powder and cumin, stirring for 30 seconds to bloom spices.
- Pour in heavy cream and diced green chiles. Stir gently until warm.
- Add shredded cheese a handful at a time, stirring continuously until each handful is fully melted and the mixture is smooth.
- Taste and adjust seasoning with salt. If too thick, add more cream; if too thin, simmer briefly.
- Spread a layer of tortilla chips on a baking sheet or platter. Spoon a generous layer of queso over the chips.
- Repeat with a second layer of chips and more queso.
- Scatter seasoned beef, black beans, jalapeños, tomatoes, and green onions over the queso.
- Dollop with sour cream and sprinkle with fresh cilantro. Serve immediately.
Notes
Grate your own cheese to avoid anti-caking agents that cause graininess. Keep heat low to prevent separation. Store leftovers separately; reheat queso gently with a splash of milk or cream.
Nutrition
- Serving Size: 1 serving of loaded
- Calories: 650
- Sugar: 3
- Sodium: 900
- Fat: 45
- Saturated Fat: 22
- Carbohydrates: 35
- Fiber: 4
- Protein: 25
Keywords: nacho bar, queso dip, party food, easy appetizer, cheese dip, loaded nachos, game day food, comfort food


