Love this? Save it for later!
Share the inspiration with your friends
My sister had sworn off Halloween baking for years. “Too much effort for something that gets eaten in five minutes,” she’d say every October while I was elbow-deep in sprinkles and melted chocolate. For a solid decade, that was her stance. Then last year, I made this pretzel bark “just for myself” on a random Tuesday afternoon, and I found her standing over the kitchen counter at 11 PM, picking candy eyeballs off the top like she was collecting treasures. She didn’t even say anything. Just kept eating.
Honestly, I get it now. There’s something about that combination—crunchy, salty pretzels, smooth melted chocolate, and those ridiculous little eyes staring up at you—that just works. I wasn’t trying to convert anyone. I was just tired of complicated Halloween treats that take three hours and leave your kitchen looking like a disaster zone. This one takes maybe 20 minutes of actual work, and the payoff is ridiculous. You know that feeling when something turns out way better than you expected? That’s this bark.
I’ve made it four times since that first batch, and every single time, someone who claimed they “don’t do holiday baking” ends up sneaking pieces when they think nobody’s watching. It’s become my go-to for Halloween parties, classroom treats, and those nights when you want something festive but don’t want to commit to a whole production. The best part? You probably already have most of what you need in your pantry right now.
Why You’ll Love This Recipe
Let me be straight with you—I’ve tested a lot of Halloween treats over the years, and most of them fall into one of two categories: too complicated or too boring. This pretzel bark hits that sweet spot where it looks impressive but takes almost no effort. Here’s why it keeps showing up at every party I bring it to:
- Quick & Easy: From start to finish, you’re looking at about 20 minutes of active time. The hardest part is waiting for the chocolate to set.
- Simple Ingredients: Pretzels, chocolate, candy eyes, and maybe some sprinkles. That’s it. No obscure baking supplies or specialty stores required.
- Perfect for Halloween Parties: Whether it’s a classroom celebration, office potluck, or just a spooky movie night at home, this bark fits right in.
- Crowd-Pleaser: I’ve watched kids and adults alike fight over the pieces with the most candy eyes. It’s hilarious and slightly concerning.
- Unbelievably Delicious: The salty-sweet combo hits every time. The crunch of the pretzels against the smooth chocolate is next-level snacking.
What makes this different from every other Halloween bark out there? It’s the texture. Most bark recipes use all chocolate, which gets boring after two bites. The pretzels add that essential crunch and saltiness that keeps you coming back for more. Plus, the candy eyes give it that fun, spooky factor without requiring any artistic ability. I’ve seen people try to pipe spiderwebs and ghosts onto bark, and honestly? It never looks as good as they think it does. This is foolproof.
This recipe is the kind that makes you close your eyes after the first bite. It’s Halloween fun without the Halloween stress—perfect for impressing guests without actually trying that hard.
What Ingredients You Will Need
This recipe uses simple, pantry-friendly ingredients to deliver that perfect salty-sweet Halloween treat. Most of these are probably already in your kitchen, which is exactly how I like my recipes to work.
- Mini pretzels (about 3 cups / 150g) – I prefer the traditional twist shape, but pretzel sticks work great too. The saltier the better—that contrast with the chocolate is what makes this work.
- Semi-sweet chocolate chips (2 cups / 340g) – I’ve tested this with Ghirardelli and Nestlé, and both work well. If you want a richer flavor, go for dark chocolate chips instead.
- White chocolate chips (1 cup / 170g) – This is for drizzling on top and gives that nice visual contrast. You can skip it if you want, but it really makes the candy eyes pop.
- Candy eyeballs (about 1/2 cup / 60g) – You can find these at craft stores, party supply shops, or online. I’ve also seen them at Target in the seasonal section.
- Orange and black sprinkles (optional, about 2 tablespoons) – Totally optional, but they add a nice festive touch. Wilton makes a good Halloween mix.
- Coconut oil or vegetable shortening (1 teaspoon) – This helps thin out the chocolate for smoother melting and easier spreading. Don’t skip it, or your chocolate might seize up.
Ingredient Tips: For the best texture, look for mini pretzels that are still crunchy, not stale. I’ve made the mistake of using pretzels that were sitting open in the pantry for weeks, and the bark ended up chewy instead of crunchy. Not ideal. If you’re using white chocolate, make sure it’s good quality—cheap white chocolate can get grainy when melted. I personally recommend Ghirardelli white chocolate chips for the smoothest melt.
Substitution Guidance: Need this to be dairy-free? Use dairy-free chocolate chips and skip the white chocolate drizzle. For a gluten-free version, swap in gluten-free pretzels—they’re widely available now and work just as well. You can also swap the semi-sweet chips for milk chocolate if you prefer a sweeter bark, though I find semi-sweet balances the salt better.
Equipment Needed
You don’t need much for this recipe, which is honestly my favorite kind of baking. Here’s what you’ll need:
- Baking sheet – A standard half-sheet pan works perfectly. Line it with parchment paper for easy cleanup.
- Parchment paper – Non-negotiable. Without it, your bark will stick to the pan and you’ll be picking chocolate shards off the metal for an hour.
- Medium microwave-safe bowls – One for the semi-sweet chocolate, one for the white chocolate. I use glass Pyrex bowls.
- Spatula or offset spatula – For spreading the chocolate evenly over the pretzels. A regular butter knife works in a pinch.
- Small piping bag or zip-top bag – For drizzling the white chocolate. A zip-top bag with the corner snipped off works perfectly and costs nothing.
- Measuring cups and spoons – For getting the ingredient amounts right.
Budget-Friendly Options: Don’t have a piping bag? Seriously, just use a zip-top bag. I’ve been doing it for years and it works exactly the same. No offset spatula? A butter knife or the back of a spoon will get the job done. The only thing I wouldn’t skip is the parchment paper—it’s cheap and saves you from a sticky disaster.
Maintenance Tip: If you’re using a glass bowl for melting chocolate, make sure it’s completely dry before you start. Any water in the bowl will cause your chocolate to seize up and turn into a grainy mess. Learned that one the hard way.
Preparation Method
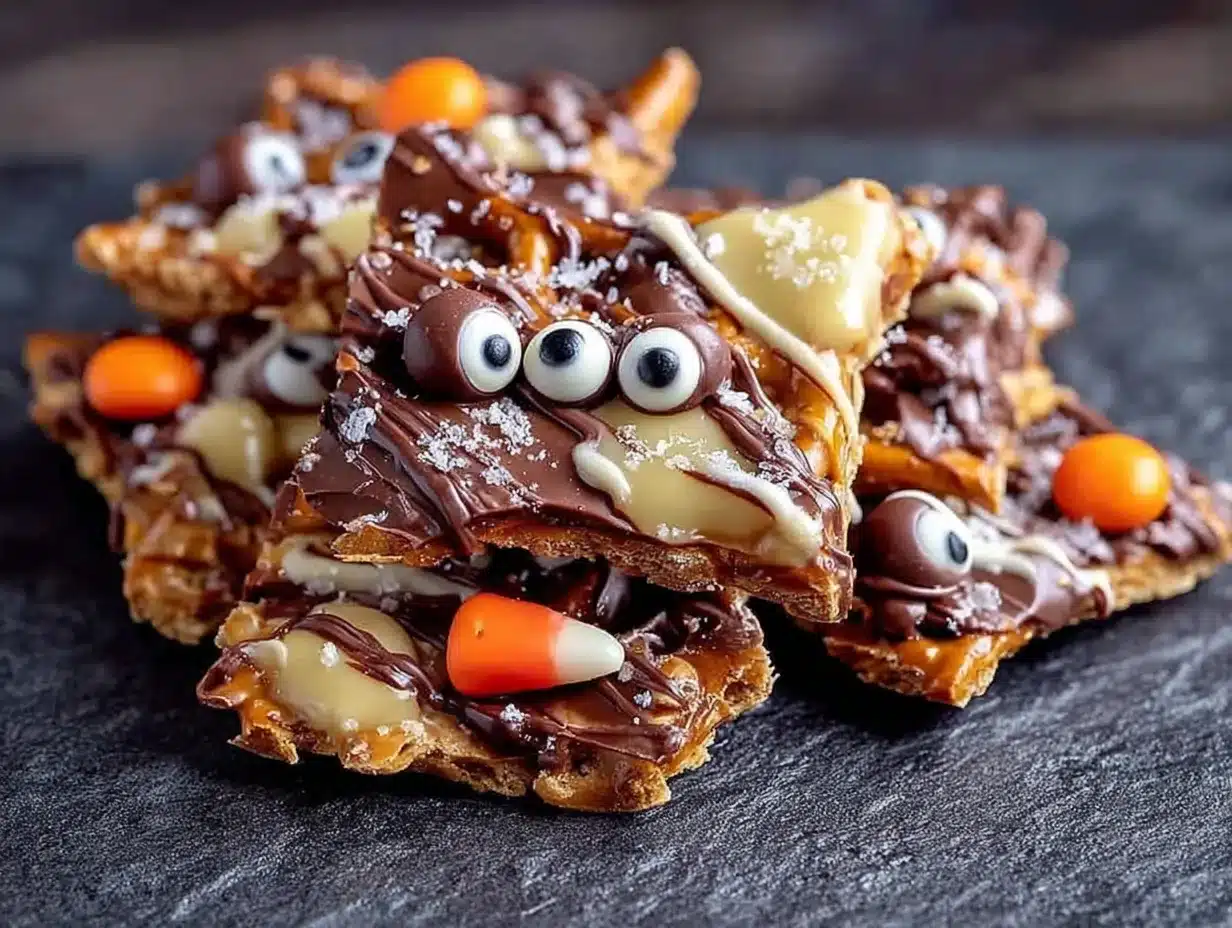
This comes together fast, so I like to have everything prepped before I start melting chocolate. Trust me on this one—once the chocolate is melted, you don’t want to be digging through your pantry looking for sprinkles.
- Prep your baking sheet. Line a standard half-sheet pan with parchment paper. Make sure the paper extends slightly over the edges so you can lift the bark out easily later. Arrange your mini pretzels in a single layer across the pan. Don’t worry about making them perfect—just spread them out evenly. Some overlap is fine.
- Melt the semi-sweet chocolate. Add your 2 cups of semi-sweet chocolate chips to a medium microwave-safe bowl along with 1/2 teaspoon of coconut oil. Microwave in 30-second intervals, stirring well after each one. This usually takes about 90 seconds total. Stop when the chocolate is about 75% melted and stir until the residual heat finishes the job. Don’t overheat it, or the chocolate will burn and get thick and clumpy.
- Pour and spread. Pour the melted semi-sweet chocolate over the arranged pretzels. Use your spatula to spread it evenly, making sure it gets into all the nooks and crannies between the pretzels. Don’t stress about making it perfect—a rustic look is part of the charm. The chocolate should be about 1/4 inch thick.
- Melt the white chocolate. In a separate bowl, melt your 1 cup of white chocolate chips with the remaining 1/2 teaspoon of coconut oil. Same method—30-second intervals, stirring between each. White chocolate is more delicate than dark, so be extra careful not to overheat it. If it starts looking thick and lumpy, you’ve gone too far.
- Drizzle the white chocolate. Transfer your melted white chocolate to a small piping bag or a zip-top bag with a tiny corner snipped off. Drizzle it back and forth over the semi-sweet chocolate layer. I like to do zigzag patterns, but any design works. Don’t overthink it—you’re going to cover it with candy eyes anyway.
- Add the candy eyes and sprinkles. While the white chocolate is still wet, press the candy eyeballs into the chocolate. This is the fun part. I like to scatter them somewhat evenly, but some clusters are fine—it adds character. Sprinkle your orange and black sprinkles over everything if you’re using them. Work quickly here, because the chocolate sets faster than you’d expect.
- Let it set. Place the baking sheet in the refrigerator for at least 1 hour, or until the chocolate is completely firm. If you’re in a hurry, 30 minutes in the freezer works too, but watch it closely so the chocolate doesn’t get too cold and brittle.
- Break into pieces. Once the bark is completely set, lift it out of the pan using the parchment paper. Break it into irregular pieces with your hands. Don’t use a knife—the uneven edges are part of the appeal. Some pieces will be bigger, some smaller, and that’s exactly how it should be.
Sensory Cues: When the chocolate is properly melted, it should be smooth and glossy, not thick or grainy. When you drizzle the white chocolate, it should flow in a steady stream, not plop out in clumps. The finished bark should snap cleanly when you break it—if it bends, it needs more time to set.
Cooking Tips & Techniques
I’ve made this recipe more times than I care to admit, and I’ve learned a few things along the way. Here’s what I wish someone had told me before my first attempt:
Don’t skip the coconut oil. I know it seems like an extra step, but it makes a huge difference in how smoothly your chocolate melts and spreads. Without it, the chocolate can get thick and difficult to work with, especially if you’re using chocolate chips instead of melting wafers. I’ve forgotten it before, and the bark was still edible, but it wasn’t nearly as pretty.
Work in batches if needed. If you’re doubling the recipe, use two baking sheets instead of trying to cram everything onto one. Overcrowding leads to uneven chocolate distribution and sad, pretzel-less patches. I learned this when I tried to make a giant batch for a party and ended up with a mess.
Watch the white chocolate like a hawk. White chocolate burns faster than any other type of chocolate. I once looked away for 30 seconds and ended up with a bowl of grainy, yellowish goo that I had to throw out. If you see it starting to look thick or clumpy, stop immediately and stir vigorously—sometimes you can save it before it’s too late.
Timing matters. This is one of those recipes where prep work actually saves you. Have your pretzels arranged, your candy eyes measured out, and your sprinkles ready before you start melting anything. Once the chocolate is melted, you don’t have time to be searching for things. Trust me on this.
Room temperature is your friend. If your kitchen is really hot or humid, the chocolate might take longer to set, or it might get a little streaky. On humid days, I pop the bark in the fridge immediately after adding the toppings. On cool, dry days, it sets fine on the counter, though I still prefer the fridge for speed.
Variations & Adaptations
One of the best things about this recipe is how easy it is to change up. Here are some variations I’ve tried and loved:
Spooky Spider Bark: Instead of candy eyes scattered everywhere, place them in clusters of two and use black licorice strings for spider legs. It takes a little more effort, but the kids absolutely lose their minds over it. I did this for a Halloween party last year and ran out in 20 minutes.
Dark Chocolate & Sea Salt: Swap the semi-sweet for dark chocolate (70% cacao or higher) and sprinkle flaky sea salt over the top before it sets. Skip the white chocolate drizzle and candy eyes for a more sophisticated version. This is my go-to when I want something that feels grown-up but still festive.
Peanut Butter Swirl: Melt 1/4 cup of peanut butter with the semi-sweet chocolate for a rich, nutty flavor. Drizzle extra peanut butter on top instead of white chocolate. Just make sure your peanut butter is smooth and drippy, not thick and chunky. I’ve tried both, and smooth wins every time.
Gluten-Free Option: Use gluten-free pretzels—they’re widely available now and taste almost identical to regular ones. Snyder’s of Hanover makes a good gluten-free mini pretzel that works perfectly here. Everything else in the recipe is naturally gluten-free.
Monster Mash Version: Use colored candy melts instead of white chocolate for the drizzle—green, purple, or orange all work great. Add different shaped sprinkles like bats, ghosts, or pumpkins. I found a bag of Halloween-shaped sprinkles at the grocery store last year and they made the bark look incredible.
Serving & Storage Suggestions
This bark is pretty forgiving when it comes to serving and storage, which is another reason I love it for parties.
Serving: Serve the bark at room temperature on a platter or in a bowl. The chocolate should be firm but not rock-hard. If it’s been in the fridge, let it sit out for about 10 minutes before serving so the texture softens slightly. For Halloween parties, I like to arrange the pieces on a black platter with some fake spiderwebs around the edges—it looks spooky without being over-the-top.
Storage: Store the bark in an airtight container at room temperature for up to 5 days. If your kitchen runs warm (above 75°F), keep it in the refrigerator instead. Layer the pieces between sheets of parchment paper so they don’t stick together. I’ve made the mistake of throwing them all in a container without paper, and they turned into one giant chocolate blob. Not cute.
Freezing: This bark freezes beautifully. Place the pieces in a single layer on a baking sheet and freeze for 1 hour, then transfer to a freezer-safe container or bag. It will keep for up to 3 months. Thaw at room temperature for about 15 minutes before serving. I always keep a stash in the freezer for unexpected Halloween guests or late-night cravings.
Flavor Development: Honestly, this bark tastes best within the first 2-3 days. The pretzels stay crunchiest during that window. After that, they start absorbing moisture from the chocolate and get a little softer. Still delicious, just not as crunchy. If you’re making it for a party, aim to make it no more than 2 days ahead.
Nutritional Information & Benefits
Let’s be real—this is a treat, not a health food. But here’s the breakdown if you’re curious:
Estimated per serving (1/8 of recipe): 320 calories, 18g fat, 38g carbohydrates, 4g protein, 22g sugar, 2g fiber. These numbers will vary based on the specific chocolate and pretzels you use.
Health Highlights: Dark chocolate contains antioxidants called flavonoids, which can support heart health when consumed in moderation. Pretzels provide a quick source of carbohydrates for energy. The portion-controlled nature of bark (you break off a piece or two) makes it easier to enjoy without overdoing it compared to a whole cookie or slice of cake.
Dietary Considerations: This recipe can be made gluten-free with GF pretzels and dairy-free with appropriate chocolate substitutions. It contains dairy and gluten in its standard form. The candy eyes may contain soy lecithin, so check labels if you have soy sensitivities.
My Perspective: I’m all about balance. This bark isn’t something you eat every day, but for a Halloween party or a fun weekend treat, it’s absolutely worth it. I’d rather have a small piece of something truly delicious than a whole plate of something mediocre. That’s my food philosophy, and this bark fits right in.
Conclusion
This easy Halloween pretzel bark is proof that you don’t need complicated techniques or fancy ingredients to make something memorable. It’s salty, sweet, crunchy, and just the right amount of silly with those candy eyes staring up at you. Every time I make it, someone asks for the recipe, and I love watching their face when I tell them how simple it is.
I encourage you to make this your own. Add different sprinkles, try different chocolates, or go wild with the candy eyes placement. The beauty of this recipe is that it’s practically impossible to mess up. Even if your chocolate gets a little thick or your drizzle isn’t perfect, it’ll still taste amazing.
I’d love to hear how yours turns out. Drop a comment below and let me know what variations you tried, or tag me in your photos if you share them online. Happy Halloween, and happy snacking!
Frequently Asked Questions
Can I use milk chocolate instead of semi-sweet?
Absolutely. Milk chocolate will make the bark sweeter, which some people prefer. Just keep in mind that the saltiness of the pretzels might not stand out as much. I’ve tested it both ways, and honestly, both are delicious.
How far in advance can I make this bark?
You can make it up to 5 days ahead if stored properly in an airtight container. For the crunchiest texture, aim for within 2-3 days. If you’re making it for a party, 1-2 days ahead is the sweet spot.
My chocolate seized up and got grainy. What went wrong?
This usually happens when moisture gets into the chocolate, or when it’s overheated. Make sure your bowl is completely dry before melting, and always use 30-second intervals in the microwave. If it does seize, you can try adding a teaspoon of coconut oil and stirring vigorously—sometimes it smooths out.
Can I use pretzel sticks instead of mini twists?
Yes, but they’ll give you a different texture. Pretzel sticks are thicker and crunchier, so the bark will have more of a substantial crunch. You might need to adjust the arrangement on the baking sheet since sticks don’t lay as flat as twists.
How do I keep the candy eyes from falling off?
Press them gently into the chocolate while it’s still wet, and make sure they’re slightly embedded, not just sitting on top. If you’re adding them after the chocolate has started to set, they won’t stick as well. Work quickly after drizzling the white chocolate.
Pin This Recipe!
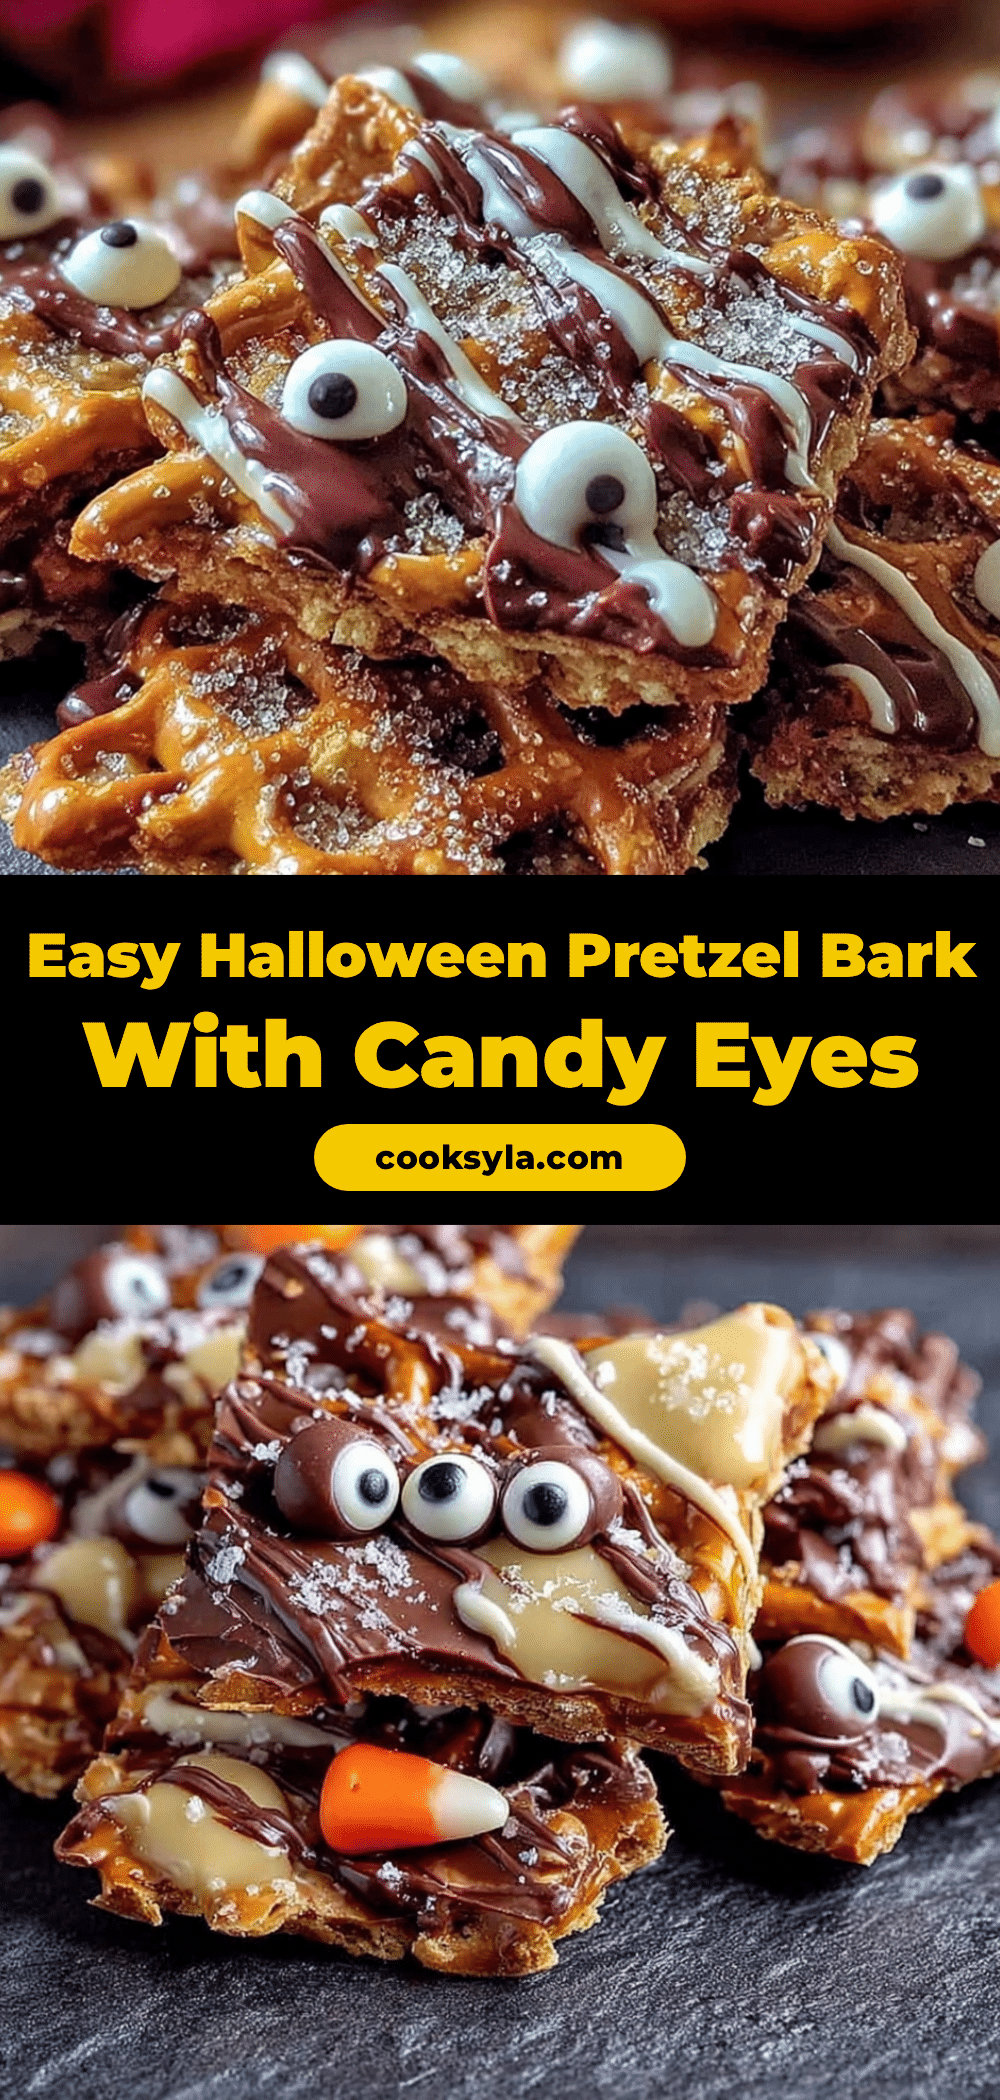
Easy Halloween Pretzel Bark with Candy Eyes
A quick and easy Halloween treat featuring crunchy pretzels, smooth melted chocolate, and fun candy eyeballs. Perfect for parties, classroom treats, or a spooky movie night.
- Prep Time: 20 minutes
- Cook Time: 0 minutes
- Total Time: 1 hour 20 minutes
- Yield: 8 servings 1x
- Category: Dessert
- Cuisine: American
Ingredients
- 3 cups (150g) mini pretzels
- 2 cups (340g) semi-sweet chocolate chips
- 1 cup (170g) white chocolate chips
- 1/2 cup (60g) candy eyeballs
- 2 tablespoons orange and black sprinkles (optional)
- 1 teaspoon coconut oil or vegetable shortening
Instructions
- Line a standard half-sheet pan with parchment paper. Arrange mini pretzels in a single layer across the pan.
- Melt semi-sweet chocolate chips with 1/2 teaspoon coconut oil in a microwave-safe bowl in 30-second intervals, stirring after each, until smooth (about 90 seconds total).
- Pour melted semi-sweet chocolate over pretzels and spread evenly with a spatula to about 1/4 inch thick.
- Melt white chocolate chips with remaining 1/2 teaspoon coconut oil in a separate bowl using the same method, being careful not to overheat.
- Transfer melted white chocolate to a piping bag or zip-top bag with a tiny corner snipped off. Drizzle over the semi-sweet chocolate layer in a zigzag pattern.
- While white chocolate is still wet, press candy eyeballs into the chocolate and sprinkle with optional sprinkles. Work quickly.
- Refrigerate for at least 1 hour (or 30 minutes in the freezer) until completely firm.
- Lift bark out of pan using parchment paper. Break into irregular pieces with your hands.
Notes
Don’t skip the coconut oil; it helps the chocolate melt smoothly. Work quickly after drizzling white chocolate as it sets fast. For best crunch, serve within 2-3 days. Store in an airtight container at room temperature for up to 5 days or freeze for up to 3 months.
Nutrition
- Serving Size: 1/8 of recipe
- Calories: 320
- Sugar: 22
- Sodium: 250
- Fat: 18
- Saturated Fat: 10
- Carbohydrates: 38
- Fiber: 2
- Protein: 4
Keywords: Halloween, pretzel bark, candy eyes, chocolate bark, easy treat, salty-sweet, no-bake


