Love this? Save it for later!
Share the inspiration with your friends
The woman at the craft fair booth two tables over watched me staring at her display of hand-painted Halloween cookies for a solid five minutes before she finally spoke. “You’re not a baker, are you?” she asked, not unkindly. I admitted I wasn’t—I was just desperate for something homemade to bring to my kid’s classroom party that didn’t come from a plastic bag. She laughed, wiped her hands on her apron, and said, “Honey, let me tell you about the shortcut that saved my sanity.” That’s how I ended up learning about black velvet cupcakes, scribbled on the back of a receipt while her husband sold painted pumpkins to a steady stream of customers. She told me the trick was all in the color—don’t waste time trying to get natural black from charcoal or squid ink when perfectly good food coloring exists. I felt a little embarrassed I hadn’t thought of it myself, honestly. But she just shrugged and said, “That’s what neighbors are for.”
I made my first batch that very night, and let me tell you—the kitchen looked like a crime scene. Black batter splattered across my white countertops, a smear of dark cocoa on my cheek, and I may have sneezed and sent a cloud of powdered sugar everywhere. But when those cupcakes came out of the oven, dark as midnight and smelling like a bakery, I knew I’d found something special. The kids at the party devoured them before I could even set out the orange napkins. One mom actually asked if I’d ordered them from a professional bakery. I just smiled and said, “It’s a family recipe.” Which isn’t exactly a lie—it’s my neighbor-from-a-craft-fair family recipe, and that counts, right?
These Quick Black Velvet Halloween Cupcakes are the kind of recipe that makes you look like a hero with almost no effort. Maybe you’ve been there—scrolling Pinterest at 9 PM the night before a school party, realizing you promised to bring something homemade. I’ve been there too, and this recipe is my emergency go-to. It’s dark, dramatic, and deeply chocolatey, but it comes together in about 20 minutes flat. That’s the beauty of it: you don’t need fancy piping skills or exotic ingredients. Just a little food coloring, some basic pantry staples, and the willingness to get a bit messy. Trust me, the mess is worth it.
Why You’ll Love This Recipe
Let’s be real for a second—Halloween baking can feel like a whole production. Between the elaborate decorations, the specialty pans, and the Pinterest-perfect designs, it’s easy to feel like you’re already failing before you even start. These Quick Black Velvet Halloween Cupcakes flip that script completely. They’re designed for real people with real schedules who still want to show up with something impressive. Here’s why they work:
- Quick & Easy: From start to finish, these cupcakes are ready in about 20 minutes. No complicated steps, no waiting around for butter to soften—just mix, bake, and frost. Perfect for those “I totally forgot” moments that happen more often than I’d like to admit.
- Simple Ingredients: You probably have most of these in your kitchen right now. Flour, sugar, cocoa powder, eggs, oil, buttermilk—nothing weird or hard to find. The only “special” ingredient is black food coloring, which you can grab at any grocery store or online for a few bucks.
- Perfect for Halloween Parties: These cupcakes are the life of the party. They’re dark, dramatic, and totally on-theme without being cheesy. Kids love the color, adults love the rich chocolate flavor, and everyone loves how easy they are to grab and go.
- Crowd-Pleaser: I’ve brought these to classroom parties, office potlucks, and neighborhood gatherings, and they disappear every single time. The black velvet color is unusual enough to spark conversation, but the flavor is classic enough to please even picky eaters.
- Unbelievably Delicious: The texture is what gets me every time—super moist, tender, and light, with that signature tang from the buttermilk and vinegar. The cocoa flavor is deep but not overwhelming, and it pairs perfectly with the creamy vanilla frosting.
What makes these different from every other black cupcake recipe out there? It’s the balance. Some recipes use so much food coloring that the batter tastes bitter or artificial. Others skip the color altogether and end up with sad gray cupcakes that look more “dusty attic” than “haunted house.” This recipe hits the sweet spot—just enough color to be dramatic, but not so much that it affects the flavor. Plus, the texture is genuinely perfect: light and fluffy, not dense or greasy like some quick recipes can be. I tested this at least five times to get it right, adjusting the ratio of cocoa to flour, tweaking the leavening agents, and figuring out the exact amount of coloring that works without ruining the batter. This is the version I keep coming back to, and I think you will too.
Honestly, this recipe is comfort food with a spooky twist. It’s the kind of treat that makes you feel like a kid again, biting into a dark, chocolatey cupcake while your fingers turn slightly black from the frosting. There’s something satisfying about making something that looks so dramatic with such minimal effort. It’s Halloween magic without the stress.
What Ingredients You Will Need
This recipe uses simple, everyday ingredients to create something that looks and tastes like it came from a fancy bakery. The magic is in the combination of a few key players—each one has a job to do, and together they create that perfect black velvet texture and flavor. Here’s what you’ll need:
- All-purpose flour, 1 ½ cups (190g) – This gives the cupcakes structure without making them tough. I use Gold Medal or King Arthur Flour for consistent results. Don’t substitute cake flour here—the extra protein in all-purpose helps the cupcakes hold their shape with the liquid ingredients.
- Granulated sugar, 1 cup (200g) – Adds sweetness and helps with browning and texture. Regular white sugar works perfectly here.
- Unsweetened cocoa powder, ¼ cup (25g) – I recommend Dutch-processed cocoa for a deeper, darker color and smoother flavor. Natural cocoa works too, but the color won’t be as intense. Hershey’s Special Dark is a great budget-friendly option, or splurge on Valrhona for a truly luxurious taste.
- Baking soda, 1 teaspoon – This reacts with the vinegar and buttermilk to create lift and fluffiness. Make sure it’s fresh—old baking soda won’t give you the rise you need.
- Salt, ½ teaspoon – Balances the sweetness and enhances the chocolate flavor. I use fine sea salt for even distribution.
- Vegetable oil, ½ cup (120ml) – Keeps the cupcakes incredibly moist. Canola or any neutral oil works fine. Don’t use olive oil—the flavor is too strong.
- Buttermilk, ½ cup (120ml) – This is the secret to tender, tangy cupcakes. The acid in buttermilk reacts with the baking soda for a light texture. No buttermilk? No problem—add 1 tablespoon of lemon juice or white vinegar to regular milk and let it sit for 5 minutes.
- Eggs, 2 large, room temperature – Provide structure and richness. Room temperature eggs incorporate better into the batter for a smoother texture. Take them out of the fridge 15 minutes before starting.
- White vinegar, 1 teaspoon – Sounds weird, I know, but it reacts with the baking soda for extra lift. You won’t taste it at all—promise.
- Vanilla extract, 1 teaspoon – Adds warmth and depth to the chocolate flavor. Pure vanilla is best, but imitation works in a pinch.
- Black gel food coloring, 1-2 teaspoons – This is the star of the show. Gel coloring is much more concentrated than liquid drops, so you need less of it and it won’t thin out your batter. Americolor Super Black or Wilton Color Right are my go-to brands. Start with 1 teaspoon and add more if you want a deeper color.
- For the frosting: Unsalted butter (½ cup, softened), powdered sugar (2 cups), vanilla extract (1 teaspoon), milk (2-3 tablespoons), and a pinch of salt. Optionally, add a drop of black food coloring for a gray “spider web” effect.
One note about the food coloring: if you’re making these for very young kids or anyone sensitive to artificial dyes, you can use natural black food coloring made from vegetable charcoal. It’s a bit more expensive and the color is slightly less intense, but it works. I’ve also seen recipes using activated charcoal powder, but be careful—too much can affect the taste and even interfere with medications. For most people, the standard gel coloring is perfectly fine and gives the best results.
Equipment Needed
You don’t need a fancy bakery setup for these cupcakes—just a few basic tools you probably already have. Here’s what you’ll need:
- Muffin pan (12-cup) – Standard size works best. I’ve used both non-stick and aluminum pans; both work fine, but I prefer non-stick for easy release.
- Cupcake liners – Halloween-themed ones are fun, but plain white or black liners look elegant too. I like the foil-lined ones for a professional look.
- Mixing bowls (2 medium-sized) – One for dry ingredients, one for wet. Glass or stainless steel is ideal.
- Whisk – For combining dry ingredients and smoothing out the wet mixture.
- Electric hand mixer or stand mixer – Not strictly necessary, but it makes the frosting much easier. You can mix the batter by hand with a wooden spoon.
- Rubber spatula – For scraping down the sides of the bowl and getting every last bit of batter into the liners.
- Ice cream scoop or cookie scoop – For evenly portioning the batter. This gives you uniform cupcakes that bake at the same rate.
- Cooling rack – Essential for letting the cupcakes cool completely before frosting. No rack? A clean dish towel works in a pinch.
- Piping bag and star tip – For that fancy bakery look. If you don’t have one, a zip-top bag with the corner snipped off works, or just spread the frosting with a knife.
If you’re on a budget, skip the piping bag and use a butter knife—rustic swirls have their own charm. I’ve done it both ways, and honestly, the taste is exactly the same.
Preparation Method
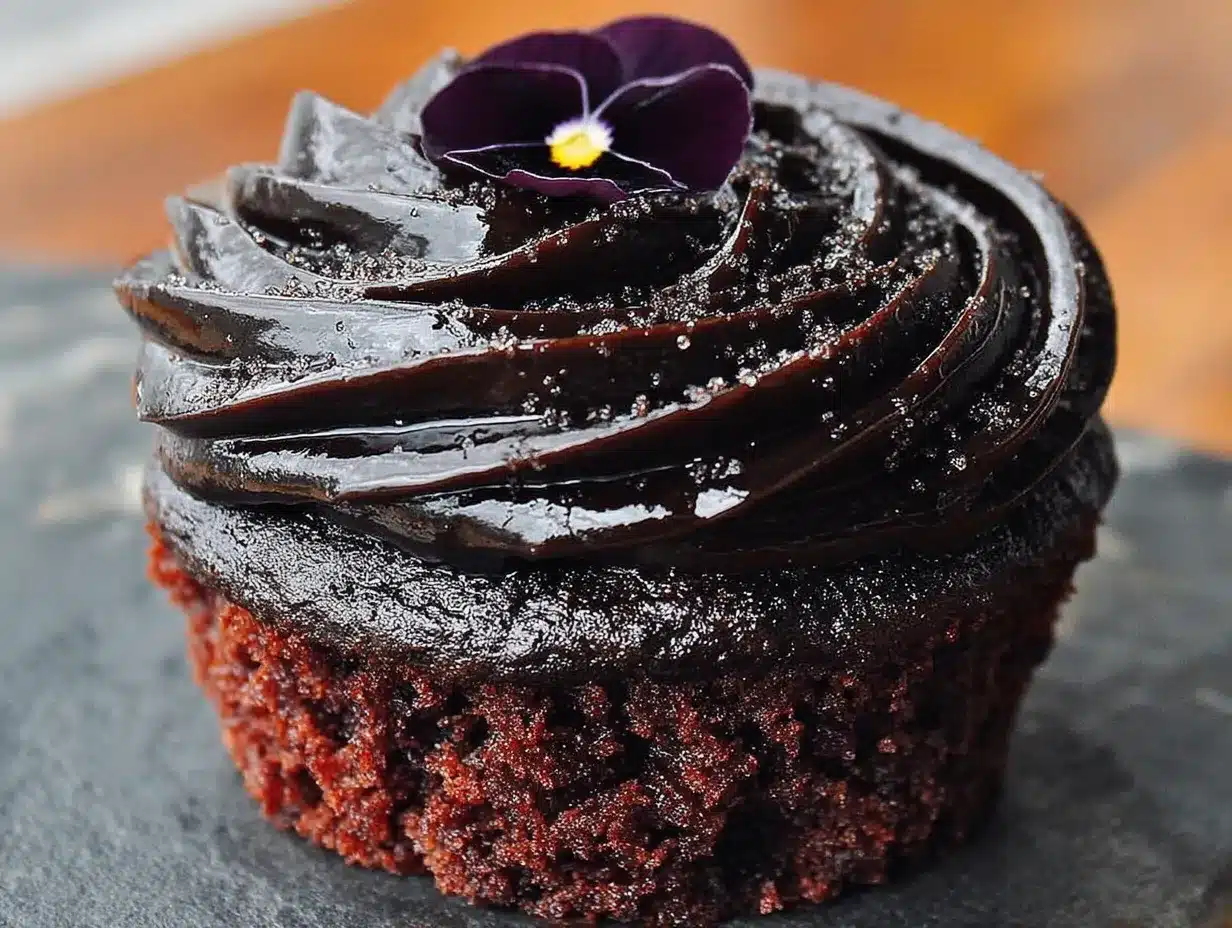
Alright, let’s get to the fun part. Here’s how to make these Quick Black Velvet Halloween Cupcakes step by step. I’ve included all the little tricks I’ve learned from making these dozens of times, so you can skip the trial and error.
- Preheat your oven to 350°F (175°C). Line your muffin pan with 12 cupcake liners. This is one of those steps you don’t want to skip—trust me, I’ve learned the hard way that preheating while mixing leads to uneven baking.
- In a medium bowl, whisk together the dry ingredients: 1 ½ cups all-purpose flour, 1 cup granulated sugar, ¼ cup unsweetened cocoa powder, 1 teaspoon baking soda, and ½ teaspoon salt. Make sure there are no lumps—cocoa powder can be stubborn, so give it a good whisk. If you see any dark specks, break them up with your fingers or a fork.
- In a separate larger bowl, combine the wet ingredients: ½ cup vegetable oil, ½ cup buttermilk, 2 large eggs, 1 teaspoon white vinegar, and 1 teaspoon vanilla extract. Whisk until smooth and well combined. The mixture will look a bit thin and pale, which is normal.
- Add the black gel food coloring to the wet ingredients. Start with 1 teaspoon and whisk it in. The batter will turn a deep grayish-purple at this stage. Don’t panic—it will darken significantly as you add the dry ingredients and during baking. If you want a truly jet-black color, add another ½ to 1 teaspoon. I usually go for 1 ½ teaspoons for a dramatic look.
- Gradually add the dry ingredients to the wet ingredients, mixing gently with a spatula or whisk. Stir just until combined—about 15-20 strokes. Overmixing will make the cupcakes tough. A few small lumps are totally fine. The batter will be thin and slightly runny, darker than you expect but not quite black yet.
- Divide the batter evenly among the 12 cupcake liners, filling each about ⅔ full. An ice cream scoop makes this super easy and ensures even sizes. I usually get exactly 12 cupcakes, no leftovers.
- Bake for 15-18 minutes, or until a toothpick inserted into the center of a cupcake comes out clean or with a few moist crumbs. My oven runs hot, so I start checking at 15 minutes. The tops should spring back when lightly touched. Don’t overbake—dry cupcakes are sad cupcakes.
- Let the cupcakes cool in the pan for 5 minutes, then transfer them to a wire rack to cool completely. This is crucial—if you try to frost them while they’re still warm, the frosting will melt into a puddle. I’ve been impatient before, and it’s not pretty.
- While the cupcakes cool, make the frosting: In a large bowl, beat ½ cup softened unsalted butter with an electric mixer until smooth and creamy, about 2 minutes. Gradually add 2 cups powdered sugar, 1 cup at a time, beating on low speed. Add 1 teaspoon vanilla extract and 2 tablespoons milk, then beat on medium-high for 2-3 minutes until light and fluffy. If the frosting is too thick, add another tablespoon of milk. If it’s too thin, add more powdered sugar. For a spooky touch, add a tiny drop of black food coloring to make the frosting a pale gray.
- Frost the cooled cupcakes. Use a piping bag with a star tip for a dramatic swirl, or simply spread the frosting with a knife. Top with Halloween sprinkles, edible glitter, or a small plastic spider ring for extra fun.
One thing I learned the hard way: the cupcakes will look darker once they’ve cooled completely. They might seem a bit too gray when they come out of the oven, but give them 10 minutes and they’ll deepen into that beautiful black velvet color. Patience is hard, I know, but it pays off.
Cooking Tips & Techniques
After making these cupcakes more times than I can count, I’ve picked up a few tricks that make the process smoother and the results more consistent. Here’s what I wish someone had told me the first time:
Don’t skip the vinegar. I know it sounds like a weird addition, but the vinegar reacts with the baking soda to create carbon dioxide bubbles, which give the cupcakes their light, tender texture. Without it, you’d end up with dense, flat discs. Same goes for the buttermilk—the acid is essential for the chemical reaction. If you don’t have buttermilk, make your own by adding a tablespoon of lemon juice to regular milk and letting it sit for 5 minutes.
Use gel food coloring, not liquid drops. This is probably the most common mistake I see. Liquid food coloring is too watery—you’d need a whole bottle to get the batter dark, and it would throw off the liquid balance completely. Gel coloring is concentrated, so a little goes a long way, and it won’t affect the texture. I’ve tried both, and gel is the clear winner.
Coat your measuring spoon with oil before measuring the food coloring. This is a random tip I picked up from a baking forum, and it works like magic. The gel slides right off instead of sticking to the spoon. Saves you from wasting expensive coloring and keeps your hands from looking like you just changed a tire.
Don’t overmix the batter. I know I said this already, but it’s worth repeating. Overmixing develops the gluten in the flour, which makes the cupcakes tough and rubbery. Mix just until the flour disappears—a few lumps are perfectly fine. The batter will be thin, which is normal for this type of cake.
Check your oven temperature with an oven thermometer. I learned this one after a batch of cupcakes came out looking like charcoal briquettes. My oven runs 25 degrees hotter than the dial says, so I had to adjust. An inexpensive oven thermometer from the grocery store will save you a lot of heartache.
Let the cupcakes cool completely before frosting. I know I mentioned this, but I’m saying it again because it’s that important. Even a slightly warm cupcake will turn your beautiful buttercream into a soupy mess. Give them at least 30 minutes on a cooling rack. If you’re in a rush, pop them in the fridge for 15 minutes.
Make the frosting while the cupcakes cool. This is my favorite time-saving trick. By the time the cupcakes are cool, the frosting is ready to go. It’s a small thing, but it makes the whole process feel more efficient.
Variations & Adaptations
One of the best things about this recipe is how easy it is to customize. Here are some variations I’ve tried and loved:
Gluten-Free Version: Substitute the all-purpose flour with a 1:1 gluten-free baking flour blend that contains xanthan gum. I’ve used Bob’s Red Mill and King Arthur Flour blends with great results. The texture is slightly more delicate, so handle gently. Everything else stays the same.
Vegan Adaptation: Replace the eggs with flax eggs (1 tablespoon ground flaxseed mixed with 3 tablespoons water per egg, let sit for 5 minutes). Use plant-based milk with 1 tablespoon lemon juice instead of buttermilk. For the frosting, use vegan butter or shortening. The cupcakes will be a bit denser but still delicious.
Spiced Halloween Version: Add 1 teaspoon of pumpkin pie spice or cinnamon to the dry ingredients for a fall twist. The warm spices pair beautifully with the dark chocolate flavor and give the cupcakes a cozy, autumnal feel. I made these for a Halloween potluck last year and they were gone in 10 minutes.
Red Velvet Twist: Use red gel food coloring instead of black for a classic red velvet look. The recipe works exactly the same way—just swap the color. You can even do half red and half black for a “zombie” themed batch.
Chocolate Ganache Filling: For something extra decadent, use a small knife or apple corer to remove a cone-shaped piece from the center of each baked cupcake. Fill with chocolate ganache (warm cream poured over chocolate chips) or raspberry jam, then replace the top and frost as usual. It’s a little extra work, but the surprise filling is always a hit.
Mini Cupcakes: Use a mini muffin pan and bake for 10-12 minutes instead of 15-18. This is perfect for kids’ parties where you want smaller portions. You’ll get about 24 mini cupcakes from one batch.
I’ve also tried adding a tablespoon of instant coffee granules to the dry ingredients for a mocha flavor. It deepens the chocolate taste without making the cupcakes taste like coffee. My husband, who claims to hate coffee, didn’t even notice—he just said they were “the best chocolate cupcakes ever.”
Serving & Storage Suggestions
These Quick Black Velvet Halloween Cupcakes are best served at room temperature, which lets the frosting soften slightly and the cake stay tender. If you’ve refrigerated them, take them out about 30 minutes before serving to let them come to room temperature.
For presentation, I like to arrange them on a black or orange platter for maximum Halloween impact. A dusting of powdered sugar (using a fine-mesh sieve) gives them a “spider web” effect that looks professional but takes seconds. Edible glitter or silver dragées add a touch of glamour. For kids’ parties, I stick a plastic spider ring or a bat-shaped toothpick into each cupcake—it’s cheap, easy, and the kids love it.
These cupcakes pair beautifully with a cold glass of milk, a hot cup of coffee, or a warm mug of apple cider. For an adult Halloween party, they’re great with a dark stout beer or a glass of red wine. The rich chocolate flavor stands up well to bold drinks.
Storage: Store unfrosted cupcakes in an airtight container at room temperature for up to 3 days. Frosted cupcakes should be stored in the refrigerator if not eaten within 24 hours, but let them come to room temperature before serving for the best texture. I’ve found that the flavor actually improves after a day—the cocoa and vanilla meld together beautifully.
Freezing: These cupcakes freeze beautifully. Freeze unfrosted cupcakes in a single layer on a baking sheet, then transfer to a freezer-safe bag or container for up to 3 months. Thaw at room temperature for about an hour before frosting. You can also freeze the frosting separately in a piping bag—just thaw in the refrigerator overnight and give it a quick whip before using.
One thing I’ve noticed: the black color can fade slightly after a day or two, especially if the cupcakes are exposed to light. If you’re making them ahead, store them in a dark container or wrap them well. A quick touch-up with a bit more frosting before serving solves the problem too.
Nutritional Information & Benefits
Let’s be honest—these are cupcakes, not health food. But here’s the approximate nutritional information per cupcake (with frosting):
- Calories: 310
- Fat: 14g
- Saturated Fat: 6g
- Carbohydrates: 44g
- Sugar: 33g
- Protein: 3g
- Fiber: 1g
- Sodium: 220mg
These values are estimates and will vary based on specific brands and any substitutions you make. The cocoa powder does offer some antioxidants, and the buttermilk provides a small amount of calcium and probiotics. But really, these are a treat—something special for a holiday celebration, not an everyday snack.
If you’re looking to lighten them up, you can reduce the sugar by ¼ cup without affecting the texture much. Using a lower-fat cream cheese frosting instead of buttercream also cuts some calories. For a dairy-free version, use plant-based milk and vegan butter—the taste is slightly different but still delicious.
Potential allergens: These cupcakes contain wheat (gluten), dairy, and eggs. The food coloring may contain artificial dyes that some people are sensitive to. Always check labels if you’re serving someone with allergies.
Conclusion
These Quick Black Velvet Halloween Cupcakes have become my go-to for every Halloween gathering, and I don’t see that changing anytime soon. They’re dramatic enough to impress, simple enough to make on a busy weeknight, and delicious enough that people actually ask for the recipe—not just the obligatory “oh, these are good” but real, genuine interest. That’s the best compliment a baker can get.
What I love most about this recipe is how forgiving it is. You don’t need to be a pastry chef or own a stand mixer. You just need a few basic ingredients, a little bit of time, and the willingness to get your hands a little messy. The black food coloring will probably end up on your counter, your spoon, and maybe your forehead, but that’s part of the fun. Halloween is supposed to be a little messy, right?
I encourage you to make these your own. Add sprinkles, change the frosting color, stuff them with ganache, or keep them simple. The base recipe is solid, but the possibilities are endless. And if you come up with a variation I haven’t tried, I’d love to hear about it. Drop a comment below or tag me in your photos—there’s nothing that makes me happier than seeing someone else fall in love with a recipe I’ve shared.
So go ahead, preheat that oven, and make some magic. Your Halloween party just got a whole lot spookier—and a whole lot tastier.
Frequently Asked Questions
Can I make these cupcakes ahead of time?
Absolutely! You can bake the cupcakes up to 3 days in advance and store them unfrosted in an airtight container at room temperature. Frost them the day you plan to serve them for the freshest look and taste. You can also freeze unfrosted cupcakes for up to 3 months.
Why did my cupcakes turn out gray instead of black?
This usually happens when you don’t use enough food coloring or when you use liquid drops instead of gel. Gel food coloring is much more concentrated and gives a deeper color. Also, the cupcakes will look darker once they’ve cooled completely, so don’t judge the color while they’re still warm.
Can I use natural food coloring instead of artificial?
Yes, you can use natural black food coloring made from vegetable charcoal. The color won’t be quite as intense as artificial gel, but it still gives a nice dark shade. Be aware that activated charcoal can interfere with certain medications, so check with your guests if you’re serving a crowd.
My cupcakes came out dry. What went wrong?
Overbaking is the most common cause of dry cupcakes. Start checking at 15 minutes, and take them out as soon as a toothpick comes out clean. Also, make sure you’re measuring your flour correctly—scooping directly from the bag can pack in too much flour. Use the spoon-and-level method instead.
Can I make this recipe into a cake instead of cupcakes?
Yes! Pour the batter into two greased and floured 8-inch round cake pans and bake at 350°F for 20-25 minutes, or until a toothpick comes out clean. The baking time will vary depending on your pan size, so start checking early. You’ll need to double the frosting recipe for a layer cake.
Pin This Recipe!
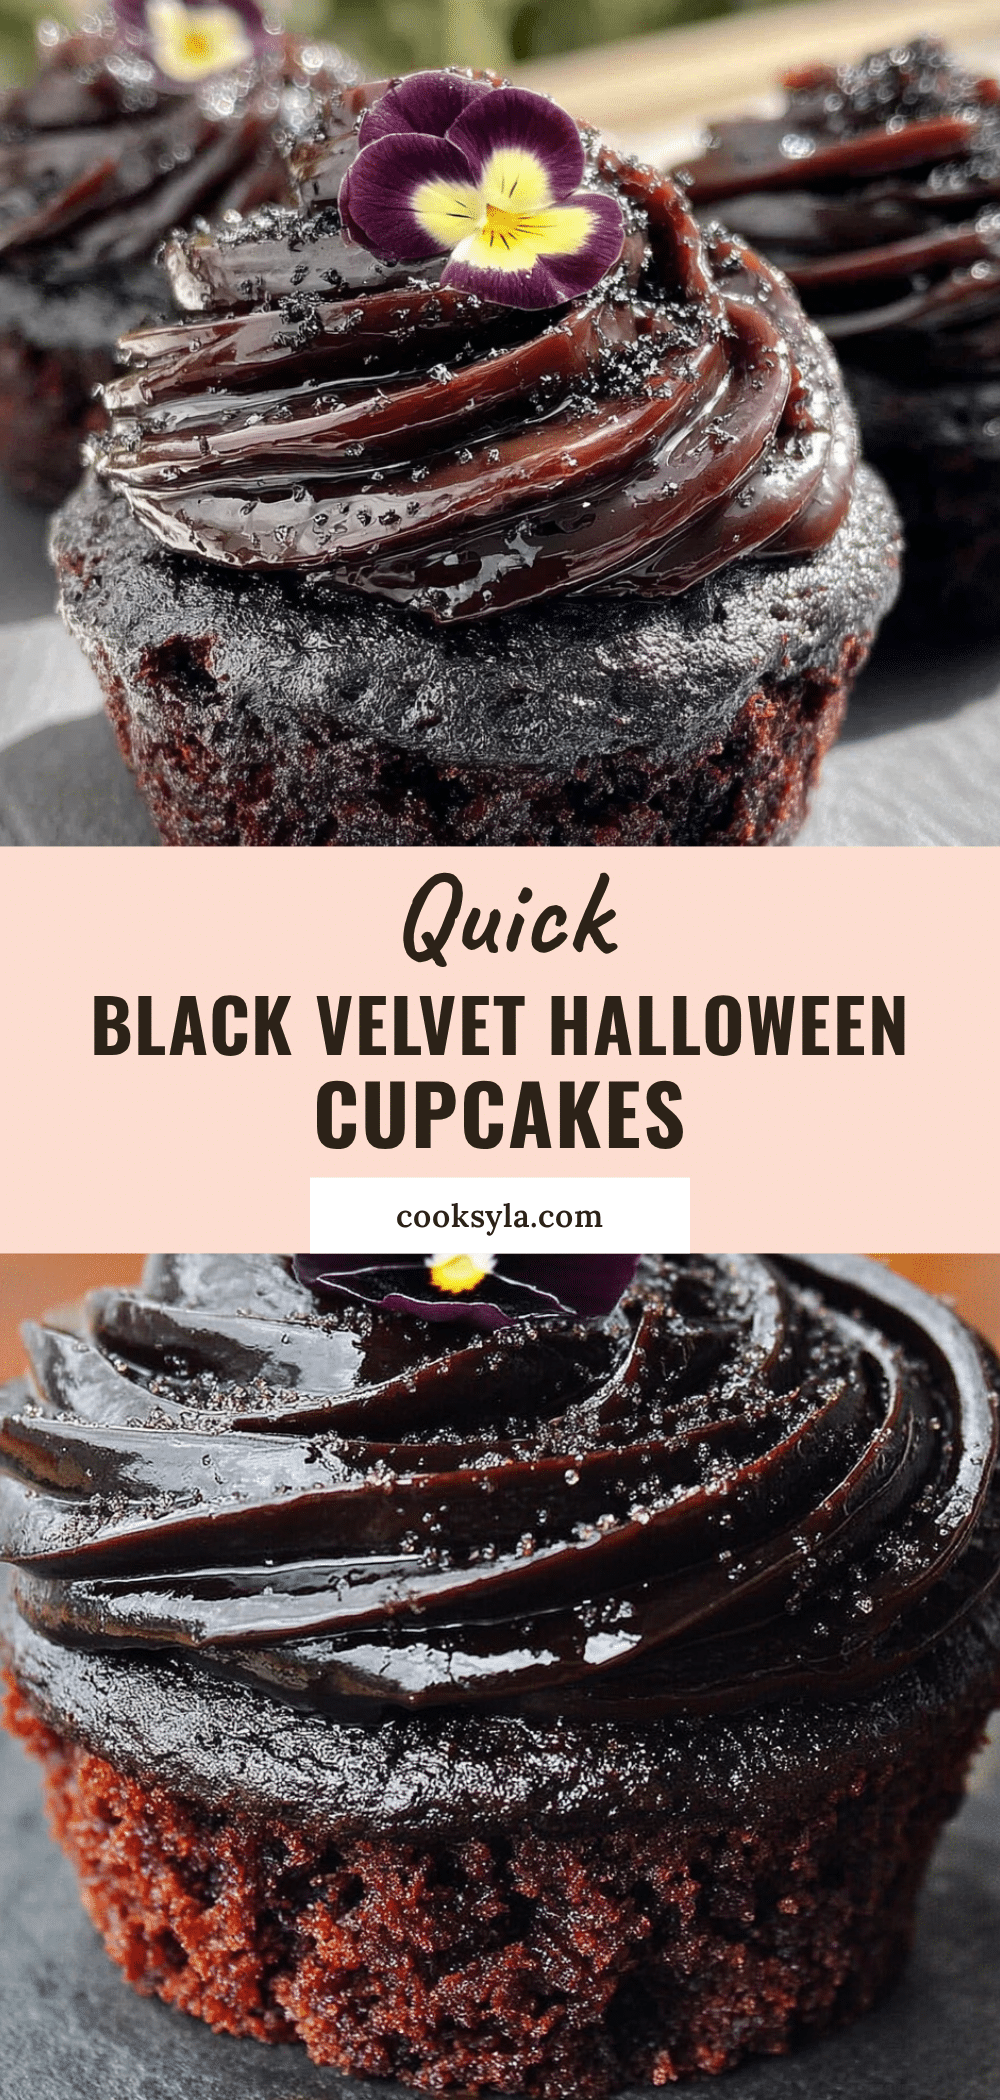
Quick Black Velvet Halloween Cupcakes: Easy 20-Min Recipe
These Quick Black Velvet Halloween Cupcakes are dark, dramatic, and deeply chocolatey, coming together in about 20 minutes flat. Perfect for Halloween parties, they use simple ingredients and black gel food coloring for a spooky yet delicious treat.
- Prep Time: 10 minutes
- Cook Time: 15-18 minutes
- Total Time: 25-28 minutes
- Yield: 12 cupcakes 1x
- Category: Dessert
- Cuisine: American
Ingredients
- 1 ½ cups (190g) all-purpose flour
- 1 cup (200g) granulated sugar
- ¼ cup (25g) unsweetened cocoa powder (Dutch-processed recommended)
- 1 teaspoon baking soda
- ½ teaspoon salt
- ½ cup (120ml) vegetable oil
- ½ cup (120ml) buttermilk
- 2 large eggs, room temperature
- 1 teaspoon white vinegar
- 1 teaspoon vanilla extract
- 1–2 teaspoons black gel food coloring
- For the frosting: ½ cup (1 stick) unsalted butter, softened
- 2 cups powdered sugar
- 1 teaspoon vanilla extract
- 2–3 tablespoons milk
- Pinch of salt
- Optional: drop of black food coloring for gray effect
Instructions
- Preheat oven to 350°F (175°C). Line a 12-cup muffin pan with cupcake liners.
- In a medium bowl, whisk together flour, sugar, cocoa powder, baking soda, and salt.
- In a larger bowl, whisk together vegetable oil, buttermilk, eggs, vinegar, and vanilla extract until smooth.
- Add black gel food coloring to the wet ingredients (start with 1 teaspoon, add more for deeper color) and whisk until combined.
- Gradually add dry ingredients to wet ingredients, mixing gently with a spatula just until combined (about 15-20 strokes). Do not overmix.
- Divide batter evenly among the 12 liners, filling each about ⅔ full.
- Bake for 15-18 minutes, or until a toothpick inserted into the center comes out clean or with a few moist crumbs.
- Let cupcakes cool in the pan for 5 minutes, then transfer to a wire rack to cool completely.
- While cupcakes cool, make frosting: Beat softened butter until creamy. Gradually add powdered sugar, then vanilla and milk, beating until light and fluffy. Add a drop of black food coloring if desired.
- Frost cooled cupcakes using a piping bag or knife. Decorate with Halloween sprinkles or other toppings as desired.
Notes
Use gel food coloring, not liquid drops, for best color. Don’t overmix batter. Cupcakes will darken as they cool. For gluten-free, use a 1:1 gluten-free flour blend. For vegan, use flax eggs and plant-based milk with lemon juice. Store unfrosted cupcakes at room temperature for up to 3 days; frosted cupcakes refrigerate if not eaten within 24 hours. Freeze unfrosted for up to 3 months.
Nutrition
- Serving Size: 1 cupcake
- Calories: 310
- Sugar: 33
- Sodium: 220
- Fat: 14
- Saturated Fat: 6
- Carbohydrates: 44
- Fiber: 1
- Protein: 3
Keywords: Halloween cupcakes, black velvet cupcakes, quick cupcakes, easy Halloween dessert, chocolate cupcakes, black food coloring, 20-minute recipe


